

Look Layer
A Look Layer plays a Look. It references one Look, rather than copying it, and shows that Look’s Personality (the fields the Look’s author chose to expose) as its own editable parameters. Multiple Look Layers can play the same Look, each with its own values for the exposed fields.
Looks themselves (creating, designing and exposing fields) are covered on the Looks page: creating a Look and designing a Look.
Selecting a Look
Section titled “Selecting a Look”Add a Look Layer to a Track, then open the Look Layer editor and choose the Look you want to play. The Look’s exposed Personality fields appear in the editor. Each field can be set and keyframed like any other Layer’s, or patched to Sockpuppet for external control. The Look selection itself can’t be keyframed.
Click Go To Look to open the selected Look and edit it. Alt+J does the same, and takes you back to the Look Layer when pressed again.
Switching a Look Layer to a different Look swaps in that Look’s Personality. Keyframes recorded against the previous Look’s fields are retained on the Look Layer as disconnected sequences, so switching back restores them.
Playback
Section titled “Playback”The Playback mode and At end point settings control how the Look plays against the Track’s timeline. They match the same settings on a Video Layer, except that there is no Ping-pong option.
Playback mode
Section titled “Playback mode”- Normal (default): the Look plays on its own clock, at the Track’s speed. Jumping around the Track while it plays does not change the Look’s position, and the Look keeps playing when the Track holds at the end of a section. When the Track stops, the Look stops and shows the frame that matches the Track’s position.
- Locked: the Look’s position always follows the Track’s playhead. Jumping to a point partway through the Look Layer plays the Look from the matching point, and the Look holds when the Track holds at the end of a section.
Tags, Notes and Cues can’t be added inside a Look, but they can sit anywhere on the Track the Look Layer is on, including partway through it. Use Locked if jumping to a Tag should play the Look from the matching point.
At end point
Section titled “At end point”This setting controls what happens when the Look reaches its end while the Look Layer is still playing:
- Loop (default): the Look starts again from the beginning.
- Pause: the Look pauses on its last frame.
Render mode
Section titled “Render mode”A Look Layer renders its Look in one of two modes:
- Passthrough (default): renders the Look’s Layers as if they were placed directly in the current Track, with no extra compositing.
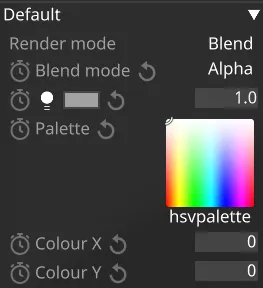
- Blend: applies an additional compositing pass and exposes the common layer properties below.
Render mode can’t be keyframed.
Common Layer Properties
Section titled “Common Layer Properties”These properties are available when the Look Layer’s render mode is set to Blend.
Blend Mode
Section titled “Blend Mode”BlendMode controls how the output of the layer is composited with the layers below. Layers are rendered in a bottom-up order: layers at the top can modify the output of the layers below.
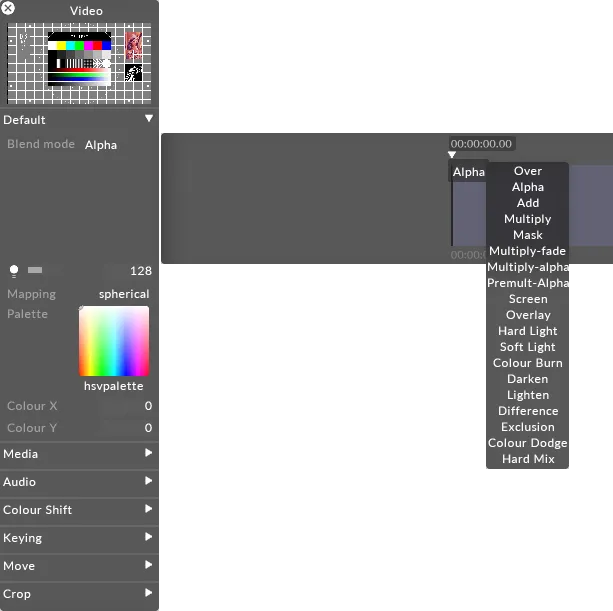
Changing brightness of a content layer in Designer is actually controlling the value of the alpha of the layer. Even when displaying a HAP video, the software will composite the layer with a controllable layer of alpha - one per layer.
There are two ways of expressing alpha in an image:
Straight alpha is an alpha channel which functions just like RGB. Alpha acts as a fourth channel of information per pixel which is as independent of the other three as R, G and B are of each other. For example, with straight alpha it is possible to have RGB = 255 (white) and alpha = 0 (fully transparent) on the same pixel. Internally generated content, such as gradient layer, are generated with straight alpha. This is the preferable style of alpha and considering the cleaner method of the two.
Premultiplied alpha takes the alpha and applies it to the values of the RGB channels per pixel. The more transparent something gets with premultiplied alpha, the closer it gets to black - as if the content is sitting on a black table. Premultiplied is the default output of Adobe Photoshop or AfterEffects. The result is our pixel at 255 RGB (full white) with 0 alpha would be calculated as a black pixel in the final image.
Here are explanations of what each individual blend mode will do.
Over
Makes a layer fully opaque. Premultiplies all alpha onto the RGB value of each pixel. Alpha = black, so adjusting the brightness of a layer in Over blend mode makes it darker.
Alpha
Default blend mode. It will apply alpha values as a transparency if the alpha is present. Brightness changes will make the layer more or less transparent.
Add
Adds the value of each RGB pixel together. Always creates a brighter result. Values clamp at 255.
Multiply
Reads the level of each subpixel as a level between 0.0 and 1.0, and multiplies source with blend. The result is always a darker image overall. For example: white x grey = 0.5. White turns transparent, black takes precedence. Alpha is applied in the same fashion as the Over Blend mode.
Mask
Applies a mask to the single layer above in the stack, irrespective of mapping. See Mask blending for more information.
Luma-Matte
This mode creates a Luma Matte by using a layer’s Rec. 709 luminance to control the alpha channel of the layer above, irrespective of mapping.
To determine transparency, the luminance of each pixel is calculated using a weighted average of its red, green, and blue channels. The luminance value is then used as the alpha (opacity) value for the corresponding pixels in the upper layers.
As a result, white areas render the layer above fully opaque, black areas make them fully transparent, and grey areas create proportional semi-transparency. This is a specialized Mask blend mode; for more details on the underlying behaviour, see Mask blending.
Inv-Luma-Matte
The Inverse Luma Matte mask works the same as the Luma Matte mask but the transparency is inverted meaning white regions are transparent and black regions are opaque.
Multiply-Fade
The same as Multiply, but will make use of the alpha channel to calculate transparency in the source and blend layers. Since maximum transparency is premultiplied, alpha results in black. This will ignore black created through premultiplying.
Multiply-Alpha
Multiply with straight alpha. This mode assumes that the alpha has not been premultiplied onto the RGB values and will not apply a correction to the semi-transparent pixels.
Premultiply Alpha
Like how Multiply-fade will ignore the darkening caused by premultiplying, this blend mode will do the same with Alpha.
Colour Burn
Blend mode increases the contrast to darken the base colour while reflecting the blend colour. The darker the blend colour, the more intensely the colour will be applied in the base image. White as the blend colour produces no change. Using the colour burn blend mode can produce some harsh results at full opacity. The colour burn blend mode can be used to make tonal and colour adjustments to a layer.
Screen
This blend mode looks at each channels colour information and multiplies the inverse of the blend and base colous. The result is always a lighter colour. Screening with black leaves the colour unchanged. Screening with white produces white. The effect is similar to projecting multiple images on top of each other - where bright white is fully opaque, black is fully transparent and 50% grey is 50% transparent.
Overlay
Multiplies or screens the colours, depending on the base colour. Patterns or colours overlay the existing pixels while preserving the highlights and shadows of the base colour. The base colour is not replaced, but mixed with the blend colour to reflect the lightness or darkness of the original colour.
Hard Light
Multiplies or screens the colours, depending on the blend colour. The effects is similar to shining a harsh spotlight on the image. If the blend colour (light source/top layer) is lighter than 50% grey, the image is lightened as if it were screened. This is useful for adding highlights to an image. If the blend colour is darker than 50% grey, the image is darkened as if it were multiplied. This is useful for adding shadows to an image. Painting with pure black or white results in pure black or white.
Soft Light
Darkens or lightens the colours, depending on the blend colour. The effect is similar to shining a diffused spotlight on the image. If the blend colour (light source/top layer) is lighter than 50% grey, the image is lightened as it if were dodged. If the blend colour is darker than 50% grey, the image is darkened as if it were burned in. Painting with pure black or white produces a distinctly darker or lighter area, but does not result in pure black or white.
Darken
Looks as the colour information in each channel and selects the base or blend colour - whichever is darker - as the result colour. Pixels lighter than the blend colour are replaced and pixels darker than the blend colour do not change.
Lighten
Looks at the colour information in each channel and selects the base or blend colour - whichever is lighter - as the result colour. Pixels darker than the blend colour are replaced and pixels lighter than the blend colour do not change.
Difference
Looks at the colour information in each channel and subtracts either the blend colour from the base colour or the base colour from the blend colour depending on which has the greater brightness value. Blending with white inverts the base colour values and blending with black produces no change.
Exclusion
Creates an effects similar to but lower in contrast than the difference mode. Blending with white inverts the base colour values. Blending with black produces no change.
Colour Dodge
Looks at the colour information in each channel and brightens the base colour to reflect the blend colour by decreasing contrast between the two. Blending with black produces no change.
Hard Mix
Adds the RGB channels of the blend colour to the RGB values of the base colour. If the resulting sum for a channel is 255 or greater, it receives a value of 255; if it is less than 255 it receives a value of 0. Therefore all blended pixels have RGB channels of either 0 or 255. This changes all pixels to primary additive colours (RGB), white or black.
Brightness
Section titled “Brightness”This property (which appears as a light bulb icon) controls the brightness of the layer output.
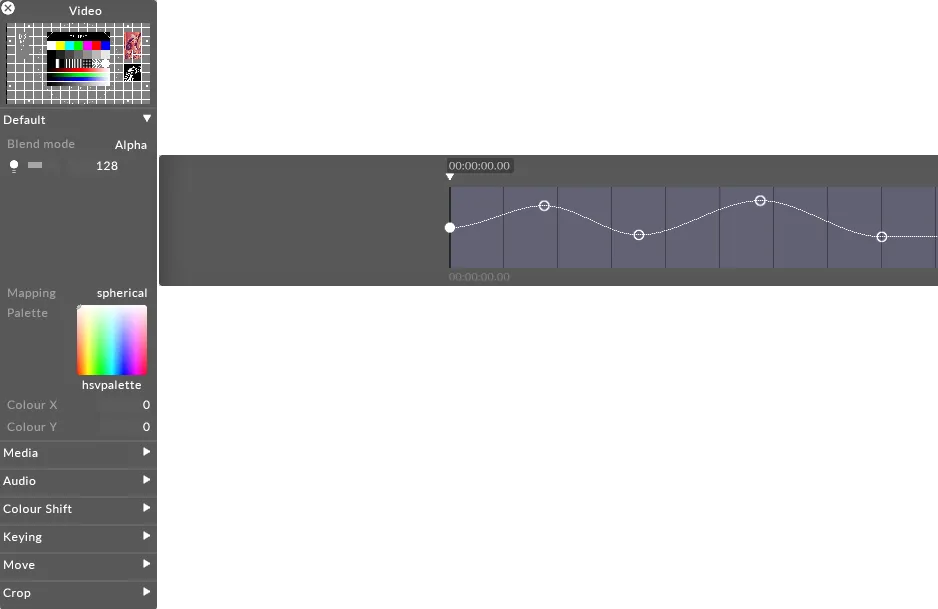
If the layers blend mode is set to Alpha, then reducing the brightness to 0 also reduces the opacity of the layer to 0. This can be useful when you want to dissolve from one layer to the next. In that case, you can place the new layer above the old layer and increase its brightness level.
Palette
Section titled “Palette”This points to the still image file that defines the bitmap from which the tint colour is taken. The default palette ( HSVPAL ) consists of the complete range of hues and saturations. Selecting this property will open the Texture object library, which shows all of the still image files saved on your local hard-drive in the DxTexture older.
To control the location within the current palette bitmap, and thus control the colour, you have to edit the xCol and yCol values (see the section for xCol, yCol).
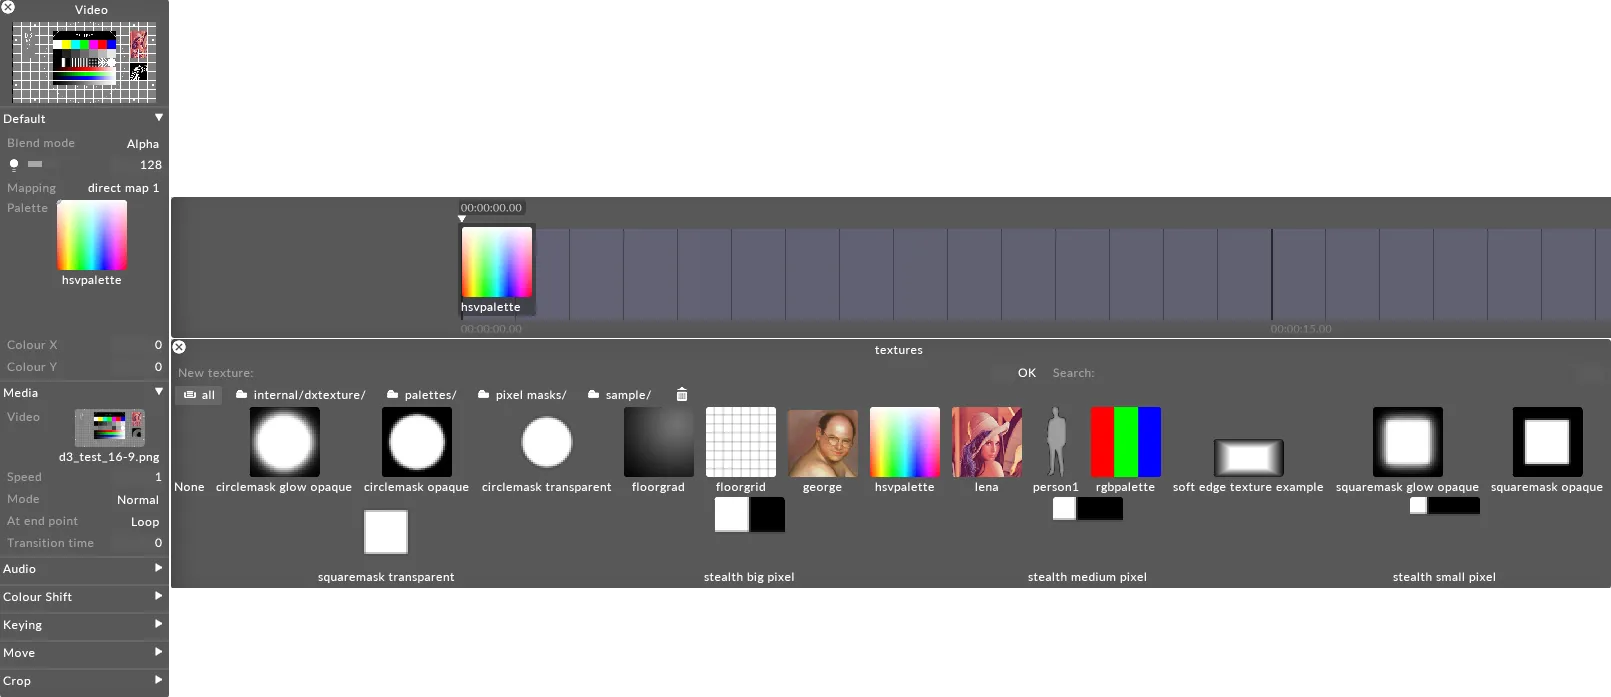
To change the current palette bitmap:
- Left-click palette to open the Texture object library.
- Left-click the still image file you want to use for the palette bitmap.
If you want to use a palette bitmap other than the standard still images provided in Designer, you will need to use a custom still image file.
See the Placing media files for a project sub-chapter to understand where to place a custom still image file and how to access it in Designer. Also save the file to a supported file format.