This software is subject to the terms and conditions of the accompanying End User License Terms. This software is provided only for use with, and for licensed End Users of, the disguise hardware. Any other use of this software is strictly prohibited and may subject you to legal action.
r27.9
Designer now supports Apple ProRes
Enhanced flexibility and smoother collaboration
Download r27.9build: 192216 (released July 16 2024)
What's new?
We have expanded the flexibility of Designer by adding native support for the ProRes video codec.
Our latest software release can reduce complexity of content workflow pipelines due to the wide support of ProRes across toolsets, speeding up your content review and delivery and allowing for a smoother collaboration with all project stakeholders. Designer uses the ProRes Apple library ensuring playback of all ProRes variants, delivering optimal quality for your projects.
*ProRes decode is CPU based and we recommend checking your server playback benchmarks when deciding whether ProRes is appropriate for your show or production.
Release notes for r27.9
Notice
All Notch blocks flickered when they were not being rendered at full frame rates when a user upgraded their project file to r27.8. As a result we removed r27.8 (build number 191665). This has now been resolved in r27.9, which includes a number of additional fixes and improvements.
The original release notes for r27.8 are also listed at the end of this document.
Improvements
- DSOF-11388 More Zoom Steps when Zoom In
Additional zoom levels have been added to zoom in and out of the timeline, for example using Alt Scroll or the timeline magnifier icons.
- DSOF-27451 Move 'Collapse All Groups' and 'Clear Arrows' into a dropdown
The Track Editor menu now contains a new Actions section which contains the following:
- Clear Arrows (if the option switch isClearArrowsEnabled is enabled)
- Toggle Groups
- Close Layer Editors (see next item)
- DSOF-26612 Add way to close all open layer editors
The Actions section of the Track Editor now contains a Close Layer Editors function, which ensures that the list of layers which would open when the timeline scrubs over them is cleared.
- DSOF-27484 'Collapse all Groups' Should toggle to expand all groups
The “Collapse all Groups” button in the Track Editor has been renamed to Toggle Groups, and it now collapses or expands all Groups across the whole track. If even one group is open then clicking the button will close the group(s). Expanding will only happen if there are no open groups on the entire track. The shortcuts Ctl Alt + and Ctrl Alt - also perform this action.
- DSOF-27207 QuickAlign option to disable adding new points
In order to easily move existing points without accidentally adding new points when doing QuickAlign, a checkbox has been added to toggle on or off adding new alignment points. The checkbox is under the Interface Options menu.
- DSOF-27246 Support multiple OSC floats in OSC position receiver
The OSC Position Receiver can now use multiple arguments in the same OSC message. This means that one message can be received for the three arguments x, y and z, rather than three separate messages.
- DSOF-27420 Transport "engaged" button should have a tooltip explaining when it's allowed and when it's not allowed to engage/disengage
The Transport Engaged / Disengaged button now has a more helpful tooltip to inform as to why it cannot be engaged and/or disengaged.
- DSOF-24911 Notes API - to be able to GET and POST notes
A new HTTP API to get and set notes has been added. For details, see the documentation at https://developer.disguise.one or the documentation bundled with Designer, which is linked from d3manager->Help->Open API Documentation.
- DSOF-27204 Manager to show list of locally connected (physical) CodeMeter containers in "d3 License" window
The d3Manager License dialog (accessible from d3Manager->Help->d3 Licenses) now contains a section detailing the serial number(s) of local Codemeter license containers.
Fixes
- DSOF-25823 - Fixed an issue that occurred on project launch, where d3manager warned "No valid Designer licence detected from d3service!" but continued to open the project
- DSOF-26562 - Fixed an issue where head names did not appear in the feed view
- DSOF-26726 - Fixed an issue where remote graphs sometimes failed to be sent to the director
- DSOF-26909 - Fixed an issue where DMX screens appeared inactive when the position was controlled with automation data until the visualiser camera was moved
- DSOF-27074 - Fixed undo (Ctrl + Z) not working work when deleting a tag
- DSOF-27144 - Sped up the timeSlideShow setup takes on projects with large number of video clips
- DSOF-27262 - Fixed an issue where WSAWaitForMultipleEvents was seen when using ArtNet
- DSOF-27280 - d3 installer now sets the d3.exe file properties to disabled for Windows versions later than 1809
- DSOF-27282 - API Docs page no longer returns blank white screen
- DSOF-27289 - Fixed an issue where a Note did not unsubscribe ResourceActions when deactivated
- DSOF-27290 - Fixed an issue where ObjectView did not unsubscribe ResourceActions before adding new ones
- DSOF-27315 - Fixed a hang that occurred when on adding / removing from timeline
- DSOF-27359 - Fixed an issue where live update was blocked blocked after long hangs on director
- DSOF-27382 - Fixed access violation when two machines on network have duplicate hostnames
- DSOF-27553 - OmniCal: Fixed an issue where the number of Projector inliers and total points were not serialised
- DSOF-27567 - Fixed shadow artefacts in dynamic blend with three projectors
- DSOF-27568 - Fixed barn doors not removing all projections
- DSOF-27596 - Fixed an issue where mask blur shadow was not accounted for by other projectors
- DSOF-27629 - Fixed multiple Access Violations when fading out of a sockpuppet layer
- DSOF-27640 - Fixed an issue where EventTransportMidiNote Notes and CC messages were no longer highlighted blue when receiving
- DSOF-27649 - Fixed an issue where setting load weight to 0 or negative caused an infinite hang
- DSOF-27665 - Fixed Access Violations in cleanup prefetch
- DSOF-27702 - Fixed an issue where inputs went black when a timeout occurred
- DSOF-27759 - Fixed an issue where Media Distribution was unable to distribute to editors
- DSOF-27763 - Fixed a crash to desktop on video file removal
- DSOF-27784 - Fixed an issue where Notch blocks flickered at all framerate fractions < 1
r27.8 Release Notes
New Features
- DSOF-17036 ProRes Support
ProRes video codecs are now supported for playout on Disguise. ProRes is a visually lossless codec that uses intra-frame compression, where each frame is stored independently and can be decoded with no dependencies on other frames.
Users are now able to playout the following ProRes codecs from Disguise:
- ProRes 422
- ProRes 422 HQ
- ProRes 422 LT
- ProRes 422 Proxy
- ProRes 4444
- ProRes 4444 XQ
ProRes RAW playback in Disguise is not supported.
ProRes video codecs are CPU-based. We recommend checking the video playback performance for the Disguise media server(s) when deciding whether ProRes is appropriate for your show or production.
Improvements
- DSOF-22928 Allocate buffers through GpuPool
This improvement prevents an error message outlining that access to the GPU device was lost on the actor machine when many high-resolution Notch LC video layers are used.
- DSOF-25479 Export profiles of GPU memory allocation
We have added profileGPUPoolFromLaunch as an option switch to enable users to trigger the creation of a memory profile so that they can understand the behaviour of a GPU pool for debugging purposes. This is exported as a .json file to a project folder called ‘output’.
- DSOF-27549 On Understudy machines, don't set output status to orange in the network status widget if the GUI is on
Fixes
- DSOF-19231 - Fixed an issue where the debug console jittered when Video Prefetcher Report is visible during video playback, and the widget could not be resized
- DSOF-24304 Fixed a BSOD when Scrubbing Timeline
- DSOF-24583 - Fixed new textures pool not responding to scrubbing
- DSOF-24584 - Fixed scrubbing detection failing during lengthy system hangs or in low frame rate scenarios
- DSOF-24608 - Fixed console logging omitting timestamp on some lines
- DSOF-24662 - Fixed an issue where the prefetcher created many unnecessary prefetch jobs while scrubbing
- DSOF-25240 - Lowered the GPU usage of Discovery ndirelay instance
- DSOF-25395 - Fixed an issue where overly active 'Strict mode' caused prefetch to miss and exhibit many errors
- DSOF-25712 - Requests in freelist no longer appear in the debug widget
- DSOF-25718 - Fixed an issue where VariableVideoModule held a reference to the last frame used even when not active
- DSOF-27157 - Texture parameters no longer switch places when using multiple texture parameters
- DSOF-27261 - Fixed an issue where CPU textures were constantly re-allocated while playing NotchLC blocks.
- DSOF-25035 - Fixed an issue where the Shot Recorder with a note in parameter collection caused a problem on project restart
- DSOF-25743 - Fixed an issue where EventTransportDmx did not highlight "Stop" in blue when it was selected, and Brightness was permanently highlighted when DMX is connected.
- DSOF-27361 - Fixed an issue wherelLayers with missing media did not update the red highlight when the layer start is dragged earlier
- DSOF-27468 DMX SockPuppet: 'DmxPersonality' object is not callable when attempting to 'View Personality' in Patch Settings widget
- DSOF-27518 'GroupLayer' object has no attribute 'controlPatch'
- DSOF-27653 Using UX fade with a UVLookup module results in an error and the playhead won't advance beyond the section break.
View the r27.9 release notes here.
View the r27.8 release notes here.
View the r27.7.4 release notes here.
View the r27.7.2 release notes here.
View the r27.7.1 release notes here.
View the r27.7 release notes here.
View the r27.6.3 release notes here.
View the r27.6.2 release notes here.
View the r27.6.1 release notes here.
View the r27.6 release notes here.
View the r27.5,1 release notes here.
View the r27.4.3 release notes here.
View the r27.4.2 release notes here.
View the r27.4.1 release notes here.
View the r27.4 release notes here.
View the r27.3.3 release notes here.
View the r27.3.2 release notes here.
View the r27.3.1 release notes here.
View the r27.2 release notes here.
View the r27.1.4 release notes here.
View the r27.1.3 release notes here.
View the r27.1.2 release notes here.
View the r27.1.1 release notes here.
View the r27.1 release notes here.
View the r27.0 release notes here.
View the r26.5.3 release notes here.
View the r26.5.2 release notes here.
View the r26.5.1 release notes here.
View the r26.5 release notes here.
View the r26.4.2 release notes here.
View the r26.4.1 release notes here.
View the r26.4 release notes here.
View the r26.3.1 release notes here.
View the r26.3 release notes here.
View the r26.2.2 release notes here.
View the r26.2.1 release notes here.
View the r26.2 release notes here.
View the r26.1.1 release notes here.
View the r26.1 release notes here.
View the r26.0.5 release notes here.
View the r26.0.4 release notes here.
View the r26.0.3 release notes here.
View the r26.0.2 release notes here.
View the r26.0.1 release notes here.
View the r26.0 release notes here.
View the r25.3.1 release notes here.
View the r25.3 release notes here.
View the r25.2.3 release notes here.
View the r25.2.1 release notes here.
View the r25.2 release notes here.
View the r25.1.4 release notes here.
View the r25.1.3 release notes here.
View the r25.1.2 release notes here.
View the r25.1.1 release notes here.
View the r25.1 release notes here.
View the r25.0.3 release notes here.
View the r25.0.2 release notes here.
View the r25.0.1 release notes here.
View the r25 release notes here.
View the r24.4.1 release notes here.
View the r24.4 release notes here.
View the r24.3.1 release notes here.
View the r24.3 release notes here.
View the r24.2.2 release notes here.
View the r24.2.1 release notes here.
View the r24.2 release notes here.
View the r24.1.1 release notes here.
View the r24.1 release notes here.
View the r24.0.4 release notes here.
View the r24.0.3 release notes here.
View the r24.0.2 release notes here.
View the r24.0.1 release notes here.
View the r24 release notes here.
View the r23.4.2 release notes here.
View the r23.4.1 release notes here.
View the r23.4 release notes here.
View the r23.3 release notes here.
View the r23.2 release notes here.
View the r23.1.3 release notes here.
View the r23.1.2 release notes here.
View the r23.1.1 release notes here.
View the r23.1 release notes here.
View the r23.0.2 release notes here.
View the r23.0.1 release notes here.
View the r23 release notes here.
View the r22.3.1 release notes here.
View the r22.3 release notes here.
View the r22.2.2 release notes here.
View the r22.2.1 release notes here.
View the r22.2 release notes here.
View the r22.1.6 release notes here.
View the r22.1.5 release notes here.
View the r22.1.4 release notes here.
View the r22.1.3 release notes here.
View the r22.1.2 release notes here.
View the r22.1.1 release notes here.
View the r22.1 release notes here.
View the r22 release notes here.
View the r21.4.10 release notes here.
View the r21.4.9 release notes here.
View the r21.4.8 release notes here.
View the r21.4.7 release notes here.
View the r21.4.6 release notes here.
View the r21.4.5 release notes here.
View the r21.4.4 release notes here.
View the r21.4.3 release notes here.
View the r21.4.2 release notes here.
View the r21.4.1 release notes here.
View the r21.4 release notes here.
View the r21.3.3 release notes here.
View the r21.3.2 release notes here.
View the r21.3.1 release notes here.
View the r21.3 release notes here.
View the r21.2 release notes here.
View the r21.1.2 release notes here.
View the r21.1 release notes here.
View the r21.0.5 release notes here.
View the r21.0.4 release notes here.
View the r21.0.3 release notes here.
View the r21.0.2 release notes here.
View the r21.0.1 release notes here.
New: The r21 release notes now include detailed feature overviews. View them here.
View the r20.1.3 release notes here.
View the r20.1.2 release notes here.
View the r20.1.1 release notes here.
View the r20.0.8 release notes here.
View the r20.0.7 release notes here.
View the r20.0.6 release notes here.
View the r20.0.5 release notes here.
View the r20.0.4 release notes here.
View the r20.0.3 release notes here.
View the r20.0.2 release notes here.
View the r20.0.1 release notes here.
View the r20 release notes here.
View the r19.1.8 release notes here.
View the r19.1.7 release notes here.
View the r19.1.6 release notes here.
View the r19.1.5 release notes here.
View the r19.1.4 release notes here.
View the r19.1.3 release notes here.
View the r19.1.2 release notes here.
View the r19.1.1 release notes here.
View the r19.1 release notes here.
View the r19.0.1 release notes here.
View the r19 release notes here.
View the r18.1.15 release notes here.
View the r18.1.14 release notes here.
View the r18.1.13 release notes here.
View the r18.1.12 release notes here.
View the r18.1.11 release notes here.
View the r18.1.10 release notes here.
View the r18.1.9 release notes here.
View the r18.1.8 release notes here.
View the r18.1.7 release notes here.
View the r18.1.6 release notes here.
View the r18.1.5 release notes here.
View the r18.1.4 release notes here.
View the r18.1.3 release notes here.
View the r18.1.2 release notes here.
View the r18.1.1 release notes here.
View the r18.1 release notes here.
View the r18.0.6 release notes here.
View the r18.0.5 release notes here.
View the r18.0.4 release notes here.
View the r18.0.3 release notes here.
View the r18.0.2 release notes here.
View the r18.0.1 release notes here.
View the r18 release notes here.
View the r17.6.2 release notes here.
View the r17.6.1 release notes here.
View the r17.6 release notes here.
View the r17.5.4 release notes here.
View the r17.5.3 release notes here.
View the r17.5.2 release notes here.
View the r17.5.1 release notes here.
View the r17.5 release notes here.
View the r17.4.12 release notes here.
View the r17.4.11 release notes here.
View the r17.4.10 release notes here.
View the r17.4.9 release notes here.
View the r17.4.8 release notes here.
View the r17.4.7 release notes here.
View the r17.4.6 release notes here.
View the r17.4.5 release notes here.
View the r17.4.4 release notes here.
View the r17.4.3 release notes here.
View the r17.4.2 release notes here.
View the r17.4.1 release notes here.
View the r17.4 release notes here.
View the r17.3.8 release notes here.
View the r17.3.7 release notes here.
View the r17.3.6 release notes here.
View the r17.3.5 release notes here.
View the r17.3.4 release notes here.
View the r17.3.3 release notes here.
View the r17.3.2 release notes here.
View the r17.3.1 release notes here.
View the r17.3 release notes here.
View the r17.2.2 release notes here.
View the r17.2.1 release notes here.
View the r17.2 release notes here.
View the r17.1.3 release notes here.
View the r17.1.2 release notes here.
View the r17.1.1 release notes here.
View the full r17.1 release notes here.
Please contact support@disguise.one for feedback and issues
Resources
Resource Categories
Please select a category to see available resources.
No third party resources were found.
Previous Versions
Previous Versions
Fixes
- DSOF-27746 - Fixed a critical issue where Notch blocks were getting 'LOGIC ERROR' in r27.7.3
Fixes
- DSOF-26647 - Fixed an issue where a duplicate process started when clicking on the start workload button from the timeline while the workload was already launching
- DSOF-26766 - Fixed an issue where timecode playmodes for layers were behaving inconsistently when playing to end of section with RenderStream
- DSOF-26953 - Fixed an Access Violation after closing the Renderstream widget
- DSOF-27243 - Fixed an issue where the debugLiveUpdate option switch was non-functional
- DSOF-27251 - Fixed an issue where Colour Calibration returned a black LUT and an .cube file with null values
- DSOF-27363 - Fixed an issue where extending the start of a layer using ctrl+< with the end of the layer at the end of track resulted in track lengthening
- DSOF-27466 - OSC/HTTP SockPuppet: Fixed an issue where Designer threw an error when attempting to display an alert box after exporting personality
- DSOF-27472 - Fixed errors being raised when attempting to drag the heading in the RenderStream cluster workload window
- DSOF-27485 - Fixed an AccessViolation when patching RenderStream layer to sockpuppet
- DSOF-27498/DSOF-27500 - Fixed an issue where slideshows did not load
- DSOF-27523 - Fixed an Access Violation on startup relating to QuickProfiler
- DSOF-27271 Notch instances that get prefetched but never end up being played through don’t return to Sleeping state
Fixes
- DSOF-21378 - Render nodes marked as failed are now notified to prevent them contributing to network traffic
- DSOF-25240 - Discovery ndirelay instance now has a lower CPU usage
- DSOF-26705 - Fixed an issue where RenderStream Layers connected to sockpuppet may not have initialised personality types leading to Exceptions
- DSOF-26899 - Fixed an issue where the first command to an OSC Indirection did not change the resource
- DSOF-27329 - Fixed an issue where a capture group config can't be saved on bluefish card
Improvements
- DSOF-27010 Add a link to learn.disguise.one in d3manager
- DSOF-22053 Upgrade to Vimba X SDK for OmniCal
- DSOF-25066 Custom colour primaries in Gamma Space mode
We have added the option to add custom output colour primaries from Designer to enable high performance colour transforms for LED panels. This is available when Gamma Space mode is selected as the colour management mode in Project Settings. This can be found by right-clicking a LED Screen found in a project and right-clicking Colour Profile underneath the Output dropdown menu.
- DSOF-25138 Designer will now respect the clipping planes defined in notch blocks. Note: Notch blocks which do not define a clipping plane will have a default one set by Designer.
- DSOF-25646 Omnical will check and notify the user if the wrong Vimba SDK is installed for use with the latest version of Designer.
- DSOF-26353 Implement colour management interface with Notch version 1.0
We now support colour management settings included in a Notch block exported from version 1.0 or later to a Notch layer in Designer
- DSOF-26356 Raise warning about Notch version 1.0 compatibility on unsupported servers
Notch Blocks that have been exported in version 1.0 or later have a number of requirements in order to run on a Disguise media server:
Windows OS - must be Windows 10 1607 or higher
GPU - support for Nvidia GPUs only (Maxwell Architecture or later)
Notch Blocks that are exported in version 1.1 or later will have the following requirements in order to run on a Disguise media server:
Windows OS - must be Windows 10 1607 or higher
GPU - support for Nvidia GPUs only (Turing Architecture or later)
We have created a notification in Designer to warn a user that attempts to run a Notch block that has been exported in version 1.0 or later on a Disguise media server that is not supported.
A compatibility table can be found below.
|
Range |
Server/Node |
Windows version in Current OS (as of r27.7 release date) |
GPU (Generation shown in brackets) |
Can I playback a Notch block exported in version 1.0? |
Can I playback a Notch block exported in version 1.1? |
|
Pro |
4x4pro |
Windows 8.1 |
AMD (GCN 2.0) |
No |
No |
|
4x2pro |
Windows 8.1 |
AMD (GCN 1.0) |
No |
No |
|
|
2x4pro |
Windows 10 1607 |
Nvidia (Maxwell) |
Yes |
No |
|
|
Plus |
2x2plus |
Windows 8.1 |
Nvidia (Maxwell) |
No |
No |
|
solo |
Windows 10 1607 |
Nvidia (Pascal) |
Yes |
No |
|
|
EX |
EX 2 |
Windows 11 23H2 |
Nvidia (Ada) |
Yes |
Yes |
|
EX 2C |
Windows 11 23H2 |
Nvidia (Ada) |
Yes |
Yes |
|
|
EX 3 |
Windows 10 1809 |
Nvidia (Ampere) |
Yes |
Yes |
|
|
EX 3+ |
Windows 11 23H2 |
Nvidia (Ada) |
Yes |
Yes |
|
|
GX |
GX 1 |
Windows 10 14393 |
Nvidia (Pascal) |
No |
No |
|
GX 2 |
Windows 10 1607 |
Nvidia (Pascal) |
Yes |
No |
|
|
GX 2C |
Windows 10 1809 |
Nvidia (Turing) |
Yes |
Yes |
|
|
GX 3 |
Windows 10 1809 |
Nvidia (Ampere) |
Yes |
Yes |
|
|
VX |
VX 1 |
Windows 10 1809 |
Nvidia (Turing) |
Yes |
Yes |
|
VX 2 |
Windows 10 1809 |
Nvidia (Turing) |
Yes |
Yes |
|
|
VX 2+ |
Windows 11 23H2 |
Nvidia (Ampere) |
Yes |
Yes |
|
|
VX 3 |
Windows 11 23H2 |
Nvidia (Ampere) |
Yes |
Yes |
|
|
VX 4 |
Windows 10 1809 |
AMD (GCN 5.0) |
No |
No |
|
|
VX 4+ |
Windows 10 1809 |
AMD (GCN 5.1) |
No |
No |
|
|
RX |
RX |
Windows 10 1809 |
Nvidia (Turing) |
Yes |
Yes |
|
RX II |
Windows 10 1809 |
Nvidia (Ampere) |
Yes |
Yes |
|
|
RX III |
Windows 11 23H2 |
Nvidia (Ada) |
Yes |
Yes |
- DSOF-26694 Upgrade nsis to 3.10
- DSOF-27009 Prewarm notch instances
We have reduced the load time when a user adds a Notch layer to a project for the first time, or starts a project with a Notch layer already assigned to a track. We have enabled this as default behaviour.
- DSOF-27056 Add support for double to rational conversion
- DSOF-27095 Update to latest FastBuild version v1.13
- DSOF-27152 Update NDI SDK to NDI 6
We have updated the NDI SDK to support NDI 6.0. This includes improvements to the 16-bit colour formats that are supported (P216/PA16) and a new specification for NDI HDR metadata. More information on NDI 6.0 can be found in their release notes here (link). It is important to note that NDI 5.0 video inputs continue to work as expected.
- DSOF-27247 Add pagination for Porta and the media API
- DSOF-27306 Include AudioFiles in the media/get api
Fixes
- DSOF-24822 - - Fixed an issue where VideoAsset SLC Region Regex checked full path instead of just the filename, causing a blue screen of death
- DSOF-25043 - Fixed an issue where VimbaCamServer used the incorrect ID for non-GigEVision cameras
- DSOF-25481- Fixed an issue where "display as" was broken for all unit types
- DSOF-25571- Fixed an issue where a 'NoneType' object had no attribute 'positionNear' when clicking on MIDI Personality names in Event Transport MIDI Note
- DSOF-26367 - Fixed an issue where Notch pass-through blocks gave a black texture when transforming with Gamma2.2 curve
- DSOF-26589 - Fixed an issue where there was no anti-aliasing on a set extension when feather is under 10
- DSOF-26595 - Designer now profiles automatically when performance is low
- DSOF-26633 - Improve Actor performance drops when running RenderStream
- DSOF-26648- Fixed an issue where RenderStream error notifications caused network spam
- DSOF-26650 Fixed an issue where bringing the brightness up on Renderstream layers caused unsynchronised pop-in across Actors
- DSOF-26897 - Fixed and issue where d3killer failed to kill nginx
- DSOF-27006 - Fixed an Access Violation in QuickProfiler subsystem when shutting down Designer
- DSOF-27034 - Fixed an issue where setting centre shift turned overscan red with zero distortion
- DSOF-27047 - Standardised HTTP sockpuppet API endpoints are in /experimental/ namespaces
- DSOF-27064 - Fixed an issue where Protoc router plugin was not generated at build time
- DSOF-27131 - Fixed an issue where removing all keyframes on a RenderStream custom event displayed a long value number
- DSOF-27153 - Fixed an issue where corrupt stage objects causes visualiser to fail to render anything
- DSOF-27244 - Fixed an issue where Undo / Redo of measurements resulted in NULL objects and drop to 2 FPS
- DSOF-27245 - API: Fixed an issue where a session did not return director status when in solo mode
- DSOF-27269 - Fixed an Async error notification not registering due to uninitialised pointer
- DSOF-27309 - Fixed an issue where Designer failed to load images in VideoFile folder with incorrect file extension
- DSOF-27338 - Fixed an issue where sorting scenes in the unreal project schema broke applications that rely on index
- DSOF-27370 - Fixed Unreal RenderStream failover in UE5.3/UE5.4
Fixes
- DSOF-24431 - Fixed an issue where LUT files created textures directly rather than through the GpuPool
- DSOF-24747 - Textures allocate less memory
- DSOF-24909 - Fixed an error message when patching strobe/radar layer to Sockpuppet
- DSOF-25308 - Designer no longer tries to reload unsupported audio files
- DSOF-25449 - Fixed an "Error 500" loading consoles or projects URLs
- DSOF-26833 - Fixed an issue where RenderStream custom event keyframes did not trigger on first frame when running timeline on loop
- DSOF-26994 - Fixed an Omnical Crash
- DSOF-27040 - Reverts DSOF-26131, which was introduced in r27.4. The change caused playback modes in a Sockpuppet video layer to behave incorrectly. As a result of the revert, DMX sockpuppet triggers will no longer be in sync between machines, however, sockpuppet inframe/outframe will once again work as intended
- DSOF-27237 - Fixed an issue where Actors failed to load MeshDeform deformed mesh
- DSOF-27310 - Fixed an issue where Natnet driver editor failed to populate with ‘onClose’ error
Improvements
- DSOF-26045 API: session/status/health does not return statuses from solo mode machines
We have enabled the Designer APIs to return status information when the machine(s) that has been queried is running in solo mode.
- DSOF-26527 Update test cards with new logo
We have updated both the colour and test patterns included as part of the Designer installer and made available in both 16:9 and 4:3 versions. We have added the following:
- Full or limited colour test pattern
- Chroma subsampling test pattern to prove 4:2:2 or 4:2:0
- Updated Disguise branding
- DSOF-27199 API: session/gototag returns 200 even when tag isn't found
In previous releases, the session/gototag endpoint returned a 200 OK HTTP status code even if a transport tag was not found. This has been resolved by returning a 400 bad request status code instead.
Fixes
- DSOF-26587 - Fixed an issue where video receive delay would drift during time in a Matrox server with OS24Q1 in r27.0
- DSOF-26898 - Fixed an m_file->codec error when ingesting content
- DSOF-27051 - Fixed an issue where Matrox Videoin Hardware Identifiers got card-swapped
- DSOF-27124 - Fixed an issue where DSE mask could be not updated properly on Animate Objects
- DSOF-27139 - "Adding machine media" console logging is now less verbose
- DSOF-27206 - Fixed an error where mesh deform gives out of bounds error when deformed mesh already exists
- DSOF-27219 - Fixed a crash to desktop on shutdown, if shutdown was triggered during startup
- DSOF-27225 - Autosave: Fixed an issue where only the current selected Transport Manager was considered when checking if we're currently in show
- DSOF-27226 - Fixed an issue where mesh deform applied maxDistance in local rather than global screen scale
- DSOF-27230 - Fixed an issue where the ProxyMaker did not unsubscribe removeResourceAction
Improvements
- DSOF-26801 Promote propSelectionPriority == 10 as default behaviour
Selection of objects in the Designer visualiser is prioritised based on the type of object. For example, if a camera is behind a projector, the camera will be selected even if the projector is visually in front. In previous releases, the Prop object had the lowest selection priority of all object types. This could be changed with the option switch propSelectionPriority. In this release, the default selection priority of Props has been changed so it is the same priority as a projector, puck, skeleton and 2.5D asset. It is still possible to use the option switch to change this, whereby setting propSelectionPriority to 0 is the lowest priority and 25 is the highest priority.
- DSOF-27059 Add async error notification to Matrox API
Async notifications from Matrox are now logged to the console which helps debug any problems with the Matrox card or driver.
Fixes
- DSOF-26510 - Fixed an issue where it was not possible to duplicate a 2.5D asset
- DSOF-26878 - Fixed an issue where the MessageBox popped up under Designer, causing the system to appear as though it were hanging
- DSOF-26993 - Change of "RenderStream Projects Folder" registry key caused the RenderStream workload to use an incorrect nDisplay file
- DSOF-27088 - Fixed an issue where the Video Asset Editor went out of alignment when version strings were different lengths
New Features
Skinned Mesh Workflows
Summary
The skinned mesh workflow allows a rigged mesh to be selected in a Skeleton, so that the mesh can be deformed based on the positions of the skeleton’s bones. This can be used to represent deforming surfaces, so that they can be used across other standard workflows within Disguise.
In this release the two main features are:
- Skinned mesh support for Skeletons
- A new SkeletalPointTrackingSource for controlling skeleton bones based on tracked points
Taken together, these features allow us to deform a mesh based on tracked marker positions from a system such as Blacktrax or Optitrack.
How-To
To use a skinned mesh as a projection surface:
- Find or create an FBX file which contains a single rigged mesh, and copy this into the project’s objects/Mesh folder
- Create a new skeleton, and select the FBX mesh in the skeleton’s mesh field
- Create a new projection surface, and select the mesh named after the skeleton (not the original FBX mesh)
- Try moving the skeleton’s bones using the manual posing controls in the skeleton editor. The mesh should deform in both the skeleton and the projection surface
- If you want to hide the skeleton mesh, set the Display mode under Appearance to Hidden
To set up a SkeletalPointTrackingSource to control a skeleton:
- Set up a marker tracking system e.g. Blacktrax or Optitrack to receive tracked points in Disguise
- Create a rigged mesh with joints at each tracked marker position, export as FBX as select in a Skeleton
- Under Hierarchy in the Skeleton, click ‘Create Reference Points’ to create a reference point for each joint
- Create a new SkeletalPointTrackingSource as the Skeleton’s tracking source
- In the tracking source editor, add points to link each tracked point to its corresponding reference point
- Points can be sorted into groups. If a point stops receiving tracking data, its position will be estimated based on a rigid body transform from other receiving points in the same groups
- Each point can also have an offset applied relative to the fixed point, and can have ‘Twist’ ticked to calculate the twist of that joint based on the positions of points within the same group
- Adjust the ‘Rejoin velocity limit’ to change the speed at which points catch up with the tracked position when tracking is received again after being lost
This workflow is also documented in the user guide at https://help.disguise.one/en/Content/Workflows/Motion-Capture/Skinned_Mesh_Workflows/Skeleton.htm and https://help.disguise.one/en/Content/Workflows/Motion-Capture/Skinned_Mesh_Workflows/Skeleton_Point_Tracking_Source.htm
Skinned skeletal mesh support
- DSOF-25206 Add deformable mesh functionality to skeleton
- DSOF-25221 Ability to import skeleton rig from FBX file
- DSOF-25307 Make skeleton layout persistent
- DSOF-25409 Render mesh when it is selected in a Skeleton
- DSOF-26074 Add retargeting to control skeletal mesh with tracked skeleton data
- DSOF-26599 Instance skeleton-controlled deformable meshes so the same mesh can be used multiple times
- DSOF-27004 Expose skeleton joint pose manual controls to users
SkeletalPointTrackingSource for marker-based skeleton control
- DSOF-25223 Ability to add tracked points to Skeleton
- DSOF-26734 Add option to clear reference points in Skeleton
- DSOF-25366 Account for non-receiving tracked points in Skeleton control
- DSOF-25407 Automatically detect and control duplicate joints
- DSOF-25484 Skeleton tracking - avoid points jumping when they stop receiving
- DSOF-25497 Skeleton tracking - avoid points jumping when they start receiving again
- DSOF-25498 Skeleton tracking - calculate bone twist angle from rigid body group
Improvements
- DSOF-24875 Add API call to indicate GUI state/selected option
- DSOF-25528 Add API call to set GUI mode
The above two items are in a new API endpoint /session/status/setguimode
- DSOF-25063 Add API call to query timecode receive status of a transport
A new receivingTimecode field has been added to TransportIndo in the Session API.
- DSOF-25088 Add API endpoints to query QuickCal pixel error and overwrite manual calibration
Two new endpoints have been added:
/quickcal/overwritemanualcalibration which overwrites the manual calibration for the given projector
/quickcal/projectorcalibration which returns information about the projector config including the error values
- DSOF-25222 Omnical - ability to mesh deform without adding verts
It is sometimes desirable to deform with Omnical without adding extra vertices. This is now configurable in MeshDeform in the new Topology Behaviour setting. Selecting “Discard inserted vertices” will result in a deformed mesh without added complexity. The number of vertices and triangles before/after MeshDeform will remain the same.
- DSOF-25351 OmniCal: minor MeshDeform performance improvements
Performance of the Omnical mesh deform feature has been improved.
- DSOF-25367 Add prediction to tracked points
A new section for Prediction has been added to the natnet driver. This can help to minimise lag. The new fields in the Prediction section are as follows:
Prediction time (sec): How much time to predict
Sample interval threshold (sec): This is the threshold of time intervals between samples to filter out noise. If the interval time between samples is bigger, detection will be ignored.
Sample size: The number of samples to use for prediction. More samples will make prediction less prone to the noise
Terms: This is the term of curve that is used for curve fitting. Value can be set to either 1 or 2
- DSOF-26057 Add user facing option to render normals
Mesh normals can now be toggled on in the Designer visualiser. To turn on normals, go to Stage -> Visualiser Camera -> Render settings -> Object visibility -> Mesh normals. Normals will then be displayed for any mesh which is selected.
Fixes
- DSOF-23836 - Fixed an issue where feeds dragged over a GUI could no longer be suppressed by Alt+G or Alt+F
- DSOF-24884 - Fixed an issue where toggling the GUI with ALT+G persisted the state through a project restart
- DSOF-25021 - Fixed an issue where NatNet driver could introduce subtle rotation errors in Rigid Bodies
- DSOF-25331 - Fixed an issue where unlabelled markers in Motive created infinite unnamed TrackedPoints in Designer
- DSOF-26190 - Fixed an issue where a dormant Sockpuppet Video Layer briefly became active when changing media slot
- DSOF-26622 - Fixed FBX mesh collisions mesh being generated incorrectly
- DSOF-26704 - Fixed FBX mesh thumbnail being empty
- DSOF-26901 - Fixed an issue where Alt+G GUI Is Disabled splash was not always in bottom right of screen
- DSOF-27011 - Offline editors no longer affect aggregate status in the session widget
Notice
The range finder option was toggled on by default when an user upgraded their project file to r27.5. In addition, an access violation was reported during the OmniCal calibration process which led to the project freezing. As a result we removed r27.5 (build number 186871) from the website. These have now been resolved in r27.5.1, which is otherwise identical to r27.5.
Fixes - r27.5.1
- DSOF-27185 - Fixed an issue where the range finder option was toggled on by default when upgrading projects to r27.5
- DSOF-27186- Fixed a Renderer Access Violation during OmniCal calibration that locked up Designer
New Features - r27.5
- Added support for RXIII server type
We have added software support for the RX III render node.
Improvements - r27.5
- DSOF-11797 Improve DMX screen position receiver to enable reception of other byte formatting
The DMX Screen Position Driver now has the option to specify the number of DMX channels to use per axis, allowing the use of 16-bit (2 channels) and 24-bit (3 channels), up to 64-bit (8 channels).
The following fields were added:
- Number of Channels per Axis - number of 8-bit DMX channels per axis
- Signed - signals whether the value is a signed integer. Toggle on for yes and toggle off for no. This allows the value to be negative
- Little Endian - signals whether the value is in Little Endian (toggle on) or Big Endian (toggle off). This is the order the channels are used to create the value.
- DSOF-25698 Add a modifier to locking to director, which first jumps the director to the editor playhead before locking
When using an Editor that is running in session, users can now press ALT + SHIFT + click ‘Lock to Director’ to jump the Director to the Editors’ time location before locking.
- DSOF-25854 Add range finder option to camera visualiser
We have added a range finder option to the camera visualiser to enable users to know how far away from a screen when completing pixel pitch calculations. This can be turned on by right clicking anywhere in the stage view, and then right clicking the Render settings. The Range finder can be toggled on and off from this menu and will appear as an overlay in the stage view.
- DSOF-26839 Allow padding outside of Renderstream full-frame renders
When the Splitting Strategy is set to ‘Full-Frame’ mode in the Cluster Assigner menu - found within the Config section the RenderStream layer - the Padding value is now applied to the outside of the full frame. This can also be used with Mesh and Direct Mappings if using the RenderStream layer.
- DSOF-26887 Remote GUI status and toggle for actors
We have added GUI status to the ‘Output’ indicator on the Network Status Widget as seen in the screenshot below. The GUI icon follows the same convention as the other icons, namely if the GUI is on a Disguise media server running in session then the icon will be green. If it is off then the icon will be grey. A tooltip also states this information if the user hovers over the icon.
- DSOF-26890 Add hotkeys to next/last through the tracks in the setlist
We have introduced hotkeys to allow users to jump between tracks in the setlist. This can be completed by pressing ‘PgDn’ to go to the next track in the setlist, and ‘PgUp’ to go to the last track in the setlist.
Fixes - r27.5
- DSOF-25041 - Fixed an issue where the package destructor would try and compact the project file even when opened in write disabled mode
- DSOF-26121 - Fixed an issue where media distribution failed because the incorrect path was used
- DSOF-26871 - Remove VideoFile references (RPs) when a resource is removed
Fixes
- DSOF-26229 - Fixed an issue where levels were marked as invalid when using an actor as a controller
- DSOF-26291 - Fixed an issue where 2.5d depth maps were unnecessarily included in the project diagnostic
- DSOF-26446 - Fixed an error message "wasn't expecting a frame receipt for a never-subscribed stream" when stopping RenderStream compressed
- DSOF-26708 - Fixed an issue where Dynamic Blend edge had jagged edge on dome with quickcal
- DSOF-26793 - Fixed an issue where feed warp 'draw control points on output' did not work in Custom mode
- DSOF-26870 - Machine List in Monitoring Manager is now sorted correctly
- DSOF-26874 - Fixed an issue where a projector mask surface with population mask in Alpha blend mode renders incorrectly in Feed output
- DSOF-26911 - Fixed an issue where Stage Movie recordings audio was 2 frames offset from video
- DSOF-26943 - Fixed incorrect blend implementation for Projector Alpha Mask
- DSOF-26949 - Fixed an Access Violation when receiving 16-channel ArtNet data
Improvements
- DSOF-26760 - Receive health widget is now resizable
- DSOF-26933 - Resized d3manager columns in the ‘Network’ tab
Fixes
- DSOF-25916 - Fixed an issue where device recordings with multiple states played back packets out of order
- DSOF-26271 - Fixed an issue where the d3 version of projects was not visible in in d3manager
- DSOF-26379 - Fixed an issue where the frame counter incorrectly changed when jumping on from a section using a direct map to one using a precomp
- DSOF-26447 - Fixed an issue where late joining Actors could be out of sync when in play to end of section mode
- DSOF-26467 - Fixed a crash to desktop when shutting down on Gx3
- DSOF-26840 - Fixed an issue where RX nodes published a display adapter list every 10 seconds
- DSOF-26958 - Fixed an issue where Frame Blend could become reversed when changing speed, causing jerky motion
- DSOF-26961 - Fixed a RenderStream Uncompressed crash
Improvements
- DSOF-26926 - BlueFish card temperature is now logged on startup
Fixes
- DSOF-25176 - Fixed an issue where the Videoin preview widget failed to open when using GUI fractional framerate
- DSOF-26000 - Fixed an issue where the input configuration menu caused the Videoin preview widget to crash while using GUI fractional framerate
Improvements
Improvements
- DSOF-17967 Make "Find Usage" more useful (jump to usage etc)
We have improved the Find Usage functionality in the VideoClip, DfxFile, and AudioTrack layer editors. This can be found by right clicking on the respective pieces of media and left-clicking on the ‘Find Usage’ button in the layer editor for VideoClip, DfxFile and AutoTrack. This will open a window with all occurrences of the current piece of media across all tracks and layers. An example can be found here:
Each entry will contain the Track, Layer and usage location, shown as the timecode time from the timeline. A left-click on the entry will jump the playhead to the start of the layer that uses that piece of media.
All Find Usage information can now be exported as a .TXT file.
The same functionality has been added to the ‘Find/Replace Usages’ button in the Mapping editor, which was introduced in r27.1 for sequenced mappings only, only in this case the window shown will display all occurrences of the mapping. In the menu, to the side of ‘Replacement Mapping’, if a user clicks on ‘None’ then a different mapping can be selected. Click ‘Replace with selected Mapping’ to assign the new mapping as seen here:
- DSOF-22572 Redistribute DMX and OSC data to allow for synchronisation
In previous releases, both DMX and OSC packets were received independently and actioned by each Disguise media server running in the session. We have changed this behaviour so that both DMX and OSC packets are now received by the director machine running in the session and distributed to the actors. This means that all DMX and OSC packets are executed at the same timestamp.
This improvement allows for the DMX and OSC protocols to be used in situations which require operations to happen in synchronisation, such as triggering DMX or OSC changes on a screen split across multiple actors for example.
If Disguise is receiving DMX or OSC packets, we can right click DMX or OSC on the state tab at the top of the Designer GUI to open the ‘DMX Recorders’ or ‘OSC Recorders’ editor menu. This includes a ‘Redistribution Delay’ field where we can customise the frame delay to enable the redistribution of the DMX or OSC packets to take place. A higher frame delay will compensate for a high-latency network as it allows more time for the DMX or OSC packets to get from the director machine to the actor machines.
Fixes
- DSOF-15782 Sockpuppet - Fixed an issue where sACN Sockpuppet playback could be out of sync
- DSOF-23659 - Fixed an issue where the tracking axis filtered value of zoom and focus failed send to system
- DSOF-24426 - Fixed an indefinite hang on mapping a bluefish input to video input
- DSOF-26481 - Fixed an issue where OSC expressions did not re-evaluate after a project restart
- DSOF-26520 - Fixed an issue where LocaleMetaData was missing from diagnostics, meaning events logs were not completely readable
- DSOF-26773 - Fixed a DMX/OSC-related error when right-click on the Devices
- DSOF-26775 - Fixed an issue where "redistributionDelay" field under the Devices was written in an incorrect style
- DSOF-26819 - RMAXd3: logging now handles 3 error codes
Fixes
- DSOF-25391 - The MIDI Beat Clock Timecode Transport, when set to Metronome mode, now holds at the end of a section when in Playing to End of Section playmode
- DSOF-26439 - Fixed an Access Violation that sometimes occurred when starting a project with pre-configured video ins
- DSOF-26631 - More than 8 RenderStream streams in Mesh Mapping no longer cause black outputs
- DSOF-26721 - Fixed an issue where RenderStream duplicated one stream across outputs
Improvements
- DSOF-26759 - Added machine name to time readout in the Readout module
- DSOF-26760 - The RenderStream Receive health widget is now resizable
- DSOF-26674 - Increase I/O limit for Designer licence to 6GByte/s
Fixes
- DSOF-26632 - Fixed an issue where UV mappings were not applied accurately in Mesh Mapping mode
- DSOF-26677 - Fixed an issue where arrowing a Blur layer into video layer degraded the quality of the arrowed media
- DSOF-26678 - Fixed an issue where we, ‘Timed out while transmitting Art-Net packet’ when setting Tracking Recorders mode to Play
- DSOF-26737 - Made Artnet packet sequence count per universe instead of globally
- DSOF-26756 - Fixed an issue where Prop surfaces were masking surfaces behind them when in Add blend mode
Notice
The size of the Designer installer for r27.3 (build number 183205) and a number of custom branches exceeded the available RAM permitted as part of the reimaging process. This caused the reimaging process to stop and prevented the user from booting the Disguise media server into Windows.
We removed r27.3 (build number 183205) from our website. This has now been resolved in r27.3.1, which is otherwise identical to r27.3.
New Features
- DSOF-9390 Lux Transparency Support
Non-opaque blend is now supported in Lux mode.
- DSOF-24027 TCP Indirection Controller
There is now a TCP variant of the Indirection Controller, in addition to the existing variant which uses UDP. It works like a UDPIndirectionController with a key value pair list and when the user sends a TCP message with a new key it causes the indirection to switch.
- DSOF-24933 HTTP Sockpuppet
In addition to control via OSC, Sockpuppet now supports control via the HTTP protocol. This makes Sockpuppet more easily controllable by web-based control interfaces and other networked components that utilize HTTP protocols.
The sockpuppet commands are sent to the director, from which the animation values are applied in sync across all machines in the session.
Patching a layer
- Create a layer in d3 that you wish to patch.
- Right click layer and select Patch to HTTP
API Overview
HTTP sockpuppet exposes the following HTTP API endpoints, currently under the experimental namespace which is not documented at developer.disguise.one. See http://127.0.0.1/docs/experimental for the Swagger documentation. Note that as these APIs are in the experimental namespace, they may be subject to change before promotion to the non-experimental namespace.
API Usage Workflow
Expected usage of APIs are as follows;
- Call sockpuppet/easingfunctions to get list of possible easing functions
- Call sockpuppet/patches to get list of possible patches
- Using data from sockpuppet/patches, use /sockpuppet/live to make changes to the patch, and therefore the layer. Send to the director only, or controlling understudy.
Live changes sent to the director will be played back in sync across the session with a 2 frame delay.
Improvements
- DSOF-4156 Shortcut to Expand all/Collapse all groups
The following keyboard shortcuts expand and collapse all groups:
CtrlAlt= (expand)
CtrlAlt- (collapse)
In addition, there is a new Collapse All Groups button in the right click menu of the track which collapses all supergroups and smart groups.
- DSOF-19079 Make strobe layer less intense when created
When a strobe layer is created the rate is now 1hz by default.
- DSOF-23033 Sequencing: Add hot key for layer 'fit to contents'
When a layer is selected using the key bind 'CTRL + SHIFT + F' it will fit layer to contents
The key bind is noted in the 'F1' Shortcut menu.
- DSOF-23439 FolderWatcher abort logs are unclear (e.g. if d3service fails to clean up)
- DSOF-25049 Add text to manual observation alignment widget explaining initial alignment
We have added text in the Manual Observation widget that explains to users that if a wireframe is not visible, then the user should increase the Stage Render Opacity and adjust the Solved Position and Rotation until the alignment objects are in view.
- DSOF-25224 DSE accounting for surface normal relative to projector
We have added functionality to the Dynamic Blend workflow which accounts for the surface normal relative to the projector. When users edit the ‘Cutoff angle’ in the Dynamic Blend section of each projector and the relative angle of the projector and the surface normal exceeds this value, then we remove the contribution of that projector and use projectors with a better view instead.
- DSOF-25614 DSE: promote "dynamicSoftEdgeFullRes" to user-editable per-projector option
The option switch dynamicSoftEdgeFullRes has been promoted to a user-editable per-projector option. This enables the soft edge resolution to vary per projector rather than set across the whole project. In the projector settings, the “Dynamic Blend” section has a “Resolution factor” field 1/16, 1/8, 1/4, 1/2 and Full. 1/16 is the default for best performance. The "Resolution factor" changes DSE resolution, affecting blend quality (it is visible).
- DSOF-25623 DSE: re-organise Dynamic Blend section to hide less-used settings
The Projector Dynamic Blend section now has an Advanced Blend Setting sub-section with less frequently used options, to save on screen real estate.
- DSOF-25657 Make crash reporting disabled by default
Crash dumps are created when an unhandled exception occurs. This incurs a brief stall while the dump is generated. This behaviour is now opt-in and disabled by default. It can be enabled by one of the following two methods:
- Option in Designer. d3 > Advanced > Enable Crash Reporting > On / Off
When On, it generates a dump file on the local machine when an Access Violation thrown.
When Off, it doesn't generate a dump file on the local machine when an Access Violation thrown.
- Advanced Project Setting > Option Switch: enableCrashReporting is Project Wide and depending which machine has the Access Violation thrown, it will generate a dump file on that specific machine.
- DSOF-25922 Keyboard modifiers for fine and coarse control of feed warp points
When on a KVM or on a laptop trackpad it tends to be easier to use a keyboard than use the cursor. Using the keyboard means the points move really slowly though. Adding modifiers means easier control of points without the movement being forced to be one slow speed. The following modifiers have been added:
- Holding Ctrl while moving feed warp points with arrow keys causes them to move in smaller increments
- Holding Shift while moving feed warp points with arrow keys causes them to move in larger increments
- DSOF-26395 Allow users to use field of view for XR calibration when focus encoder unreliable
If a tracking system is not sending a reliable focus encoder value, it can be preferable to disable it and use the field of view instead as a basis for XR calibration. Now, when the focus encoder value in the camera tracking source is disabled, it will be overwritten by the horizontal field of view if the focal length value is enabled
This value is shown as the zoom value when doing XR spatial calibrations, and is also used as the zoom encoder value when interpolating calibrated lens poses during operation
When overriding, the field in the tracking source is highlighted red, with the help text explaining why it is overridden. Similar highlighting and help text is also shown when the field is locked from the spatial calibration. All the equivalent of above is also true for focus encoder, overriding with focus distance where available.
Fixes
- DSOF-7470 Removing resources doesn't work in session (previously Remove missing media on editor machines resets on reconnecting to session)
- DSOF-8134 - Fixed an issue where population masks with alpha gradients were not respected in the Lux renderer
- DSOF-23636 - Dynamic Soft Edge: Fixed an issue a banding effect on blended region when brightness changed
- DSOF-23747 - fixed a CHECK_LOGIC error when launching RenderStream for mesh mapping with no screens
- DSOF-23788 - Fixed an issue where mesh mapping frustum jitters when following a camera
- DSOF-24891 - Fixed an issue where Tracking History would cast time to float and back, potentially causing minor issues for long running projects
- DSOF-25012 Fixed an issue where the installer had no 25G/100G rivermax licence files if offline
- DSOF-25036 - Fixed an issue where mesh projection would give strange viewpoints when a camera is very close to screen
- DSOF-25046 - Fixed an issue where graphics semaphores would not be released properly on Nvidia machines.
- DSOF-25101 - Fixed an issue where 'StageEditor' object had no attribute 'onResourceChanged' error when opening Stage Editor Menu.
- DSOF-25157 - Fixed an issue where the QuickAlign/AR alignment tool would inaccurately select vertices
- DSOF-25195 - Arri Lds driver: removed "sensor height" field to avoid overwriting aspect ratio
- DSOF-25358 - Fixed TrackedPoint labels being incorrectly offset
- DSOF-25576 Dynamic Soft Edge: Fixed an issue where a profile would not be created if the empty project was created after d3 version was updated
- DSOF-25648 - Fixed an issue where OscDevice 'receiving' attribute did not match the true state
- DSOF-25856 - Fixed GraphicsDebugger log missing newline
- DSOF-25859 - QuickCal: Fixed an issue where rendering lineup was very slow for large meshes
- DSOF-25871 QuickCal: Fixed an issue where occlusion calculation for hidden markers was incorrect
- DSOF-25878 QuickCal: Fixed an issue where mouse-over help text was not shown for some settings
- DSOF-25919 - d3service: Fixed an issue where getThisMachine() would mix up machine Range and Model in API v1 response
- DSOF-25940 - Improved the resolution of the disguise logo in the installer
- DSOF-26162 - Quest 3 headset now works properly with d3
- DSOF-26199 - Improved performance of DMX screen
- DSOF-26580 - Fixed a RenderStream workload crash on launch with Exception: ILLEGAL_INSTRUCTION
Improvements
- Added support for VX 3 server type
- DSOF-26613 - "d3-events" EventLog now included in System Diagnostics
Fixes
- DSOF-24757 - Fixed an issue where focus distance showed negative values in the object
tracking mode - DSOF-26575 - Fixed an issue where 2.5D assets incorrectly said it was at zero depth
Improvements
- DSOF-26470 IP VFC: inform a user when no SFPs are connected
When using an IP-VFC card, we have added error reporting into the feed scene in the form of a tooltip for the ‘Sync Mode’ button.
When a user is using the PTP option in sync mode, if there is no compatible 25Gb SFP in Port 1 on the IP-VFC then the sync mode button will turn red and a message will state the Disguise media server and VFC slot number which has the invalid configuration as seen below:
When a user is using the EXT option in sync mode, if there is no compatible single or dual SDI SFP in Ports 3 and/or 4 on the IP-VFC then the sync mode button will turn red and a message will state the Disguise media server and VFC slot number which has the invalid configuration.
- DSOF-26538 IPVFC - change PTP_LOCKED mode name to PTP_SYNC
When using IP-VFC, we have changed the name of the PTP sync mode located under the Sync Info tab in the IP-VFC control widget from PTP_LOCKED to PTP_SYNC
- DSOF-26571 TrackJump - increase maximum section number from 32 to 1000
Improvements
- DSOF-26139 - Changed the wording of "Replace with another Mapping" button to “Replace with selected Mapping”, and a tooltip with further explanation has been added to video layers
Fixes
- DSOF-22638 - Fixed a video memory leak when mapping/unmapping video inputs
- DSOF-24199 - Fixed a hang that could occur on shutdown due to in-flight HTTP requests
- DSOF-24760 - Fixed an issue where object tracking mode for camera focus distance did not account for object hierarchy
- DSOF-25317 - Fixed occurrences of `toFree.addr4 != 0` error messages when using RenderStream
- DSOF-26140 - Fixed an issue when key-framed, Mapping Replacement names only updated after refresh of layer
- DSOF-26168 - Stage Render Layer - Fixed an issue where screens in 'Frontplate' layer mapped to the backplate showed up red
- DSOF-26339 - Fixed an issue where Dynamic Soft Edge did not affect Actors in session
- DSOF-26361 - Fixed an issue where the ‘Find/replace usages’ widget did not have a scrollbar when it extended offscreen
- DSOF-26377 - Fixed a shader errors being thrown when using radial mapping
- DSOF-26410 - Fixed an Access Violation using Blur layer
Improvements
- DSOF-23937 IPVFC: Device names in NMOS are more descriptive
When using the IP-VFC in ST 2110 mode, we have changed the NMOS device label so that it clearly states the slot that it is occupying on the Disguise media server, for example ‘Slot 1’. In previous releases, the NMOS device label of each IP-VFC would be ‘Disguise Port 0’.
We have also changed the NMOS node label to be the user-defined name, which is often changed from the Windows name to match the role in which it occupies within the d3net session i.e. Actor01.
Fixes
- DSOF-25640 - Fixed an issue that occurred when as an Editor, you were not prompted to join a session when opening project file
- DSOF-26138 - Fixed an issue where asset sync in RenderStream did not sync deleted files
- DSOF-26350 - Fixed console spam caused by setting a placeholder clip on a videoin
- DSOF-26391 - Fixed an issue where LayerStack was not being applied to video input
Fixes
- DSOF-25853 - Fixed an Access Violation that occurred after changing plates meshes within a 2.5d asset, and then undoing changes with ctrl + z clicked quickly several times
- DSOF-25991 - Fixed an issue where malformed PSN data when recorded could not be played back and caused other device recordings to fail
- DSOF-26094 - Fixed an issue where RenderStream Compressed caused d3 framerate drops
- DSOF-26097 - Fixed an issue where Device Recordings would intermittently appear empty if continuously receiving data and jumping through sections on the timeline
- DSOF-26157 - Fixed an issue where the Editor moved forward in the timeline rather than following the Director's timeline after unlock and lock to Director
- DSOF-26185 - Fixed issue where itu709 setting in gamma mode corrupted the display of certain files
- DSOF-26208 - Fixed 2.5d assets included in project diag resulting in very large file sizes
- DSOF-26288 - Fixed an issue where the DPX feed export yielded an unexpected colour space shift
- DSOF-26305 - Fixed an OmniCal lenscalibrator crash on startup due to a DLL issue
- DSOF-26319 - Fixed an issue where d3 could intermittently crash to desktop if a connection was lost while sending a failed HTTP Request
Improvements
- DSOF-23762 Ability to see usages of mappings
- DSOF-25935 Replace all usages of a mapping
The above two improvements are accessible via the 'Find/Replace Mapping Usages' button in the Mapping editor.
- DSOF-23946 Remove "CodeMeter USB Mode" check from installers
- DSOF-24291 Show Designer software version in UI
We have added the Designer software version in the bottom right of the UI next to the machine name.
- DSOF-25256 Machine List in Monitoring Manager should be alphabetical
We have made the Machine List alphabetical within the Monitoring Manager window, found by left clicking on the FPS in the lower right hand corner of the track.
- DSOF-25700 Warn the user when the audio codec in their embedded audio is not supported
We have added a notification to warn the user that an unsupported audio codec is recognised when using embedded audio, and to convert the audio codec to either ‘sowt’ or ‘twos’.
- DSOF-25873 Define a certain degree of a cylinder mapping
We have added an Arc field to allow users to choose the degree, (0 to 360,) of coverage on a Cylindrical Mapping. This option is the same as the Arc field on the Spherical Mapping
- DSOF-25936 Auto-select first enabled layer in feed warp editor
In previous releases, when a user left-clicked the + button under Deformation layers - found within the Edit Warp Menu in the feed view - the first deformation layer was selected, even if the deformation layer had been disabled. In r27.1 the first deformation layer that is selected is the first one within the stack that is enabled.
- DSOF-26029 OmniCal: export unstructured point clouds (without invalid points)
We have enabled users to be able to export unstructured point clouds when using OmniCal. Structured point clouds directly correspond to the 2D grid output by projectors, and will include invalid points as NaN values. These values are usually those that were not visible to enough cameras or where 3D reconstruction failed. Unstructured point clouds provide no invalid points as NaN values within the export.
This can be found in the Advanced section in OmniCal Calibration and clicking on ‘Save PointCloud’. This will save four PCD files for each projector grid within the Optical Stage Plan folder:
- Aligned and unaligned (as captured)
- Structured and unstructured
- DSOF-21670 DMX String: Now defaults to 1 fixture
We have changed the default behaviour of new DmxStrings to one fixture.
Fixes
- DSOF-24032 - Fixed an issue where an 'Indirections' object had no attribute 'role' - d3net Manager
- DSOF-24561- Fixed an issue when starting a RenderStream workload, RMAX receiver was being attached/detached several times
- DSOF-25904 - Sockpuppet: Fixed an issue where moving the Frame Index value caused stuttering and jumping of playhead in Video Clip
- DSOF-25950 - Asset preview for 2.5D beach asset no longer clashes
- DSOF-25987- Fixed an issue where adjusting prediction would break spatial mapping
- DSOF-26146 - Added feedback when active latency automatic calculation is higher than the manually set active latency override
- DSOF-26247 - Fixed an Access Violation when starting DSV video in preview
- DSOF-26251 - Fixed an Access Violation opening Virtual Reality Navigator editor
- DSOF-26290 - Fixed an issue where MAC addresses stored in NetworkAdapter were wrong
- DSOF-26137 - Fixed an issue where UE would crash on launch when a single fragment was too large
- DSOF-26562 - Fixed an issue where pre-multiplied alphas did not look correct in 2.5d workflows
- DSOF-26250 - Fixed an Access Violation when using VR headset
Improvements
r27 introduces a number of improvements specific to Disguise media servers with a Matrox SDI capture card installed. These include:
- Mixed frame rate support - users can now work with any combination of video resolution formats and refresh rates across each video input. This resolves the outstanding TA-19: Matrox Video capture cards advisory found here
- Ultra low latency mode - we have reduced the video latency when running in ultra low-latency mode from 4 frames per second to 3 frames per second at 30Hz, 50Hz and 60Hz
- General performance improvements
These improvements are only available when running Designer software version r27 and above alongside the following OS builds - all of which are available to download on disguise.download/#hardware or https://disguise.cloud/account/software/os-downloads:
|
Disguise media server |
OS |
|
vx 1 |
vx1_vx2_24Q1 |
|
vx 2 |
vx1_vx2_24Q1 |
|
vx 4 |
vx4_24Q1 |
|
vx 4+ |
vx4+_24Q1 |
|
gx 3 |
gx3_24Q1 |
Fixes
- DSOF-21761 Support for mixed frame/ refresh rates which are not related
- DSOF-24646 - Fixed an issue where 1080psf 29.97 VideoIn on a gx3 gave half quadrant artefacts
- DSOF-24666 - Fixed an issue with interlacing modes other than discard did not work
- DSOF-25337 - Fixed capture buffer delay sporadically being too large resulting in tearing
- DSOF-25394 - Fixed interlaced capture on driver 10.4.101.1269 having fields in the wrong order
- DSOF-25460 - Fixed an issue when using Quad coupled mode, losing inputs 2-4 would result in a black frame
- DSOF-25465 - Fixed an issue where only the 12G-enabled ports hold onto the last frame if input was removed
Fixes
- DSOF-26466 - Fixed an issue where RenderStream Proxy did not show up on Director if both 25g connectors were active
- DSOF-26550 - Fixed an issue where a duplicate process was started when clicking quickly on the start or restart workload button
Fixes
- DSOF-25851 - Fixed Manage Renderstream Workloads not working reliably
Fixes
- DSOF-26273 - Fixed console spam with 'Updating Scene Due to Change in Resource' every time feed scene is changed
Improvements
- DSOF-25410 - Updated the way proxy and non-proxy streams are filtered in health status widget
- DSOF-25448 Receive Health status in the RenderStream layer editor should no longer report "Frames Dropped Recently" for Proxy streams.
Fixes
- DSOF-23229 - Fixed an issue where the current status of RenderStream was not shown under ‘Network’ tab within d3manager
- DSOF-23266 - RenderStream Workload widget does now automatically shrinks
- DSOF-23889 - Fixed an issue where d3manager did not update network share location when changing d3 projects folder
- DSOF-23890 - Fixed an isse where d3manager did not update network shares if not running as admin / elevated
- DSOF-24449 - Fixed an issue wher eRenderStream uncompressed streams intermittently only rendered black
- DSOF-24474 - Fixed an issue where Heap corruption in Rivermax cleanup code caused a crash in touchdesigner
- DSOF-24475 - Fixed a CL_OUT_OF_HOST_MEMORY error on vx using RenderStream
- DSOF-24622 - Fixed an issue where workloads could occasionally get stuck in awaiting requests
- DSOF-24648 - Fixed an intermittent flickering issue when starting RenderStream
- DSOF-24706 - Fixed an issue that occurred when using an uncompressed Unreal RenderStream, some actors showed RECV 0
- DSOF-24707 - Fixed an issue where an exception occured when trying to remove a channel mapping
- DSOF-24715 - Fixed an issue where actors crashed whilst starting and stopping workload
- DSOF-24838 - Fixed an issue where pool usage was not shown for assets using the default channel name
- DSOF-24855 - Fixed d3 heap corruption and a crash to desktop with RenderStream compressed in LibGpuVideoCodec (AMD 22.Q2)
- DSOF-24918 - Fixed an issue that occurred If the drive that d3manager was pointed at disappeared, launching d3 remotely on that machine would default to another drive
- DSOF-24943 - Improved RenderstreamSystem system speed when updating statistics about many streams
- DSOF-24974 - Fixed an issue where starting and stopping a render stream workload reduce performance of the director
- DSOF-24984 - Fixed an issue where launching d3manager with a missing d3 projects folder would result in the next project folder from the list being launched
- DSOF-25009 - Fixed an issue where adding samples to an uninitialized graph descriptor caused an exception
- DSOF-25023 - Fixed a crash on director when receiving proxy streams
- DSOF-25028 - Fixed an issue where if d3service crashed while RenderStream is running, all renderstream processes on that machine will no longer be controllable via d3net
- DSOF-25039 - Fixed an intermittent issue where streams were occasionally never received
- DSOF-25096 - Fixed an issue where calling an invalid API endpoint can intermittently caused a crash to desktop
- DSOF-25113 - Fixed an issue where 16K or higher screen couldn’t use blur layer even using enableSLC switch
- DSOF-25136 - Fixed an Access Violation can occur when moving the playhead out of a RenderStream layer after the GUI had been reloaded during development.
- DSOF-25137 - Fixed an issue where Renderer Graph was not accessible via the Workload details GUI
- DSOF-25183 - Fixed an issue where a video layer missing media highlight no longer updated as frequently to changes in sequencing
- DSOF-25185 - Fixed an issue where a vx occasionally dropped all received frames with RenderStream Uncompressed
- DSOF-25237 - Fixed an issue where missing media scenarios with a Bitmap layer caused notification spam: Corrupt keyframe, please check sequencing
- DSOF-25327 - Fixed an issue where Feed Mapping Editor still opened and is interactable even if the feed mapping is "Locked"
- DSOF-25338 - Reduced active time of "Packets dropped recently"
- DSOF-25556 - Fixed an issue where editing Feed Warps intermittently did not take effort on actor machines in session, but the control points did move
- DSOF-25568 - Fixed an issue where RenderStream failed to initialise due to an exception, rs_initialise returns success
- DSOF-25629 - Fixed an error when launching project on actor, "Current d3projects folder not available on machine..."
- DSOF-25631 - When opening d3 manager "Run Project" buttonis now populated with the "current" project
- DSOF-25765 - Fixed an issue where Understudy takes over but does not indicate on director, sometimes failing to trigger matrix failover
- DSOF-25829 - Fixed RenderStream Failover
- DSOF-25892 - Improved Track widget updates when RenderStream workload status is updating
- DSOF-25893 - Improved receive health widget
- DSOF-25932 - Fixed an issue where workload state intermittently got stuck in "Launching"
- DSOF-26095 - Fixed an issue where some RenderStream uncompressed streams failed to start on the director when using an actor controller to run many streams
- DSOF-24245 - Fixed an indefinite hang/crash due to exhausting video memory
- DSOF-25905 - Fixed an issue where mesh mapping fragments teared when the engine origin is changed in real-time
Fixes
- DSOF-25476 - Fixed an issue where Projection Screens could be inactive on Editors when animated with Animate Object Preset
- DSOF-25569 - Fixed stYpe Focus Distance not being used
- DSOF-25930 - Fixed an issue where 2.5D assets did not auto-extract on Actors
- DSOF-25983 - Fixed Black Magic Video Hub 3g no longer receiving commands
- DSOF-26026 - Fixed a topological sort error for 2.5D assets and plates
- DSOF-26093 - Fixed an issue where 2.5D had an error parsing depth map when an image was fully transparent
Fixes
- DSOF-21902 - Fixed an issue where projects failed to load with error: m_delayDsp
- DSOF-23674 - Fixed an issue where video layers used in Layer Stacks were previewing the second to last requested media
- DSOF-25485 - Fixed an issue where pop-ups from session widget flickered back and forth between being on top and behind of the session widget
- DSOF-25499 - Fixed an issue with ncam tracking
- DSOF-25880 - 2.5D assets no longer have lower selection priority than displays
- DSOF-25912 - Fixed an issue where Device Recordings did not play back captured PSN data correctly
- DSOF-25943 - Fixed an issue where d3 was unable to import proxy files it had just made of versioned fragment replacement video clip
- DSOF-25949 - 2.5D - Depth maps no longer interpreted incorrectly
- DSOF-25976 - Fixed an issue where Perspective Mappings only appeared n Director, not Actors
- DSOF-25990 - Moved Variable Timecode implementation behind the option switch 'forcePIDTimecodeChase
- DSOF-26027 - Fixed an issue that occurred when using sockpuppet bank editor, using NONE did not respect transition times
- DSOF-26028 - Fixed an issue that occurred when switching from a NONE clip in a sockpuppet video layer the frame counter did not reset on the clip
- DSOF-26051 - Fixed an issue where machines with capital letters in their hostname did not show VFC status information
New Features
- Added support for vx2+
Fixes
- DSOF-25920 2.5D - Fixed an issue where changes in z-offset for plates with depth maps don't get saved to 2p5d file
Fixes
- DSOF-24939 - Fixed an Access Violation when selecting the tracker delay calibration thumbnail
- DSOF-25649 - Video mode Inframe - Fixed an issue where a sockpuppet video layer playing audio caused d3 performance to drop
- DSOF-25869 - Fixed an issue where transparent screens had a black background in non-UV regions in an upgraded project
- DSOF-25898 - Fixed an issue when using 2.5d where an artifact was present in parsed depth maps containing narrow non-alpha columns
- DSOF-25926 - Fixed an issue where the GUI was black when starting Designer on a server when Parsec Virtual Display Adapter is installed
New Features
New 2.5D Workflow
The new 2.5D workflow is also covered in the Disguise User Guide, together with a demonstration video, here.
What is 2.5D?
2.5D workflows bridge the gap between traditional 2D video plates and full 3D generative scenes. By building up a scene with layers of images or video plates, with the possibility to add depth or shaping to the plates, users can quickly create a realistic-looking scene with parallax. 2.5D assets can be saved as .2p5d files and shared across projects or created using external integrations such as Cuebric to harness the power of generative AI to optionally create the image or just to speed up the process of image segmentation using AI.
What has changed?
2.5D has been possible with Designer prior to 26.3, however, it required the manual creation of plates using a projection surface per plate, manually applying specific settings to each plate, and the use of a StageRender layer. With r26.3, 2.5D has been made a first-class citizen in Designer with its own layer type and the concept of a 2.5D asset. This dramatically increases the usability and speeds up the workflow, as well as making it more intuitive and less error-prone.
In addition, the Cuebric integration speeds up the pipeline between the creative and volume control stages of the end-to-end workflow.
How-To
The following instructions assume an LED and MRset have already been set up in the Designer project
To set up a 2.5D asset from an existing .2p5d file:
- Copy the .2p5d file to objects/2p5DFile in the project folder
- Add a 2.5D layer to the timeline
- Click on the asset field in the 2.5D layer. The copied 2p5d file should appear in the list of assets
- Click on the asset to select it, it should then load and be visible in the stage
- Select the desired 3D mapping in the 2.5D layer, e.g. MR set backplate
- To reload the asset from the file and overwrite any local changes, click ‘Reload from file’ under Import/Export in the 2.5D asset editor
To create a new 2.5D asset from scratch:
- Add a 2.5D layer to the timeline
- Click on the asset field in the 2.5D layer, and create a new 2.5D asset
- Add a new 2.5D plate to the ‘plates’ field in the 2.5D asset
- Under ‘Layer Stack’ in the plate editor, click ‘Add Video’ to add a video or image to the plate
- Continue adding plates and modifying their properties until the desired scene composition is achieved
- Select the desired 3D mapping in the 2.5D layer, e.g. MR set backplate
- To export the asset for use in other projects, click ‘Export to file’ under Import/Export in the 2.5D asset editor. The exported .2p5d file will appear under objects/2p5DFile in the project folder.
Modifying 2.5D asset properties:
- The 2.5D asset is an Object which can have its offset and rotation set by changing the values in the editor or moving the white box in the visualiser. Doing so changes moves all the plates to change the origin point of the 2.5D scene. It is recommended that the origin is set roughly in the middle of the range of movement of the camera, to achieve the most realistic-looking parallax.
- The ‘Field of view’ and ‘Maximum depth’ fields can be adjusted to scale the total area encompassed by the 2.5D scene. This can be used to ensure that the edges of the plates are not seen when moving the camera within its expected range.
- Plates can be added to or removed from the asset using the +/- buttons in the ‘Plates’ field. Plates are ordered by depth, and reordering the plates in the list will update the plates' depth to reflect their new positions.
- The Import/Export settings can be used to load or save .2p5d files. When loading files that contain depth maps, the ‘Depth map minimum override’ setting can be used to change the minimum distance from the origin, represented by full white in the depth map.
Modifying 2.5D plate properties:
- The plate depth can be changed by modifying the z offset value, or by dragging the plate in the visualiser. If the option ‘Scale with depth’ is ticked, the scale and x/y offsets will automatically be adjusted with depth so that the plate looks the same when viewed from the asset origin. If ‘Scale with depth’ is not ticked, the scale and x/y offsets will not change, so the plate will appear smaller as it moves further away.
- By default new plates will be scaled to match the total field of view of the asset. However, the scale values can be adjusted in the 2.5D plate editor to change the scale. Similarly, the x and y offsets can be adjusted to move the plate position.
- The plate’s mesh can be changed to add depth to a layer and make the parallax effect more realistic. Some .2p5d files will contain depth maps, which will be converted to meshes when importing. To remove the depth from the plate, the standard rectangle mesh can be selected instead.
- The plate Layer Stack is used to set up the layers appearing on the plate. To quickly add an image or video to the plate, use the ‘Add Video’ button. Otherwise, layers can be created as normal and stacked to create effects such as blur or colour adjust. Note that these layers can’t be keyframed, see ‘Advanced Workflows’ for methods to keyframe layers on plates.
Advanced workflows:
The 2.5D layer and assets are designed to provide a user-friendly way to quickly create 2.5D scenes which are portable between projects. The standard workflow should allow for the majority of use cases, however, more advanced workflows can also be achieved by combining 2.5D assets with other tools in Designer.
- Generally, images, videos, and effects should be added to plates using the plate Layer Stack. However, this does not allow for keyframing within these layers. To keyframe content on plates, layers should be added to the timeline as normal. Content can be mapped to 2.5D plates from the timeline similarly to any other display.
- 2.5D assets and plates are both Objects, so it is possible to animate them from the timeline, or parent assets to other objects which are controlled using tracking data
- The ‘Stage render layer’ which was used for 2.5D workflows prior to r26.3 still functions as it did previously, so it is still possible to use the old workflow if desired.
Cuebric Integration
Cuebric is a web-based tool for creating 2.5D scenes with the help of AI. For more information visit https://cuebric.com/.
With r26.3, 2.5D scenes can be exported from Cuebric and imported into Disguise. At the time of writing, the Cuebric scene is exported from Cuebric by clicking on “Plug & Play 3D” in the Segmentation view under the Depth option. Once exported, follow the instructions in the section above on “To set up a 2.5D asset from an existing .2p5d file”.
When the Cuebric export includes AI-generated mapping depth information, Designer will auto-generate a 3D mesh from the depth data to add shape to the plates.
To remove the depth mapping from the plate, the standard rectangle mesh can be selected instead in the plate properties.
For a video explanation of the Cuebric to Disguise end-to-end workflow, click here.
Improvements
- DSOF-17618 - HDR processing of Notch content
- DSOF-25812 - Branding updates
Fixes
- DSOF-25844 - ResourceTransport: Fixed an Undefined Behaviour copying "UID not found Reason" list
Fixes
- DSOF-24356 - Fixed an issue where inserting time that would push layers beyond the end of a track did not extend the track
- DSOF-25007 - Fixed 'Invalid t: > track length' error when dragging to the end of timeline that had a video that was a frame long at the end
- DSOF-25595 - Fixed an issue that occurred when global crossfade pairing with audio layers caused stuttering and hangs when jumping around timeline
- DSOF-25637 - Fixed an issue where "Director is under heavy load" notification did not always clear
- DSOF-25663 - Fixed an issue where the compose layer would sometimes display black when being shifted horizontally
- DSOF-25691 - Fixed an issue where matrix commands sent to a Blackmagic Smarthub 12g sometimes didn’t set the configuration correctly
Fixes
- DSOF-23262 - Fixed an issue where the Bank Editor widget resized when adding a new bank, hiding all of the slots in the top half of the widget
- DSOF-24284 Fixed an issue where the RenderStream Assets List text was drawn partly outside of widget
- DSOF-25151 Fixed an issue where using some blend modes while SLC was active stretched and compressed the content
- DSOF-25644 Fixed audio not looping when Locked and Paused At end point
- DSOF-25685 - Fixed API issue where a malformed d3 version would cause an internal error
- DSOF-25701 - Fixed an issue where a brighter line of content showed in some SLC configurations
- DSOF-25711 Fixed an issue where Mesh Policy rendered black frames when the Unreal Project in film/video & live events mode
Improvements
- DSOF-24937 - Fixed an issue where SaveOnDelete Resource Transport commands shouldn't blocked Resource Transport if a resend failed
- DSOF-25413 - Default Variable Timecode Implementation
Fixes
- DSOF-25050 - Fixed an issue where right clicking a Screen of DMX lights on an editor while in a 2 machine or more session stopped DMX outputting
- DSOF-25186 - Fixed an issue where remote installation occasionally failed to start d3service with 'Entry Point Not Found' errors on RX servers
- DSOF-25420 Fixed an issue where the Position Receiver Axis could not use "Set" button for input ranges
Fixes
- DSOF-25507 - Fixed an issue seen in AMD machines, where SLC affected output when using Stage Render layer
Fixes
- DSOF-22666 - Fixed an issue where d3 would hang due to a network security sweep
- DSOF-24346 - Added logging to Live Update option switch
- DSOF-24360 - Fixed an issue where RenderStream Uncompressed only received texture parameters on the first adapter
- DSOF-24786 - Fixed an issue where installing HDMI VFC REV E cards in a system after having QSDIVFC cards installed caused d3 to stall when loading
- DSOF-25156 - Added DCS sensor width manual column
- DSOF-25283 - Fixed an issue where project templates caused an error during install
- DSOF-25440 - MatroxApi now warns the user when there is driver and SDK version are mismatched
- DSOF-25468 - Fixed an issue where Arri LDS device was not parsing raw encoder values for zoom or focus distance
- DSOF-25527 - lenscalibrator.exe is now code-signed
Fixes
- DSOF-25401 - Fixed an issue where it was not possible to select objects after opening 'Points' separator in Rigid Body Tracking Source editor
- DSOF-25423 OmniCal: Fixed an issue where editing the camera plan in upgraded pre-r23 projects froze d3
- DSOF-25450 OmniCal: Fixed Rig Check workflow
Fixes
- DSOF-24126 - Fixed an issue where MidiBeatClock jumped backwards in the timeline when set to Loop Section
- DSOF-25089 - Arri Lens Data System version 102 is supported in addition to version 103.
- DSOF-25244 - Fixed an issue where the Sockpuppet video layer media did not turn black when 'None' is selected
- DSOF-25335 - Fixed existing TransportJumpCommands being broken broken when upgrade to r26.0
- DSOF-25401 - Fixed an issue where it was not possible to select objects after opening 'Points' separator in Rigid Body Tracking Source editor
Fixes
- DSOF-24932 - Fixed an issue where Deltacast vx4+ video input group 2 is duplicated
Fixes
- DSOF-17119 - Fixed an issue where the PSN receiver assigning to rotation.x and rotation.z would not doing full 360
- DSOF-24221 - Fixed an issue where it was not possible to open the port editor of QSDI with 'NoneType' error
- DSOF-25068 - Fixed an issue with installing fonts when the user had a space in their user folder name
- DSOF-25120 - Fixed an issue where RenderStream download_buffers did not release its download queue on destruction
- DSOF-25121 - Fixed an issue where starting and stopping a RenderStream workload reduces performance of WorkloadManager on the director
Improvements
- DSOF-25123 - We have implemented a preview feature that allows d3 to chase timecode at non-standard framerates. This can be used for example to adjust the playback speed of video in line with a DJs adjustments to the BPM of a track.To utilise this preview feature you can enable the option switch "forcePIDTimecodeChase". Chasing LTC or any kind of timecode will smoothly follow adjustments to timecode playback while this is set.If you perform large timecode jumps you may find that the playhead will fast-forward to get to the new timecode rather than immediately jump to that point.If you have feedback about this new preview feature please let us know via our support@disguise.one email so that we can take that into account for the finished implementation.
Fixes
- DSOF-23668 - PreComps - Fixed an issue where clicking Effect or Generative layer caused feed blur
- DSOF-24802 - Fixed an issue where a video layer with speed ‘0’ was interpreted ambiguously.
- DSOF-24835 - Fixed an issue where deleting a VirtualLineup layer mapped to a camera's perspective after timeline focus was taken away from the layer and then returned causes Access Violations
- DSOF-24921 - Fixed an issue where an Object Tracking error blocked Spatial Calibration when not receiving Tracking data
- DSOF-25037 - Fixed an issue where the TrackingMarker output showed incorrectly when using feed map with SLC
- DSOF-25146 - Reduced the amount of wireframes shown in QuickAlign alignment widget
Improvements
- DSOF-16666 Simple FBX mesh support
The FBX file format can now be successfully imported into Designer as a single mesh, meaning that users can now export models without the need for conversion from their respective 3D tool of choice. These can be used in the schematic, lux and heatmap renderers. Any FBX mesh will be imported with global positions, and non-triangulated meshes are triangulated on import. FBX files imported with up to 3x UV maps are supported.
It is important to note the following mitigations with this feature:
- Object hierarchies found within the FBX file in Designer are currently not supported
FBX file format support can be used with the option switch enabled. To access, right click on a project folder in d3manager, select ‘Advanced project settings’ and then select ‘enableFbxMeshImport’. Please contact product-team@disguise.one for feedback on this feature.
- DSOF-22271 TransportJumpCommand locations should use time adjusted by timecode tag when using timecode location
When making a TransportJumpCommand in the TransportControl module, the location value has the option of being set with ‘CUE <cue>’ or timecode.
In previous releases, when there are timecome tags on the track that a user wants to specify a location on, the timecode displayed in the GUI is based on the timecode tags, but the location that the TransportJumpCommand uses does not take the timecode tags into account.
In r26, the location for TransportJumpCommand now uses the time adjusted by timecode tags when using the timecode location.
- DSOF-23321 Show RenderStream proxy stream status in the GUI
We have added RenderStream proxy information in the RenderStream Editor widget.
- DSOF-23699 Make list/grid view selection for media/texture browsers persistent
In previous releases, the behaviour of the media and texture browser in Designer was not persistent when a user would switch between grid view and list view. In r26 we have made the selection of grid or list view in the media/texture browser to remain persistent across all machines running in a session.
- DSOF-23810 Add FBX ASCII format for Shot Recorder export
Users can now export data from the Shot Recorder to the FBX ASCII format.
- DSOF-24041 XR: improve usability of Tracker Delay UI
We have made a number of changes to the Tracker Delay UI. These include changing the overlay colour from magenta to red to signify when no tracking data was captured, or the delay is set to too low or too high. We have also introduced help text in a number of areas of the UI to provide instruction on the Tracker Delay process.
- DSOF-24066 Alert the user when video lookup times becomes unstable or if errors are high
We have added a visible notification within the UI to notify users that the video receive delay is set incorrectly during the spatial calibration process when working with MR Sets. The calibration will be highlighted in red, and hovering over the row with a mouse will explain that there is a video receive delay error and to perform the delay calibration again.
- DSOF-24089 DSV capture: minor performance optimisations
- DSOF-24090 DSV capture: add dropped frames detection
- DSOF-24099 Shorten RenderStream workload/stream friendly names for the UI
In previous releases, RenderStream workloads and streams were identified within the UI through a 64 bit unique ID to enable users to reference each stream. In r26 we have shortened the RenderStream workload names to make it more straightforward for a user to reference each RenderStream workload.
- DSOF-24153 Expressions: if expressions are broken, the layer they are used in should change colour as well as the parameter
In previous releases, if an incorrect Expression had been written then this would be flagged to the user by turning the parameter orange in colour.
In r26 we have included the layer that is using the Expression to also change to red in colour so that the user is notified that the Expression is incorrect. If the layer is in a group, then the group will turn red when the layer it contains turns red.
We have also included an error message on the layer via a tooltip. If a user corrects the Expression then the layer will return to its default colour.
- DSOF-24160 Better texture buffer management for LogicalVideoInDevice
- DSOF-24166 Make list editors stickyable
In r26 we have enabled users to pin ListEditors to the Designer UI by clicking the pin in the top left hand side of each ListEditor as seen in the image below.
- DSOF-24271 Change default location for d3 Projects to D:Drive after reimaging a disguise media server
In r26 we have changed the default location for d3 Projects to be in the D:Drive after reimaging a disguise media server. In previous releases, a user would be pointed towards the Documents folder whereas all Designer projects should be located in the D:Drive.
- DSOF-24375 Include display master brightness in the feed UI
We have included the master brightness of LED screens and projectors within the feed UI. This can be seen as a percentage underneath the name of each screen, as shown in the screenshot below.
Fixes
- DSOF-11028 - Fixed an issue where an embedded audio in a video layer would drift out of sync from the playhead either over time or due to frame drops
- DSOF-17926 - Fixed an issue where setting a value with '=' in an expression locked the value to the conditional value
- DSOF-21117 - EventTransportMidiNote Personality Train is no longer offset in GUI
- DSOF-21827 - MultiTransport Manager: Fixed an issue where Editors would respond to timecode cues when the Director’s transport had been disengaged
- DSOF-22783 - Clarified active latency mismatch error
- DSOF-22876 - RenderStream: Fixed a stall / crash to desktop when modifying ClusterAssigner options while sending remote texture
- DSOF-22900 - Fixed an issue where pre-capture in spatial calibration did not work when multiple cameras are using same video input
- DSOF-23276 - It is no longer possible to rename a group to an empty name, which then prevented opening group options widget
- DSOF-23281 - Fixed an Access Violation in the input manager when using keyframe editor with multi-layer selection
- DSOF-23315 - API: Fixed /sequencing/changeindirections only matching classes not subclasses
- DSOF-23367 - Fixed the keywidget timeline repositioning to the timeline playhead rather than the time indicator when moving between control parameters, thus losing view of keyframes being edited
- DSOF-23645 - Fixed an issue where Actors and Understudies were not showing frame rate at Startup until open the session widget
- DSOF-23661 - Fixed an issue where the missing media window could go off screen
- DSOF-23710 - Fixed an issue where FBX data from disguise shot recorder doesn't import correctly in 3rd party software (UE, Maya)
- DSOF-23749 - Fixed being unable to filter by resolution in list editor
- DSOF-23841- Monitoring manager improvements
- DSOF-23848 - OmniCal: Fixed an issue where NUL was logged instead of integer value 0 for "projectorSimulationOptions"
- DSOF-23898 - Fixed an issue where user made video-in resource used in layers would generate content table fails
- DSOF-23934 - Fixed an issue where d3 switching between full screen and windowed would sometimes caused a crash to desktop
- DSOF-23955 - Inconsistent version tags no longer cause a crash to desktop
- DSOF-24036 - Fixed DSE not work with Face Culling
- DSOF-24088 - DSV capture: Fixed capture failure leading to shortening of capture buffer
- DSOF-24093 -Stop on TC Lost Behaviour is now consistent between director and editor
- DSOF-24105 - Fixed an issue where timecode tags where the frame number is the same as the number of frames per second caused the playhead to show the wrong time
- DSOF-24116 - Fixed an issue where versioning down a file used in smart group versions down every file used in that smart group, regardless of version number
- DSOF-24127 - OmniCal: UI Clarified when Multi-Pose is disabled because of missing cameras
- DSOF-24133 - Fixed an Access Violation when attempting to Empty Trash for LED Screen and Projection Surface
- DSOF-24168 - Fixed an issue where users could not create string literals in expressions
- DSOF-24189 - Fixed an issues ehre Go To Timecode ( Ctrl + / ) went to timecode plus a frame when used after a timecode tag
- DSOF-24204 - Fixed video is not being in sync when an actor rejoined the session
- DSOF-24209 - Fixed frame drops when moving between multiple video clips with audio
- DSOF-24214 - Fixed remote installs of d3 stalling
- DSOF-24269 - Fixed an Access violation when trying to write more than one mpeg-4 feed movie if using an unsupported resolution
- DSOF-24278 - Fixed an Access Violation in VideoInSystem::render when GPU driver had crashed
- DSOF-24343 - Fixed an issue where sockpuppet changes were not actually being applied to an audio layer
- DSOF-24384 - Trial: Fixed an issue where a write compacted package on exit will leave project file empty
- DSOF-24385 - Fixed an issue where an unreadable shader source directory could stop shader cache creation
- DSOF-24429 - Fixed an issue where audio underran at the start of videoclip with audio
- DSOF-24439 - Fixed Text Module failing to update text on project restart
- DSOF-24445 - Groups are now red when they are created containing layers which are already red
- DSOF-24454 - Installer: Fixed d3 Installer hanging when d3 is running the background
- DSOF-24462 - Fixed an issue where every string rendered to screen was copied 1x more than required
- DSOF-24466 - Fixed RSCompressedVideoIn not calling shutdown(), bypasses videoInShutDown actions
- DSOF-24507 - Fixed an issue where ResourceTransport was blocked on Actor / Understudy machines after FeedRect edits
- DSOF-24520 - ResourceManager: search() now includes matching files on disk
- DSOF-24521 - ResourceManager: Fixed remove() calling removeResourceAction twice
- DSOF-24529 - Fixed an issue where the List View and Grid View highlight icons were reversed
- DSOF-24553 - Fixed widget suggestion text being unnecessarily copied
- DSOF-24573 - Fixed an issue where ObjectDeformationSettings::remove used single parameter erase call when used with std::remove_if
- DSOF-24588 - Fixed a virtualCam error when starting a RenderStream workload
- DSOF-24605 - Fixed an error notification "m_cameras.front() == cam" being produced during spatial calibration
- DSOF-24805 - XR: Fixed being Unable to create a Legacy Observation
- DSOF-24806 - Fixed an issue where removing feed rectangle on output threw error: 'Machine' object had no attribute 'feeds'
- DSOF-24807 - Fixed errors thrown when trying to duplicate a feed rectangle
- DSOF-24815 - RenderStream: Fixed Uncompressed workloads failing to start
- DSOF-24819 - Fixed an issue where users were unable to duplicate multiple feed rectangles in the feed view
- DSOF-24841 - Fixed remote install failing on RX
- DSOF-24847 - Improved LED Screen List Editor duplicate names handling
- DSOF-24956 - Fixed an issue where a combination of Matrox VX2 director and Deltacast VX4 or VXUnderstudy caused “Unable to create video capture stream” error notifications.
- DSOF-25099 - Fixed an issue d3preview caused an Access Violation on opening file
Fixes
- DSOF-23415 - Overlay message added to alert user "live update ready" if live update recovers
- DSOF-25061 - Fixed an issue where OSC expressions may fail to update with more than one OSC input device until the device list was re-ordered
- DSOF-25122 - Fixed an issue where d3manager showed "no license" popup on disguise servers in some situations
- DSOF-25130 - Fixed an issue seen where an indefinite capture freeze could occur when moving between capture card inputs
Improvements
- DSOF-24101 - Unified "dropped frames" counting across all videoin classes
- DSOF-24349 - Implemented IMvVideoConnectorNotification for inputs to receive status updates in console
Fixes
- DSOF-24301 - Fixed an issue where consecutive timeouts on capture cards would abort the thread and not restart it
- DSOF-24443 - Fixed an issue that occurred when a capture card input was unplugged and replugged, all inputs would freeze for a few seconds before recovering
- DSOF-24549 - Fixed Matrox thread 1A Aborting thread due to repeated time out
- DSOF-24552 Fixed an issue where output would get stuck if the video input signal was lost and recovered
- DSOF-24693 - Fixed an issue where checkInputSignalChanged was causing main thread to hang
- DSOF-25115 - Fixed an issue where the capture thread could occasionally crash with an Access Violation while configuring a quad input
- DSOF-23828 - Fixed an issue where setting EDIDS to unmanaged/force off did not work as intended
- DSOF-25064 - Fixed an issue where Mellanox licence failure was not reported as an error on gx3 servers
- DSOF-25070 - Fixed an issue where Canon ACES input transforms were not selectable in the UI
Fixes
- As part of r25.2.2
- DSOF-23391 - Fixed an Access Violation when opening 'Manage Old Media'
- DSOF-24694 - Fixed an issue where the frontplate was not aligned correctly when in minimal latency mode
- DSOF-24889 - Fixed an issue where OSC Expressions did not working properly after loading snapshot
- DSOF-24985 - Fixed an issue where use of Renderstream texture parameters would eventually cause a crash
- As part of r25.2.3
- DSOF-24726 - Fixed a “No video in texture for videoin_1.mov -” warning error on Video Input device
- DSOF-25031 - Fixed issue related to manual AR calibration
- DSOF-25040 - RenderStream: Fixed multiple Access Violations when starting a workload with proxy streams
- DSOF-25044 - Fixed an issue where Rotation Delay for tracking sources was not updated
- DSOF-24761 - Fixed an issue where Indirection Media didn't indicate that it is a value set by indirection when the value is None
Fixes
- DSOF-23505 - Fixed an Access Violation that occurred if the Capture Setup widget was open while a capture is in progress
- DSOF-24762 - Fixed an issue where the GUI framerate fraction caused some strange widget behaviours
- DSOF-24888 - Fixed an issue where the Focus distance and Aperture would stick to 0 after an MR set observation
- DSOF-24922 - Fixed an issue where the sensor width was erroneously overridden by spatial calibration
- DSOF-24950 - Fixed an Access Violation when importing objects
- DSOF-24965 - Fixed an issue where long entries in the debug window would cause a ‘<NULL>’ notification to appear.
Fixes
- DSOF-24386 - Fixed an issue where an error stating permission was denied [Error 13] when opening project from d3 Manager
- DSOF-24424 - Fixed a delay when launching a project from d3 Manager and Designer opening
- DSOF-24594 - Improved the speed of NDI source discovery
- DSOF-24758 - Fixed an issue where missing dependencies caused Notch Blocks to not load.: “Unable to load error: Error 0x7e: The specified module could not be found”
- DSOF-24808 - Fixed an issue where 12G SDI input limit was reached even using 3G
- DSOF-24814 - Improved audio prefetching limit logging
- DSOF-24816 - RenderStream: Fixed an issue where framerate plummets and/or workload crashes when un/assigning texture parameters
- DSOF-24928 - Fixed a memory leak in RenderStream Uncompressed with Texture Parameters
Fixes
- DSOF-24204 - Fixed an issue where video was not in sync when an Actor rejoined the session
- DSOF-24799 - Fixed an Access Violation when trying to add a MIDI device
Fixes
- DSOF-23458 - Fixed IO stalling due to too many concurrent read operations
- DSOF-23645 - Fixed an issue where Actors and Understudies were not showing frame rate at startup until opening the session widget
- DSOF-24130 - Fixed an issue where the tooltip didn't render text but could grow too tall when you have groups within group
- DSOF-24295 - Fixed an issue where timecode was sometimes ignored when track jumping
- DSOF-24576 - Fixed an Access Violation when stopping uncompressed RenderStream workload on an rx
- DSOF-24595 - Fixed an issue where it was not possible to create a group in an existing group
- DSOF-24734 - Fixed an issue where it was not possible calibrate tracking delay when using object rather than camera tracking source
- DSOF-24748 - Fixed lens calibration not being applied when using Object tracking source
- DSOF-24751 - Fixed an issue where camera focus distance and aperture were usable as layers
- DSOF-24752 - Fixed an issue where d3net session between servers containing different capture card types threw "Unable to create video capture stream" errors and spammed the console continuously
Improvements
- DSOF-24681 - Improved performance of getContentViewpointsForFragment
Fixes
- DSOF-24399 - Fixed an Access Violation encountered when using multi transport
- DSOF-24439 - Fixed an issue where the Text Module failed to update text on project restart
- DSOF-24672 - Fixed an issue that occurred when leaving a video layer with embedded audio in "at-endpoint" loop mode resulted in a hang
- DSOF-24678 - Tracking marker no longer has aliasing at the edge of meshes
Fixes
- DSOF-24610 - Fixed an issue where RenderStream channels with higher load factor composited behind other channels
- DSOF-24600 - Improved virtual camera stability
Fixes
- DSOF-22915 - Fixed a crash on exit when DxDevice was lost
- DSOF-24500 - d3service no longer crashes on close
- DSOF-24507 - Fixed an issue where ResourceTransport blocked on Actor / Understudy machines after FeedRect edits
- DSOF-24523 - Fixed ACCESS_VIOLATION 0x280 while renaming the stage from an Editor
- DSOF-24558 - Fixed an issue where Heap Corruptions caused a crash to desktop
- DSOF-24560 - Fixed an Access Violation when using the 'Removing Virtual Head' option in the FeedHead widget
Improvements
- DSOF-24186 - TrackingMarker layer now shows red on output when the LED is blocked by another LED in camera view
Fixes
- DSOF-23300 - Fixed an issue when a signal was lost, video input format did not go to "None"
- DSOF-24422 - Improved Camera movement in Unreal Engine 5.2 with DirectX12
- DSOF-24531 - Fixed an issue with 12g input on capture cards where it would report “input limit reached” and prevent capture
Fixes
- DSOF-23420 - Fixed an issue where media which was present on the machine was reported as missing in d3
- DSOF-23859 Fixed - Access Violations when failing to create WebBrowser in Text Layer
- DSOF-23964 - Fixed an issue where DeltaCast Video Input (Capture) Group 1 & Group 2 were flipped
- DSOF-24156 - Fixed an issue where artefacts appear over RenderStream
- DSOF-24393 - Keyframes: Fixed an issue where setTimeQuantised had missing checks which could result in keyframes with the same time
- DSOF-24437 - Fixed an Access violation in folderwatcher causing d3service to be broken silently
- DSOF-24473 - Fixed Access Violations in RenderStreamModule editor running RenderStream Assets with widgets open and crossfades on timeline
- DSOF-24483 - Fixed an Access Violation when programming renderstream layers
Fixes
- DSOF-23423 - Fixed an issue where placeholder images appear on output for the first frame after a patched videoin becomes active
- DSOF-23692 - - Fixed an issue with IPVFC with no SFP, sometimes launched d3 with a blank GUI
- DSOF-23783 - Fixed an issue where VariableVideoPlayer: "Invalid frame calculated"/ "start != end" notification showed on sharp speed changes
- DSOF-23983 - Fixed an issue where layers with a video keyframe that fell before their start were not prefetched properly
- DSOF-24277 - Fixed an issue where UDP Camera Switching caused frame drops and dirty switches in a session
- DSOF-24376 - Fixed an issue where the background flashed when switching Video layer media via DMX
- DSOF-24288 - Fixed a performance hit caused by unnecessary domain copies
New Features
DSOF-21756 Support for Invisible: real-time markerless mocap by move.ai
For details on how to use real-time markerless motion capture with Invisible by move.ai, please visit: https://help.disguise.one/en/Content/Workflows/Motion-Capture/Invisible/Invisible-Overview.htm
DSOF-23201 Improve lens tracking source workflows
In r25 we have made a number of improvements to the camera tracking workflow within Designer.
To add a tracking source to a camera:
- Under Devices, add a PositionReceiver
- In the PositionReceiver under Drivers, add the relevant tracking driver and set it up to receive tracking data
- Engage the position receiver
- Create a Camera in the Stage
- Under the Camera Settings, select tracking source. This should have been automatically generated by the driver once tracking data started to be received
- Data from the tracking source should start overwriting the values in the camera
General UI Improvements
We have now highlighted values in the camera that have been overridden when using external tracking sources or spatial calibrations. We have also added tooltips that indicate to the user that each value has been overridden.
We have also added an ‘Open Driver’ button to go straight to the driver from the tracking source, and vice versa we have added an ‘Open Tracking Sources’ button in the driver to go to the tracking source to improve navigation.
Added receive time smoothing to tracking sources
Within the tracking source, we have added a number of new options. The first is the ‘Smooth receive time’ box, which when turned on smooths out the tracking data received by disguise, but may add a small amount of latency. This was previously an always-on option but can now be optionally turned on or off by the user.
Added the ability to disable particular axes in tracking sources
The Values box can be expanded to provide all values being provided within the tracking source, and these will be highlighted in green. There are also check boxes next to each value to allow users to untick values that they don’t want passed through to the tracking source. These values will change within the camera when unticked, and can be edited by the user manually within the camera.
To toggle values applied from the tracking source:
- From the Camera, open the Tracking Source editor
- Expand the Values separator
- Values highlighted in green are being received from the tracking source. Values with a dark grey background are not being received. Values with a light grey background are received but toggled off
- Untick the checkbox to stop the value being applied in the camera
- Tick the checkbox to apply values again
We have also added a ‘Delays’ option within the tracking source to apply lens delay offset if required.
In previous releases, if users had a tracking source that failed to send a particular value then we would have used a dummy value on the camera. In r25 we now leave the value that has been provided by the tracking source and will not replace them with a dummy value.
Lens focus parameters for tracking sources
We have also added parameters for controlling focus and depth of field parameters. This has currently been implemented for RenderStream Unreal Engine assets only. Within the Unreal project, the user has to select the ‘CineCamera’ for the channel.
To use lens focus parameters:
- Set up a RenderStream layer with an Unreal asset, with a channel created from a CineCamera
- Map the channel to a Camera or MR set backplate or frontplate
- Start the RenderStream workload
- Adjust the ‘Focus mode’ under Camera / Physical / Lens / Focus. There are three options:
- Disabled - no depth of field. Focus mode is disabled by default
- Manual - use this mode to turn on the feature. Focus distance and aperture can be adjusted manually to adjust the depth of field. These can also be received from tracking sources which provide them
- Object Tracking - select an object in Designer to calculate the focus distance from. The aperture will be changed manually or received from tracking data, and the focus distance will be controlled by tracking the specific object within your scene
- Adjusting the lens focus parameters in the camera should cause the depth of field effect to change in Unreal Engine
Tracking Smoothing graph
We have added tracking smoothing graphs to help debug tracking issues. The lines in the graph can be interpreted as follows:
- Lookup offset (ms) - this is the time in milliseconds between the smooth tracking data that we are looking up, and the latest data received. This should almost never go below zero, as that would mean that we have received the tracking data too late to be able to smooth it. If it is consistently much greater than zero, this means that we are adding unnecessary additional latency whilst waiting to receive smooth data
- Index delta - the change in index of the tracking data that we look up in the buffer across each frame within Designer. If the tracking frame rate is twice the Designer frame rate, this would be around 2. The smoothness of this line shows the success of the receive time smoothing. We are aiming for a consistent index offset between each packet of tracking data that we look up
- Received delta - the change in the receive time of the tracking data of each frame. This shows us how smooth the tracking data would be without receive time smoothing. It can be compared against the ‘Index delta’ line to check that receive time smoothing is working
- Instantaneous smooth data delay (ms) - indicates how far we would have to look in the buffer to ensure that we have received tracking based on the latest received packets. This is aggregated over time to give a stable lookup time
- Local smooth data delay - the maximum smooth data delay for this specific machine
- Global smooth data delay - the maximum smooth data delay over all machines. This is particularly relevant when we are redistributing tracking data across machines. It should provide a consistent period to look back in the buffer to ensure that we have smooth tracking data
DSOF-7571 BlackTrax: Implement BlackTrax Centroid calculations
We have implemented centroid tracking sources into the RTTrPMDriver within the PositionDriver devices. This means that we can now receive centroid data within disguise for Blacktrax tracking systems.
DSOF-22936 Add ARRI LDS as a device driver for receive lens data native from Arri Cameras
We have added Arri LDS within the PositionReceiver devices so that users can receive metadata from Arri cameras into disguise - that being focal length, aspect ratio, vertical and horizontal field of view, sensor size, aperture, and focus distance.
Improvements
DSOF-22279 Ensure Quad-SDI VFC output signal is not interrupted after configuration
In previous releases, the output from a Quad-SDI VFC card would be interrupted if a project would be restarted within Designer
In r25, if a user was to restart a project within Designer then the output from a Quad-SDI VFC card would be the same resolution as it was before the project was restarted. This prevents the signal being interrupted upon restarting a project within Designer.
The only time that an output will be interrupted from a Quad-SDI VFC will be if a disguise media server was restarted or powered off, or when apply feed settings is executed.
DSOF-22410 Support focus and iris data in FBX export from shot recorder
In r25 we have added both aperture and focus distance to the default parameter collection for new cameras within the Shot Recorder feature. These properties can also be set within the Shot Recorder FBX export.
DSOF-22460 Keep last-known camera position if camera tracking drops
In previous releases, when camera tracking is lost, the camera will revert back to 0,0,0. In r25, the camera tracking will remain at the last tracked camera position.
DSOF-22672 Make common base project for d3api and d3service
DSOF-22837 Write functionality to clear up exported glb, movie and metadata files
We have added an improvement to the Previz Link within Designer in r25 to clear up disk space by deleting old export files related to Previz that are no longer being used by any other application. Any export file that is still being used will not be deleted until the next time a clean-up takes place, where again we will only delete export files that are no longer being used by any application.
DSOF-22937 Move nginx logs to d3 app data directory instead of in program files
In r25, nginx logs have been moved from the program files path to C:\Users\d3\AppData\Local\d3\nginx
DSOF-22995 GUI: The layer editor should move to front open keyframe editors when it gains focus
In previous releases, when working on a large timeline that overlaps on-screen with a layer editor, if a user was to click on the layer editor to focus on it, the layer editor widget would be foreground but the keyframe editor would be behind the timeline. In r25, when a user brings a layer editor into focus, the keyframe editor will now foreground with it.
DSOF-23002 Sequencing: On project upgrade, disable sequencing for all fields which are not sequenced
In previous releases, if a project was upgraded from a version of Designer that did not support the Keyframe Toggle (before r20.0), all fields were set to have Keyframes enabled. This required a significant amount of tidying to be able to benefit from the Keyframe Toggle. In r25, we have enabled any fields that only have 1 frame and therefore no sequencing should have the Keyframe Toggle automatically set to off on project upgrade.
DSOF-23110 Videoins with placeholder images should have the resolution of the placeholder.
In previous releases, when adding a Videoin for a placeholder image, the video would be set to the last resolution of the video input received by disguise. In r25, if a Videoin is added with a placeholder image, the video will be set to the resolution of the placeholder image that is used. The Videoin will override the placeholder image resolution when it is available.
DSOF-23245 Optimize DmxScreenRead layer
In previous releases, it was reported that the DmxScreenRead layer was impacting the performance of Designer. We have now optimised the layer.
DSOF-23336 IP VFC SDP file paths should be discoverable
We have added a ‘Copy SDP path to clipboard’ button within the IP-VFC settings menu. This includes the SDP path that can be copied and added onto a ST 2110 receiver device, such as the Megapixel Helios.
DSOF-23646 GET activetransport API should return the selected track for each transport
We have enabled the ActiveTransport API to return the currently selected track for each transport. This can be found within the GET activetransport API, where we have included a currentTrack property that indicates the current selected track of a given transport.
DSOF-23756 Add double dot RS plugin version to schema JSON
We have added a new RenderStream release naming convention to include double dots for plugin-specific hotfixes. This can now be seen within the Designer GUI.
DSOF-23808 Implement support for Arri Alexa LogCv4 to ACES workflow
DSOF-23927 Allow user to copy/paste notifications
Users can now copy and paste notifications from Designer without having to open the console.
Fixes
DSOF-19735 - Fixed an issue where snapshots failed to create after the snapshot widget was closed
DSOF-19736 - Fixed: If a snapshot has failed to create, an access violation was displayed if a widget was opened while taking a snapshot
DSOF-20435 - Fixed an issue where the CPUMonitor did not respect poll unit/interval settings
DSOF-20791 - Fixed an issue where "Edid port invalid errors" on applied feed settings
DSOF-21510 - Improved the efficiency of Text Layers
DSOF-21687 - Fixed an issue where Media Distribution did not report correct size for image sequences
DSOF-21694 - Fixed an issue that occurred when undoing a creation of a group with the widget open displayed a "not in list" error
DSOF-21839 - Fixed an issue where projects started with a Masking object appearing until the stage is brought into focus
DSOF-21988 RenderStream: Fixed an issue where Designer would hang when stopping a workload
DSOF-22109 - Fixed an issue where list indirections were not triggering multitransport
DSOF-22756 - Fixed an issue that occurred after deleting a Skeleton object from Stage and its Stick Man was still visible
DSOF-22780 - Fixed an issue where it was not possible to open the rollback window of 2 objects at the same time
DSOF-22781 - Fixed an issue where duplicating group with video transition layer
DSOF-22798 - Video Input Patch Editor: Fixed an issue where the format field was not refreshed upon project startup
DSOF-22812 - Fixed an unnecessary error continuously being thrown when an empty texture parameter was assigned
DSOF-22846 - Fixed an issue that occurred when disengaging the Position Receiver, the status didn't work as expected
DSOF-22916 - Fixed framerate drops on solo with section on the timeline
DSOF-23030 - Fixed an issue where a new section break was not dropped on the exact frame when zoomed out and using ; ` shortcut to move playhead
DSOF-23103 - Fixed an Access Violation when using ctrl+z to undo deleting a layer
DSOF-23107 - Fixed incorrect timestamps on a newly created project within d3manager
DSOF-23127 - Mosys Driver: Fixed an issue where it was possible to edit lens values in the GUI when using Mosys GeneratedCameraTrackingSource
DSOF-23153 - Fixed an issue where Video Inputs was not scrollable
DSOF-23157 - Fixed an issue where Udp::connect error didn't specify which port it failed to bind to
DSOF-23159 - Fixed an issue where ObjectView did not expand according to buckets / subdirectories
DSOF-23179 - Fixed an issue where the VideoIn format field was not serialising correct value with director/actor setup
DSOF-23180 - Fixed an issue where Layer Stack did not affect placeholders in LogicalVideoInDevice
DSOF-23215 - Fixed an issue where Movie Output > Output movie size had options for 2K and 4K export on the MPEG-4 drop-down list despite Designer reporting errors that "d3 designer can only export resolutions up to 2160 pixels" and then failed any export attempt
DSOF-23264 - Fixed an Access Violation when taking a Snapshot after closing Snapshot manager
DSOF-23287 - Fixed an issue where a calibrated camera with no tracking source silently overwrote lens intrinsics
DSOF-23303 - Fixed an issue where the console was spammed when Designer was minimised while running in application mode
DSOF-23319 - Fixed an issue where Designer delayed tracking longer than it needs to when doing receive time smoothing
DSOF-23328 - Fixed an issue where many (Save) Actions were not unsubscribed at d3 shutdown
DSOF-23331 - Added detailed logging on shutdown for still subscribed Actions
DSOF-23332 - Fixed an error at 'MissingMediaDomain: checkMissing'
DSOF-23333 - Fixed an issue that occured when changing SLC sizes would result in an error after configuring feed
DSOF-23342 - Fixed an issue where copying and pasting a layer at the end of the timeline did not extend the track
DSOF-23358 - Fixed an issue where keyframes outside of the highlighted grouping area were not deselected and not included in the keyframe grouping
DSOF-23361 - Fixed an issue when assigning empty VideoInTexture caused a parameter size error
DSOF-23368 - Fixed an issue when selecting a group of keyframes whilst there was already an active group selection in the keywidget added the new selection to the old
DSOF-23422 - Fixed [XR] Spatial Cal not working as expected
DSOF-23429 - Fixed an issue where a "'NoneType' object has no attribute '__base__'" notification was displayed when right clicking on proxy maker with disableProxyMaker option switch enabled
DSOF-23513 - Fixed iPod 6 showing as an option in OmniCal
DSOF-23550 - Fixed an issue where the Patch Assignments Widget could not be opened
DSOF-23558 - Fixed an issue where Telemetry would fail with error "queryLogs failed: Can't find manifest"
DSOF-23566 - Previz link: Fixed an issue where props didn't handle alpha material and textures properly
DSOF-23575 - Fixed an issue where Rotational X value flickered between two numbers in Tracking Source Data when Smooth Receive Time unchecked
DSOF-23581 - Fixed an issue where ‘Cannot create a link without a Resource’ error was displayed when adding the new depth of field parameters to the shot recorder
DSOF-23595 - Fixed an issue where the ‘enable Depth of Field (DOF)’ option check-box in Camera settings has changed to a number field input box
DSOF-23598 - Fixed mesh fragment artefacts in a mesh mapping
DSOF-23611 - Fixed an issue where upper and lower-case letters in names of the Camera Settings were mixed up
DSOF-23613 - Fixed an issue where it was not possible to do secondary observations with trackmen camera tracking system as zoom encoder is always 1.f
DSOF-23620 - Fixed an issue where the prop mesh could not be assigned 'None'
DSOF-23629 - Fixed an issue where Mesh Mapping would jump the camera for a few frames to a different position
DSOF-23666 - Attribute Error: Fixed 'NoneType' object having no attribute 'hidden' when adding a spherical camera
DSOF-23685 - Fixed the Focus field inside Camera widget not working as expected
DSOF-23716 - Fixed a VirtualCam notification error when starting RenderStream with MR set mapping
DSOF-23740 - Fixed an m_renderPoseHistory.empty() Error Notification upon re-opening a project with RenderStream layer
DSOF-23751 - Fixed an error spamming whenever opening the Tracking Source widget of a Skeleton
DSOF-23754 - Fixed an issue where a camera with a tracking source selected and no videoin, opening the camera widget showed an error
DSOF-23777 - Fixed Open Tracking Sources widget not working as expected with Skeletons
DSOF-23783 - Fixed an issue where VariableVideoPlayer: "Invalid frame calculated"/ "start != end" notification was shown on sharp speed changed - check
DSOF-23811 - Removed Skeleton Scale
DSOF-23893 - RTTrPM driver - Fixed an issue where centroid positions had Y / Z positions swapped
DSOF-23899 - Fixed an issue where the Inner Frustum was not visible when using Backplate and Mesh Mapping
DSOF-23963 - Fixed NGINX being set to Manual instead of Automatic in Services
DSOF-23978 API: - Fixed an issue where boolean properties in result of /service/system/detectsystems never returned to 'false'
DSOF-24042 - Fixed an issue where alembic mesh centroid did not match when mesh is far away from origin
DSOF-24049 - Fixed a typo on response to http://localhost/api/session/status/health
DSOF-24083 - Fixed multipleAccess Violations and crashes to desktop when trying to stream 3 channels over RenderStream
Fixes
- DSOF-22798 - Video Input Patch Editor: Fixed an issue where the format field was not refreshed
upon project startup - DSOF-23179 - Video Input Patch Editor: Fixed an issue where the format field did not save the
correct value with a director/actor setup
Fixes
- DSOF-23379 - Fixed an issue where the proxy maker made proxies 1 frame short for videos 1 frame short of rounded duration to fps
- DSOF-23559 - Fixed an issue where video inputs dropped out with timeout error
- DSOF-23939 - Fixed an intermittent kMvSynchroStatusCancelledLate error which stopped capture
- DSOF-24155 - Fixed option switch for overriding nDisplay config file in Unreal Renderstream
Fixes
- DSOF-24070 - Fixed an issue where it was not possible to scroll in larger nested folder structures
- DSOF-24191 - Fixed EX3 and Vx4n machine types being missing from HTTP APIs machine enums
- DSOF-24200 - Resolved an issue introduced that could prevent launching projects when spherical, perspective or parallel projections were in use.
Fixes
- DSOF-23040 - Fixed an issue where the rsync port conflicted with VPN
- DSOF-23732 - Fixed an issue where the proxy generated by the proxy maker was not recognized
- DSOF-23885 - Improved Camera Switching performance
- DSOF-23899 - Fixed an issue where the Inner Frustum was not visible when using Backplate and Mesh Mapping
- DSOF-24083 - Fixed Access Violations and a crash to desktop when trying to stream 3 channels over RenderStream
- DSOF-24106 - Fixed an issue where OmniCal cameras could not be added to a project on EX 3
Fixes
- DSOF-24056 - RenderStream Uncompressed: Fixed an error where "packet/frame dropped recently" message did not clear after a stream recovered
- DSOF-24001 - Fixed an issue where quad link capture displayed a black screen
Fixes
- DSOF-23566 - Previz link: Fixed an issue where props did not handle alpha materials and textures properly
- DSOF-23748 - Fixed an issue where a hang occurred the first time playing into a layer of content
- DSOF-23758 - Fixed a d3service crash seen in r23.1.2
- DSOF23023 - Fixed an issue where pucks were not exported properly to glTF
New Features
- Added product support for EX 3
Fixes
- DSOF-23375 - Fixed an issue where the Video Prefetcher was not creating video requests for the next section
- DSOF-23797 - Fixed a crash to desktop seen in r24.0
- DSOF-23829 - Fixed Edit VideoClip button
- DSOF-23878 - API: Fixed transport engage/disengage not applying session wide
- DSOF-23961 - Fixed an issue with heap corruption when hot-reloading shaders
- DSOF-23996 - Fixed an issue where d3 could not run on multiple machines with RPVII cards (vx4+ or vx4n)
Improvements
- DSOF-23365 - The improved GPU memory management system shipped in r24.0 behind
the option switch 'useGpuPool' is now enabled by default. It provides reliable stability
for demanding video playback loads and other high-memory-usage scenarios
Fixes
- DSOF-23038 AV in "Upload assets" test case in test_cloudserver
Fixes
- DSOF-23694 - SDI-IPVFC: Fixed an issue where 4096x2160 59.94 10bit failed to enable stream
- DSOF-23725 - Updated Designer API documentation
- DSOF-23900 - Fixed an issue where quitting d3 and re-opening, IPVFC stream was disabled
Fixes
- DSOF-21119 - GPU fan speed is now programmatically set on vx4+
- DSOF-23479 - Fixed Access Violations that occurred when a mapping indirection is added to a slot in the Bank Editor, and when a new indirection is subsequently attempted
- DSOF-23569 - SDI- IPVFC: VX4 output is no longer tearing or not outputting
- DSOF-23726 - IPVFC - Addressed a 10 second sleep that was causing 'Timed out waiting for output mode change' error notification
Improvements
- DSOF-23660 - Support Riedel MN-Z-SFP-2T-SDI-12G
Fixes
- DSOF-23630 - Fixed an issue when #upgrading to r24.0, SDI VFC outputs were forced to 444
and not 422 - DSOF-23691 - Fixed an issue where using 3D perspective projection did not work when using 3D
content - DSOF-23714 - Fixed an issue where using 3D perspective projection did not work when using 2D
content - DSOF-23722 - Fixed an issue where 'DisplayList' object had no attribute "printimmediate" when
opening patch editor
Fixes
- DSOF-23249 - Fixed an Access Violation on deleting a layer mapped to a pre comp
- DSOF-23253 - IPVFC - Fixed issue with 1280x720@24hz mirror mode and various other formats on gx3 presenting some artefacts on the LED. (PTP)
- DSOF-23345 - Fixed an issue where StageRenderLayer displayed certain proxy levels as if they were proxy-off after opening the feed view
- DSOF-23447 - Fixed a RenderStream crash to desktop when using texture parameters
- DSOF-23487 - Fixed an Access Violation when creating the alignment point when using OmniCal
- DSOF-23514 - Fixed all screens being inactive In VR
- DSOF-23556 - Fixed an issue where DCS focal length was incorrect when sensor sizes were not set to 35mm
- DSOF-23615 - Fixed an issue where MR set plate resolution changed when switching cameras with different overscan
- DSOF-23675 - XR: Fixed a Python error "no attribute 'refreshObservationList' when adding a manual observation
- DSOF-23690 - Fixed an Access Violation in feed view with IP VFC on remote machines, causing grey screen on startup
Advisories
- DSOF-17848 - With "disableDmxPacketSendWait" on, lost sACN node on network still causes the project to slow to a halt.
- DSOF-17540 - Sequencing changes do not transfer to other machines in session when restoring a snapshot
- DSOF-17193 - Multi User Edit in UE requires preferred sync adapter to be set to a network adapter which is available to all machines
- DSOF-17108 - Current NCAM data implementation used can exhibit unreliable packet timing
- DSOF-16935 - d3 cannot set SDI VFCs to Quad 4K 2SI 23.98, 24, 29.97 or 30Hz
- DSOF-16425 - Renderstream: When using MultiChannelMapping, only one spatial map w backplate is able to change position/rotation
- DSOF-15445 - Editor machines with a user account linked to an Microsoft Account can't join d3 sessions due to permissions errors
Q-SDI VFC Firmware advisory
Background:
SDI VFCs are unable to achieve a guaranteed genlock to an interlaced genlock signal. There is 50% chance there will be a phase offset of 1 field (180 degrees). This is due to the way in which the sync cards for both AMD and NVidia GPUs detect genlock signals.
Firmware version 1.9.0 adds a button to reverse the field, which enables you to revert to the alternate field if genlock is phase offset. To properly use this feature, you will need to have the relevant equipment to be able to measure the phase of the SDI output.
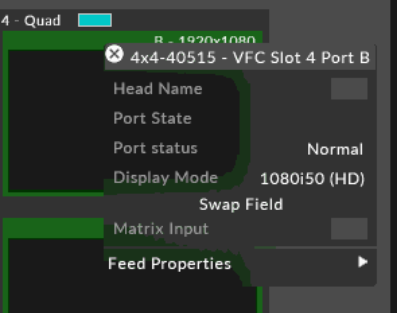
Firmware version 1.9.0 requires the use of r17 or greater.
Impact of Issue:
Any Q-SDI VFC shipped with firmware 1.8.0 or earlier and needing to lock to interlaced Genlock Signal
Affected Hardware:
All Q-SDI VFC shipped with previous firmware versions.
How to determine the current firmware version:
- Populate VFC compatible disguise machine with only the SDI cards you want to check.
- Run vfcfirmwareupdater.exe located at C:\Program Files\d3 Production Suite\build\msvc
- Check Firmware Version

How to update to v1.9.0:
- Populate any VFC compatible disguise machine with only the SDI cards required to be updated.
- Download the VFC firmware update from: https://d3packages.s3.amazonaws.com/vfc/quad_sdi_vfc_v1-9-0.rbf
- Run vfcfirmwareupdater.exe located at C:\Program Files\d3 Production Suite\build\msvc
- Click Choose file and load the downloaded VFC firmware update. The filename should be quad_sdi_vfc_v1-9-0.rbf
- Slots will be automatically selected. Ensure only SDI type cards have this firmware update applied to them.
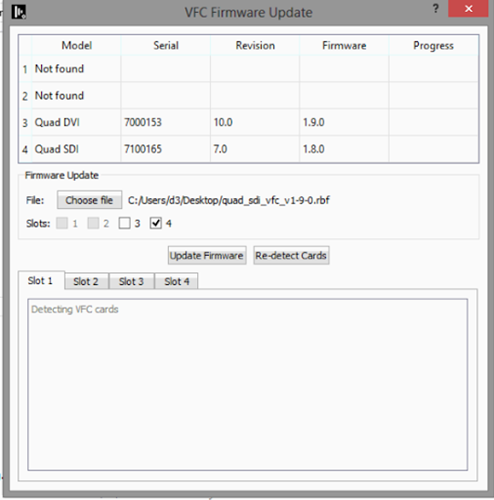
- Click Update Firmware, the update will start and will take between 10-25 minutes.
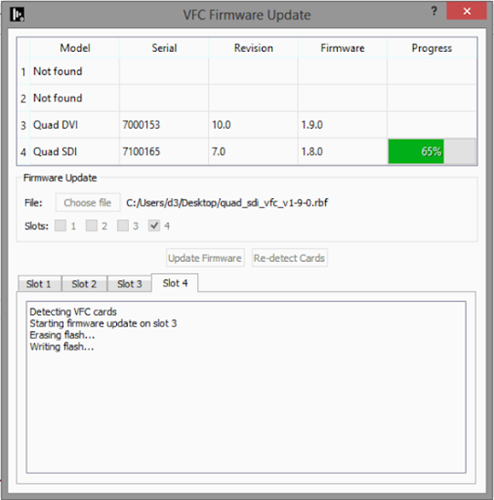
- On completion, the Firmware version field will not update until all cards have finished updating and have been re-initialised and detected.
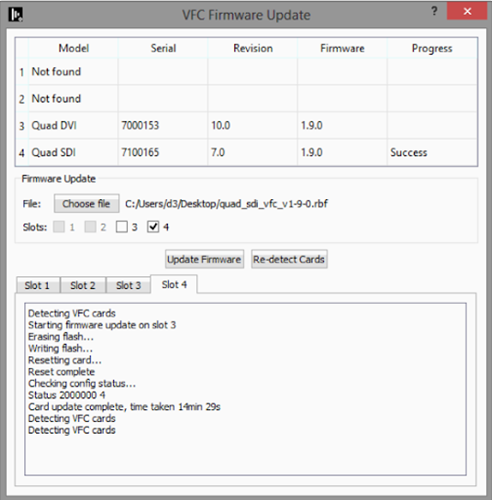
- Finally, reboot the system.
New Features
- DSOF-3357 Ability to view waveform of audio in modules
The audio waveform allows users to visualise the audio output of a single layer, a collection of layers or the quantized audio track while working in the keyframe editor. This permits them to add keyframes while taking audio output as a consideration at a glance.
How-To
To visualise the audio waveform of one or more layers:
1. Create one or more audio layers
2. Set the audio track of the layer(s)
3. Open a keyframe editor
4. Right-click in the keyframe editor area to access the options
5. Click on
a. layer to visualise the waveform of the currently opened layer
b. combined to visualise the collective waveform of multiple layers
To visualise the audio waveform of the quantized audio:
1. Add an audio track to the track
2. Open a keyframe editor
3. Right-click in the keyframe editor area to access the options
4. Click on quantised to visualise the waveform of the timeline audio track
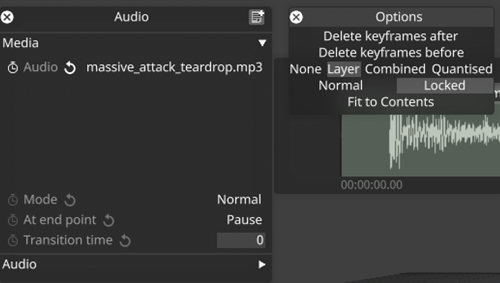
Key widget audio waveform modes
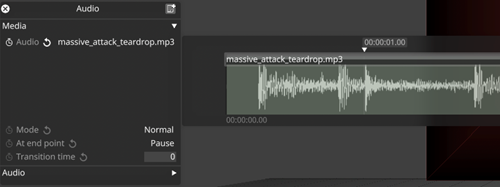
Single layer audio waveform
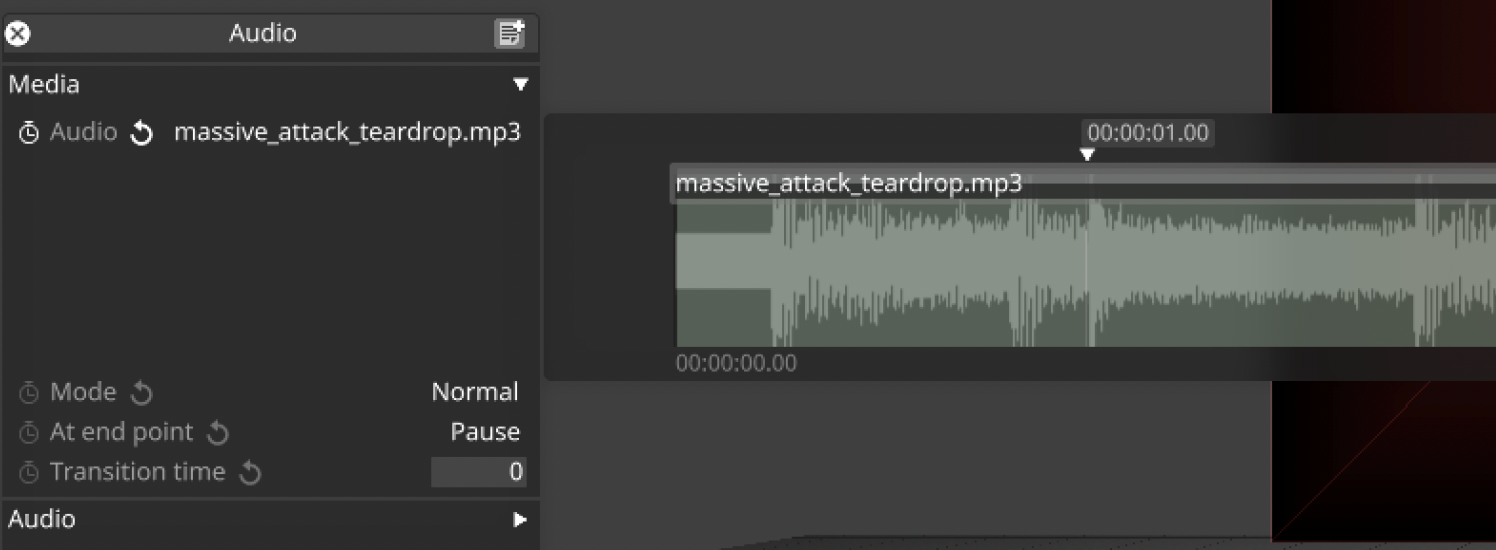
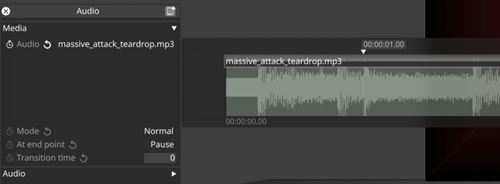
Combined layers audio waveform
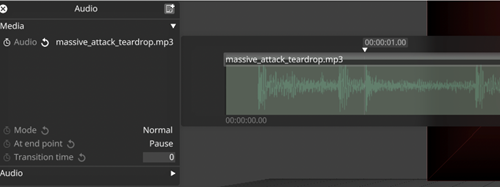
Quantised audio waveform
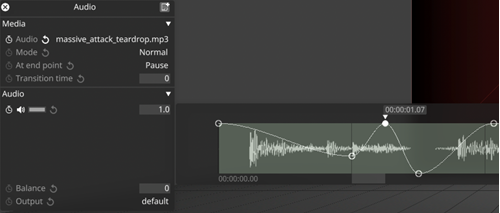
Audio waveform with volume keyframes
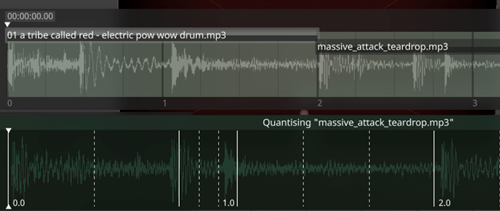
Audio waveform in quantised mode with quantised track
- DSOF-7298 Dynamic Layer Naming
This feature allows users to rename layers with dynamic tags that will be automatically replaced in the rename process by specific values in the layer.
How-To
1. When renaming a layer either by right-clicking on the layer or pressing alt+r this feature is available.
2. When renaming the layer you can use words between curly braces to create dynamic tags like this {special tag}
3. Hitting rename on a layer will then automatically replace the text in that tag with special values based on the tags.
4. The tags that are supported are:
a. {type} is replaced by the type of the layer.
b. {index} is replaced by an incrementing index starting from 1. i. You can append a number after \"index\" as the start number (e.g. {index5}).
c. {currentname} is replaced by the current name of the layer.
d. {<field>} will be replaced with the name of the first keyframe in the layer with the name <field> i. Examples: {mapping}, {speed}, {blend mode}. ii. If a field is not present in the layer the {<field>} text will be removed from the final name.
5. Typing in a layer name with mis-matching {} tags will stop renaming and make the rename widget turn red with an explanatory tooltip.
Documentation:
Right-clicking on the field will bring up the documentation as described above as well as text boxes that save the last rename used and places for the user to store renames that are used frequently.
Renaming multiple layers:
When renaming multiple layers the user is presented with a confirmation dialogue that shows a preview of the renames to occur. At this stage the user can either abort or finish the renaming. This dialog can be toggled on and off with a toggle.
- DSOF-11013 Support for YUV 4:4:4 modes from the Quad-SDI VFC card at 1080p when using Firmware 1.9.0
We have enabled support for YUV 4:4:4 chroma subsampling from the Quad-SDI VFC card after updating the firmware to 1.9.0: 1080p30, 1080p29.97, 1080p25, 1080p24, 1080p23.98
- DSOF-14192 Bank Editor detach and attach resource view options
We have enabled users to detach the Resources view from the Bank Editor, making access easier when working with lots of resources. To access this feature, open the ‘options’ menu on the Bank Editor and click on ‘Detach Resource View’. This allows users to have the Resources view separate to the Bank Editor. Each view can be made larger or smaller according to what is required, and users can still drag and drop files into the Bank Editor. The Resource View can be reattached by opening the ‘options’ menu on the Bank Editor and click on ‘Attach Resource View’.
- DSOF-20481 "Apply Matrix Feed Routing" button added to Feed Output
We have added an “Apply Matrix Feed Routing” button in the Feed Output menu. This enables users to send the Matrix In-Out settings and Presets to the corresponding Matrix, and avoid mismatching between Designer and the Matrix. In previous releases, Designer would not send the Matrix In-Out Settings and Presets to the Matrix.
- DSOF-22859 Tell the user which Expression doesn't match any known Resources
In previous releases, when we cannot match a name in an Expressions with any loaded resources, we do a potentially very costly brute-force search as warned in a notification. In r24 we tell the user we now notify the user which name can’t be matched so that it can be fixed.
Improvements
- DSOF-13096 Projector editor should use checkboxes
We have enabled a check box in the Dynamic Blend dropdown on the Projector editor menu to enable and disable Dynamic Blend, and to Use Snapshot (yes/no).
- DSOF-13485 Improve soft edge gradient with S curve
We have enabled a predefined S curve interpolation that can be used as an option to the linear curve when generating custom softedge textures. This can be found as a ‘S Curve Interpolation’ toggle when creating a SoftEdgeTexture mask editor.
- DSOF-14203 Sockpuppet: auto populate error message to include bank and slot for easy navigation
We have adjusted the error message found when users are notified that there is an Auto Populate Conflict in the Bank Editor within Sockpuppet. The new error message outlines “Bank X / Slot X already contains Media_Name.mov - couldn’t auto-populate older media Media_Name.mov”
- DSOF-15109 OSC output data for 'trackposition' should match Designer timeline
When adding an OSC Event Transport to the current transport, we have enabled the track position from the OSC output data to match the timeline markers within the Designer GUI.
- DSOF-20363 Inconsistent Tag notification should tell users to amend their naming
The ‘Version tag inconsistent’ notification tells users that the folder or file name may need amending.
- DSOF-20382 Ability to override alpha rendering order
In previous releases, when working with two LED or projection surfaces with the blend mode set to alpha, the default behaviour would be that surface 1 would always cover surface 2. In r24 we have enabled a ‘depth sort override’ that enables users to manually override the depth sorting. Objects with lower values will be rendered before objects with higher values.
- DSOF-20581 Add ability to override un-sockpuppeted controls in video layers to take from the video clip instead of from the timeline
Sockpuppet layers expose 4 frames on the layer that are usually set directly on the video clip object when used with a normal video module - those being Frame Index, Trim Frames, Loop In Frame, and Loop Out Frame. These are exposed on the Sockpuppet Video Module in order to control them via Sockpuppet.
We have enabled the ability to set an option switch called overrideUnpatchedMediaFields which mean that the Frame Index, Trim Frames, Loop In Frame and Loop Out Frame fields will be taken from the video clip instead of being directly sequenced when they are not used in Sockpuppet. When these fields on the layer are used in Sockpuppet then they behave as expected and can be controlled by Sockpuppet external controls.
- DSOF-21087 Improve input/output transform widget usability
- DSOF-21351 Allow user to export compositor and output frames to content directory
We have enabled users to capture a single frame from the output or compositor feed so that it can be used as content within a scene. We have added ‘Export Compositor Frame’ and ‘Export Output Frame’ in the Feed View.
- DSOF-21392 Add hotkey for jumping to the end of the track
We have added a hotkey [End] that enables users to jump the playhead to the end of the current track.
- DSOF-21563 Detect when d3service is not running on disguise servers and advise
- DSOF-21711 Add inverse transform for RED Wide Gamut
We have added an option for RED Wide Gamut, a colour space designed to encompass every colour that is recordable by RED’s current and past cameras. This can be found in ACES mode under the list of Output Transforms (ODTs) under ‘Camera’.
- DSOF-21712 Add Gamma 2.6 utility transforms
We have added an option for Gamma 2.6 in the utility output transform list for both Input Transforms (IDT) and ODTs to support users working with projector and LED screens that operate with a gamma of 2.6 in Designer. In previous releases, Gamma 2.2 and Gamma 2.4 were available.
- DSOF-22043 Profiler widget should not bring up the text write-out and graphs on default
We have removed the text write out of the trace and various graphs from the profiler widget, which can be found by pressing CTRL + ALT + P. The widget provides buttons to change the profiler name, start and stop recording, and live monitor which will then bring up the original text write out and various graphs.
- DSOF-22553 Searching in media lists should have the option to behave like a filter
We have enabled users to be able to specify in any objectview how they’d like searching and filtering in all object views to behave. This can be accessed by pressing the little arrow next to the search bar in the object view.
There are two options - Alphabetical Filter and Relevance Search. The option selected will be machine-wide and will not transfer to other editors/controllers in the session. It will also persist through restart.
- DSOF-22741 BRGW fixture We have added the ability for users to add BRG + White (BRGW) fixtures within Designer.
- DSOF-22847 Make sure receive health widget keeps updating between launch of RenderStream
We have enabled the Receive Health widget for RenderStream continues to update when RenderStream is stopped and restarted so that it can be pinned as a way of monitoring the health of RenderStream.
- DSOF-22974 Audio waveform: Keyframe widget options need more context
We have added text labels for each section of the Keyframe widget that describe the section controls for Keyframe Interpolation, Audio Visualisation and Key Mode.
- DSOF-23006 Transport Manager: Incoming clock should be displayed even when transport disengaged
In previous releases, ‘Not engaged’ was shown when the transport was disabled. We have enabled users to see the incoming timecode within the Transport Manager widget. The timecode is shown but greyed out to demonstrate that the timecode status is known. If the timecode clock is running, it will update in the Transport Manager widget. If the timecode clock is not running, the last time received will be shown.
Fixes
- DSOF-4778 - Fixed an issue where topological sort would find a cycle when duplicating projectors with populated DSE exclude lists
- DSOF-4900 - Fixed projector output mode not being fully synchronised on editor join
- DSOF-14238 - Added a solution to Bank thumbnail spaces preventing Resources list to be seen
- DSOF-15539 - Fixed an issue where fuzzy search did not prefer matches which begin with the search term
- DSOF-16935 - Fixed Designer being unable to set SDI VFCs to Quad 4K 2SI 23.98, 24, 29.97 or 30Hz
- DSOF-17691 - Fixed an issue where alembic mesh was not showing video in LUX renderer
- DSOF-18781 - Fixed the FPS indicator not being centred
- DSOF-18817 - Fixed ADL Function Pointers failing to load
- DSOF-19448 - Fixed the zoom size of bookmark on project restart
- DSOF-19663 - Fixed an issue where event logs generated with system / project diagnostic do not save display information
- DSOF-19889 Fixed inconsistency in the naming of Colour shift between brightness / contrast and hue / saturation
- DSOF-20138 - Disabled "Draw control points on output" by default
- DSOF-20158 - Fixed an issue where directory changes within symbolic link / directory junction were not detected
- DSOF-20159 - Fixed an issue where the projector list editor showed a "visualiser" section that did not exist in editor
- DSOF-20202 - Fixed an issue where DSE Include / Exclude lists could contain the same projector multiple times
- DSOF-20246 - Fixed an issue where soft edge texture output points did not scale with feed rectangle
- DSOF-20567 - Fixed an issue where changing the stream parameters while stopping a stream cause a crash
- DSOF-20707 - Fixed an issue when using multiple feed scenes, the feed name listed in Feed view did not update when loading a feed scene
- DSOF-20791 - Fixed an issue where "Edid port invalid errors" on applied feed settings
- DSOF-20798 - Fixed an issue where the ACES mode HLG utility showed a black window on videoin
- DSOF-21025 - Fixed OSC Indirection in video asset for change video in not working
- DSOF-21407 - Fixed an error in IdentityDomain when upgrading project
- DSOF-21447 - Multi Feed selection GUI is no longer inconsistent
- DSOF-21457 - Fixed d3manager taking 1-2 minutes to launch after reboot
- DSOF-21483 - Fixed DeltaIn::lockAndCreateStream failing to correctly check if channels have been locked
- DSOF-21536 RenderStream: - Fixed an issue where resetting keyframes on Scene field resulted in "INVALID" selection
- DSOF-21552 - Fixed an issue where selecting Rescan whilst Proxy Maker is running results in errors
- DSOF-21707 - Fixed an issue when starting RenderStream "!fragment.stream.empty()" could occur
- DSOF-21765 - Track Section Fade taking priority over all layers in the section
- DSOF-21768 - Fixed DMX Indirection not affecting layer mapping when assigned
- DSOF-21782 - Installer no longer takes focus to a text field as soon as it launches, taking keyboard input from whatever else the user is doing.
- DSOF-21814 - Fixed an issue where Renderstream Layer using Perspective Map with DMX could get stuck on Awaiting Requests
- DSOF-21921 - d3Manager default column widths improved
- DSOF-22013 - Fixed a 'NoneType' error when duplicating / changing a SpatialCalibrationConfig resources
- DSOF-22174 - Fixed Unused Media Domain not removing DxTexture and Audio from cache
- DSOF-22175 - Fixed an issue where MachineMediaRegistry did not update itself when an Image Sequence was removed from disk
- DSOF-22231 - Fixed an issue where Videos would sometimes not play the last frame
- DSOF-22236 - Fixed an issue where "Create New Layer" and "Create New Object" lists looped back to the top of the list when scrolling or using arrow keys to select new object
- DSOF-22304 - Fixed an error in IdentityDomain after clearing ingestion history
- DSOF-22322 - Fixed an issue Fuzzy Search sometimes behaved unexpectedly and gave worse matches before better ones.
- DSOF-22350 Spatial Calibration- Fixed error message "!!! Main thread hung due to early render access < DxTexture::movePixels"
- DSOF-22369 - Fixed an issue where OSC Indirection Controllers required that the user specify the object type in the message
- DSOF-22372 - Fixed an issue where DSE did not apply correctly to automated screens using tracking sources
- DSOF-22417 - Fixed an issue where virtual lineup complained about inactive cameras if any camera is not active
- DSOF-22453 - Fixed an issue when using multiple MR sets, the last MR previously opened populate the MR set list
- DSOF-22473 - Fixed an issue where some alembic files appear flipped when loaded
- DSOF-22474 - Fixed the Installer being unable find libprotobuf.dll when installing Designer
- DSOF-22518 - Designer now respects the content viewpoint of RenderStream clients which modify the camera data
- DSOF-22526 - Fixed an issue where the incorrect automatic shutdown message (on exit) when unplugging license was displayed
- DSOF-22544 - Fixed an issue where d3manager disconnected network adapter warning banner was cropped
- DSOF-22548 - Fixed an issue where the CDL layer did not tell the user why it is red
- DSOF-22573 - Alembic mesh: Fixed an issue where imported normals were wrongly assigned
- DSOF-22683 - Fixed Udp::bindToPort error not correctly specifying which port it failed to bind to
- DSOF-22684 - Fixed an issue where the Actor Status Widget' reported OSC devices as offline when not receiving
- DSOF-22702 Deltacast capture: - Fixed an issue when moving from 1080p to 2048p50, the capture thread would crash repeatedly
- DSOF-22713 - Fixed an issue where reference points could not be unlocked from the reference points management widget
- DSOF-22721 - Fixed the console being spammed with "Warning: Trying to truncate to a negative width"
- DSOF-22728 RT: - Fixed topological sorting found while changing track in attached project
- DSOF-22754 - Fixed an issue where layer naming jumped 322 if the same type of layer is created
- DSOF-22769 - Fixed an issue where a "Project restart required" notification was displayed even when it isn't required
- DSOF-22775 - Fixed an Access Violation when adding the camera (NVIDIA broadcast) option to an input
- DSOF-22779 - Fixed an issue where three virtual VFC heads were created when Split Mode changed from Mirror to Quad
- DSOF-22780 - Fixed an issue where it was not possible to open the rollback window of two objects at the same time
- DSOF-22796 - Matrox capture : Fixed an issue where 'No signal' mapped videoins contribute to 12G/3G limits
- DSOF-22797 - Matrox capture : Fixed valid 12g signal being detected on a 3G port
- DSOF-22813 - Fixed an issue where removing the version tag from the folder name after an Inconsistent Tag notification caused image versions to fail
- DSOF-22825 - Fixed an Access Violation in checkIfCurrentWorkloadHasLostPackets when opening two streams on same render node
- DSOF-22851 - Fixed an issue where it was not possible to set none Keyframe is Resource keyframe editors
- DSOF-22875 - Fixed an Access Violation With fade transtion, when forwardin the playhead in video trigger layer
- DSOF-22891 - Fixed an issue where RefpointsManipulator shadows based class onFocusChanged() instead of overriding it
- DSOF-22932 - Fixed implereview tool not working with tortoise 6.2 or later
- DSOF-22954 - Fixed FNV hash in fnv.cpp
- DSOF-22970 - Fixed an issue when changing the split mode of a VFC card from Quad to Mirror removed virtual heads
- DSOF-22984 - Fixed "&resource" error when attempting to set "None" resources in layer parameters
- DSOF-22990 - Tracking marker module - Fixed an Access Violation when setting marker image to ‘None’
- DSOF-23059 - RenderStream: Fixed an issue where proxy streams no longer being identifiable
- DSOF-23073 - Fixed an error in 'StreamObject' object when attempting to open log via Show Log button
- DSOF-23092 - Fixed an issue where the camera editor throw an error attempting to add field to "Appearance Separator"
- DSOF-23116 - Fixed being unable to import gui.MediaDistributionWidget
- DSOF-23125 - Fixed an issue where text boxes with nothing in them were invisible until text is entered
- DSOF-23130 - Fixed an issue where the camera did not use DCS provided focal length
- DSOF-23132 - Fixed an Access Violation when media sync fails
- DSOF-23156 - Fixed an issue where 'bounds-check' error was displayed when attempting search with no items
- DSOF-23161 - Fixed an issue where the Ttext field and caret were not visible for empty text fields
- DSOF-23166 - Fixed an issue where Right-click > Add Feed Rectangle in feed view threw error notification "global name 'currentMachines' is not defined"
- DSOF-23172 - Fixed an issue where StreamInfo population in /renderstream/layerstatus needed refactoring
- DSOF-23176 - Trial: Fixed an issue where Feed Mapping output was enabled, but shows red text that outputs are disabled
- DSOF-23185 - [ACES] Fixed an issue where sShader failed to compile when selecting 'Gamma 2.6' as Output Transform
- DSOF-23186 - Fixed an issue where it was not possible to rename groups or layers inside of a group, causing a 'MulticastDelegate' error
- DSOF-23252 RenderStream: - Fixed an issue where the alpha channel from all render nodes was added together
- DSOF-23311- Fixed an issue where the Feed Output was disabled, but did not tell the user why
- DSOF-23320 - Fixed an issue where a Matrox capture card could randomly drop frame during playback
- DSOF-23440 - Fixed an issue where the DisplayManager stopped working after attempting to apply feed settings
- DSOF-23523 - Fixed an issue where disable UnusedMediaDomain by default caused issues
- DSOF-23557 - Fixed an issue with d3 service clean up cloud folder while it iwa empty, causing login and read issue
- DSOF-23655 - Fixed an issue where Metadata fields didn’t't open when right-click on the value box
Fixes
- DSOF-23093 - Fixed an issue where frontplate mapped content did not respond to AR fades
- DSOF-23183 - Fixed an issue where attempting to edit the Stacking Warp caused "no attribute 'rect'" to be displayed
- DSOF-23395 - Fixed an issue where StageRenderModule proxy levels were incorrect during transition
- DSOF-23404 - Fixed an issue where a m_file -> codec() error was thrown on the Actor relating to media ingestion
- DSOF-23428 - Fixed an issue where it was impossible to open a workload with an unknown asset
- DSOF-23514 - Fixed screens being inactive in VR
Fixes
- DSOF-23184 - Restricted range of of PTP domain number for IP VFC card to valid range
- DSOF-23218 - Fixed IP VFC Cards from misreporting a missing PTP source
- DSOF-23346 - Fixed an issue where the video input patch reported wrong Deltacast card for vx4
- DSOF-23386 - Fixed an Access Violation when receiving Artnet
- DSOF-23408 - Fixed an issue where failing to read corrupt or missing frames from content caused content to stop rendering requiring a project restart
Fixes
- DSOF-22406 - Fixed an issue where applying 10 bit feed settings on Nvidia disguise only applied to the GUI and not to VFC cards
- DSOF-23141 - Fixed an issue where changing SLC region sizes resulted in error
- DSOF-23151 - Fixed an issue where frames would be dropped when camera switching unless patch editor preview was enabled
- DSOF-23241 - Fixed an issue where Resource Transport was blocked on the director when deleting MidiNote or Playmode Module
- DSOF-23248 - Fixed an issue that occurred when the shelved packet debug widget was open, live update was blocked when splitting a rect in a feed map on editor
- DSOF-23254 - Fixed an issue where RT was blocked when importing a layer that overlaps the end of the timeline
- DSOF-23255 - Fixed Shader compile error when using Live Action Volume with virtual camera
- DSOF-23263 - Fixed an Access Violation when selecting none when importing feeds from table
- DSOF-23270 - Fixed an error when moving feed rectangles between output heads
- DSOF-23272 - Fixed an issue where quickly duplicating a text layer twice and then deleting one on an editor could cause Live Update to become blocked
- DSOF-23273 - DMX Sockpuppet: Fixed an issue where the patch assignment widget doess not update after clicking "Unpatch All Layers" until the DMX patch settings widget was closed
- DSOF-23275 - Fixed an issue where Live Update was blocked after unpatching DMX sockpuppet layer
- DSOF-23242 - When Live Update is blocked on the director this error is now visible in the Actor Status Widget
New Features
- Added support for our IPVFC cards, outputting video in ST 2110 Mode*
- *SDI functionality will be added in a future release
Fixes
- DSOF-18962 - Fixed an issue where Pixelate layer did not work without a mask input
- DSOF-20373 - Fixed an Access Violation after 'Attempt to retrieve slug font data that hasn't been loaded!'
- DSOF-21734 - Performance: Improved FPS for layers
- DSOF-22630 - Rollback: Fixed an issue seen when rolling back a camera to a previous version, the 'from' path changed when the import widget opened
- DSOF-22877 - RenderStream: Fixed an error when attempting to restart workload running an Unreal asset
- DSOF-23016 - Reduced CPU usage when using multiple indirections
- DSOF-23028 - Fixed Dynamic Feed expressions
- DSOF-23058 - Fixed an issue where setup_fonts.py took about ~40 second to convert/copy .ttf and .otf during installation if no fontcache existed
- DSOF-23079 RenderStream: Fixed an error when "truncate log" when attempting to start a workload running Unreal asset
- DSOF-23085 - Fixed feed warp not showing content
- DSOF-23097 - RenderStream: Fixed an issue where RenderStream failed to create workload log file or folder, if the folder did not exist
- DSOF-23139 - Made Output now exports size for mpeg-4 stage movie list of options rather than custom value boxes
- DSOF-23226 - Fixed Track jump module selection of 'current track' does not persisting
New Features
- Designer Public APIs
A suite of revamped and extended HTTP APIs for Designer are available in this release.
A new website for full documentation is available at https://developer.disguise.one, including
general guidance, API method documentation and OpenAPI JSON specification download.
The API documentation is also available from within Designer itself, by following the menu option
in d3manager -> Help -> Open API Documentation.
The new APIs fall into two categories: The Service APIs relate to functionality provided by the
d3service runtime and are available whenever disguise is installed on a machine. The Session
APIs relate to the currently running session and as such are only available when the d3 runtime is
running.
The previously existing V1 API, found at /api/v1, should be considered deprecated as of the launch
of the stable API set under the Service and Session APIs.
New API integrations should not target the V1 API and should instead use the APIs documented
under /api/service and /api/session. No new APIs or functionality will be added to V1, however the
V1 API will be maintained for the foreseeable future and we will give notice if we plan to remove it
in the future.
- Export Designer Scene to Disguise Cloud Previz
Previz link allows the user to export their stage and content from Designer, and upload it to disguise drive as a Previz Scene. With a URL to the uploaded Previz Scene, users and disguise show programmers can share the current state of the disguise show without restricting the end customers with baked-in camera angles, or having to install Designer themselves.
How-To
1. Ensure that you are logged in to your disguise cloud account via d3Manager
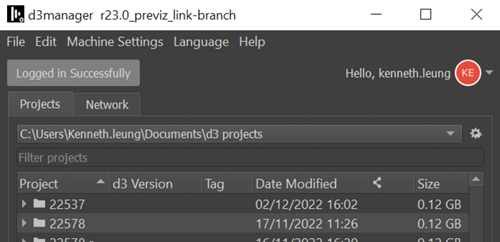
2. Access the cloud export editor either by:
a. shift-selecting a portion of the timeline, or
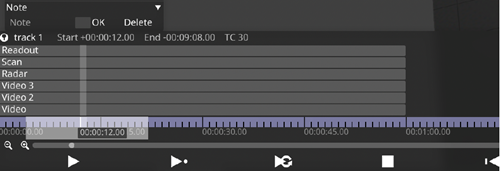
b. opening the d3 state editor
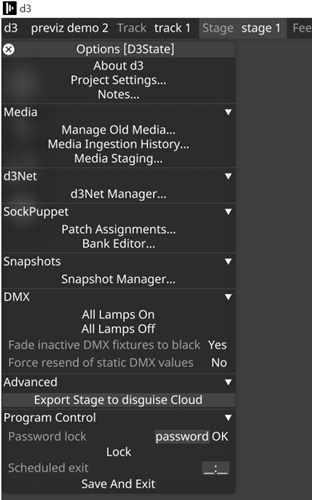
3. Select the disguise drive organisation and drive to export the Previz scene to, refreshing the storage information if new organisations and drives have been created
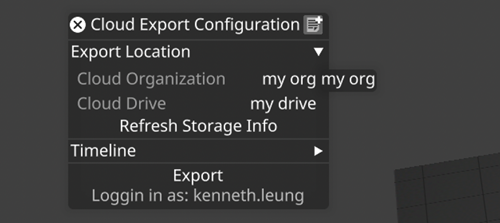
4. Choose to either export the highlighted portion of the timeline, or the whole timeline
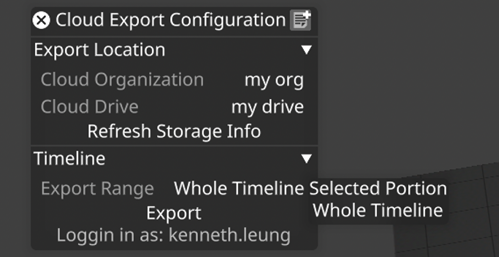
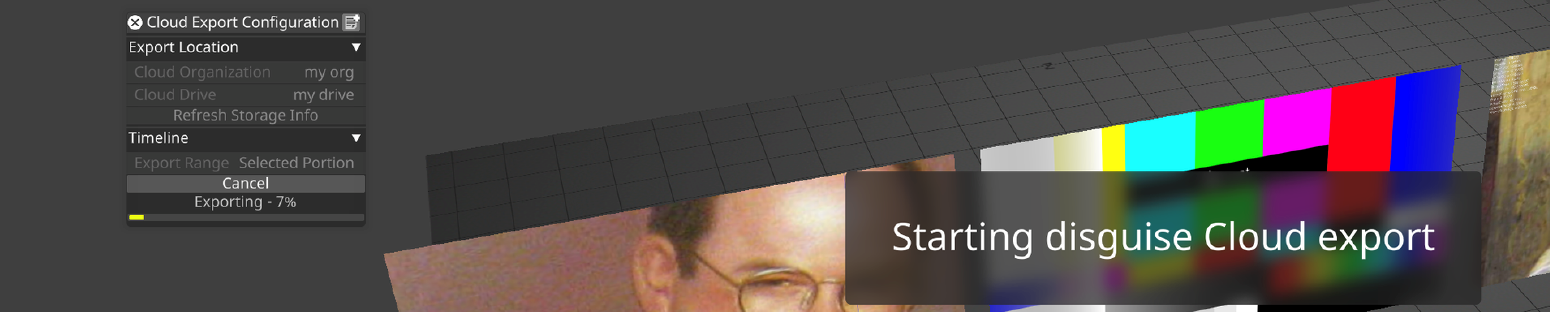
5. Click on Export and wait for the progress bar to complete

6. Click “Copy URL to Clipboard” and paste it in the the web browser address bar to open uploaded scene in Previz.
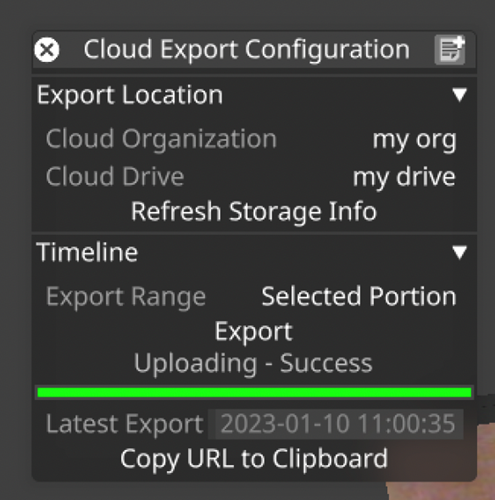
Improvements
- DSOF-20573 Support exporting stage from Designer in glTF format
We have enabled users to be able to export stages in Designer in gITF to support files to disguise
drive as a Previz scene. Under the stage menu export section, change the extension to either gltf
or glb. The option button will also become available which will contain some material and
compression settings.
Fixes
● DSOF-23038 AV in "Upload assets" test case in test_cloudserver
Advisories
- DSOF-18764 - Legacy Video Module doesn’t work with color shift
- Workaround: Not known
- Affects Version: r19.1.7
- Fixed in r21.0
- DSOF-20056 - Tracking Camera frustrum out of sync between Director & Actor with AxisObjectTrackingSource
- Workaround: Not Known
- Affects version: r21.0
- Fix due in r21.0.1
- DSOF-18015 - Intermittent issue - Heap Corruption causing Crash To Desktop
- Workaround: Not known
- Affects version: r19.0.1
- DSOF-17848 - With "disableDmxPacketSendWait" on, lost sACN node on network still causes the project to slow to a halt.
- Workaround: Add a static entry into the local systems ARP table.
- Open an elevated commant prompt.
- Find out MAC for IP, could use arp -a to see existing entries in local arp cache.
- Run netsh interface ipv4 show interfaces to get a list of interface names.
- Add a new entry to the ARP table netsh interface ipv4 add neighbors "<interface name>" <dest ip> <dest mac>
- E.g netsh interface ipv4 add neighbors "Wi-Fi" 10.105.1.253 01-02-03-04-05-06
- Remove entry like so; netsh interface ipv4 delete neighbors <dest ip>
- Important - Remove entries when done or re-image system!!! Otherwise network issues may occur in the future sending the manually added IP addresses.
- Affects version: r18.1.7
- Workaround: Add a static entry into the local systems ARP table.
- DSOF-17540 - Sequencing changes do not transfer to other machines in session when restoring a snapshot
- Workaround: Not known
- Affects version: r18.1.2
- DSOF-17193 - Multi User Edit in UE requires preferred sync adapter to be set to a network adapter which is available to all machines
- Workaround: Often the preferred sync adapter is set to the 25Gb network to facilitate faster sync. Unless all machines in the network have a 25Gb adapter, the preferred sync adapter must be set to another network adapter when multi user edit sessions are running in UE. The adapter can be changed back for when running sync tasks.
- Affects version: r18.0
- DSOF-17108 - Current NCAM data implementation used can exhibit unreliable packet timing
- Workaround: Not known
- Affects version: r18.0
- DSOF-16935 - d3 cannot set SDI VFCs to Quad 4K 2SI 23.98, 24, 29.97 or 30Hz
- Workaround: Not known
- Affects version: r18.0.2
- DSOF-16425 - Renderstream: When using MultiChannelMapping, only one spatial map w backplate is able to change position/rotation
- Workaround: Not known
- Affects version: r18
- DSOF-16082 - Clustered Rendering: d3service requires restart for asset discovery to work on new Unity executables
- Workaround: restart d3 service
- Affects version: r18
- DSOF-15553 - Feed mapping editor shows white screens in a notch layer on first use. In subsequent use it will then show the first pixel
- Workaround: Not known
- Affects version: r17.4.9
- DSOF-15445 - Editor machines with a user account linked to an Microsoft Account can't join d3 sessions due to permissions errors
- Workaround: Create a second local user account
- Affects version: r17.4.8
- DSOF-12837 - Looping within a section with loop play mode occasionally plays content of first frame in next section
- Workaround: Not known
- Affects version: r17.0.2
Fixes
- DSOF-21313 - Fixed an issue where machines with bluefish cards could spontaneously restart
- DSOF-22986 - Fixed an issue where launching designer would always trigger "VFC outputs may be in an inconsistent state"
- DSOF-23008 - Fixed an issue where live update could become blocked and changes would not propagate through the session
- DSOF-23095 - Fixed an issue where vx4 and vx4+ video inputs do not update when switching Capture Card Variant to Matrox
Fixes
- DSOF-22680 - Fixed an issue where DMX failover resulted in understudy hang when sending a command with the value "1"
- DSOF-22874 - Fixed an issue where the Fader layer did not work with more than three screens and actors in session
- DSOF-22912 - Fixed a memory leak in the GUI
- DSOF-22968 - Fixed an issue where it was not possible to add layers to layer stacks
Fixes
- DSOF-22297 - Fixed an issue where it was not possible to set outputs to 10 bit at certain resolutions and frame rates
- DSOF-22409 - Fixed an issue where virtual lineup was not shown when the physical camera is set on the Camera object in non-dedicated director mode
- DSOF-22631 - Fixed an Access Violation when attempting to rollback objects with multiple instances of the same object type exist in the project
- DSOF-22755 - Cue list window no longer causes frame drops
Fixes
- DSOF-22001 Upgrading project removes RenderStream scene keyframes
Fixes
- DSOF-22692 - Fixed an issue where a transition from 'None' to media did not respect
transition time - DSOF-22878 - Fixed an issue where if a failure to load GPGPU occurred it led to an
Access Violation and failure to launch project
Fixes
- DSOF-22032 - Fixed an Access violation when closing Check Cameras window
- DSOF-22034 - Renderstream: Fixed an issue when using 3+ texture parameters into RenderStream resulted in glitchy/scrambled textures
- DSOF-22208 - Fixed the D3NetManager instance no longer being static leading to a potential performance hit
- DSOF-22581 - Fixed an Access Violation when setting then unsetting media in video layer
- DSOF-22636 - Fixed a 'long too big to convert' error when previewing empty videoin
- DSOF-22637 - Fixed an Access Violation when previewing VideoClip with embedded audio
- DSOF-22663 - Fixed an issue where Deltacast capture could not decode specific psf formats
New Features
- DSOF-21736 Live Action Volume
Live Action Volume allows users to define a region of an XR stage which contains ‘live action’, e.g. performers and props. All areas outside this volume will be covered with virtual set extension, rather than exposing the filmed LED screens.
The reasons for doing this include:
1. To mask on-stage objects outside the performance region (e.g. cameras, lights).
2. To make more of the frame be taken up by virtual content, which seamlessly blends with the filmed screens within the live action volume.
How-To
To add a live action volume to an XR setup:
- Create an object (e.g prop, screen etc.)
- Change the object’s render layer to ‘Live action volume’
- Set the object’s mesh and more it to the desired location on the stage to contain all the live action
- Multiple live action objects can be created to cover disconnected regions of live action
Usage notes:
Live action volume objects (along with set extension mask and addition objects) apply globally. All objects in the stage in these layers will automatically modify the set extensions of all MR sets, without needing to be added to the MR set ‘On-stage’ object list.
On-Stage objects positioned behind or in front of a Live Action Volume won’t make them covered by the Set Extension unless they are on the side of it as we only render the Live Action Volume in 2D.

Improvements
- DSOF-3606 Ability to set non-SMPTE timecode for frame accurate sequencing in any frame rate
We have created an option to set Custom Timeline FPS to support frame accurate sequencing. This is made available in the Timecode Collapsible widget found in the right-click menu for Transport.
- DSOF-11343 Debug log window resize
It is now possible to resize the debug log window, which makes it much more user friendly.
- DSOF-12624 Notify user of new or mismatching VFC firmware
If the VFC firmware is found to be old or mismatching, this is now flagged with a notification stating “Found old VFC firmware”.
- DSOF-15168 All objects should be able to be used as set extension masks/additions without adding as an on-stage object in the MR set
In order to add set extension masks or set extension additions, it is no longer necessary for these to be part of the MR set. All objects in the relevant layers can work as masks or additions, without needing to be in the MR set.
- DSOF-19189 Show film strip of a clip in the key frame editor
The film strip for a video is now available in the key frame editor. This is useful to get an overview of the content without having to play it through. This feature is disabled by default, and can be enabled by unchecking the “Disable key frame editor film strip” option in the Project Settings.
Without the film strip
With the film strip |
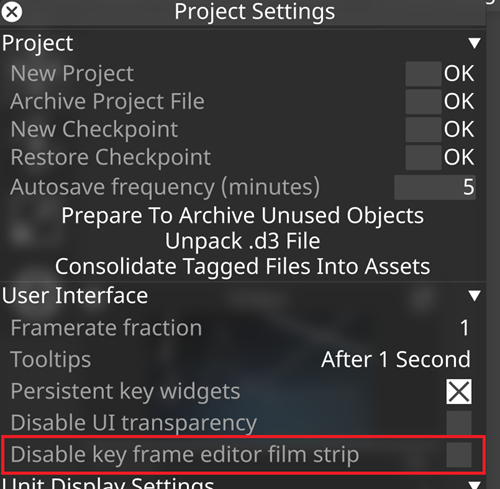
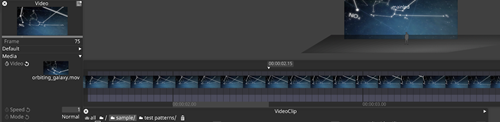
- DSOF-20495 Add mellanox dumps to system diagnostics
Mellanox crash dumps are now included in the system diagnostics.
- DSOF-20669 Remove blue flash watermark from feed view
The Feed view has been modified so that both the Feed Rectangle and Feed Output behaviour is consistent. In previous releases, the Feed Rectangle would fade to blue while the Feed Output would not fade
For a non-server Designer machine, the Feed rectangle will fade to blue (on gold release) or purple (on a beta release) every 10 mins. The Feed Output will exhibit the same behaviour.
For any disguise server, the Feed Rectangle shall never fade on a gold release but fade to purple on a beta release. The Feed Output will exhibit the same behaviour.
- DSOF-20844 Indicate which machine is the local machine in d3manager
In d3manager, the local machine is now highlighted in bold. As a user, this is useful when accessing multiple machines via a KVM and needing to know which of the machines listed is the one you are logged onto.
- DSOF-21987 Cloud login improvements
The disguise cloud login functionality within Designer which was released in r22.2 has undergone several quality improvements.
- DSOF-21196 Add ability to customise the API endpoint
|
The HTTP API port settings are now configurable via d3manager under Machine Settings -> Set API Ports. Care should be taken when changing settings in this dialog to restart the project or the machine, depending on what settings have been changed, as per the instructions in the setting dialog. |
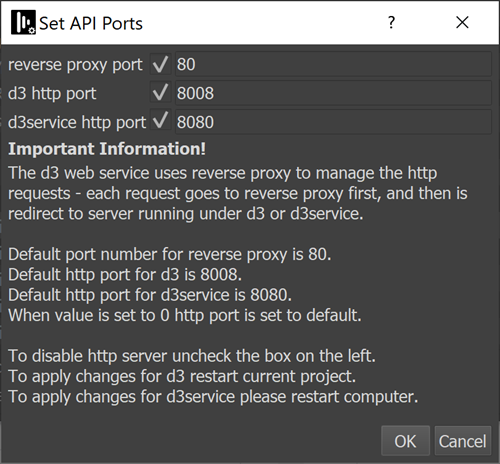
- DSOF-21322 MTC layer does not support 29.97 drop frame
The MTC layer for outputting MIDI timecode now supports 29.97 Drop Frame (DF) timecode.
- DSOF-21618 ‘Cue table exported’ pop-up added
|
|
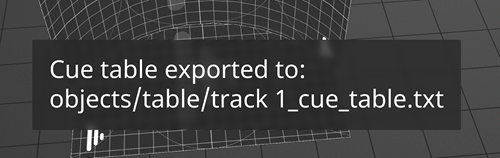 When exporting a cue table, a pop up message now indicates that the cue table has been exported, consistent with the behaviour of other export features.
- DSOF-21623 Remove ‘HDMI 3840X2160 10bit’ warning
A confusing warning message in Notifications has been removed.
- DSOF-21633 Allow ALT+G to toggle GUI on all machine roles
|
|
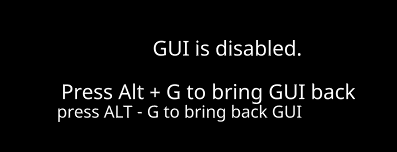 The key combination ALT+G now toggles GUI rendering on or off on all machine roles. When ALT+G has been used, this is indicated with text on screen.
- DSOF-21652 Don't render set extension mask when set extension alpha = 0
If the set extension alpha is set to zero, the software no longer renders the set extension mask as it is wasted effort. This performance improvement is applicable to VP setups where set extensions are not used.
- DSOF-21738 Virtual object camera visibility setting
The “Virtual Object Alpha” setting in a Camera enables objects which define regions of interest to be displayed in the visualiser with a specified level of alpha. This is useful for objects such as set extension mask/addition layers, live action volumes or 2.5D layers.
In previous releases, these objects were not rendered to the camera which could make them difficult to interact with. This setting is now enabled by default in the visualiser camera, but not in other cameras.
The example screenshot below shows layers of a 2.5D scene which have been output to the StageRender layer being displayed as translucent layers with this setting enabled. The setting is found in the Camera object under Stage Render / Render Settings / Object Visibility.
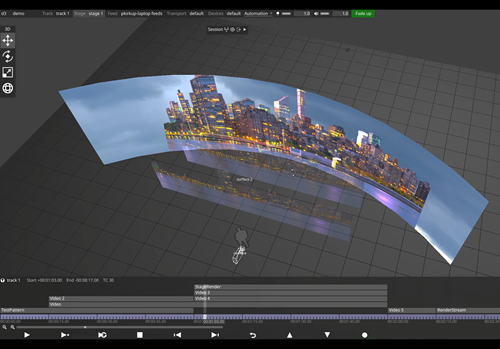
- DSOF-21785 Tidy up camera visibility settings
The settings of a Camera object have been tidied up in order to take up less space on the GUI, and makes it easier to manage.
- DSOF-21971 RenderStream assets which crash on startup leave no information for fault finding
In previous releases, if a RenderStream asset crashed on startup (before even renderstream.dll loads), there was no way to report why it crashed. In r23, this is now captured, and log files are placed in the %LOCALAPPDATA%\d3\renderstream_workloads folder, with a subfolder for the asset name, then “friendly” workload name.
Each instance is stored into an instance_n.txt file, where n is the instance number within the workload. The log viewer in Designer is able to view the file via the Designer Logs share on the render machine, so access to all logs from assets which failed to start will be available too.
- DSOF-21984 RenderStream host memory applications need to be able to specify pixel format
This improvement is relevant for developers of RenderStream plugins. The pixel format was limited to BGRA8 pixel formats only on all versions of RenderStream up to 1.30.
From RenderStream 1.31, the engine can now specify the memory it provides in the same way dx apps can use a reasonable selection of pixel formats in the textures they provide to the API.
- DSOF-22039 Add the ability to render 3D content from spherical mappings
Spherical mapping supports a new property called Content Mode which is set to 2D or 3D. When set to 2D, the behaviour is the same as previous releases. When set to 3D, RenderStream and other 3D layer types (StageRender, Notch and Renderstream) will render 6 views of their world in order to build the 6 tiles of a cube in order to generate 360 degree content.
The cube mapping viewpoints will be automatically created for render engines, resulting in 6 workloads - one for each side of the cube - and the resulting content is mapped for 360 degree coverage, i.e. a 360 degree arc around the spherical focal point. This achieves the same observed behaviour as equirectangular content which spherical mappings normally use.
- DSOF-22454 Run -NoVerifyGc Command on RenderStream Launch
RenderStream layers for Unreal Engine now pass through the -NoVerifyGc option by default for Unreal Engine RenderStream workloads. This significantly speeds up the launching of these workloads, without having to put this config in custom configuration.
Fixes
- DSOF-4472 - Fixed an issue where it was not possible to unsockpuppet tint or access individual RGB values
- DSOF-16022 - Fixed the object selection outline being incorrect in the camera view with overscan
- DSOF-17699 - Video Input textures are now included in the bandwidth estimates
- DSOF-19158 Fixed an issue where it was not possible to add observation while acting as a dedicated director
- DSOF-19378 - Fixed an issue where the RenderStream log was not always copied to Director
- DSOF-19945 [ACES] - Fixed an issue where the VideoIn Preview failed to preview Input Transforms
- DSOF-19965 - Fixed an issue that occurred when transitioning between two pre-comps in Bitmap layer using "Transition time" causes fade from black instead of crossfade
- DSOF-19968 - Fixed an issue where jumping into the currently running RenderStream layer caused a stutter between 50-500ms
- DSOF-20351 - Fixed an issue that occurred when a showfile was transferred between different GUI resolutions, the widget may have drawn off screen
- DSOF-20522 - Fixed an issue where groups of layer starts could jitter when being selected and resized
- DSOF-20524 - Fixed an issue where Designer received invalid comms messages and crash to desktop
- DSOF-20565 - Fixed overscans on RenderStream content creating a clear visual difference to non-overscanned content
- DSOF-20627 - Fixed an issue where d3service presented an offline error on launch despite d3service running
- DSOF-20726 - Fixed issue where Designer issued warning that a Bluefish driver on a Solo is newer than required
- DSOF-20754 - Renamed Automation in the device monitor icons
- DSOF-20867 - Status UI now handles lost device errors during rendering
- DSOF-21007 - Fixed the debug window text is overflowing
- DSOF-21149 - Fixed an issue where previews were not rendered after a restart in VideoIn patch panel
- DSOF-21200 - Setting UI transparency to off is now represented on Understudies
- DSOF-21201 - Designer could crash if using precomps as texture parameters when switching maps in Unreal
- DSOF-21205 - Fixed an issue where UnusedMediaDomain didn't detect media on remote machines on the first project startup
- DSOF-21250 - Fixed an error in CameraCalibrationObservationEditor when undoing creation of a Manual Observation while editor is open
- DSOF-21269 - Fixed an error in the Colour Picker when undoing colour selection
- DSOF-21277 - Improved performance when using multiple videoins and RenderStreams on vx 4 and vx 4+ due to OCL queue synchronisation
- DSOF-21279 - Fixed an issue where RenderStream ‘receive health’ did not report issues with packet receipt
- DSOF-21281 - Fixed an issue where deleting a keyframe ‘before/after’ when using [] as selector did not work correctly
- DSOF-21282 - Fixed an issue where multi-select on parameters, keyframe modified levels together, but deleting before/after only affected the parameters right clicked on
- DSOF-21294 - Spatial Calibration Object - Fixed an issue when selecting a new calibration object the calibration wasn't applied
- DSOF-21312 - Fixed an issue where opening and closing the d3net manager widget within a session displayed a 'multicastDelegate' error
- DSOF-21319 - Fixed an issue where changing API ports resulted in API documentation not being accessible
- DSOF-21347 - Fixed an issue where ACES input transform options were available on RenderStream assets regardless of Colour Management
- DSOF-21356 - Improved console notifications around dedicated directors applying group feeds
- DSOF-21406 - AnimateObjectPreset: Fixed an error in ScreenConfigurationEditor when adding objects to a ScreenConfiguration
- DSOF-21476 - When restarting a RenderStream, "!fragment.streams.empty()" is no longer shown
- DSOF-21525 - Fixed an issue where GUI Update was sluggish on showfile
- DSOF-21538 RenderStream: Fixed an issue where the pool incorrectly reported asset were out of sync
- DSOF-21539 XR: Spatial Calibration "MulticastDelegate: Fixed 'startup error'"
- DSOF-21572 - Fixed an issue where API Query Parameters were not displayed in the Swagger documentation
- DSOF-21576 - Fixed an issue where deleting unused media didn't work for image sequences
- DSOF-21578 - Fixed an issue where removing fields within an Open layer created a Multicast Delegate error
- DSOF-21593 - Fixed an issue where GPU could lose access when playing 1 x 12k and 1 x 8k Notch LC files at the same time
- DSOF-21597 - Fixed an issue where arrows ended up in a wrong state when removed on remote machine
- DSOF-21598 - Layers no longer cause crash on exit
- DSOF-21619 - Fixed an issue where cue table import on section would break when a project is set to 59.94
- DSOF-21635 - Using a 'StageRender' layer with a perspective mapping in 3D content mode no longer fails
- DSOF-21661 - Feeds no longer have a red border in designer mode
- DSOF-21691 - Fixed an issue where pressing CTRL + 1 with a keyframe timeline open caused an Access Violation
- DSOF-21706 - ‘Spatial map’ now behaves like ‘3D perspective map’ when reprojection distance is zero
- DSOF-21732 Fixed a potential Access Violation when undoing undo colour selection in a Palette
- DSOF-21748 - Fixed issue where SLC Region Updates can no longer be called multiple times.
- DSOF-21755 - Mesh Mapping now supports Vulkan image formats
- DSOF-21783 - Fixed an issue where the overscan field was green when tracking system was used
- DSOF-21790 - Fixed an issue where the text layer text font didn't change to imported fonts
- DSOF-21808 - Console no longer spammed when 'Configure' separator is open inside RS workload
- DSOF-21831 - Fixed a d3Manager crash when renaming project folder
- DSOF-21832 - Fixed an issue where SLC regions were available for all videoclips, even when SLC was not enabled for the project
- DSOF-21836 - Fixed an issue where d3Manager crashed on startup if the current project no longer exists in debug
- DSOF-21841 - Fixed an issue where with "enableWebGL"on, web still reports WebGL disabled
- DSOF-21847 - Fixed an issue where ALt Drag DMX values resulted in incorrect number assignment
- DSOF-21850 - Fixed an issue where props did not work as live action volumes
- DSOF-21851 - Fixed an issue where the media ingestion history window was blank upon opening
- DSOF-21857 - Fixed an issue where importing the FeedRect setting was not available
- DSOF-21873 - Delete All Unused Media API is now more reliable
- DSOF-21897 _ Fixed an issue where the OpticalCalibrator could hang
- DSOF-21899 - OmniCal: Fixed an issue where projector lens distortion did not update if only 3rd order coefficient is set
- DSOF-21934 - Fixed an issue where Unreal exposed Custom Events didn't behave like any other keyframe in d3
- DSOF-21969 - Fixed an issue where links to RenderStream assets using custom extensions didn’'t get launched correctly.
- DSOF-21970 - RenderStream shortcut asset now respects the working folder option
- DSOF-21973 - Fixed an issue where d3Manager licence check didn't account for developer authorisation and blocked d3 from running
- DSOF-21977 _ fixed an issue where there was no way to save & load a RenderStream asset metadata effectively when using shortcuts
- DSOF-22011 - Export Output Frame from Feeds now export as expected
- DSOF-22032 - OmniCal: Fixed an Access violation when closing Check Cameras window
- DSOF-22033 - Fixed anissue that occurred when a virtual camera points 180 degrees behind the physical camera, the physical view appeared upside down
- DSOF-22037 - Tracking Marker Module - brightness and colour adjustment now work on the markers
- DSOF-22050 API: Fixed an issue the custom d3service http port was not respected
- DSOF-22061 - Fixed an issue where virtual camera positions would reset on restart
- DSOF-22071 - Fixed an issue where d3 start-up was stuck with a black window sometimes
- DSOF-22085 _ Projectors in blank projects are no longer set to be Hidden
- DSOF-22092 - Fixed an issue where set extension content was disconnected from screens when backplate reprojection distance is zero
- DSOF-22101 - Camera frustum size no longer increases when virtual camera moves
- DSOF-22118 RenderStream: Improved compressed workloads
- DSOF-22126 - Camera visibility settings - upgrading old project now makes virtual objects visible in the visualiser
- DSOF-22132 - Fixed an issue where Workload Status Widget on the RenderStream layer has the wrong scaling for it's list views.
- DSOF-22133 - Fixed an issue where it was not possible to remove MR sets and Mesh Projections from Hierarchy once added
- DSOF-22136 - Fixed an issue where the tracking marker module didn’tn't clip properly for 2D perspective and feed maps
- DSOF-22164 - RenderStream New Mappings are are now visible
- DSOF-22165 - Fixed an issue wher eit was not possible to Adjust Texture Streaming Assigners when Scene Name is too long
- DSOF-22208 - D3NetManager instance is once again static
- DSOF-22213 - Fixed an Access Violation when trying to access the cue list
- DSOF-22233 - Fixed an issue where the incorrect RenderStream Version was reported
- DSOF-22245 - Fixed an issue where DMX lights with fixtures quickly degraded performance
- DSOF-22304 - Fixed an error in IdentityDomain after clearing ingestion history
- DSOF-22372 - Fixed an issue where DSE did not apply correctly to automated screens using tracking sources
- DSOF-22379 - Fixed an issue where the bitmap module displayed the previous keyframe (instead of the current keyframe) when transition time was set to 0
- DSOF-22384 - RenderStream: Fixed an 'Attempt to allocate more than DX_MAXTRISTRIPS' error when Details widget was open with running workload
- DSOF-22387 - MR set output resolution now affects camera plate mapping resolution
- DSOF-22393 - ‘Apply genlock button’ should be greyed out when genlock is applied as it becomes non functional
- DSOF-22413 - Fixed an issue where scaling the grid spacing down on the testpattern layer produced an exception
- DSOF-22433 - Fixed an issue where Go To Timecode did not work with custom (non-SMPTE) FPS when the frame value wass higher than 29
- DSOF-22445 - Fixed an Access Violation when using profiler on local machine
- DSOF-21722 - Fixed an issue where vx4’s could lose access to the GPU during NotchLC playback
- DSOF-22488 - Fixed Errors when creating / deleting tags and notes on the timeline
Bugs
- DSOF-16856 - Sony IDTs no longer appear wron
- DSOF-16841 - All LED Screens now have a hierarchy dropdown again
- DSOF-16834 - d3 trial build now starts properly
- DSOF-16811 - set extension and led LED walls no longer fall out of sync when AR fade is set to 0
- DSOF-16787 - d3service will no longer crash if empty/corrupted file ending in ".uproject" found in Renderstream Projects folder
- DSOF-16765 - Camera switching is no longer broken when frontplate is in minimal latency mode
- DSOF-16744 - rslogs folder is now correctly included in diagnostics
- DSOF-16734 - RenderStream Active Latency no longer causes excessive stuttering when not set to a multiple of the refresh rate
- DSOF-16703 - Mapping Quick Select slots no longer allow for non MultiChannel mappings to be applied on RenderStream layers
Improvement
- DSOF-16674 - Renderstream workload actions (Start, Stop Sync) will now be greyed out when the corresponding operation is in progress.
- The Sync button will grey out while there are running sync operations, on completion of all operations (success or failure) the button will no longer be greyed out
- The Stop button will be greyed out when the workload is not running
- The Start and Sync buttons will be greyed out when the workload is running
- The Start button will be greyed out while there are running sync operations
Fixes
- DSOF-21313 - Fixed instability in Solo machines with Bluefish capture cards
Improvements
- DSOF-22450 Implementation of Deltacast 8x channel capture card
We are now shipping new vx 4+ hardware with Deltacast capture cards. These can be identified within Designer in the following ways:
- Via the dropdown in the machine menu. The capture variant will be automatically selected as seen below:
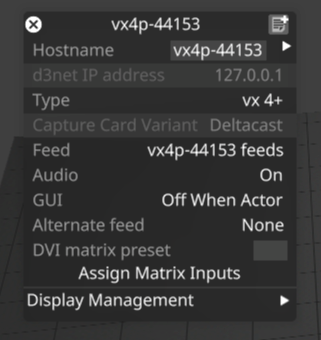
- Via the available information in the d3manager “help” dropdown as “Capture Card Vendor”. Within this view, we have also included machine type, serial number, backplane model, and VFC card load
We have also enabled any vx 4+ with Deltacast capture be identified in the following ways:
- A note on the vx 4+ label on the rear of the machine indicating Deltacast capture
- Via the OLED in the machine field. Deltacast is listed as (De)
It is important to note that Deltacast capture is unable to decode the following formats:
- 2K DCIpsf30
- 2K DCIpsf29.97
- 2K DCIpsf25
Fixes
- DSOF-22011 - Fixed an issue where Export Output Frame from Feeds was not exporting at the expected resolution
- DSOF-22477 - Fixed an issue where nginx was not launched on vx4 or vx4+ resulting in d3 APIs did working
- DSOF-22541 - Fixed an issue where the 'Capture Card Variant' field became permanently uneditable once machine joins the session
- DSOF-22578 Fixed an issue where patching videoin 5-12 as a media source for a layer did not render to the target surface
Fixes
- DSOF-21308 - Fixed an issue where failed RmaxVideoIn instances would pollute pool
- DSOF-21731 - Fixed an issue where cube LUTs with negative values didn't parse
- DSOF-22300 - Fixed EXR image support
- DSOF-22305 - Fixed an issue where setting the colour space of a colour profile to Rec.709 did not work until project restart
- DSOF-22511 - Fixed an issue where a "No valid Designer licence detected!" popup blocked Trial release from launching
Improvements
- DSOF-21766 - Created a d3manager link to sample assets on the website
Fixes
- DSOF-19487- Fixed an issue when applying feed settings, the bit depth changed from 10 to 8 bit
- DSOF-21425 - Fixed an issue when using an Actor as UCRS controller, all machines would intermittently stop receiving streams periodically and recover on their own
- DSOF-21981 API | Fixed CDL failing to connect to Actors | Director not interactively passing Data to Actors
- DSOF-22295 - vx4+ comes pre-populated with Deltacast input options
- DSOF-22321 - Fixed an issue where d3manager failed to send profiler HTTP request under certain network conditions
- DSOF-22345 - Fixed an issue where the diagnostic zip failed to be generated due to locked file
Matrox Improvements
- DSOF-22431 Switch default Matrox clock to input clock
- DSOF-22106 Wrong input patch preset when Matrox unit is set to Actor
- DSOF-22146 Matrox: occasional dropped frame
- DSOF-22147 Console can spam with thousands of lines of "!!!!! VideoIn texture handle is NULL!"
- DSOF-22201 Matrox: Tearing seen on capture inputs
- DSOF-22204 "Matrox: Card incorrectly configured" error seen in Designer when opening a new project
- DSOF-22435 'Unable to create Matrox video input' error when assigning video input
Fixes
- DSOF-21825 - Fixed an issue where using a 1D Lut produces an error
- DSOF-22265 - Fixed understudy misreporting timecode as being out of sync with director
- DSOF-22278 - Fixed Renderstream compressed not working on vx4 or vx4+
- DSOF-22301 - Fixed an issue where Renderstream texture parameters were proxied
- DSOF-22345 - Fixed an issue where diagnostic zip files failed to be generated due to locked file
- DSOF-22346 - Fixed an issue where d3 could hang when aborting colour calibration
Fixes
- DSOF-22220 - Fixed an issue where the frame lock icon in actor status widget was reporting no frame lock
- DSOF-22219 - Fixed an issue where enableGuiFeed option switch resulted in a black feed in feed view.
- DSOF-22016 - Fixed an issue where FrameLatency did not change when switching from Full Speed to Full Speed Low Latency on nvidia machines
- DSOF-20735 - Fixed an issue where Reference Point labels were offset incorrectly in the Visualiser Camera
Fixes
- DSOF-22180 - Fixed an issue where the failover test channel with an offset of 0 in DMX event transport potentially causes understudy to hang on failover
- DSOF-21837 - Fixed an issue where vx4s fails to apply feeds at 60, reverts to 59.94
- DSOF-21673 - Fixed an issue where the remote profiler failed to take profiles between different machines in the office
Fixes
- DSOF-22078 - Fixed an issue where Actors were not in sync with Understudy after failover command
- DSOF-21804 - instantaneousModeTime() now behaves like network time in all cases
- DSOF-21721 =- Matrox input now shows as hz, not fps
- DSOF-21713 'FieldAccessor' object has no attribute 'undecoratedName' displays when showing and hiding columns in the projector multi-selects menu
- DSOF-20978 SLC: Fixed multiple errors with invalid frames calculated and outFrames out of bounds when configuring asset regions
- DSOF-20208 - Fixed an issue where the Understudy's timecode was out of sync with Director's timecode
Fixes
- DSOF-22003 Fixed exception on shutdown that could lead to loss of data on shutdown in rare cases
- DSOF-21957 Fixed an issue where disguise cloud would sometimes fail to log in for certain network configurations
- DSOF-21550 Creating new multiview subregion no longer causes an access violation
- DSOF-21928 Fixed an issue that would cause incoming automation data to glitch when failing over to an understudy.
- DSOF-21926 Folders now correctly appear again in the media selection object view
- DSOF-21813 GPU profiler monitor now appears correctly again in remote monitors list
- DSOF-21803 Fixed an issue where the Media ingestion history window would make columns disappear if you had text with very long file names.
- DSOF-21788 Text Layer no longer fails to render sometimes upon project restart
- DSOF-21747 Scaling down an output rectangle beyond a certain size no longer makes the preview turn black.
- DSOF-21740 Fixed an issue where Ncam k1 and k2 values when taken from the ncam system by setting the ncam system to send these values directly were the wrong scale.
Matrox Capture Card fixes
- DSOF-21743 Warning notification for Matrox SDK & driver mismatch has been improved. This notification will now only be visible on machines that actually have Matrox hardware installed.
- DSOF-21681 Fixed issue where a Matrox capture card could occasionally fail to create a system topology for specific inputs. Should improve stability of Matrox capture cards when receiving intermittent video signals.
- DSOF-21626 Fixed issue where after project restart on machines including Matrox video inputs could under certain conditions show up black and need to be remapped.
- DSOF-21605 Added support for capturing following Psf formats that were missing on Matrox capture cards:
- 1080sf 23.98,
- 1080sf24,
- 1080p47.95 and
- 1080p48
- DSOF-21477 - Fixed an issue where noisy signals could cause flashes to black on Matrox input cards with “free running/locked” change notifications. For users that need genlock sync, we have added a ‘matroxInputClockEnabled’ option switch. Having it ON forces the capture card to only use the first connected SDI input as a genlock clock source. Having it OFF defaults the capture card to use its internal clock and not an external one.
- DSOF-21394 - Matrox cards will no longer consume excess memory leading to a machine blue-screen on d3 project close.
- IMPORTANT NOTE: This issue was related to supporting VITC (Video Timecode) processing on Matrox cards. To resolve it we have disabled VITC by default on machines with Matrox cards. If you want to re-enable it you can find a special option switch you will need to enabled under advanced machine settings called: matroxVITCEnabled
Fixes
- DSOF-21941 - Fixed an issue where the close button in the cloud authorization popup was misaligned, mostly obscured
- DSOF-21940 - Fixed an issue where the first time sign in banner text can be selected and copied
- DSOF-21936 - Fixed an issue where the first-time login banner in d3manager was too long for the default size of the window, obscuring the hyperlink at the end
- DSOF-21929 - Fixed an issue where d3manager sign-in button stopped working if the sign in page was closed
- DSOF-21927 - Fixed No Data in Feeds - Scopes
- DSOF-21923 - Fixed an issue where the cloud icon did not appear, and was cropped
- DSOF-21870 - Fixed an issue where SLC showed errors with a minimal project
- DSOF-21853 - Fixed an issue where CallStack objects allocated large amounts of stack memory and run a high risk of causing a stack overflow
- DSOF-21846 - Fixed an issue where Unused medias aren't detected when starting new actor&machine project
- DSOF-21844 - RenderStream: Fixed an issue where the alpha channel rendered white when enabled on AMD machines
- DSOF-21830 - Fixed an issue where editor machine was not locating cue on re-engage to director - when using multi transport manager
- DSOF-21794 - Fixed Cam Lens data showing "-nan(ind)" when using MosysF4 protocol but not turning on "F4Lens" switch in Mo-sys.
- DSOF-21759 - Distribute: Fixed an issue where missing Media Domain didn't remove media when a video file changes
- DSOF-21744 - Fixed an issue where zooming out using proxies has no effect
- DSOF-21730 - Fixed an Access Violation when rendering bitmap module in ACES mode while no texture is mapped
- DSOF-21725 XR: Fixed an issue where a stall / minor hang happened at end of Colour Calibration
- DSOF-21485 - Fixed FrameLatency not changing when switching from Full Speed to Full Speed Low Latency
- DSOF-21481 - Fixed an issue where AnimateCameraPreset layer blocked movement for Virtual Cameras when using Relative
- DSOF-20995 - Fixed CUE list editor not resizing to the right correctly
- DSOF-20975 SLC: - Fixed an issue where opening the preview separator in the VideoRegionSet widget before any regions are set caused an error
- DSOF-21935 - Updated the popup when attempting to run a d3 project without a licence to point users toward the cloud licence flow
New features
- disguise Cloud Integration
Designer r22.1 offers login to disguise Cloud through d3manager by clicking on the new “Sign In” button (circled red in the screenshot).
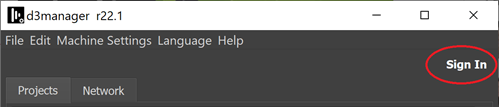
On sign in, you will be prompted to link your machine to your disguise Cloud account by following the on screen instructions. You can link your Designer install to an existing disguise Cloud account, or sign up for a new account.
If your Designer is not licensed, you will be able to acquire a Designer license via the Designer integration with disguise Cloud.
You can return to licence activation by clicking “Account” in the d3manager cloud menu. This will take you to your disguise Cloud account details page which includes Designer license activation functionality.
Further disguise Cloud integrated functionality in Designer will be rolled out over the coming months.
Advisory
Please note:
The launch of r22 has also coincided with OS 200, both of which are major updates to disguise. The OS includes significant updates for a host of drivers to support the new features in r22, so if you currently own a disguise vx 1, vx 2, vx 4 or vx 4+, please make sure to download the latest OS upgrades for these machines from the Hardware section of our software download page to ensure their compatibility with r22 and future releases.
It is important to note that a project built in r22 will need to have the hardware specified for playback with an OS above 200. Once the hardware is updated to support OS 200 and above, there is no option to roll back to a previous OS version. Please follow this link for the advisory.
New Features
Single Large Canvas (SLC) - DSOF-13257, DSOF-12450, DSOF-12958
A Single Large Canvas (SLC) is a practically unlimited canvas that users can operate on without having to manually split canvases (i.e. the displays and mappings) or concern for the mechanics and logic of distributing content over multiple machines or for performance. SLC allows users to focus on the creative side without concern for the practical limitations of large scale projects.
Previously a show going from a small venue with HD screens to a large venue with massive screens had to work around GPU limits - like the max internal resolution of 16384x16384 pixels of GPUs - and manually split content across machines so the increased resolution wouldn’t affect performance.
SLC removes these limitations and allows you to operate on massive content as if it was a single large piece of content, while only processing the content that is being output by each individual machine in the session.
SLC works in conjunction with the Media Distribution feature to make working with video at massive resolutions practical.
If you have a show where SLC might be a required feature then we’d love to work with you. Please contact us at support@disguise.one.
How-To
The new logic is always enabled, but the SLC configuration is hidden and limited to non-SLC resolutions until explicitly enabled.
1. Tick the “enableSLC” option switch in advanced project settings a. The SLC config is now visible under d3->Advanced->SLC configuration b. SLC-aware display types (currently projection surfaces and LED screens) now have their default min/max set to 100,000x100,000 instead of 16384x16384.
2. Create a display larger than 16384x16384 or reduce the “Resolution threshold” in the SLC configuration to enable SLC splitting for that display.
3. Create SLC video content
a. Split video content into regions smaller than 16384x16384 (most codecs only support 8K) and include a region name into each split in the format “_region<region name>” b. Ingest the content and specify the regions inside d3 under <video clip>->Video asset->Regions
Usage notes:
● SLC currently only supports projection surfaces and LED screens. Other displays are still limited to 16k.
● SLC does not currently integrate with any other content than video.
● We have also enabled SLC to be combined with mesh projection in order to split large canvases across multiple machines.
Media Distribution - DSOF-11971
The new Media Distribution feature provides a built-in mechanism to easily ensure that the exact required media files are present on each d3 machine involved in a d3 session. There are two parts to the Distribute system:
1. Sync/copy missing media - copying media used by the d3 project and needed by a machine’s feed mapping.
2. Delete unused media - removing media that is not used by the d3 project.
The power of the Media Distribution feature is its utilisation of the project state for all machines in the session, only distributing video layer media to a machine in the session if the media is mapped to one or more outputs on the machine. e.g. Adding media to a video layer in itself will not make it a candidate media to be distributed to a machine unless the media has been mapped to an output on that machine in the Feed view.
Media Distribution applies to all media types in the d3 project objects folder.
Note that in r22.0, there is no option to use Media Distribution to delete unused media from the Director in case media is later required. We are interested in user feedback as to whether including the Director (or giving the option) would be a useful addition.
Listing missing media and initiating media syncing is also available in r22.0 via a REST HTTP API. Listing unused media and deleting unused media will be available via a REST HTTP API in a subsequent release.
To use the Media Distribution feature
1. On the Director machine, right-click on the d3 menu and select “Media Distribution…” to open the Media Distribution Widget.
2. Expand both collapsible widgets to see the details of what media files are missing and unused copies.
3. “Include Mobile Editors” is defaulted OFF as they may wish to manage their own files, but the option is available.
4. Either click on “Sync” or “Delete” next to each item to sync or delete individual files on the target machines, or alternatively click “Sync All” or “Delete All” to action all the items in the respective tables.
a. For copying large files, it will display the copy progress as a percentage.
b. At the end of a copy, it will display the task state as either “Success” or “Failed”. For delete, the item should just disappear from the table.
5. Click on “Clear Finished Tasks” above the sync table to remove syncs that completed successfully and reset the status on syncs that failed.
The Media Distribution feature has several planned improvements which are not included in r22.0 but planned for upcoming releases:
● Sync and delete tasks by Media Distribution can only be triggered by the Director. Enabling Media Distribution from Editors is planned.
● Password-protected sharing must be turned off for all machines in the network for remote copying and deleting to work. This is the default configuration for disguise servers but may need to be configured for Editors working on non-disguise PCs or laptops. The requirement for this configuration is planned to be removed.
● Syncing of proxies to be included in the distribution feature.
● Performance improvements including:
○ Distribution from one actor to another is routed via the director. This limitation will be removed.
○ Sync and delete is executed over d3net. In a subsequent release, it will be possible to execute media distribution over alternative network adapters.
RenderStream 1.30
RenderStream 1.30 brings us a host of new features including:
● DSOF-20552 RenderStream: backwards compatibility
We have included built-in backwards compatibility into RenderStream to enable third-party applications to still run effectively if the RenderStream API is updated.
● DSOF-20485 RenderStream: API to release image references
● DSOF-19997 Display UE engine version in the Asset
RenderStream assets now show which graphics engine is being used, in addition to the version of that particular graphics engine. On a RenderStream asset, this is now shown in the Engine Name and Engine version fields as seen in the image below.
● DSOF-18049 RenderStream: Vulkan API
We have enabled integration of the Vulkan API, which allows for easier integration of RenderStream into applications powered by Vulcan. This also means that applications built with Vulkan can now be used as both compressed and uncompressed RenderStream assets.
● DSOF-14835 RenderStream: custom asset description/readme
RenderStream assets now have an “Info” field which is filled in from data provided by the graphics engine that is being used.
● DSOF-16148 Fast Spatial Calibration
We have reduced spatial calibration time to less than half the amount taken in previous software releases. For studios with multiple cameras for example, this can result in a time saving of several hours. The Fast Spatial Calibration is enabled by default.
Improvements
● DSOF-21620 Update missing media API for r22
In r21.4 we removed the missing media API, but this has now been replaced. API documentation can be found either via ‘Open API documentation’ under the ‘help’ section of d3manager, or by accessing http://localhost/docs/v1/index.html on a disguise media server.
● DSOF-21574 Education license should allow 4 VideoIn channels (not just 1)
In previous releases, the education license for Designer only allowed for 1 video capture channel. In r22 we have enabled 4, the same as currently found in standard Designer licenses.
● DSOF-21026 RenderStream: allow pinning of Receive Health widget
We have enabled the Receive Health widget to be pinned when using RenderStream, so that users can see the health status of all RenderStream during a show.
● DSOF-20740 Trigger UE events from d3
In r22 we have enabled support for Unreal Engine events to be triggered from within Designer using the ‘Custom Events’ tab when running RenderStream. This is populated when users add custom events on their level blueprint within Unreal Engine. Custom events can then be exposed as keyframable sequences that can be triggered from the timeline within Designer.
● DSOF-5762 Ability to add a global delay to Audio
We have added a ‘Delay’ field within the editor of each AudioOutPatch resource to support audio teams from having to add delay on their side and be able to accommodate for video latency within the production chain without having to add any further delay. The delay is set to 0 by default, and any delay specified is applied to all audio that is being output on the patch. The delay is applied across all machines within a d3Net session. This will not effect external audio engines like Web, Notch and RenderStream.
● DSOF-21331 Hide live action position marker in Camera when not using old virtual camera workflow
We have hidden the ‘live action position marker’ field in the camera behind the ‘enableLegacyVirtualCameraWorkflow’ option switch. The reason for this is that most of this work is completed within VirtualCameras.
● DSOF-21242 Skip drawing of Point Cloud grid on an Omnical project if max line length is 0
We have made an improvement to Omnical workflows in r22. In previous releases, the ‘Point Cloud max line length’ is only checked before drawing individual lines between point neighbours. This would mean that grid points would need to be drawn even if the threshold is set to 0. We have removed this step in r22, meaning that if the threshold is set to 0 then no lines need to be drawn between the grid points.
● DSOF-21208 Layers that do not exist on a track don't say so in their descriptions
In previous releases, the description of a layer tells users where it is on a timeline, but if it was not on a timeline then it’s either in the list of saved layers or in a layer stack. This could cause confusion to a user when attempting to remove missing media if it was in use in a layer that isn’t on their track, especially if a layer had been exported or removed from a track a long time ago.
In r22 we have added additional logging to a layer to highlight to users where it is located.
● DSOF-21178 Warn user when insufficient overscan used
When using overscan for lenses in a xR workflow, we have enabled a warning to users when the overscan is not sufficient by giving the overscan field a red background, and adding the minimum required overscan values into the overscan tooltip.
● DSOF-21073 Virtual camera: Use live action marker at (0, 0, 0) as default when none selected
In previous releases, when no live action position marker is selected within the Virtual Camera, a reprojection is completed at a constant distance of 3 metres. In r22 we have amended the default distance of a live action position market at (0, 0, 0).
● DSOF-21164 Manual Observations have uninitialised RMS Error field
We have adjusted the Manual Spatial Calibration observation so that its RMS Error field should report as 0.
● DSOF-21088 Make default videoclip input transform utility-sRGB in ACES
In ACES mode, we have enabled the default Input Transform value of every VideoClip resource as being set to ‘sRGB - ITU-R BT.709’
● DSOF-21041 HTTPcontrol module should support HTTP PATCH commands
In r22 we have enabled support for HTTP Patch within the HTTPcontrol module to support integration with partner APIs.
● DSOF-20938 Allow multi-layer editing of multiple group layers or group layers mixed with normal layers
We have enabled a multi-edit layer window, enabling users to select multiple group layers with any number of layers and multi-edit any of them. In previous releases, we only supported the ability to multi-edit a single group layer.
If a single group layer is selected, it will be titled as “Group <Name of Group> of N Layers”, but a multi-select of multiple groups will not include the group names.
● DSOF-20868 Replace reset keyframe icon with a dedicated icon
● DSOF-20807 Add the ability to filter RenderStream assets by source machine to the ResourceView
We have added check boxes in the ResourceView to make it easier to filter specific machine assets as part of the RenderStream workload.
● DSOF-20794 Separate set extension and LED backplates
In r22 we have made it possible in xR workflows to separate the rendering of the backplate into two separate plates - content that goes to the LED screens, and content that goes to the set extension. We have therefore implemented two new render layer options - ‘Back Plate Screens’, and ‘Back Plate Set Extension’.
● DSOF-20782 String Expressions - enable carriage returns
In r21.1 we added a text module which enables users to make a text layer. This can be used to add notes to an output for a rehearsal for example. Fonts can then be downloaded into objects/textfonts as a .ttf file.
Taking this further with Expressions, right-click on the property you want to control within the Text Module. In r22 we have enabled the ability to add a carriage return - used to reset to the beginning of a line of text - into the string. This can be completed by splitting the expression across multiple lines in the input by hitting the enter key as normal as seen below:
● DSOF-20731 Report and adjust RenderStream projects folder path inside d3
In previous releases, the only way to adjust the RenderStream Projects Folder - located in the RenderStreamMachine editor - was via manually editing the machine registry.
In r22, the RenderStream Projects folder is where the current folder path is reported, which is when it appears on the remote machine. When providing a new folder path, it should be the same path reported on the remote machine and should also be going to an existing folder.
In order to do this, d3service must be running on the remote machine with admin privileges, as would be the case when using vx machines alongside rx render nodes for example.
If d3 service is not running with admin privileges, everything will succeed except the creation of a network share for the folder. If this fails, users would need to ensure that d3service is running with admin privileges to complete the step again.
If the folder path provided does not exist on the remote machine, no change will occur.
● DSOF-20700 d3manager: ability to compare two project files
In d3manager, we have added the ability to compare two project files. This can be completed by going to Projects / right-click on project/Show History. Right-click on the history file and click on the ‘Compare to existing’’ option to open a new window to display the current project file alongside the selected history file.
● DSOF-20664 d3manager: rollback functionality
In d3manager, we have added the ability to rollback a project. This can be completed by going to Projects / right-click on project/Show History. Double-click on the history file to receive a confirmation of rollback dialogue. Right-click on the history file and click on the ‘Rollback’ option.
Rolling back a project will replace the current project file with the selected history file, which will be renamed to match the name of the current file. The ‘Date Modified’ will automatically update according to the selected history file. If an overwrite happens, users will see a backup name
<show>rollback<date> appear in the history folder.
In r22 we have enabled
● DSOF-20662 ObjectView: improve subfolder hierarchy UI
In previous releases, when in ObjectView users see a hierarchy of boxes and folders when there are objects in each subfolder. In r22 we have made it clearer that it’s a tree view as seen in the new view below:
● DSOF-20597 RenderStream: use the full asset path
In r22 we have enabled RenderStream assets to use the full asset path within its naming instead of the last directory to avoid assets being overwritten.
● DSOF-20540 VideoClip: ability to preview clip without a layer
Within the GUI, we have enabled users to preview a video without creating a layer in r22. In the VideoClip widget, click on ‘edit video clip / Preview’. The widget also has a ‘Frame’ field that can be used to jump between each frame of the content.
● DSOF-20514 d3manager: dark mode
Dark mode in d3manager is now enabled in r22. Users can change between dark and light modes when selected within the Windows Colours settings.
● DSOF-20482 Add workload-friendly name to RenderStream asset editor
We have added the workload name to the stream editor (located in the Stream widget when starting a RenderStream workload) so that it’s possible to see which stream is related to which workload. In previous releases there was no way of seeing this information.
● DSOF-20320 d3preview: standalone application for previewing files/videoclips
In r22 we have created a simple standalone application called d3preview. This enables users to check whether Designer will support playback of that content, without having to ingest it into a temporary project. This can be completed by right-clicking on any file that Designer supports / Open with / Choose another app /C:\Program Files\d3 Production Suite\build\msvc\d3preview.exe.
We have created a dedicated UI that includes the ability to play/pause/scrub the content via the mouse and spacebar, volume via the mouse wheel and the ability to change scaling/clipping. Users can also use multiple instances of d3preview.
● DSOF-20389 Installer: option to associate supported image/video extensions with d3preview
For d3preview, we have enabled users to preview files in a host of media file formats including
.d/.dpx/.exr/.mov/.tga/hap. To enable this feature, in the Installation Options of d3installer, we have included an option to ‘Associate media files with d3preview’.
When this is enabled, any file with an extension of .d/.dpx/.exr/.mov/.tga/hap will have an option to open with d3preview within its ‘Open with’ action menu.
● DSOF-19737 CDL API (LiveGrade integration)
We have enabled a REST HTTP API in order to receive CDLs into disguise. This is needed in order to integrate with Pomfort LiveGrade. API documentation can be found either via ‘Open API documentation’ under the ‘help’ section of d3manager, or by accessing http://localhost/docs/v1/index.html on a disguise media server.
● DSOF-18892 Upgrade Rivermax to 1.10.20
We have upgraded Rivermax to 1.10.20, which contains performance improvements and Windows GPUDirect support.
● DSOF-9876 Show project version in d3manager
In r22 in the Project view within d3manager we have included an additional column titled ‘d3 Version’ that displays the d3 version each project file was last modified in.
● DSOF-8922 Ability to specify number of proxy levels generated per file
In r22 we have enabled a ‘Settings’ feature within the Proxy Maker widget to enable users to dictate what proxies are needed and how many. We have enabled options to select each available proxy level, which are then generated at the specified levels. The ‘Rescan’ button is then used to rescan internal proxies and determine which need to be created based on the selection.
● DSOF-6784 Ability to reset limits/delete MetaField
In r22 we have included a ‘Reset’ button within each MetaField widget. This button becomes active if any of the fields within the widget are not equal to their default values. Clicking the button will then restore all fields within the widget to their default values. In previous releases, users would have to type in the expected or remembered values.
● DSOF-3941 Ability to reset keyframes to default values
In r22 we have enabled the ability to reset keyframes to default values. This can be used by clicking on the icon located to the right of all keyframable fields across all modules. The reset keyframe button is only active when the field value does not match its default value at the current playhead position.
Selecting the reset keyframe button should reset the field back to its default value at the current playhead position, and should not affect any keyframes not at the current playhead position.
● DSOF-995 WebModule: Control over audio
In r22 we have created an ‘Audio’ toggle located within the editor of each WebBookmark resource. The value of this field will be set to True by default, which means that any content presented by the WebBookmark resource that contains audio will be heard.
If the toggle is set to False by default, any content presented by the WebBookmark resource that contains audio will not be heard.
Fixes
- DSOF-21624 - Fixed a Rivermax driver mismatch
- DSOF-21608 - All languages no longer load when running d3 with "isDeveloper" set
- DSOF-21588 - Fixed an issue where ActorStatusWidget did not open when RS layers are present
- DSOF-21579 - XR: Fixed a potential hang when running Colour Calibration on non-dedicated Director
- DSOF-21576 - Fixed an issue where deleting unused media didnn't work for image sequences
- DSOF-21567 - Fixed an error in RenderStreamMachine when ClusterPool with 1+ machine assigned and session is active
- DSOF-21566 - Fixed an issue where Setting Director always requested a project restart
- DSOF-21556 - Fixed an issue where - 0 missing media was reported when using same media repeatedly
- DSOF-21555 - Fixed an issue where Mapped Media Domain was not returning all mapped media locations correctly
- DSOF-21538 - RenderStream: Fixed an issue where pool incorrectly reported asset is out of sync
- DSOF-21534 - RenderStream: Fixed a potential can hang when stopping a workload
- DSOF-21533 - Fixed an issue where it was not possible to export OmniCal camera study
- DSOF-21508 - Fixed an issue where rotating a camera in visualizer caused d3 to run extremely slowly
- DSOF-21503 - Fixed a hang on startup if a project has webmodule
- DSOF-21502 - Fixed an exception in Layer Stack
- DSOF-21501 - Fixed an issue where unmapping multiple media files consecutively didn't update the UnusedMediaDomain correctly
- DSOF-21498 - APIEventTransport is now hidden in the UI
- DSOF-21495 - Fixed 'invalid vector subscript' error when using sample RenderStream assets
- DSOF-21494 - Fixed an issue where Horizontal Back and Front Plates caused issues with mapping resolution
- DSOF-21493 - Fixed an issue where SceneOrigin could have its Scale modified through 3D manipulators
- DSOF-21473 - Fixed RenderStream returning invalid scene index
- DSOF-21471 - Fixed an issue where CodeMeter error message ended with a single NUL character
- DSOF-21470 - Fixed Media Distribution Widget saying >1 of the same media is missing
- DSOF-21463 - Fixed a Python exception when changing machine type in d3Net widget to a machine that does not support 10bit
- DSOF-21461 - Fixed Export Projector Study
- DSOF-21456 - Fixed an issue where Directional Lighting created CPU Lock error
- DSOF-21453 - Fixed an issue where DMXPersonality was no longer scrollable
- DSOF-21449 - Fixed an invalid memory access from ManipController on shutdown
- DSOF-21445 - Fixed an issue where SlcRegionManagement::update used reference to map element after it is erased
- DSOF-21443 - Fixed an issue where the OBJReader file buffer wasn't null terminated causing line reading to read uninitialised memory
- DSOF-21406 - Fixed AnimateObjectPreset: error in ScreenConfigurationEditor when adding objects to a ScreenConfiguration
- DSOF-21401 - RenderStream: Fixed scene tab in RS layer mentioning INVALID
- DSOF-21399 - RenderStream: Fixed an issue where Receive Health displayed wrong amount of frames when on Automatic preferred network
- DSOF-21383 - Mesh Projection: Fixed an issue where it was possible to create and add a Projector to your Mesh mapping through the Mesh Mapping widget
- DSOF-21372 - Fixed an Access Violation when adding a point to a Rigid Body Tracking Source
- DSOF-21371 - Mesh Projection: Fixed an issue where changing the res of a display did not change the Bandwidth estimate
- DSOF-21366 - Fixed SharedLibLoader setting an error code if DLL load succeeds
- DSOF-21353 - Added the same EventTransportMSC to both Remote & Local displays a MulticastDelegate error
- DSOF-21352 - Fixed an issue where OSC indirection controllers notify too verbosely when a string is a mis-match
- DSOF-21344 - Fixed an issue where the master volume control did not work with legacy video layers
- DSOF-21342- Fixed an issue where the Media Distribution Widget does not update if cache is different - but cache size is the same
- DSOF-21330 - Fixed an issue where Missing Media Domain reported unused versions of video files as missing
- DSOF-21316 - Fixed an issue where adding objects to an Omnical Plan within a session displays a 'multicastDelegate' error
- DSOF-21312 - Fixed an issue where opening and closing the d3net manager widget within a session displayed a 'multicastDelegate' error
- DSOF-21308 - Fixed Failed RmaxVideoIn instances polluting pool
- DSOF-21298 - Fixed unused Media Domain displaying files that are still in use
- DSOF-21275 - PureLinkMatrix: Fixed a possible access to freed memory in Callback
- DSOF-21270 - Fixed TrackTransitionInfo serialising 'size_t' member (i.e. architecture-dependent size)
- DSOF-21266 - Fixed an issue where edits to layers within layer stacks are not guaranteed to be serialized
- DSOF-21262 - ColourCal: Fixed an issue where the CameraData move-constructor moved camera from itself
- DSOF-21246 - Fixed an issue with Cue Tag selection inaccuracy depending on level of zoom on timeline
- DSOF-21245 - Fixed an issue where mesh projection rendered Notch content at 1x1 px resolution
- DSOF-21230 - Reinstated support for query strings in generated gRPC HTTP routers
- DSOF-21228 - Fixed an issue where opening an Omnical camera widget displayed a 'NoneType' error
- DSOF-21194 - Fixed the VideoTrigger layer
- DSOF-21138 - Improved the RenderStream asset object picker
- DSOF-21136 - Fixed an issue where apostrophes passed into the text module via an expression break rendering
- DSOF-21135 Text Module - Fixed an issue where incomplete expressions on text parameter result in strobing content
- DSOF-21132 Text module - Fixed an issue where alignment breaks when font size exceeds available space on the mapping
- DSOF-21126 - Fixed an "Incorrect shutdown" warning about AssetLauncher channels, when Comms object is destructed
- DSOF-21122 - Fixed an error when keywidget was on focus after resource selection widget is closed
- DSOF-21114 - Fixed an issue where the console cursor offsets vertically as new input lines were added
- DSOF-21107 - Notch blocks no longer create duplicate exposed parameters
- DSOF-21098 - Fixed an issue where the queue of "Apply Feed Settings" and "Apply Genlock" commands caused issue in d3service
- DSOF-21092 - Fixed an issue where d3 stayed on a black screen after resetting EDIDs on a machine following Applying Feed Settings
- DSOF-21090 - Fixed an Invalid Aspect Ratio Console Message
- DSOF-21056 - Fixed an issue where tint did not apply to the VideoTrigger layer
- DSOF-21043 - Fixed an error calling 'pDXGIAdapter3->QueryVideoMemoryInfo' when running d3 on a VM
- DSOF-21042 - Http Response code for NotFound exception is wrong
- DSOF-21034 - Fixed an issue when managed workload is on, any new RenderStream layer would cause an Access Violation
- DSOF-21009 - Fixed a write error when attempting to save d3 with Colour Calibration widget pinned
- DSOF-21005 - Fixed an OmniCal access violation on d3 startup with pinned simulated camera
- DSOF-20999 - Fixed an issue where d3service would should down uncleanly
- DSOF-20996 - Fixed an issue where creating a new setlist or changing a setlist would display a convert error
- DSOF-20959 - Fixed an issue where changing padding while the Cluster Workload widget it's open throws an exception.
- DSOF-20904 - Fixed Undo+redo+undo triggering MulticastDelegate: duplicate add
- DSOF-20903 - Fixed an issue where resetting keyframe wasn't undoable
- DSOF-20902 - Fixed an issue where opening an Omnical camera widget or the capture widget displays a Mulicastdelegate error
- DSOF-20894 - Fixed puffersphere warp layer being impossible to access
- DSOF-20889- Fixed an issue where changing EXT refresh rate on blackmagic sync gen sometimes didn't change on D3 unless user do a cold boot
- DSOF-20887 - Fixed Colour Workflow not being in : sockpuppetvideomodule
- DSOF-20861 - Fixed DX11 test app getting stuck on "starting..."
- DSOF-20855 - Fixed an issue where Video Trigger Layer could not arrow into Notch Block
- DSOF-20835 - Fixed an issue whereAnimate Object Pre-set was affected by fade on section
- DSOF-20822 - RenderStream: Fixed "invalid map<K,T> key" error after changing "Scene" while running workload
- DSOF-20810 - Fixed an issue where opening the Audio Output Patch editor displays a MulticastDelegate notification
- DSOF-20808 - Fixed an issue where using audio delay doesn't stop audio when the timeline has stopped
- DSOF-20776 - Package: Fixed an issue where trials could modify a project on disk
- DSOF-20775 d3manager: Fixed an Access Violation in Display::activate when clearing ingestion history
- DSOF-20774 - Fixed the auto-save reporting the wrong d3 version
- DSOF-20758 - Fixed an issue where a video file with long a name as new placeholder clip causes input patch editor quick view to crop its width
- DSOF-20715 - CUDA binaries now built for all supported platforms
- DSOF-20714 - RenderStream UI: Fixed an issue where clicking on "Details" button didn't open monitor and shows error
- DSOF-20711 AudioSystem: Fixed a hang and CTD on project launch
- DSOF-20678 Package: Fixed an issue where there was no way to open read-only
- DSOF-20627 - Fixed a d3service offline error on launch despite d3service running
- DSOF-20625 - Fixed an error when opening widget for WebCommandKeyboard resource
- DSOF-20623 - Fixed web layer not working when chromium cache from previous version exists
- DSOF-20602 - AssetLauncher: Fixed custom extensions being broken
- DSOF-20527 - Fixed an issue where the feed output shifted 1px to the left when setting SMPTE timing
- DSOF-20525 - RecordingSystem: Fixed an issue where onAppStarted was called before project loads
- DSOF-20517 - Fixed an issue where users needed to do a cold boot to change between static and dynamic
- DSOF-20489 - Fixed an issue where uninitialised data passed to CUDA
- DSOF-20463 - Fixed an issue where turning a single version of a video asset off causes all versions to be turned off when EnableSmartGroups option switch is set
- DSOF-20440 - Fixed an issue where RenderStream streams intermittently did not work
- DSOF-20394 - Fixed an issue where translator/locale used/loaded too early
- DSOF-20358 - Fixed an issue where Layer Search sometimes filtered out valid matches
- DSOF-20347 - Fixed an issue where clicking on frame replay OFF/ON created output in the widget.
- DSOF-20346 - RenderStream: Added better error reporting for RenderStream::Core::getImageFrameParameter
- DSOF-20175 - Fixed an issue where DMX surfaces were incorrectly highlighted in red on the stage
- DSOF-20107 - Mesh Rendering - Fixed an issue where mesh mapping allowed Projectors as a target
- DSOF-20105 - Fixed an issue where Play Head Prefetch Loses prefetch key time: []
- DSOF-20079 - Fixed an issue where Virtual lineup layer does not work when a live camera is used
- DSOF-20076 - Fixed an Invalid map<K, T> key error when mapping a video layer to an MR set via backplate
- DSOF-20062 - Fixed an issue where feed mapping mirror flip buttons caused the whole rectangle to turn black
- DSOF-20052 - Fixed an issue where holding the output of a single projector while Dynamic Blend is enabled froze the GUI and made every other output turn black
- DSOF-20050 - Added NatNet Protocol Improvements for Optitrack
- DSOF-20029 - Fixed an issue where precomps did not work
- DSOF-19950 - Fixed an issue where scrubbing through the timeline while paused causes video layers to flicker black
- DSOF-19948 - Fixed an Access Violation when changing surface type
- DSOF-19778 - Fixed an issue where d3 could be launched without d3service running and no notification wwas provided
- DSOF-19643 - Fixed LTC disengage / re-engage on editor machines on network
- DSOF-19627 - Fixed an issue where list editors field sorting did not work for custom columns without a comparator
- DSOF-19616 - Fixed exposure and gamma controls on RenderStream asset
- DSOF-19583 - Widget::subscribeAction no longer used in populate
- DSOF-19344 - OmniCal: Fixed an issue where iIf a calibration had too many outliers, d3 would hang
- DSOF-19127- SimpleHelp.exe no longer uses port 80, blocking d3 from creating a HTTPContext
- DSOF-18814 - Help menu search field is now case insensitive
- DSOF-18185 - Fixed an issue where 16-bit EXR was loaded as 32 bits per channel
- DSOF-16571 - Fixed an issue adding new Scenes to RenderStream asset causes previously keyframed scenes to offset
- DSOF-15428 - Fixed an issue where RenderStream was unable to be used by packaged/cooked UE projects
- DSOF-12656 - Sockpuppet video module: Scale.x and scale.y parameters keep the same range as the regular video moduleDSOF-21675 - GPGPU now prevents the system from attempting to interop when presenting
- DSOF-21642 - Fixed an issue where the camera perspective map generated 2nd view of the frustum upside-down out from the back like a pin hole cam
- DSOF-21534 RenderStream: Fixed an issue where d3 could hang when stopping a workload
- DSOF-21533 - Fixed an issue where it was not possible to export omnical camera study
- DSOF-21520 - Fixed an issue where d3 could not export camera views
- DSOF-21461 - Fixed Export Projector Study not working
- DSOF-21365 - Fixed an Access violation in CEF causing crash to desktop when using Text layer or Web Layer
Advisory
Please note:
The launch of r22 has also coincided with OS 200, both of which are major updates to disguise. The OS includes significant updates for a host of drivers to support the new features in r22, so if you currently own a disguise vx 1, vx 2, vx 4 or vx 4+, please make sure to download the latest OS upgrades for these machines from the Hardware section of our software download page to ensure their compatibility with r22 and future releases.
It is important to note that a project built in r22 will need to have the hardware specified for playback with an OS above 200. Once the hardware is updated to support OS 200 and above, there is no option to roll back to a previous OS version. Please follow this link for the advisory.
Fixes
- DSOF-21825 Fixed an issue where using a 1D Lut produces an error
- DSOF-22305 - Fixed an issue where setting the colour space of a colour profile to Rec.709 does not allow you to revert to default
Fixes
- DSOF-22016 - Fixed an issue where FrameLatency did not change when switching from Full
Speed to Full Speed Low Latency on nvidia machines - DSOF-20995 - Fixed an issue where the CUE list editor didn't resize to the right correctly
Fixes
-
DSOF-21784 - Renderstream: Fixed an issue when there is a dmxlight with a fixture in a project, any RenderStream will hit "!!!!!fragment.streams.empty()"
-
DSOF-22180 - Fixed an issue where the failover test channel with an offset of 0 in DMX event
transport potentially causes understudy to hang on failover -
DSOF-21837 - Fixed an issue where vx4s fails to apply feeds at 60, reverts to 59.94
-
DSOF-21673 - Fixed an issue where the remote profiler failed to take profiles between different
machines
Fixes
- DSOF-22078 - Fixed an issue where Actors were not in sync with Understudy after failover command
- DSOF-21804 - instantaneousModeTime() now behaves like network time in all cases
- DSOF-20208 - Fixed an issue where the Understudy's timecode was out of sync with the Director's timecode
Fixes
- DSOF-21928 PSN data on failover is now handled correctly by the understudy
- DSOF-21730 Fixed access violation when rendering bitmap module in ACES mode while no texture is mapped
Fixes
- DSOF-21830 - Fixed Editor machine not being located to cue on re-engage to director - when using multi transport manager
- DSOF-21647 - Fixed Editor machine not being located to cue on re-engage to director
- DSOF-21646 - Fixed an issue where pressing Interact on a web layer causes an Access Violation
Fixes
-
DSOF-21554 - Fixed an Access Violation with FMOD API
Fixes
- DSOF-21580 - FMOD upgrade reinstatted
- DSOF-21532 - Fixed an issue where TextModule::m_vAlignment was uninitialised
- DSOF-21427 - Fixed an issue where machines that joined a session after it had started didn't listen to indirection changes
- DSOF-21426 - Fixed indirection state not persisting through project restarts
- DSOF-21341 - Corrected vx4+ Capture input labels
- DSOF-21318 - Fixed an issue where Animation and NotchLC videos with embedded audio not handling changes in clip fps
- DSOF-21309 - Improved the speed of the Prefetcher Report
Fixes
- DSOF-21313 - Fixed instability in Solo machines with Bluefish capture cards
Fixes
- DSOF-21507 - Fixed an Access Violation on startup when MR set exists in project
- DSOF-21499 - Fixed an issue where playing more than 8 layers of NotchLC or Quicktime Animation codec causes ctd
- DSOF-21478 - Fixed an issue where adding more than 8 Audio layers or assigning more than 8 channels in the audio output patch editor throws Exception Error notifications.
- DSOF-21369: Mesh Projection: Fixed an issue where eyepoints were split in the wrong way when a surface had bigger res than the Max Tile Size
- DSOF-21367 - Fixed a heap corruption causing crashes to desktop
- DSOF-21304 - RenderStream: Fixed an error starting workload via API when Actor controls rendering
- DSOF-21113- Fixed an issue where moving play-head to a specific frame didn't show layer content as expected
- DSOF-21112 - Fixed an issue where changing transport brightness or volume caused playback to go out of sync between machines
- DSOF-21107 - Fixed an issue where Notch blocks created duplicate exposed parameters
- DSOF-20856 - Fixed an issue where remote profiling does not copy the created JSON file
- DSOF-20763 - Fixed Access Violations when swapping source content in Placeholder Clip settings
New Features
DSOF-18115 Mesh projection mapping for Renderstream
The “Mesh” projection is a mapping which projects 3D content from an eye point onto the entire mesh of a screen. It is a perspective projection which automatically adjusts its rotation centre and field of view to match the extent of the mesh. It is particularly useful for large-canvas installations or out-of-frustum content in an XR setup.
The main advantages of mesh over perspective mappings are:
- The rotation and field of view automatically adjust to the mesh extent, making it easier to set up a projection encompassing a single screen
- When using Renderstream, the UV-space pixels are streamed, removing the additional bandwidth required to stream rendered pixels which get cut off when projected onto the mesh.
To set up a mesh projection:
- Create and set up a 3D content layer (e.g. a Notch or RenderStream layer).
- Create a new Mesh mapping and select this in the content layer.
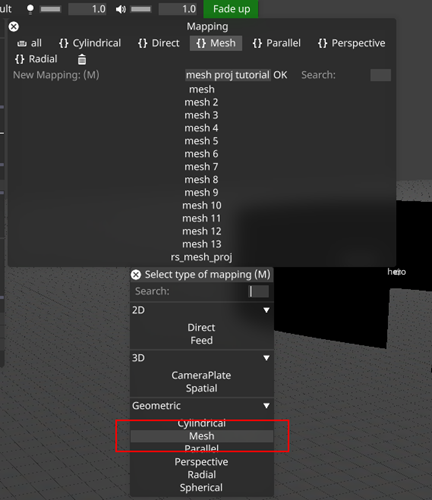
- Assign screens to the mapping. In this instance, we are adding a simple Rectangular LED screen with a resolution of 1920 x 1080.
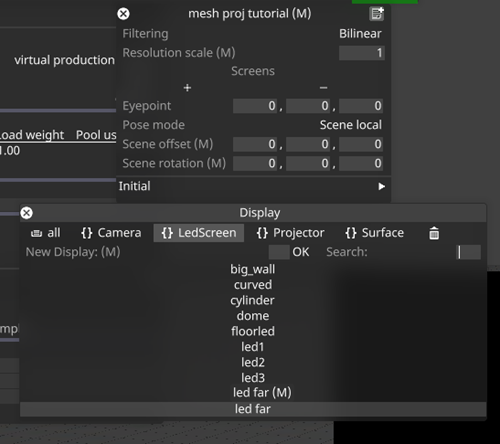
- Adjust the eyepoint if necessary. The view frustum from the eye point is shown when screens are present and gives a reference to position the eye point.

- Adjust the offset of the 3D scene if desired by adjusting the same fields used to do this for spatial mapping, i.e. “Initial origin”, “Initial rotation”, “Scene offset”, “Scene rotation”, and “Pose mode”.
- Set the resolution scale if desired. The content will render at the screen resolution, multiplied by this scale factor. In more complex setups, each viewpoint will provide a render at the resolution scale multiplied by the resolution of the region of the screen the viewpoint covers.
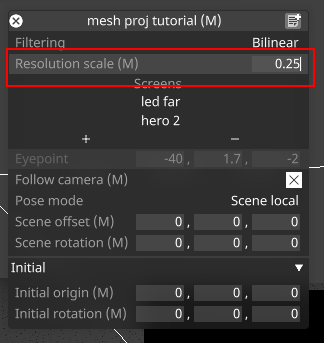
- The mapping setup is complete, and we can see our content. An example of a RenderStream layer rendering a Notch block to the screen via a Mesh mapping:
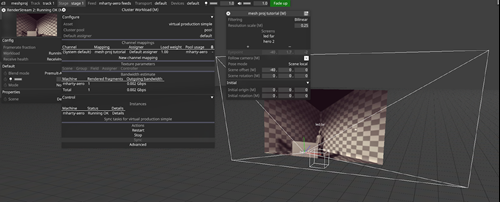
- A more complex wraparound screen (highlighted) with an eyepoint positioned within its bounds generating two viewpoints via RenderStream instancing forcing UV splits:
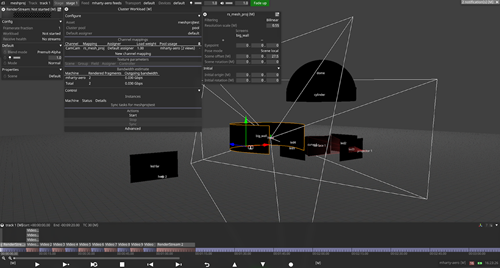
To set up a dynamic eye point which moves around the stage:
It is possible to set up a dynamic, moving eye point rather than keeping the position fixed. There are various ways this can be done, including:
- Parent the mapping to any object in the stage to make the eye point follow that object (offset by the values specified in the eye point field)
- Add a camera to the list of screens for the mapping. Content will not render to the camera. However a new field will appear in the Mesh mapping editor below the eyepoint field called “Follow camera”. If this field is ticked, the eye point will follow the camera position.

- Similarly, an MR set can be added to the list of screens in the mapping. The mapping will then render to the screens of the MR set, and the eye point will follow the active camera of the MR set if “Follow camera” is ticked.
To split the content over multiple machines:
- For Renderstream layers, the content can be split across multiple render nodes as usual by adding multiple machines to the pool. The content for each screen in the mesh mapping will be rendered on a separate machine if available. If more render nodes are available than screens, the content will be split into fragments automatically to spread the load across machines.
- For other layers, the rendering load can be split across machines using “active screen regions” to define separate areas of each screen to render per machine.
- If active screen regions are used in combination with a Renderstream layer, machines will only subscribe to streams which are required for the active regions on that machine. For example, if you are rendering content to a screen with 4 rx and 4 vx machines, you can add the rx machines to the Renderstream pool to split the screen into 4 fragments and set corresponding active regions on the vx machines to receive one stream per machine. Be aware that setting overlap on the Renderstream layer may result in more streams being received per machine.
Scene Origin - DSOF-21037
A SceneOrigin can be used to modify the zero-point of a 3D scene. It represents an offset between the virtual world of the render engine and the real world represented in Designer. SceneOrigins can be shared between mappings, and can be saved and recalled as a way of managing scouted locations for different shots.
To create a SceneOrigin:
- Set up some 3D content with a supported 3D mapping (e.g. Spatial or Mesh)
- Create a new resource in the ‘Scene Origin’ field of the mapping
To modify the origin:
- Change the offset/rotation values to modify the location of the scene origin in d3 space
- Change the Engine offset/rotation values to modify the location of the scene origin in render engine space
- Attach a tracking source to make the origin follow a tracked object in Designer space
- Change the pose mode to change the method used to place the camera into the 3D scene:
- Scene global: place the origin of the 3D scene within Designer’s stage, rotating around the scene origin
- Scene local: place the origin of the 3D scene within Designer’s stage, rotating around the chosen location
- Camera parent: place a virtual parent transform of the camera. Designer stage position has no meaning in this mode.

Tracking Marker Module - DSOF-20500
The tracking marker module generates a repeating pattern of markers on a coloured or transparent background. It is useful for virtual production workflows where some scenes require a green screen, either just within the camera frustum or on the whole of the LED screen. It can be used for both 2D and 3D mappings, and the markers will appear fixed to the screens in both cases.
To use the tracking marker module:
- Add a TrackingMarker layer to the timeline:
- Select the mapping:
- To cover an entire screen or fixed portion with markers, choose a Direct mapping
- To display markers within the camera frustum only, choose a CameraPlate or Spatial mapping
- Other 2D or 3D mappings can also be selected for different workflows
- Change the marker image, size and spacing if required.
- Add a background colour if required. Note that the default is transparent, so alpha will need to be increased to see any colours.
- Use the cropping settings to apply the markers to only a portion of the screen or frustum. The numbers define the distance cropped from each edge, with 0 being no cropping, 0.5 being the middle of the image and 1 being the opposite side.
![]()
Improvements
Improvements
- DSOF-20383 Persist feed view settings
When working in FeedView, we enable the option to change the layout of the feeds and machines. In previous releases, when Designer is restarted, the settings go back to their original state. The view settings in the feed are now stored after a restart.
- DSOF-20279 Ability to delete/rename files in file explorer while d3 is open
In the video file editor, we have added an “unlock” toggle option to enable users to remove or rename files on the disk, making it more straightforward to clean up old media files.
- DSOF-19845 Identification of Matrox or Deltacast capture card on d3manager dropdown
- DSOF-19830 Identification of Matrox or Deltacast capture card on vx OLED
- DSOF-19019 Support for TCD protocol for EzTrack lens data
We have enabled support for the TCD protocol from EzTrack to enable the delivery of intrinsic lens data to be used for green screen and AR workflows.
- DSOF-14079 API - implement Transport Control API
Transport controls are available via HTTP REST API. Details can be found in the OpenAPIdocumentation accessed from d3manager in Help -> Open API Documentation. Note that the d3 HTTP APIs will be unified, expanded and formally released in r22 as APIs version 2.
- DSOF-21134 Improve how generate_api_docs.py ignores temporary swagger files
- DSOF-21038 Remove the option to choose between relative and absolute time in strobe and radar modules
We have removed the option to choose between relative and absolute time in the strobe and radar modules, and have kept the option where the strobe timing was relative to the beginning of the layer.
- DSOF-20815 Enable Machine and Machine Feed editor widgets to be opened directly from Feed View
We have enabled both the Machine Editor widget and Machine Feeds editor widget to be opened in the Feed View. This can be completed by right-clicking on the machine name, in which case the Machine Editor widget will open, or right-clicking on the machine name feed, in which case the Machine Feeds editor widget will open.
- DSOF-20780 Add support for alignment in Text Layer
We have added both vertical and horizontal alignment in the Text Layer.
- DSOF-20764 Create UnusedMediaDomain
The UnusedMediaDomain has been created to cache files that exist on machines but are not mapped anywhere. It also contains a method to delete all but one copy of unused media across the d3 session.
- DSOF-20694 Notify the user that a ShotRecorder's Timecode source needs to be set within the TransportManager
- DSOF-20667 Add separators for Designer licences versus RenderStream licences in d3manager
We have added more visual separation between Designer and RenderStream licences reported in the d3 License section of d3 manager (accessed via d3 manager / help / d3 License)
- DSOF-20592 Add shortcut to be able to specify the name of a new layer when duplicating (CTRL + SHIFT + D)
We have added a shortcut to be able to specify the name of a new track layer and/or layer stack layers. When creating a layer, select it and press CTRL + SHIFT + D. There will be a rename box pop-up to allow renaming the layer from the default name.
- DSOF-20502 FeedWarp button to limit all points to be inside the image borders
We have created a “Restrict To Bounds” button when using FeedWarp to limit all or selected control points to within the image borders. This can be found when right-clicking on FeedRect, select “Edit Warp” and the “Restrict to Bounds” button can be found. Clicking this button will restrict all points to values between 0 and 1. If a user right-clicked on a control point, clicking the “Restrict to Bounds” button in this instance will restrict all selected points to values between 0 and 1.
- DSOF-20418 Show layer/track name in RenderStream workload UI
We have added the Layer (Track) name option in the RenderStream workload UI to help distinguish between layers with the same asset and pool.
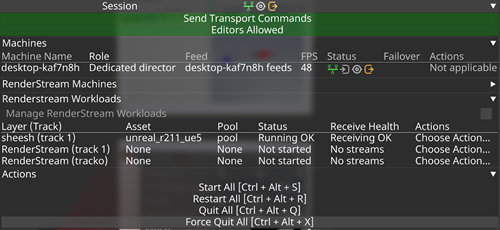
- DSOF-20376 Allow GUI heads to be genlocked if they are the only output head on the machine, and reflect this status in the GUI
We have enabled dedicated director machines to have their GUI heads genlocked from within Designer, even if the VFCs of this machine are not connected or emulated. The previous workflow was to make sure that the VFC cards are all emulated even when they are not connected.

- DSOF-19868 Move display management buttons from feed visualiser to machine editor in Feed View
We have moved the following buttons from the feed view to a new Display Management separator located in the machine editor:
- Apply Feeds
- Apply Genlock - greyed out when no genlock is present, when already applied, or on a Solo
- Remove Genlock - greyed out when no genlock is present, when already applied, or on a Solo
- Refresh - greyed out for AMD machines i.e. vx series
- Reset EDIDS
- Bit Depth Selection - only bit depths that are supported by the machine type are available
- DSOF-19481 Improve AR calibration tool by allowing multiple alignment objects
In previous releases, it was only possible to use one alignment object when doing an AR calibration. As the AR calibration tool also requires at least 6 reference points per alignment object, it meant that only complex surfaces could be used as alignment objects, rather than flat LED or projection surfaces.
In r21.4 we have made it so that users can use as many alignment objects as are needed in order to align the camera, and therefore be able to use two LED or projection surfaces as an example.
- DSOF-18251 Right-click options for moving layers to top/bottom
To aid compositing in a layer stack, we have added the option to moving layers to the top or bottom of the stack. This can be completed by right-clicking on a layer, layers, or group layer / move to top OR move to bottom right-click on a layer, layers or group layer.
- DSOF-17002 Create the ability to drag a section break on the timeline with mouse
We have enabled the ability to drag a section break on the timeline with a mouse. If a user hovers the mouse pointer over a section break, the mouse pointer changes to reflect that the section break can be moved.
Press ALT + drag the mouse to adjust the position of the section break only on the timeline, and CTRL + ALT + drag the mouse to adjust the position of the section break with the tag and note on the timeline.
- DSOF-17001 Creation of keyboard shortcuts for snapping layer(s) length to section break:
We have created the following keyboard shortcuts for snapping layer(s) to section break:
- Ctrl + < extend the Start of the selected layers to last section break
- Ctrl + > trim the Start of the selected layers to next section break
- Alt + < trim the End of the selected layers to last section break
- Alt + > extend the End of the selected layers to next section break
- Ctrl + Alt + </> move the selected layers to last/next section break (length remain the same)
- DSOF-14667 When applying feeds on an actor from a director, the status of the feed application process should be viewable from the director
In a multi-machine setup - in this instance 1 director and 1 actor - when applying feed settings on the actor, the director GUI will show "Applying Feed Settings..." in the machine status area in the feed view. The output icon will also change to blue for status “busy” with "Applying Feed Settings” in the tooltip. The status will return to its previous state and the text in the feed view will disappear once the remote machine has finished applying feeds.
- DSOF-10297 Allow colour depth selection per output and per machine
We have created an additional field in the machine editor in the display management separator called "Machine bit depth". Within this field, there's the option to use the project bit depth as set in the d3 project editor or in the global buttons in the feed view, or to override the project bit depth selection for that machine with 8 bit or 10 bit specifically. Machines not capable of supporting 10 bit will only present 8 bit as an option.
In the event that a machine is set to a type that supports 10 bit, has Project Bit Depth or 10 bit selected, and then the machine type is changed to one that does not support 10 bit, then the selection will show “invalid” until it is changed to a valid selection.
- DSOF-7493 "Insert Time" function now remembers the last typed value
In previous releases, inserting time to the timeline is something that has to be completed over multiple sections, layers and so on. We have enabled it so that the Insert Time field remembers the last value entered.
- DSOF-2134 Output Port selection and multi-edit of resolution
We have enabled the bulk editing of VFC output settings for multiple machines. The settings that can be changed in bulk are EDID Emulation, Split Mode (when supported), Timing Mode and Output Resolution.
- DSOF-20111 Send screen pose data dynamically over Renderstream for Mesh Projection
- DSOF-20026 Add resolution scale factor to Mesh Projection
- DSOF-19975 Include roll angle in perspective matrix for Mesh Projection
- DSOF-19751 Use RenderStream splitting logic to define UV splits for Mesh Projection
- DSOF-19674 Implement overlap for Mesh Projection
- DSOF-19673 Implement padding for Mesh Projection
- DSOF-19672 Implement SLC splitting for Mesh Projection
- DSOF-18671 Warp rendered video to mesh in RenderStream sender
- DSOF-18670 Calculate perspective data for Mesh Projection
- DSOF-18114 Implement basic UV splitting for Mesh Projection
- DSOF-18113 Synchronise surface mesh over RenderStream for Mesh Projection
- DSOF-18112 Create mapping for Mesh Projection
Fixes
- DSOF-21268 - Fixed a RenderStream Access Violation
- DSOF-21251 Invalid access to DmxDisplay System error on launch
- DSOF-21249 Errors when >1 camera added to spatial map for Renderstream layer
- DSOF-21248 renderstream includes discarded frames in the total 'sent' when calculating receive health.
- DSOF-21247 RenderStream workloads fail with "Send Frame error: 16"
- DSOF-21214 sanitise_xml.py script fails the build if test result file contains certain unicode characters
- DSOF-21195 Assigning a camera to the input of a video_in.mov freezes d3 and displays an Access Violation in the console
- DSOF-21181 Invalid access to RenderStreamSystem error on launch
- DSOF-21175 Assigning/removing media that has been removed by the Media Distribution widget displays an AV
- DSOF-21173 Trying to open a Manual Observation with an Alignment Object assigned displays a 'not defined' error and will not open the widget
- DSOF-21148 - Fixed an issue where d3service shutdown blocked for 8 minutes waiting for rsync.exe to be cleanly closed
- DSOF-21131 - Fixed an Access Violation when opening project if enableActiveRegions set
- DSOF-21061 - Fixed an issue when using the All VFC Devices widget, changing the Spilt would cause the VFC SDI QUAD 4k feed resolution to increase
- DSOF-21059 - Fixed an issue where all VFC Devices widget displayed an out bounds error when the Spilt mode is changed to Quad 4k
- DSOF-21046 - Fixed an Access Violation during “Apply Genlock”
- DSOF-21000 - Fixed LUT Files sync failing between machines when doing Colour Calibration
- DSOF-20970 - Fixed an issue where right-clicking a Port within the All VFC Devices widget opened VFCPortConfig widget
- DSOF-20969 - Fixed an issue where all VFC Devices widget did not remove Ports when changing Split Mode that removes them
- DSOF-20968 - Fixed an issue where the All VFC Devices widget named newly added Ports "VFCPortConfig"
- DSOF-20967 - Fixed All VFC Devices widget not automatically resizing when changing Split Mode
- DSOF-20965 - Fixed All VFC Devices widget showing Split Mode for all VFC types
- DSOF-20963 - Fixed All VFC Devices widget does respecting non-editable fields
- DSOF-20946 - Fixed an issue where update the mesh while RenderStream is running resulted in a wrong overlapping.
- DSOF-20931- Fixed an Access Violation when using Sockpuppet : Strobe Layer
- DSOF-20874 - Fixed Display Management separator in the machine editor not opening
- DSOF-20863 - Fixed an issue where local RenderStream streams may not appear in the Receive Health indicator
- DSOF-20829 - Improved the speed of API calls
- DSOF-20817 - Fixed a Notch Sockpuppet Access Violation on releasing mapping
- DSOF-20816 - Fixed an issue where the node status error would be displayed when starting an Actor while Machine Editor widget is open
- DSOF-20813 - Fixed d3 failing to run when no network connections are active
- DSOF-20809 “D3StateEditor" objects has no attribute "Contents” error when starting a blank project
- DSOF-20802 - Fixed an Access Violation when creating either TimecodeTransportMidiBeatClock or TimecodeTransportTapTempo within a ShotRecorder
- DSOF-20801 - Fixed an issue where driver info of Fixture Instance defaults to “None” every time the machine reboot.
- DSOF-20781 - Moved Text Layer into Generative
- DSOF-20762 - Fixed an issue where, on exit, d3 always logs "saving all resources: done." even if nothing was saved
- DSOF-20751 - Fixed a buffer lock access error when setting a camera to Lux mode
- DSOF-20748 - Fixed an issue where video inputs could not be mapped in quick editor
- DSOF-20746 - Fixed audio output patches in the audio layer only showing up to 12 patches
- DSOF-20745 - Fixed an issue where layers within groups did not correspond with moving to the top or bottom options
- DSOF-20737 - Fixed an error when clicking on “Details” to get log for RenderStream workload
- DSOF-20728 - Fixed an issue where refreshing an Editor showed a “NoneType” object having no attribute “canClose”
- DSOF-20721 - Fixed an Access Violation when scrolling versions number in “Manage Old Media”
- DSOF-20708 - Fixed an Access Violation when unpatching a Video layer from Sockpuppet after it has had its mapping set to None
- DSOF-20681- RenderStream: fixed incorrect options length for Workload Transport Formats
- DSOF-20671 - Fixed D3State menu taking up two rows
- DSOF-20661 - Fixed an Access Violation when creating a Fixture in a DMX Light
- DSOF-20660 - Fixed an issue where exceptions during project sync could lead to data loss
- DSOF-20646 - RenderStream: Fixed an issue where Creating Channel Instances before adding a map would cause an Access Violation
- DSOF-20642 - Web: Fixed a pathing error due to suffix when reloading URL for local file via Interact widget
- DSOF-20638 - Fixed playback framerate issues
- DSOF-20634 - Feed Warp: Fixed DeformStackItem accessing reserved but unallocated memory
- DSOF-20620 - Improved Spatial calibration when running two observations
- DSOF-20610 - Improved SmartGroup functionality
- DSOF-20593 - Fixed Clip information text not updating on versioning toggle
- DSOF-20587 - Fixed an Error when undoing added RenderStream layers
- DSOF-20570 - Fixed an issue where could freeze when applying feed settings
- DSOF-20554 - LumaKeyedVideoIn: Fixed a zero-sized texture being used error
- DSOF-20528 - TestPattern module is now Generative
- DSOF-20527 - Fixed feed output shifting one pixel to the left when set SMPTE timing
- DSOF-20516 - Removed a misleading log entry "Replaced existing hook for Subsystem"
- DSOF-20512 - Fixed SmartGroup Versioning changes affecting assets not in the SmartGroup
- DSOF-20510 - Fixed an issue where waveform scope has graphical artefacts when Scope is resized to be too small
- DSOF-20507 RenderStream: Fixed an Access Violation when attempting to start a workload with the Manual splitting strategy
- DSOF-20504 - Fixed Data Rate reporting
- DSOF-20484 - Objectview: added “found” filter to hide all missing assets
- DSOF-20474 =- Fixed an error after unmapping a placeholder clip
- DSOF-20469- Fixed nginx.exe not starting when running through Visual Studio
- DSOF-20455 - It's no longer possible to open multiple Receive Health widgets for a single Workload
- DSOF-20439 - Improved CameraVideoIn subsystem
- DSOF-20432 - Fixed being unable to use the same video on placeholder clip of different videoin
- DSOF-20427 - Workload editor, Advanced window improvements
- DSOF-20423 - Fixed NotchLC decoding having redundant allocations
- DSOF-20402 - Fixed Clip Duration not updating correctly when toggling between versions
- DSOF-20347 - Clicking on frame replay OFF/ON no longer creates output in the widget
- DSOF-20332 - Fixed the SockPuppet bank windows not resizing
- DSOF-20331 Fixed the SockPuppet Bank Editor not showing the bank lists
- DSOF-20312 - Debug info now available if Rivermax does not initialise
- DSOF-20307 - Fixed a rawTracking.Received error when viewing camera not in stage
- DSOF-20290 - vx4+ - Fixed an issue where applying feeds settings in d3 results in breaking the genlock
- DSOF-20288 - Fixed cycle being detected when undoing the deletion or addition of a manual observation
- DSOF-20287 - Reverse proxy improvements
- DSOF-20276 - TextModule: Fixed an issue where inputs could not be adjusted with a mouse scroll
- DSOF-20259 - RenderStream: Fixed an issue where received health showed the status of machines which are not subscribed to the stream, resulting in “no frames received yet” status
- DSOF-20255 - Fixed an Access Violation when clicking on a video-in preview after removing a live source input
- DSOF-20252 - Fixed an issue where duplicating a GreenScreen added the copy name twice to the “Greens screens” list
- DSOF-20250 - Fixed a pathing error thrown when selecting a local HTML file with whitespace in its path
- DSOF-20238 - Fixed 9-point feed warp selection being rendered incorrectly on outputs
- DSOF-20228 - Fixed audio devices list in Audio Patch not having vertical scroll
- DSOF-20187 - Fixed UserInfoProcessMessageHandler
- DSOF-20180 - Fixed an issue where setting fractional resolutions in surfaces breaks the mapping resolutions
- DSOF-20175 - Fixed an issue where DMX surfaces are incorrectly highlighted in red on the stage
- DSOF-20158 - Fixed directory changes within symbolic link / directory junction not being detected
- DSOF-20116 - Fixed spherical mapping wireframe being misaligned from actual content projection
- DSOF-20103 - Fixed an issue where tearing could occur when having no GUI enabled or emulated
- DSOF-20089 - Fixed an issue where only half of each stream rendered when split into two fragments
- DSOF-20079 - Fixed an issue where virtual lineup layer did not work when a live camera is used
- DSOF-20062 - Fixed an issue where the feed mapping mirror flip buttons caused whole rectangle to turn black
- DSOF-20055 - Fixed an issue where option switches set in Advanced Project Settings did not sync to other machines on initial launch
- DSOF-20052 - Fixed an issue when holding the output of a single projector while Dynamic Blend is enabled froze the GUI and made every other output turn black
- DSOF-20028 - Fixed content roll jumping between 90 degree offsets
- DSOF-19950 - Fixed an issue where scrubbing through the timeline while paused caused video layers to flicker black
- DSOF-19948 - Fixed an Access Violation when changing surface type
- DSOF-19910 - Fixed the perspective matrix being incorrect when eye point is above screen
- DSOF-19698 - Fixed an issue where if Colour Management was disabled or set to Gamma, LUTs had a popup window which is totally empty of controls
- DSOF-19668 - ACES: Improved CDL tooltip
- DSOF-19362 - Fixed an issue where the Pause All feature of graphs caused machine FPS to be reported as 0 (or frozen at last value)
- DSOF-19262 - Fixed a Topological Sort and Access Violation when attempting to undo alignment point in manual observations
- DSOF-19226 - Fixed an issue where DMX Lights were not immediately affected by TargetObject
- DSOF-19168 - fixed an issue where using CTRL+Z to undo a manual observation created an "!!!!! Operation: topological sort found cycle; please send console to support" error
- DSOF-19100 - Fixed an issue where delecting a Chroma Source within a Luma Keyed Input resulted in “Unable to create video capture stream”
- DSOF-18542 - Fixed an Access Violation when layer editor for Notch layer is open across multiple machines
- DSOF-18362 - Fixed an issue where rear projected surfaces did not dynamically blend properly
- DSOF-17496 - Fixed an issue where the d3 network widget would get hidden by d3 state editor
- DSOF-17197 - Changing content version doesn't work with Smart Groups
- DSOF-12262 - Fixed population masks being ignored by DSE
- DSOF-11582 - Fixed setDebugName not limiting strings passed to DirectX SetPrivateData
- DSOF-7081 - Fixed an issue where the fuplicate quantiser title text overlapped with metronome controls
- DSOF-4981 - Added mechanism for using consistent VFC output resolutions when mixing passthrough (DisplayPort/HDMI) and quad VFC cards (Quad SDI/Quad DVI)
Advisories
Q-SDI VFC Firmware advisory
Background:
SDI VFCs are unable to achieve a guaranteed genlock to an interlaced genlock signal. There is 50% chance there will be a phase offset of 1 field (180 degrees). This is due to the way in which the sync cards for both AMD and NVidia GPUs detect genlock signals.
Firmware version 1.9.0 adds a button to reverse the field, which enables you to revert to the alternate field if genlock is phase offset. To properly use this feature, you will need to have the relevant equipment to be able to measure the phase of the SDI output.
Firmware version 1.9.0 requires the use of r17 or greater.
Impact of Issue:
Any Q-SDI VFC shipped with firmware 1.8.0 or earlier and needing to lock to interlaced Genlock Signal
Affected Hardware:
All Q-SDI VFC shipped with previous firmware versions.
How to determine the current firmware version:
- Populate VFC compatible disguise machine with only the SDI cards you want to check.
- Run vfcfirmwareupdater.exe located at C:\Program Files\d3 Production Suite\build\msvc
- Check Firmware Version
How to update to v1.9.0:
- Populate any VFC compatible disguise machine with only the SDI cards required to be updated.
- Download the VFC firmware update from: https://d3packages.s3.amazonaws.com/vfc/quad_sdi_vfc_v1-9-0.rbf
- Run vfcfirmwareupdater.exe located at C:\Program Files\d3 Production Suite\build\msvc
- Click Choose file and load the downloaded VFC firmware update. The filename should be quad_sdi_vfc_v1-9-0.rbf
- Slots will be automatically selected. Ensure only SDI type cards have this firmware update applied to them.
- Click Update Firmware, the update will start and will take between 10-25 minutes.
- On completion, the Firmware version field will not update until all cards have finished updating and have been re-initialised and detected.
- Finally, reboot the system.
Fixes
- DSOF-21248 - Fixed an issue where RenderStream included discarded frames in the total 'sent' when calculating receive health
- DSOF-20609 - Fixed multiple Access Violations
Improvements
- DSOF-20421 - Refactored NotchLCSubSystem to have one decoder per resolution
Advisories
-
Q-SDI VFC Firmware advisory
Background:
SDI VFCs are unable to achieve a guaranteed genlock to an interlaced genlock signal. There is 50% chance there will be a phase offset of 1 field (180 degrees). This is due to the way in which the sync cards for both AMD and NVidia GPUs detect genlock signals.
Firmware version 1.9.0 adds a button to reverse the field, which enables you to revert to the alternate field if genlock is phase offset. To properly use this feature, you will need to have the relevant equipment to be able to measure the phase of the SDI output.
Firmware version 1.9.0 requires the use of r17 or greater.
Impact of Issue:
Any Q-SDI VFC shipped with firmware 1.8.0 or earlier and needing to lock to interlaced Genlock Signal
Affected Hardware:
All Q-SDI VFC shipped with previous firmware versions.
How to determine the current firmware version:
- Populate VFC compatible disguise machine with only the SDI cards you want to check.
- Run vfcfirmwareupdater.exe located at C:\Program Files\d3 Production Suite\build\msvc
- Check Firmware Version
How to update to v1.9.0:
- Populate any VFC compatible disguise machine with only the SDI cards required to be updated.
- Download the VFC firmware update from: https://d3packages.s3.amazonaws.com/vfc/quad_sdi_vfc_v1-9-0.rbf
- Run vfcfirmwareupdater.exe located at C:\Program Files\d3 Production Suite\build\msvc
- Click Choose file and load the downloaded VFC firmware update. The filename should be quad_sdi_vfc_v1-9-0.rbf
- Slots will be automatically selected. Ensure only SDI type cards have this firmware update applied to them.
- Click Update Firmware, the update will start and will take between 10-25 minutes.
- On completion, the Firmware version field will not update until all cards have finished updating and have been re-initialised and detected.
- Finally, reboot the system.
Fixes
- DSOF-21165 - Fixed set extension being mask misaligned with screen when using large distortion & centre shift
- DSOF-21095 - Fixed an issue where UVLookup module had checkerboard cross artefacts on the image
- DSOF-21057 - Fix gpu fan speed not running at 100% while d3 is running to improve performance and stability on a vx4
Advisories
-
Q-SDI VFC Firmware advisory
Background:
SDI VFCs are unable to achieve a guaranteed genlock to an interlaced genlock signal. There is 50% chance there will be a phase offset of 1 field (180 degrees). This is due to the way in which the sync cards for both AMD and NVidia GPUs detect genlock signals.
Firmware version 1.9.0 adds a button to reverse the field, which enables you to revert to the alternate field if genlock is phase offset. To properly use this feature, you will need to have the relevant equipment to be able to measure the phase of the SDI output.
Firmware version 1.9.0 requires the use of r17 or greater.
Impact of Issue:
Any Q-SDI VFC shipped with firmware 1.8.0 or earlier and needing to lock to interlaced Genlock Signal
Affected Hardware:
All Q-SDI VFC shipped with previous firmware versions.
How to determine the current firmware version:
- Populate VFC compatible disguise machine with only the SDI cards you want to check.
- Run vfcfirmwareupdater.exe located at C:\Program Files\d3 Production Suite\build\msvc
- Check Firmware Version
How to update to v1.9.0:
- Populate any VFC compatible disguise machine with only the SDI cards required to be updated.
- Download the VFC firmware update from: https://d3packages.s3.amazonaws.com/vfc/quad_sdi_vfc_v1-9-0.rbf
- Run vfcfirmwareupdater.exe located at C:\Program Files\d3 Production Suite\build\msvc
- Click Choose file and load the downloaded VFC firmware update. The filename should be quad_sdi_vfc_v1-9-0.rbf
- Slots will be automatically selected. Ensure only SDI type cards have this firmware update applied to them.
- Click Update Firmware, the update will start and will take between 10-25 minutes.
- On completion, the Firmware version field will not update until all cards have finished updating and have been re-initialised and detected.
- Finally, reboot the system.
Fixes
- DSOF-21020 - Fixed an issue where Virtual Cameras would offset real cameras on the stage
- DSOF-20896 - Fixed an issue where fonts would appear tiny in the gui
- DSOF-20803 - Fixed an issue where the Set Extension in an MRset would leave a fringe around the LED when lens intrinsics weren’t set
Advisories
-
Q-SDI VFC Firmware advisory
Background:
SDI VFCs are unable to achieve a guaranteed genlock to an interlaced genlock signal. There is 50% chance there will be a phase offset of 1 field (180 degrees). This is due to the way in which the sync cards for both AMD and NVidia GPUs detect genlock signals.
Firmware version 1.9.0 adds a button to reverse the field, which enables you to revert to the alternate field if genlock is phase offset. To properly use this feature, you will need to have the relevant equipment to be able to measure the phase of the SDI output.
Firmware version 1.9.0 requires the use of r17 or greater.
Impact of Issue:
Any Q-SDI VFC shipped with firmware 1.8.0 or earlier and needing to lock to interlaced Genlock Signal
Affected Hardware:
All Q-SDI VFC shipped with previous firmware versions.
How to determine the current firmware version:
- Populate VFC compatible disguise machine with only the SDI cards you want to check.
- Run vfcfirmwareupdater.exe located at C:\Program Files\d3 Production Suite\build\msvc
- Check Firmware Version
How to update to v1.9.0:
- Populate any VFC compatible disguise machine with only the SDI cards required to be updated.
- Download the VFC firmware update from: https://d3packages.s3.amazonaws.com/vfc/quad_sdi_vfc_v1-9-0.rbf
- Run vfcfirmwareupdater.exe located at C:\Program Files\d3 Production Suite\build\msvc
- Click Choose file and load the downloaded VFC firmware update. The filename should be quad_sdi_vfc_v1-9-0.rbf
- Slots will be automatically selected. Ensure only SDI type cards have this firmware update applied to them.
- Click Update Firmware, the update will start and will take between 10-25 minutes.
- On completion, the Firmware version field will not update until all cards have finished updating and have been re-initialised and detected.
- Finally, reboot the system.
Fixes
- DSOF-20997 – Fixed an issue where Multiple MIDI devices reported as "MIDI" making it impossible to select a specific one
- DSOF-20988 - Fixed an issue where virtual cameras did not inherit LUTs of calibrated cameras
Advisories
-
Q-SDI VFC Firmware advisory
Background:
SDI VFCs are unable to achieve a guaranteed genlock to an interlaced genlock signal. There is 50% chance there will be a phase offset of 1 field (180 degrees). This is due to the way in which the sync cards for both AMD and NVidia GPUs detect genlock signals.
Firmware version 1.9.0 adds a button to reverse the field, which enables you to revert to the alternate field if genlock is phase offset. To properly use this feature, you will need to have the relevant equipment to be able to measure the phase of the SDI output.
Firmware version 1.9.0 requires the use of r17 or greater.
Impact of Issue:
Any Q-SDI VFC shipped with firmware 1.8.0 or earlier and needing to lock to interlaced Genlock Signal
Affected Hardware:
All Q-SDI VFC shipped with previous firmware versions.
How to determine the current firmware version:
- Populate VFC compatible disguise machine with only the SDI cards you want to check.
- Run vfcfirmwareupdater.exe located at C:\Program Files\d3 Production Suite\build\msvc
- Check Firmware Version
How to update to v1.9.0:
- Populate any VFC compatible disguise machine with only the SDI cards required to be updated.
- Download the VFC firmware update from: https://d3packages.s3.amazonaws.com/vfc/quad_sdi_vfc_v1-9-0.rbf
- Run vfcfirmwareupdater.exe located at C:\Program Files\d3 Production Suite\build\msvc
- Click Choose file and load the downloaded VFC firmware update. The filename should be quad_sdi_vfc_v1-9-0.rbf
- Slots will be automatically selected. Ensure only SDI type cards have this firmware update applied to them.
- Click Update Firmware, the update will start and will take between 10-25 minutes.
- On completion, the Firmware version field will not update until all cards have finished updating and have been re-initialised and detected.
- Finally, reboot the system.
Features
- DSOF-17918 - vx4+ Support
Fixes
- DSOF-21017 - Fixed an issue where projects with a stage render layer could not launch
- DSOF-20982 - Fixed an issue where Within-Spec NotchLC file playback stuttered
- DSOF-20980 - Fixed the "rsync.exe failed to start" error on server shutdown
- DSOF-20952 - Fixed an issue where MSVCR100.dll was not found when d3service is started (nginx)
- DSOF-20911 - Fixed being unable to select MIDI device in MTC layer on server
- DSOF-20895 - Fixed an issue where ‘manage workloads’ caused new workloads to start continuously
- DSOF-20806 - Fixed node-js Conan package not being fully self-contained and needing an internet connection
- DSOF-20759 - Fixed an issue where a HAP mov file added as New Placeholder Clip did not function properly
- DSOF-20347 - Fixed an issue where clicking on frame replay OFF/ON created output in the widget
- DSOF-20258 - Fixed d3 crashing if the placeholder image and input are the same and the input is removed
Advisories
-
Q-SDI VFC Firmware advisory
Background:
SDI VFCs are unable to achieve a guaranteed genlock to an interlaced genlock signal. There is 50% chance there will be a phase offset of 1 field (180 degrees). This is due to the way in which the sync cards for both AMD and NVidia GPUs detect genlock signals.
Firmware version 1.9.0 adds a button to reverse the field, which enables you to revert to the alternate field if genlock is phase offset. To properly use this feature, you will need to have the relevant equipment to be able to measure the phase of the SDI output.
Firmware version 1.9.0 requires the use of r17 or greater.
Impact of Issue:
Any Q-SDI VFC shipped with firmware 1.8.0 or earlier and needing to lock to interlaced Genlock Signal
Affected Hardware:
All Q-SDI VFC shipped with previous firmware versions.
How to determine the current firmware version:
- Populate VFC compatible disguise machine with only the SDI cards you want to check.
- Run vfcfirmwareupdater.exe located at C:\Program Files\d3 Production Suite\build\msvc
- Check Firmware Version
How to update to v1.9.0:
- Populate any VFC compatible disguise machine with only the SDI cards required to be updated.
- Download the VFC firmware update from: https://d3packages.s3.amazonaws.com/vfc/quad_sdi_vfc_v1-9-0.rbf
- Run vfcfirmwareupdater.exe located at C:\Program Files\d3 Production Suite\build\msvc
- Click Choose file and load the downloaded VFC firmware update. The filename should be quad_sdi_vfc_v1-9-0.rbf
- Slots will be automatically selected. Ensure only SDI type cards have this firmware update applied to them.
- Click Update Firmware, the update will start and will take between 10-25 minutes.
- On completion, the Firmware version field will not update until all cards have finished updating and have been re-initialised and detected.
- Finally, reboot the system.
Fixes
- DSOF-20837 - Fixed feed setting UI display "House sync signal present" rounding 59.94hz to 60hz
- DSOF-20790 - Fixed an issue where a layer name was no longer cut when the layer was resized
- DSOF-20757 - Fixed "Invalid type specifier" while Applying Feed Settings
- DSOF-20720 - Fixed an issue where the UV Lookup Module was pixelating content
- DSOF-20705 - Fixed console spam when feed view is active
- DSOF-20677 - Fixed the text in the DMX monitor being out of alignment
- DSOF-20657 - Fixed an Access Violation when creating an Indirection
- DSOF-20438 - Fixed an issue with applying feed settings at 1080i59.94
- DSOF-20302 - Fixed an Access Violation when performing the unsupported operation of dragging a meta-field min/max from a video module into an open layer
Advisories
- DSOF - 20565 - Overscan on RenderStream content creates a clear visual difference from non-overscanned content
- DSOF-17848 - With "disableDmxPacketSendWait" on, lost sACN node on network still causes the project to slow to a halt.
- DSOF-17540 - Sequencing changes do not transfer to other machines in session when restoring a snapshot
- Workaround: Not know
- Affects version: r18.1.2 - DSOF-17193 - Multi User Edit in UE requires preferred sync adapter to be set to a network adapter which is available to all machines
- DSOF-17108 - Current NCAM data implementation used can exhibit unreliable packet timing
- DSOF-16935 - d3 cannot set SDI VFCs to Quad 4K 2SI 23.98, 24, 29.97 or 30Hz
- DSOF-16425 - Renderstream: When using MultiChannelMapping, only one spatial map w backplate is able to change position/rotation
- DSOF-15445 - Editor machines with a user account linked to an Microsoft Account can't join d3 sessions due to permissions errors
Q-SDI VFC Firmware advisory
Background:
SDI VFCs are unable to achieve a guaranteed genlock to an interlaced genlock signal. There is 50% chance there will be a phase offset of 1 field (180 degrees). This is due to the way in which the sync cards for both AMD and NVidia GPUs detect genlock signals.
Firmware version 1.9.0 adds a button to reverse the field, which enables you to revert to the alternate field if genlock is phase offset. To properly use this feature, you will need to have the relevant equipment to be able to measure the phase of the SDI output.
Firmware version 1.9.0 requires the use of r17 or greater.
Impact of Issue:
Any Q-SDI VFC shipped with firmware 1.8.0 or earlier and needing to lock to interlaced Genlock Signal
Affected Hardware:
All Q-SDI VFC shipped with previous firmware versions.
How to determine the current firmware version:
- Populate VFC compatible disguise machine with only the SDI cards you want to check.
- Run vfcfirmwareupdater.exe located at C:\Program Files\d3 Production Suite\build\msvc
- Check Firmware Version
How to update to v1.9.0:
- Populate any VFC compatible disguise machine with only the SDI cards required to be updated.
- Download the VFC firmware update from: https://d3packages.s3.amazonaws.com/vfc/quad_sdi_vfc_v1-9-0.rbf
- Run vfcfirmwareupdater.exe located at C:\Program Files\d3 Production Suite\build\msvc
- Click Choose file and load the downloaded VFC firmware update. The filename should be quad_sdi_vfc_v1-9-0.rbf
- Slots will be automatically selected. Ensure only SDI type cards have this firmware update applied to them.
- Click Update Firmware, the update will start and will take between 10-25 minutes.
- On completion, the Firmware version field will not update until all cards have finished updating and have been re-initialised and detected.
- Finally, reboot the system.
Improvements
- DSOF-20318 Warn when EDID timings don't match
- DSOF-20205 OscControl: rename OscCommand's address to "OSC address" that distinguishes it from the IP Address
- DSOF-20153 More informative "zero-sized texture being used" notification
- DSOF-20098 Improve performance of NotFoundMediaSystem
- DSOF-20083 Make default VFC to be HDMI rather than DVI
- DSOF-19946 Improve Project / Upgrade Load Time
- DSOF-19865 [ACES] CDL functionality outside ACES mode
- DSOF-19785 RenderStream Compressed: increase target bits/sec when using alpha plane
- DSOF-19645 Increase default resolution maximum of VFC cards from 5120x5120
- DSOF-19547 Left-click on layers in the layer stack to immediately open the layer editor
- DSOF-19546 Notes: seen/unseen states
- DSOF-19535 Simplify and fix SlugFont implementation
- DSOF-19318 Add support for alpha in 4:2:2 RenderStream uncompressed format
- DSOF-19065 RenderStream: Include asset schema JSON in diagnostics
- DSOF-18602 Improve process and gpu memory graphs to better represent the state of memory usage
- DSOF-18258 Camera switching control module
-
DSOF-18234 API control for shot recording
- DSOF-17374 Expanded LUT file support (including 1D LUTs)
- DSOF-17343 Camera bookmarks for the feed view
- DSOF-16686 Avoid pixelation when doing virtual camera moves through the reprojection plan
- DSOF-12111 Make isCefPaintDirtyRectangles behaviour default and remove option switch
- DSOF-9531 Listing of background tasks
- DSOF-8456 Network status widget should remember its position
- DSOF-8390 Notify the user that joining a session hosted by a different version of d3 is available, but not recommended or supported
- DSOF-4298 Inclusion of timestamp to notifications
- DSOF-4253 Ability to define image sequence frame rate automatically
- DSOF-3477 Selecting FPS for the system time transport control
Fixes
- DSOF-20666 - Fixed an issue where the virtual camera disappeared from the stage when tracking source is used
- DSOF-20658 - Rendering Regression: Fixed no startup text, and flickering visualiser
- DSOF-20656 - Fixed an issue where exceptions on startup could cause unclean shutdown and risk project corruption
- DSOF-20654 - Fixed transport controls on separate lines from HUD status at 3840 * 2160 with 250% dpi scaling
- DSOF-20621 - Fixed an issue where the recorder icon in d3 state bar had a massive border on addition
- DSOF-20619 - Fixed an issue where 'Show 3D Observations' only showed text labels
- DSOF-20617 - Fixed an issue where spatial calibration produced bad results
- DSOF-20616 - Fixed an issue where spatial calibration didn't run for all screens in MR set
- DSOF-20615 - Fixed an error when clicking 'Reset all Observations' in spatial calibration
- DSOF-20608 - Fixed an issue where text seemed vertically squashed with high dpi scale
- DSOF-20542 - Fixed an issue where Independent Editor could disengage transport on director
- DSOF-20541 - Fixed an issue where there were device conflicts and potential crashes with two device managers
- DSOF-20492 - Virtual camera can no longer be added as a parent camera
- DSOF-20478 - Fixed an issue where values within Patch Assignments widget offset at random
- DSOF-20447 - Fixed an Access Violation when opening DmxPersonality widget
- DSOF-20433 - Fixed an Access violation when removing unassigned streams
- DSOF-20388 - Fixed an error when adding fields of the camera in parameter collection
- DSOF-20380 - Fixed an issue where linking a Collection to a Source created an Arraybox error notification
- DSOF-20365 - Fixed an issue where setting the resolution of a surface referenced by a mesh mapping to zero would cause d3 to hang
- DSOF-20321 - Fixed the Missing Media widget being too narrow to read long filenames
- DSOF-20306 - Fixed an Access Violation when running Colour Calibration
- DSOF-20305 - Fixed an issue where mapping plane/wireframe was not drawn for most geometric mappings
- DSOF-20282 - RenderStream: Fixed an issue where the stream crashes after a while when there is a proxy stream in the assigner
- DSOF-20275 - Fixed an issue where d3 locks up when ingesting large quantities of media
- DSOF-20274 - - Fixed a Python error "Cannot convert from 'int' to 'Colour'" when creating QuickAlign point
- DSOF-20256 - Now ensure clean shutdown of s3 main thread using RAII
- DSOF-20251 - Fixed an issue where it was not possible to open the list editor for Projectors and Cameras
- DSOF-20248 - Fixed an exception when attempting to open the Patch Assignments widget
- DSOF-20182 - Fixed a crash when attempting to jump to the timecode
- DSOF-20154 - AnimateCameraPreset: The copy values button is no longer under the Virtual Camera separator
- DSOF-20148 - Fixed an issue where resizing a module from the very start of the track pushes the module to the right, past the end of the track
- DSOF-20147 - Fixed an issue when adding a new string into the Slate's input the Take number did not revert back to one
- DSOF-20136 - Proxy streams are now included in bandwidth estimates
- DSOF-20125 - 3D Perspective and parallel projections now use content viewpoint returned from Renderstream
- DSOF-20121 - Fixed an issue where mapping was no longer directed at surface 1 and displayed a "Bad Projection Used" error
- DSOF-20102 - Authorisation: reduced CPU spikes by moving time checks outside of CriticalSection
- DSOF-20077 - Fixed an issue where the console window did not scroll to the end of the log
- DSOF-20069 - VideoIn Fixed unresponsive UI after being mapped to a stage camera video in
- DSOF-20066 - Fixed an issue where multiple warp editors can be opened for the same feed rectangle
- DSOF-20065 - Fixed an issue where feed mapping buttons have lost their backgrounds
- DSOF-20063 - Fixed an issue where the feed mapping edit multiple table contained parameters that did not apply to feed mappings
- DSOF-20058 - Fixed a crash on startup when the director was set to the local machine
- DSOF-20053 - Fixed an issue where dynamic blend did not work when the projector is using MSAA
- DSOF-20030 - Fixed an issue where ObjectViews that were filtered via search did not display items in relevant order
- DSOF-20020 RenderStream: Fixed Receive Health widget not clearing each time a workload was started
- DSOF-20017 RenderStream: Fixed an issue where tests showed a symbol error about d3renderstreamsend.dll
- DSOF-20007 - Choose Action button is now correctly labelled for RenderStream workloads
- DSOF-19990 - Fixed an issue where Trash Icons overlapped text within devices
- DSOF-19976 - Fixed an issue where "Remove Genlock" did not update the indicator of genlock status on Nvidia Machines
- DSOF-19966 - Bulk edit for videoclips is now laid out better and contains appropriate fields
- DSOF-19957 - Fixed an Access Violation when editing VideoIn Input Transform after defocusing VideoIn
- DSOF-19842 - Fixed an issue where a project could hang at "Scanning Package" upon start
- DSOF-19835 - Improved Renderstream active latency rounding up
- DSOF-19829 - Fixed an issue where 'Power' in a CDL widget brought up the wrong widget of values
- DSOF-19807 Video: Fixed CDL being active when ACES is disabled
- DSOF-19804 - Fixed an issue where the video input patch editor's widget was minimized when stopping a preview
- DSOF-19787 - Fixed an issue where greyed out resource fields could be selected
- DSOF-19697 - Fixed an issue where StageRender layer only works with 3D mappings
- DSOF-19690 - Fixed Timeline Control section containing non-timeline related settings
- DSOF-19687 - Fixed RGB Colour module having Input Transform option in Gamma mode
- DSOF-19638 ACES: Fixed Input Transform field appearing for videoins regardless of Colour Management value
- DSOF-19554 - Fixed thumbnail resolution for certain types of resources
- DSOF-19488 Mesh: Fixed PosIndex comparison operators > and < being incorrect
- DSOF-19280 - Fixed a delay and main thread hang when switching video modes with capture cards
- DSOF-19174 - Fixed Expressions referencing fields of other fields passed by value return garbage
- DSOF-19146 - Fixed an issue when setting Venue to None or Changing Venue removes parent-child relationships from props within it
- DSOF-19025 - Fixed an issue where Video In Placeholder Clips could not be NotchLC files
- DSOF-18996 - Fixed an Access violation when taking shot with no timecode selected
- DSOF-18969 - Fixed an issue where the network widget will always be fully expanded when d3 is started
- DSOF-18669 - Fixed vertical alignment of text not being properly centred
- DSOF-18508 - Fixed Parameter collection UI not showing enum values as a string
- DSOF-18409 - Fixed an Access violation when shot recorder links to 'None' resource
- DSOF-18377 - Fixed multiple Access violations when adding arrowing new parameters into collection
- DSOF-18289 XR: Fixed an issue where it was not possible to remove alignment points when changing mesh of Alignment Object
- DSOF-18271 - Fixed an issue where importing .dpx files in d3 was giving the wrong colour shift
- DSOF-18241- Fixed n Access Violation if new content is deleted from the Feed view if old content is viewed in the Edit Warp widget
- DSOF-18225 - Fixed an issue where the Mapping field was not controllable via DMX if set to "None"
- DSOF-17605 - Fixed an issue with 10bit feed settings requiring a restart of d3
- DSOF-12071 - Fixed an issue with Video clip editor showing incorrect value for bits per channel for NotchLC clips
- DSOF-9815 - Fixed an issue where fade up/down/hold with an editor in independent mode affected the master
Advisories
- DSOF-17848 - With "disableDmxPacketSendWait" on, lost sACN node on network still causes the project to slow to a halt.
- DSOF-17540 - Sequencing changes do not transfer to other machines in session when restoring a snapshot
- DSOF-17193 - Multi User Edit in UE requires preferred sync adapter to be set to a network adapter which is available to all machines
- DSOF-17108 - Current NCAM data implementation used can exhibit unreliable packet timing
- DSOF-16935 - d3 cannot set SDI VFCs to Quad 4K 2SI 23.98, 24, 29.97 or 30Hz
- DSOF-16425 - Renderstream: When using MultiChannelMapping, only one spatial map w backplate is able to change position/rotation
- DSOF-15445 - Editor machines with a user account linked to an Microsoft Account can't join d3 sessions due to permissions errors
Q-SDI VFC Firmware advisory
Background:
SDI VFCs are unable to achieve a guaranteed genlock to an interlaced genlock signal. There is 50% chance there will be a phase offset of 1 field (180 degrees). This is due to the way in which the sync cards for both AMD and NVidia GPUs detect genlock signals.
Firmware version 1.9.0 adds a button to reverse the field, which enables you to revert to the alternate field if genlock is phase offset. To properly use this feature, you will need to have the relevant equipment to be able to measure the phase of the SDI output.
Firmware version 1.9.0 requires the use of r17 or greater.
Impact of Issue:
Any Q-SDI VFC shipped with firmware 1.8.0 or earlier and needing to lock to interlaced Genlock Signal
Affected Hardware:
All Q-SDI VFC shipped with previous firmware versions.
How to determine the current firmware version:
- Populate VFC compatible disguise machine with only the SDI cards you want to check.
- Run vfcfirmwareupdater.exe located at C:\Program Files\d3 Production Suite\build\msvc
- Check Firmware Version
How to update to v1.9.0:
- Populate any VFC compatible disguise machine with only the SDI cards required to be updated.
- Download the VFC firmware update from: https://d3packages.s3.amazonaws.com/vfc/quad_sdi_vfc_v1-9-0.rbf
- Run vfcfirmwareupdater.exe located at C:\Program Files\d3 Production Suite\build\msvc
- Click Choose file and load the downloaded VFC firmware update. The filename should be quad_sdi_vfc_v1-9-0.rbf
- Slots will be automatically selected. Ensure only SDI type cards have this firmware update applied to them.
- Click Update Firmware, the update will start and will take between 10-25 minutes.
- On completion, the Firmware version field will not update until all cards have finished updating and have been re-initialised and detected.
- Finally, reboot the system.
Fixes
- DSOF-20543 - NotchHost: Fixed fields in schema having no sequence set to true incorrectly
- DSOF-20203 - d3service now ensures rsync is running always once starting
Advisories
- DSOF-17848 - With "disableDmxPacketSendWait" on, lost sACN node on network still causes the project to slow to a halt.
- Workaround: Add a static entry into the local systems ARP table.
- Open an elevated command prompt.
- Find out MAC for IP, could use arp -a to see existing entries in local arp cache.
- Run netsh interface ipv4 show interfaces to get a list of interface names.
- Add a new entry to the ARP table netsh interface ipv4 add neighbors "<interface name>" <dest ip> <dest mac>
- E.g netsh interface ipv4 add neighbors "Wi-Fi" 10.105.1.253 01-02-03-04-05-06
- Remove entry like so; netsh interface ipv4 delete neighbours <dest IP>
- Important - Remove entries when done or re-image system!!! Otherwise, network issues may occur in the future sending the manually added IP addresses.
- Affects version: r18.1.7
- DSOF-17540 - Sequencing changes do not transfer to other machines in session when restoring a snapshot
- Workaround: Not know
- Affects version: r18.1.2DSOF-18446 - Very large NotchLC content can cause d3 to lose access to GPU device
- DSOF-17193 - Multi User Edit in UE requires preferred sync adapter to be set to a network adapter which is available to all machines
- Workaround: Often the preferred sync adapter is set to the 25Gb network to facilitate faster sync. Unless all machines in the network have a 25Gb adapter, the preferred sync adapter must be set to another network adapter when multi user edit sessions are running in UE. The adapter can be changed back for when running sync tasks.
- Affects version: r18.0
- DSOF-17108 - Current NCAM data implementation used can exhibit unreliable packet timing
- Workaround: Not known
- Affects version: r18.0
- DSOF-16935 - d3 cannot set SDI VFCs to Quad 4K 2SI 23.98, 24, 29.97 or 30Hz
- Workaround: Not known
- Affects version: r18.0.2
- DSOF-16425 - Renderstream: When using MultiChannelMapping, only one spatial map w backplate is able to change position/rotation
- Workaround: Not known
- Affects version: r18
- DSOF-15445 - Editor machines with a user account linked to a Microsoft Account can't join d3 sessions due to permissions errors
- Workaround: Create a second local user account
- Affects version: r17.4.8
Q-SDI VFC Firmware advisory
This document outlines:
- Background
- Impact of issues
- Affected Hardware
- How to determine the current firmware version
- How to update to v1.9.0
Background:
SDI VFCs are unable to achieve a guaranteed genlock to an interlaced genlock signal. There is 50% chance there will be a phase offset of 1 field (180 degrees). This is due to the way in which the sync cards for both AMD and NVidia GPUs detect genlock signals.
Firmware version 1.9.0 adds a button to reverse the field, which enables you to revert to the alternate field if genlock is phase offset. To properly use this feature, you will need to have the relevant equipment to be able to measure the phase of the SDI output.
Firmware version 1.9.0 requires the use of r17 or greater.
Impact of Issue:
Any Q-SDI VFC shipped with firmware 1.8.0 or earlier and needing to lock to interlaced Genlock Signal
Affected Hardware:
All Q-SDI VFC shipped with previous firmware versions.
How to determine the current firmware version:
- Populate VFC compatible disguise machine with only the SDI cards you want to check.
- Run vfcfirmwareupdater.exe located at C:\Program Files\d3 Production Suite\build\msvc
- Check Firmware Version
How to update to v1.9.0:
- Populate any VFC compatible disguise machine with only the SDI cards required to be updated.
- Download the VFC firmware update from: https://d3packages.s3.amazonaws.com/vfc/quad_sdi_vfc_v1-9-0.rbf
- Run vfcfirmwareupdater.exe located at C:\Program Files\d3 Production Suite\build\msvc
- Click Choose file and load the downloaded VFC firmware update. The filename should be quad_sdi_vfc_v1-9-0.rbf
- Slots will be automatically selected. Ensure only SDI type cards have this firmware update applied to them.
- Click Update Firmware, the update will start and will take between 10-25 minutes.
- On completion, the Firmware version field will not update until all cards have finished updating and have been re-initialised and detected.
- Finally, reboot the system.
Fixes
- DSOF-20533 - Fixed an issue where CDL didn't pass through alpha
- DSOF-20496 - Fixed an issue where two separate disguise sessions would stop each other's RS Workload
- DSOF-20419 - Fixed an issue where video layer projection was getting set to None and causing access violation
- DSOF-20391 - Renderstream: Fixed an issue where the web API was broken when RenderStream superlayers exist
- DSOF-20390 - Fixed an issue where importing mesh dependency from one project to another broke import
- DSOF-20371 - Fixed an issue where would d3 hangs when RenderStream assets change on the network in a project with lots of assets
- DSOF-20207 - Dynamic Blending Flashing on automation data update
- DSOF-19898 - Fixed an Access violation on notifying NotFoundMediaMessage onNotFoundChanged
- DSOF-20539 - Fixed an issue where d3 could not build when multiple VS versions or Build Tools are installed
Advisories
- DSOF-17848 - With "disableDmxPacketSendWait" on, lost sACN node on network still causes the project to slow to a halt.
- Workaround: Add a static entry into the local systems ARP table.
- Open an elevated command prompt.
- Find out MAC for IP, could use arp -a to see existing entries in local arp cache.
- Run netsh interface ipv4 show interfaces to get a list of interface names.
- Add a new entry to the ARP table netsh interface ipv4 add neighbors "<interface name>" <dest ip> <dest mac>
- E.g netsh interface ipv4 add neighbors "Wi-Fi" 10.105.1.253 01-02-03-04-05-06
- Remove entry like so; netsh interface ipv4 delete neighbours <dest IP>
- Important - Remove entries when done or re-image system!!! Otherwise, network issues may occur in the future sending the manually added IP addresses.
- Affects version: r18.1.7
- DSOF-17540 - Sequencing changes do not transfer to other machines in session when restoring a snapshot
- Workaround: Not know
- Affects version: r18.1.2DSOF-18446 - Very large NotchLC content can cause d3 to lose access to GPU device
- DSOF-17193 - Multi User Edit in UE requires preferred sync adapter to be set to a network adapter which is available to all machines
- Workaround: Often the preferred sync adapter is set to the 25Gb network to facilitate faster sync. Unless all machines in the network have a 25Gb adapter, the preferred sync adapter must be set to another network adapter when multi user edit sessions are running in UE. The adapter can be changed back for when running sync tasks.
- Affects version: r18.0
- DSOF-17108 - Current NCAM data implementation used can exhibit unreliable packet timing
- Workaround: Not known
- Affects version: r18.0
- DSOF-16935 - d3 cannot set SDI VFCs to Quad 4K 2SI 23.98, 24, 29.97 or 30Hz
- Workaround: Not known
- Affects version: r18.0.2
- DSOF-16425 - Renderstream: When using MultiChannelMapping, only one spatial map w backplate is able to change position/rotation
- Workaround: Not known
- Affects version: r18
- DSOF-15445 - Editor machines with a user account linked to a Microsoft Account can't join d3 sessions due to permissions errors
- Workaround: Create a second local user account
- Affects version: r17.4.8
Fixes
- DSOF-20489 - Fixed an issue where uninitialised data was passed to CUDA
- DSOF-20426 - Replaced ‘RMAX stream framerate may be misconfigured’ error message with ‘RSUC Uncompressed timestamp error, potential issue with multiple streams on network conflicting or duplicate RenderStream processes on render node’
- DSOF-20424 - Fixed an issue where NotchLC decoding did not pool CPU decompress buffers
- DSOF-20412 - RenderStream: Fixed an issue where uncompressed textures were locked/unlocked on the wrong queue
- DSOF-20372 - Fixed an issue where a track with many precomps caused performance issue
- DSOF-20357 - RenderStream: Fixed an issue where OpenGL textures stopped working due to texture id reuse
- DSOF-20344 - RenderStream: Fixed an issue where enabling upscaling flipped the image upside down
- DSOF-20341 - RenderStream: Fixed a crash on rs_shutdown when running OpenGL
- DSOF-20143 - Fixed an issue where the metric monitor always polled per frame, ignores selected poll rate
- DSOF-19941 - Fixed an issue where CPU time overloaded when sending uncompressed video streams
- DSOF-14603 - Fixed an Access Violation and VideoFile Read Error on TGA sequences
- DSOF-8094 - Fixed an issue where speed property has to be in Sockpuppet mode to be able to play layer back
Fixes
- DSOF-20410 - Fixed an issue where NotchLC playback flickers black under load
- DSOF-20349 - Fixed an issue where vx4s were failing to get 2G/2H input
- DSOF-20333 - Fixed an issue with GUI auto Vsync that caused GUI constantly adjust and stall
- DSOF-20319 - Fixed an issue where NotchLC throttling is performed too late for smaller resolution videos
- DSOF-20314 - Fixed an Access Violation when releasing media file through sockpuppet
- DSOF-20222 - Fixed an issue where Camera frustum movement was delayed by five seconds
Improvements
- DSOF-19920 - Improved save time on projects with lots of resources
- DSOF-19595 - Improved "DMX changed from status / status" console logging
Fixes
- DSOF-20219 - Fixed an issue where Quantiser closed and reopened when starting playback
- DSOF-20214 - Fixed an issue where it was possible for Rivermax to deadlock when receiving multiple streams
- DSOF-20213 - Fixed an issue where RenderStream received health reports 'subscribed' after the workload was stopped
- DSOF-20212 Fixed issue where non-director machines would attempt to start actors when deferActorStartup is set
- DSOF-20210 - Fixed an issue where starting RenderStream workloads could stall
- DSOF-20209 - Fixed an issue where RenderStream Streams were fully unsubscribed at workload exit
- DSOF-20128 - Fixed Custom UE engine builds in UE project not getting parsed correctly
- DSOF-20103 - Fixed an issue when having no GUI plugged in or emulated, and output would not Vsync, and cause tearing
- DSOF-20056 - Tracking: Fixed an issue where the camera frustum movement was out of sync between director & actor with AxisObjectTrackingSource
- DSOF-20032 RenderStream: Compressed - Fixed workloads with Alpha flickering on VX4s
- DSOF-19957 - Fixed an Access Violation when editing VideoIn Input Transform after defocusing VideoIn
- DSOF-19826 - Fixed an issue where having two separate disguise sessions would trigger each other's RS Workload Commands
- DSOF-19641 - Fixed an issue where an Actor was 2 frames delayed when the Director jumps on the timeline
Advisories
Fixed in r21.0.1
- DSOF-20056 - Tracking Camera frustrum out of sync between Director & Actor with AxisObjectTrackingSource
- Workaround: Not Known
- Affects version: r21.0
Advisories
- DSOF-18015 - Intermittent issue - Heap Corruption causing Crash To Desktop
- Workaround: Not known
- Affects version: r19.0.1
- DSOF-17848 - With "disableDmxPacketSendWait" on, lost sACN node on network still causes the project to slow to a halt.
- Workaround: Add a static entry into the local systems ARP table.
- Open an elevated commant prompt.
- Find out MAC for IP, could use arp -a to see existing entries in local arp cache.
- Run netsh interface ipv4 show interfaces to get a list of interface names.
- Add a new entry to the ARP table netsh interface ipv4 add neighbors "<interface name>" <dest ip> <dest mac>
- E.g netsh interface ipv4 add neighbors "Wi-Fi" 10.105.1.253 01-02-03-04-05-06
- Remove entry like so; netsh interface ipv4 delete neighbors <dest ip>
- Important - Remove entries when done or re-image system!!! Otherwise network issues may occur in the future sending the manually added IP addresses.
- Affects version: r18.1.7
- Workaround: Add a static entry into the local systems ARP table.
- DSOF-17540 - Sequencing changes do not transfer to other machines in session when restoring a snapshot
- Workaround: Not known
- Affects version: r18.1.2
- DSOF-17193 - Multi User Edit in UE requires preferred sync adapter to be set to a network adapter which is available to all machines
- Workaround: Often the preferred sync adapter is set to the 25Gb network to facilitate faster sync. Unless all machines in the network have a 25Gb adapter, the preferred sync adapter must be set to another network adapter when multi user edit sessions are running in UE. The adapter can be changed back for when running sync tasks.
- Affects version: r18.0
- DSOF-17108 - Current NCAM data implementation used can exhibit unreliable packet timing
- Workaround: Not known
- Affects version: r18.0
- DSOF-16935 - d3 cannot set SDI VFCs to Quad 4K 2SI 23.98, 24, 29.97 or 30Hz
- Workaround: Not known
- Affects version: r18.0.2
- DSOF-16425 - Renderstream: When using MultiChannelMapping, only one spatial map w backplate is able to change position/rotation
- Workaround: Not known
- Affects version: r18
- DSOF-16082 - Clustered Rendering: d3service requires restart for asset discovery to work on new Unity executables
- Workaround: restart d3 service
- Affects version: r18
- DSOF-15553 - Feed mapping editor shows white screens in a notch layer on first use. In subsequent use it will then show the first pixel
- Workaround: Not known
- Affects version: r17.4.9
- DSOF-15445 - Editor machines with a user account linked to an Microsoft Account can't join d3 sessions due to permissions errors
- Workaround: Create a second local user account
- Affects version: r17.4.8
New Features
- DSOF-18466 4K XR Camera Compositing Improvements
- DSOF-18044 Colour Insider Group Improvements
- DSOF-16029 Video Scopes - Vectorscope
- DSOF-19630 Per feed rectangle vectorscopes
- DSOF-16020 Video Scopes - Histogram
- DSOF-16018 Video Scopes - Waveform
- DSOF-19721 Add scope and histogram functions to video inputs and/or virtual cameras
- DSOF-18625 Add ink dropper to colour picker UI
- DSOF-18296 Including the server name in the diag folder
- DSOF-17301 Non-stylised custom colour primaries/transform function idt/odt for ACES
- DSOF-16793 Ability to control Spatial Maps with AnimateObjectPreset
- DSOF-13139 Promote non transparent ui to a project setting
- DSOF-11229 Ability to remove video output sync (genlock) within d3
- DSOF-10146 Add DXGI support for HDR displays
- DSOF-8200 Enable a backface culling option on stage view
- DSOF-5796 Option to force emulation of disconnected outputs (usually DP VFC cards)
- DSOF-5321 Keyboard shortcut for Layer Library
Improvements
- DSOF-19757 RenderStream: highlight 'Default Assigner' field if the selected ClusterAssigner is in an unsupported configuration
- DSOF-19564 RenderStream: Notch engine settings
- DSOF-19567 Improvements to RenderStream UI
- DSOF-19402 Actor Status Widget Renderstream section should only show machines that are currently in cluster pools in the project
- DSOF-19401 The Actor Status Widget RenderStream machine dropdown should start collapsed.
- DSOF-19384 Ability to clean up list of streams on RenderStream machines.
- DSOF-19366 Ability to start/stop a RenderStream layer by right-clicking Layer on the timeline
- DSOF-19349 Move forceUnrealRenderStreamWindow to option in UI
- DSOF-19338 RenderStream workload details should show startup messages
- DSOF-19048 RenderStream: cannot balance multiple low load channels onto a single render
- DSOF-18761 Per-engine settings in RenderStream
- DSOF-18692 RenderStream: process more network events per loop iteration
- DSOF-18557 RenderStream: append newline to all rs_logToD3 calls
- DSOF-18494 List editor for RenderStreamMachines
- DSOF-17970 RenderStream: notify the user if the Controller machine is not online
- DSOF-17565 RenderStream: allow the same machine to be added multiple times as an Understudy
- DSOF-17564 RenderStream: ensure 'Engine animation sync' option is disabled / hidden when a non-Unreal asset is selected
- DSOF-17181 RenderStream: better indicator that a Source Machine must be set when attempting to Sync
- DSOF-16931 RenderStream: Add colour channel toggles to stream preview
- DSOF-19538 Improve & update information available in RemoteStream editor
- DSOF-19385 No way to see if a stream is regarded as online in RemoteStream editors
- DSOF-18748 Notify user if trying to use a renderstream workload across render nodes running different d3 builds
- DSOF-19248 Present all and only valid transport formats
- DSOF-17230 Add "Local loopback" auto populated network interface to the Preferred Adaptor list in RenderStream Cluster Assigners
- DSOF-17083 Add Swagger APIs for RenderStream workloads
- DSOF-18356 d3service should refresh adapters for preferred renderstream adapter selection if they change on the machine
- DSOF-18285 Consolidate RenderStream frame info in one place
- DSOF-15669 Clustered rendering: only sync required asset files
- DSOF-15102 Show alpha checkerboard in RemoteStream editor window
- DSOF-19094 Add Gen5 IDT for Blackmagic colour
- DSOF-19051 RGBColour layer should allow IDT
- DSOF-19340 Screenshot/export image to EXR
- DSOF-1985 unable to output lossless feed stills
- DSOF-17902 CDL Import / Export
- DSOF-19098 CDL Transforms
- DSOF-17901 Linear Exposure and Gamma Controls available on a layer in ACES mode
- DSOF-17625 Ability to apply an input device transform (IDT) directly to VideoIn
- DSOF-17433 Pre/Post ACES transforms should only be attached to LUTs
- DSOF-6656 Buffer DMX screens texture downloads to remove CPU stall
- DSOF-19859 Prevent intermittent crashes when using very large (16K+) NotchLC content
- DSOF-19836 Make CodeMeter series 2 dongles work with Runtime v7.40
- DSOF-19823 Catch2 tests: log failure to console to assist troubleshooting of test issues
- DSOF-19760 Add tooltips to the feed rectangle buttons
- DSOF-19712 Allow UDP Indirection Controller to switch if key is contained with the UDP string or partially-matching strings
- DSOF-19702 When enabling sequencing the keywidget should automatically appear
- DSOF-19599 Update help text of esc enter to make it clear that it saves on exit
- DSOF-19552 GUI: only close active widget when pressing esc
- DSOF-19529 NotchLC: cache compiled shader
- DSOF-19495 upgrade to latest CodeMeter SDK/Runtime v7.40 or later
- DSOF-19469 Allow setting of delay and trigger mode for VideoTrigger module
- DSOF-19453 Autosave indicator
- DSOF-19413 Show last opened project in d3manager
- DSOF-19359 Improve 'Unreal DDC path' and 'Unreal log level' tooltips
- DSOF-19309 Move engine settings from assigner to asset
- DSOF-19302 Expressions: support module properties
- DSOF-19287 Disable CORS for d3 APIs
- DSOF-19232 Default typed in option switches to true
- DSOF-19222 Shortcut to quit all machines in session
- DSOF-19144 Add smoothstep interpolation to gradients
- DSOF-19037 Improved EDID emulation support for HDMI devices
- DSOF-18915 Option to 'lock' feed rectangles so that they cannot be edited, in the same way that feed scenes and other objects can be locked
- DSOF-18911 Enable Spatial Calibration to be used as a Frame of Reference
- DSOF-18794 Populate -ConcertDisplayName with unique node names when starting a workload & joining a MUE session from d3
- DSOF-18675 Observation debugger now renders wireframe of alignment object
- DSOF-18663 More descriptive tooltip for spatial calibration scope
- DSOF-18580 Set DDC configuration for unreal engine on rx’s via d3
- DSOF-18573 Move shader cache to project folder to avoid stalls during playback on freshly reimages machines
- DSOF-18532 Improve network status widget indicators to give a broader indication of machine status
- DSOF-18495 Differentiate duplicate machines in cluster pool
- DSOF-18486 Add option to run "hdmifix" from feed view
- DSOF-18451 Add a shortcut to the API documentation in d3 Manager
- DSOF-14082 API - /docs/v1/Swagger.json should be a combined file with all APIs
- DSOF-18441 Warn in feed view when output bit depth does not match
- DSOF-18434 Add context menu option to windows explorer to set d3 project as the startup project
- DSOF-18426 Warn user when actor is in application mode
- DSOF-18295 Add Separate rotation delay to the camera in case your tracking source sends rotation and translation separately.
- DSOF-18274 Implement support for BlackMagic SDI routers
- DSOF-18206 User should be able to view stream performance across all machines instead of just the local one
- DSOF-18123 DCS LDT Telemetry protocol for streaming lens data integration
- DSOF-18092 Ability to cut and paste a layer
- DSOF-1709 Copying and pasting of (multiple) layers
- DSOF-17507 d3service to use single Comms instance
- DSOF-16657 User friendly notification when sync source isn't available
- DSOF-15572 Display Observations error in the Observations list editor
- DSOF-14290 HttpControlModule: basic HTTP control
- DSOF-12038 Dismiss previous "screenshot saved" on-screen text when taking a screenshot in d3
- DSOF-11277 Confirm with prompt when exiting on a director with actors/understudy still active in session.
- DSOF-10969 Expose chroma sub-sampling information to users in the feed view
- DSOF-10417 Shortcut to rename selected layer
- DSOF-9984 Add tooltip for projector study
- DSOF-6869 Improve Console logging for shows being controlled by Artnet
- DSOF-4109 Search Function in keyboard shortcut widget (F1)
- DSOF-4094 Warp points to appear on outputs
- DSOF-19224 Link "sticky notes" to any object or widget
- DSOF-19332 Ability to save notes to output folder as a txt file
- DSOF-1598 Asset library: have a 'Root' tab which shows only the assets placed in the root.
Fixes
- DSOF-20013 - Fixed OmniCal simulated plans
- DSOF-20009 - Fixed an issue where GUI text was rendering incorrectly in some widgets
- DSOF-20003 - Fixed the Receive Health window being unreadable
- DSOF-19989 - Fixed RenderStream channel mapping order not being user controllable
- DSOF-19985 - Fixed rawTracking.tRecieved being displayed is an Alignment Object is not selected before Manual Observation is taken
- DSOF-19971 - Fixed an Access Violation in InputMapManager
- DSOF-19969 - Fixed an issue where fully zooming out timeline hid layers and removed timeline zoom buttons
- DSOF-19967 - RenderStream: Fixed an issue where layers using PreComps as texture input did not show orange arrow
- DSOF-19964 - Fixed an issue where manage workloads caused new workloads to start continuously
- DSOF-19960 - Fixed an issue where machines reports different active and output resolutions
- DSOF-19954 - ACES: Fixed an issue where LUT Pre/Post Transforms are not copied to selected LUT objects on upgrade
- DSOF-19947 - Fixed an issue where GUI Observation List did not add observations after a number of 12
- DSOF-19944 - Fixed an Access Violation when opening the DeviceStatus widget
- DSOF-19940 - Fixed an issue where feed mapping still used the lock icon to link source
- DSOF-19939 - RenderStream: Fixed an issue where a layer mapped to PreComp failed to render unless a dummy screen was added to PreComp mapping
- DSOF-19934 - Fixed ESC no longer closing feed mapping editor
- DSOF-19933 - Fixed an issue where a user was unable to edit coordinate and resolution values of feed rectangles
- DSOF-19916 - RenderStream: fixed an error on dedicated director when screens are not visible
- DSOF-19915 - Improved text layout in debug window
- DSOF-19914 - Fixed an issue when looking at smaller full res content on half res screen
- DSOF-19900 - Fixed OmniCal report widget being cut short
- DSOF-19896 - Fixed an issue with a large amount of RenderStream projects dominating the screen
- DSOF-19895 - Fixed an issue where Renderstream active latency was less than variable latency value
- DSOF-19885 - Fixed an issue where selected feed rectangles were missing text readout of coordinates and resolution
- DSOF-19880 - Fixed an issue where newly detected RenderStream machines were always displayed in the Renderstream Machines drop-down
- DSOF-19876 - Fixed an issue where the tracker delay could not be calibrated - VLL out of sync
- DSOF-19871 - RenderStream: Fixed 'NoneType' error when Workload widget open + layer breaking when performing remote install on render node -
- DSOF-19862 - Fixed an issue with render nodes crashing when reconfiguring
- DSOF-19852 - Fixed Tracker Delay calibration tool not working for lens calibration
- DSOF-19849 - Fixed an exception being thrown when setting the Preferred Network Adapter to Automatic in an image parameter assigner
- DSOF-19838 - Fixed an issue where you could not right click on RenderStream machines in the bandwidth estimate
- DSOF-19829 - Fixed an issue where 'Power' in a CDL widget brought up the wrong widget of values
- DSOF-19825 - Improved RenderStream camera switching
- DSOF-19818 - Fixed an issue where you were unable to right-click on group layers and have a popup for controls
- DSOF-19813 - Fixed an issue where open layer connected fields are not sequenced
- DSOF-19812 - Fixed an issue where RenderStream assignments confusingly report "0.0.0.0 <manual>" for automatic selection of preferred network adapter
- DSOF-19811 - Fixed an issue where adding the first screen to a mapping in the RenderStream layer did not immediately set the mapping resolution to the screen resolution
- DSOF-19810 - Fixed an issue where you could not create an uncompressed stream without selecting a preferred network adapter
- DSOF-19807 - Video: Fixed CDL being active when ACES is disabled
- DSOF-19803 - Fixed an issue where RenderStream channel mapping tables didn't deal with lots of items well
- DSOF-19795 - Renderstream: Fixed an issue when upgrading existing RenderStream layer to new channel mapping workflow created many extra channel mappings
- DSOF-19794 - Fixed Receive Health reporting Good when receive rate is significantly less than request rate
- DSOF-19792 - Fixed an issue where overscan smoothing/interpolation errors caused flickering
- DSOF-19790 - Fixed an issue where the scroll bar covers up the delete icon in the channel mapping list in the cluster workload widget
- DSOF-19784 - RenderStream: Fixed an issue with non-progressive, non-BGRA transports getting stuck on first frame
- DSOF-19783 - Fixed 'bad allocation' error when launching d3
- DSOF-19782 RenderStream: Fixed "Unhandled transport type" when using NDI (with enableRenderStreamNDI option switch)
- DSOF-19781 RenderStream:Implemented a fix for incorrect bandwidth estimates for multiple instances of the same machine
- DSOF-19779 - ACES: Fixed ‘Input Transform’ field appearing for certain Texture resources regardless of Colour Management
- DSOF-19776 - Fixed the default audio buffer being too small
- DSOF-19769 - Fixed AMDADLDisplay::colorFormat throwing ADL_ERR on headless display emulator
- DSOF-19762 - Fixed the ability to spread streams across multiple NICs on VX machines
- DSOF-19756 - Fixed an issue where RenderStream compressed wouldn't send if no adaptors are connected
- DSOF-19755 - Fixed RenderStream bandwidth estimate not updating when changing mapping or assignment settings
- DSOF-19754 - Fixed an erroneous Prompt of bit depth change when no change is occurring
- DSOF-19749 - Fixed an Access Violation when adding ANY layers in the timeline
- DSOF-19747 - Fixed GPGPU: first GpGpuResourceID always being invalid
- DSOF-19746 RenderStream: Fixed asset field not highlighting if there is a single render node and it does not have the asset
- DSOF-19744 RenderStream: Improved notification for missing render engine
- DSOF-19743 RenderStream: Fixed various RenderStreamModuleConfig errors when setting a Content Source Machine
- DSOF-19742 - RenderStream: Fixed asset sync information being missing
- DSOF-19734 - Fixed an access violation in response to RenderStream list workloads API
- DSOF-19729 - Fixed an issue where screens used in an MRset backplate Stage Render layer have an incorrect proxy level set.
- DSOF-19728 - Fixed the Cluster Workload UI not refreshing when texture parameters are added / removed
- DSOF-19727 - RenderStream - Fixed a major hang when starting up with texture parameters mapped
- DSOF-19726 - RenderStream: Fixed multiple Access Violations when starting workload if 'Channel Instances' separator is open
- DSOF-19725 - RenderStream: Fixed an Access Violation when adding new channel mapping before assigning Default ClusterAssigner
- DSOF-19716 - Fixed an issue where camera switching was not clean when using minimal latency mode with fractional frame rates
- DSOF-19708 - Fixed an issue where Camera Frustum movement only worked in Director but not in Actors when using an axis tracking source
- DSOF-19707 - Fixed an issue where incorrect names were suggested when duplicating various resources
- DSOF-19696 - Fixed an issue with RenderStream Frame request when multiple streams are served from one instance
- DSOF-19691 - Improved Feed Outputs icon
- DSOF-19688 - Fixed LUT layer missing capitalisation
- DSOF-19683 - Fixed inconsistent naming for hidden / invisible option for projectors
- DSOF-19680 - Fixed an issue with list editors field sorting not working
- DSOF-19667 - ACES: Fixed the 'Colour' separator appearing for Video layers / modules regardless of Colour Management option
- DSOF-19666 - Fixed an Access Violation when pressing Esc after deleting a layer / module
- DSOF-19659 - HoldOutputSystem: Fixed newStatusAction not being triggered on controller
- DSOF-19655 - Fixed an issue where pinning camera switching debugger didn't persist through restarts
- DSOF-19654 - Fixed Textbox / Thumbnail text not fading when hitting ESC to close widget
- DSOF-19642 - Fixed an issue where the main thread hung due to early render access < NotchLCSubsystem::doUpdate
- DSOF-19636 - Fixed an Access Violation when closing Video Input Patch Editor while previewing input
- DSOF-19635 - Fixed an issue when loading a new media resource resulted in invalid access error
- DSOF-19619 - Fixed an issue where excluded mappings were still excluded when option switch is disabled
- DSOF-19589 - Fixed an issue where the Editor's titlebutton/bar didn't always update
- DSOF-19584 - Fixed Feed Rectangle widget being missing to adjust the resolution size
- DSOF-19579 - Fixed an Access Violation when selecting prop with no mesh
- DSOF-19578 - Fixed an issue where workload status widget breaks GUI after closing RenderStream layer editor
- DSOF-19577 - Root folder box no longer shown if there are no other folder boxes
- DSOF-19576 - Pressing Escape now finds a window to close, if there is nothing focused (except fixed windows)
- DSOF-19575 - When selecting objects in the stage or venue editor lists, other currently selected objects are deselected
- DSOF-19574 - Fixed an issue where a selected layer couldn’t be deleted with delete key
- DSOF-19571 - RS: Fixed Notch blocks with uppercase letters not syncing between machines
- DSOF-19570 - Fixed an issue where content appears behind camera when rendering to backplate.
- DSOF-19559 - Fixed an issue with d3service access violation and invalid Renderstream settings when parsing incomplete uproject file
- DSOF-19558 - Fixed an issue where Layer editor did not receive focus when opened
- DSOF-19553 - Improved performance when zooming in XR
- DSOF-19551 - Added Engine Sync tooltip
- DSOF-19544 - Fixed an issue where the wrong widget receives click when clicking d3 window to regain focus
- DSOF-19543 - Fixed RenderStream notifications being displayed in blank projects - unexpected workload
- DSOF-19540 - Fixed an issue where the screen in StageRender layer blurry on first frame on camera switch
- DSOF-19537 - Sticky Notes icon will no longer overlap the layers widget's name
- DSOF-19534 - Fixed d3 hanging when opening console in gui if a console file is large
- DSOF-19531 - Fixed Multiple errors when changing Colour Management option with RenderStream widgets open
- DSOF-19528 - Fixed YUV4:2:2 causing artifacting in RenderStream
- DSOF-19524 - Added notifications that active latency is higher than can be displayed
- DSOF-19518 - Fixed an issue where RenderStream camera switching wasn’t clean at framerate fractions other than 1
- DSOF-19502 - Fixed an issue whereRenderStream machines which have their d3service process terminated never go offline
- DSOF-19498 - Fixed an issue where the multi user session host field's tool tip prompted to enter an IP, rather than the device name
- DSOF-19497 - Renamed P3DCI spaces to P3D65 where appropriate
- DSOF-19491 - RenderStream: Fixed a 'NoneType' error when attempting to open Actions menu for unconfigured Workload in Session widget
- DSOF-19485 - RenderStream: Fixed 'unprocessed frames' error spam after failing over when Actor controls rendering
- DSOF-19483 - Fixed VFC Slot UI overlapping in Feed view
- DSOF-19479 - RenderSream Uncompressed - fixed bandwidth estimates being wrong (much too low) for Drop-Frame framerates.
- DSOF-19478 - Fixed uncompressed remote texture parameters being flipped
- DSOF-19475 - Fixed an issue where VideoInTexture: was longer visible to users
- DSOF-19470 - Fixed an access violation when setting DMX lights XML file to None
- DSOF-19468 - Fixed ACES colour inside StageRender appearing different to direct mapping
- DSOF-19465 - Expressions: fixed an error messages are overwritten with "Invalid ReflectionValue"
- DSOF-19463 - Fixed an issue where Colour Picker fights with Keying property to result in continuous flash
- DSOF-19461 - Fixed an issue where Tooltips are always present when "Only When f1 is Pressed" is selected and help widget has been open and closed once
- DSOF-19459 - Fixed an issue where uUnticking all Histogram channels creates exceptions
- DSOF-19458 - Fixed an issue where Warp Deformation Layers "green/brown" activation rectangles are incorrectly displayed
- DSOF-19447 - Fixed an issue where feed rectangle selections don't show individual resolutions/positions but boundary ones instead
- DSOF-19439 RenderStream: Fixed an error when attempting to start a UE workload with an Understudy
- DSOF-19438 RenderStream: Fixed 'frame response error' when failing over
- DSOF-19437 - RenderStream: Fixed an Access Violation when starting workload
- DSOF-19435 - Fixed multiple Access Violations and NoneType error when undoing duplicated layer mapped to PreComp
- DSOF-19426 - Fixed "invalid stoull argument" when mis-typing dmx expression so that there is a letter instead of a number for the universe or channel
- DSOF-19424 - Fixed failing over to a understudy using RS, displaying a ‘!!!!! input.size() < output.size()’ error
- DSOF-19422 - Fixed an issue where an error thrown and 0KB file created when attempting to export EXR screenshot not in 10-bit mode
- DSOF-19420 - Fixed an issue where the Colour Picker dropper makes colour selection when Esc is pressed
- DSOF-19419 - Improved performance when using the Colour Picker
- DSOF-19412 - Improved the visibility of the toggle warp grid button
- DSOF-19409 Fixed an issue where it was not possible to export OBJ files
- DSOF-19407 - Fixed an Access Violation when exporting current camera view
- DSOF-19405 - Fixed an issue where Filmed & Set Extension were not being rendered on Actors
- DSOF-19395 "discarding request" message when launching many RenderStream assets
- DSOF-19391 - RenderStream: Fixed an issue with invalid unordered_map <K, T> key when attempting to start workload
- DSOF-19387 - RenderStream: fixed failover failing if unassigned streams conflict
- DSOF-19386 - RenderStream: fixed failover potentially causing the standby instance to fail
- DSOF-19381 - Reduced internal renderstream console logging if engine does not set custom logging functions
- DSOF-19360 - Fixed an issue where you could not select properties of MR set active camera using expressions
- DSOF-19356 RenderStream workload control API - Fixed an issue sending start for an already started workload restarting the workload
- DSOF-19331- Fixed RenderStream layers becoming stuck in "Awaiting Requests" status, restarting d3 restores functionality
- DSOF-19330 - RenderStream: Fixed a crash on shutdown when not running workload/in UE editor
- DSOF-19329 - Added GPGPU VRAM usage in vmem readout
- DSOF-19328 NotchHost: Fixed an issue where unrelated notch blocks will be hot-loaded and stall streams
- DSOF-19327 - Fixed an issue where CITP incorrectly converts UTF-8 to wstring
- DSOF-19325 - AssetLauncher: Fixed an issue where a failure to resolve a shortcut aborts process
- DSOF-19317 - Fixed performance drop when a track with precomps duplicated multiple times
- DSOF-19313 - Fixed an issue where the Profiler could not be opened
- DSOF-19311 - Fixed an issue where Notch host instances accumulated when restarting renderstream workloads, leaving zombie instances which aren't killed
- DSOF-19307 - Fixed console spam when using direct maps with Notch Host Renderstream
- DSOF-19306 - Fixed the error notifier continuously flashing
- DSOF-19305 - Fixed VideoIn images not being captured for blob detection
- DSOF-19301 - Fixed an issue where most controls are disabled when a colour picker is open
- DSOF-19298 - No cursor when colour picker dropper is active
- DSOF-19296 - Fixed the colour picker dropper causes main thread to hang and spam access violations
- DSOF-19295 - Fixed a discrepancy between video clip data rate in tooltip and widget
- DSOF-19279 - Fixed a issue where, on RS start after changing cluster pool, notification "Failed to find session node for workload instance id: XXXXXXX" was present
- DSOF-19278 - Made fields of axistrackingsource nullable
- DSOF-19277 - Fixed after Alt + Tabbing out of d3 - focus was stolen back by d3
- DSOF-19264 - XR: Fixed an error when attempting to open Coordinate System debugger with 2+ observations taken from the same position
- DSOF-19263 XR: Fixed an issue where Lens Poses were not removed when all relevant observations have been individually deleted
- DSOF-19261 XR: Fixed an error when attempting to open Coordinate System debugger with Calibration Scope 'Registration Only' or any Calibration Scope and manual observations
- DSOF-19257 - Fixed an issue whereestarting a single or multiple machines in a d3net session doesn't bring them back online
- DSOF-19255 - Fixed an issue where the ath in fullscreen notification when exporting current camera frame / view is empty
- DSOF-19254 - Fixed Unicode characters not being supported in d3 projects path
- DSOF-19251 Camera: Fixed an issue where venue objects could still be lasso/shift-selected when venue visibility is off
- DSOF-19250 - Fixed an issue where Spherical camera rendered stage with reversed z order
- DSOF-19245 Notch: Fixed LoadDFX fails with unicode block paths
- DSOF-19244 - Fixed an issue where process creation does not support unicode paths
- DSOF-19242 - Fixed an issue where SyntaxError spammed the console when newlines are present in Web layer string fields
- DSOF-19240 - Fixed being unable to reset OmniCal QuickAlign lineup
- DSOF-19238 OmniCal: Fixed being unable to open View Calibration
- DSOF-19237 - Fixed Esc + Enter shortcut not presenting confirmation dialog
- DSOF-19235 - Layer Stack: Fixed video playback speed being doubled when in 'Normal' mode
- DSOF-19229 - Uxfade: Fixed an access violation in PlayHead::playModeChanged
- DSOF-19221 - Fixed the format field in video input patch not updating immediately when input format is changed
- DSOF-19214 - RenderStream is now spelt correctly in RenderStream machine settings
- DSOF-19208 - Fixed an issuewhere Async file loading meant that max width and height values in SlugFont were not initialised if extent is called too early
- DSOF-19207 - Fixed Slug rendering slightly wider than previous DxFont for the same point size and font
- DSOF-19205 - Fixed Callsite specified text scaling no longer working in font rendering
- DSOF-19203 - Text objects now cache scale and rebuild dynamically when scale changes
- DSOF-19190 - XML Workflow - Fixed an Access Violation when loading XML files without a fixture
- DSOF-19187 - Fixed an issue where an empty session name crashes all comms instances
- DSOF-19183 - Fixed an error thrown when attempting to Add Observation without having expanded Blob Settings separator
- DSOF-19180 - Fixed Renderstream not working if controller machine is replaced by understudy
- DSOF-19178 - Fixed an issue where d3 cannot run with embedded display manager due to not being able to share channels within a single comms node
- DSOF-19163 - Fixed an issue where dragging Vicon device out of the list in device manager and re-adding it requires a restart of d3 before Vicon data is received again
- DSOF-19162 - Fixed an where stopping and starting Vicon streaming data, the d3 Vicon device did not reconnect
- DSOF-19153 - Fixed an issue when a multi-user session is in use with UE saving the scene,a crash could occur
- DSOF-19152 - Fixed an issue where faces / vertices / edges culled by Face Cull Mode were still selectable
- DSOF-19123 - Fixed an issue where video layers in layer stack flickered
- DSOF-19122 - Fixed a NoneType error when opening profiler - machine double-unsubscribed
- DSOF-19115 - Fixed an issue where project diagnostics would try to compress files that are much too large
- DSOF-19103 - Fixed: Content Table Export - Feature exports all tracks instead of selected
- DSOF-19095 - Fixed asset source error being shown in the wrong place
- DSOF-19093 RenderStream: Fixed an issue where there was no way for a follower to know if streams changed
- DSOF-19070 - Fixed an issue where the first slice of RenderStream Uncompressed is offset incorrectly when padding is set
- DSOF-19062 - RenderStream: Fixed stream conflict when splitting Unreal workload across multiple render nodes
- DSOF-19054 - Fixed an issue when RenderStream versions did not match, d3 would hang when opening the Cluster Workload tooltip window
- DSOF-19049 - RenderStream: Fixed an issue where assignment forecast does not show manually assigned fragments
- DSOF-19046 - Fixed an issue where genlock indicator was mis-matched between Session monitor and Feed View
- DSOF-19045 - Fixed an issue where you would be unable to open editor of 'New luma keyed input' if closed
- DSOF-19042 - Fixed an issue where system diagnostics did not store log files created in Saved folder of Unreal projects
- DSOF-19027 - Fixed an issue where dragging left/right to adjust parameters can sometimes result in values outside of the min/max range
- DSOF-19017 - Improved UI to sign post error with preferred network setting in assigner after IP has changed
- DSOF-19015 - Fixed an Access Violation launching RS workload when engine-specific settings object has not been created
- DSOF-19013 Fixed: “WorkloadManager: Attempted to update running process for workload instance that doesn’t exist” notification when using 2 x RS layers, each with a different workload controller
- DSOF-19011 - Fixed an issue where MR set content was not rendering at overscan resolution
- DSOF-19008 - Fixed an issue when adding a layer to the stack, remnants of the layer creation window floated around
- DSOF-18998 - Fixed an issue where direct-mapped UE Renderstream content stretched to fit screen
- DSOF-18994 - Fixed an issue with RenderStream API not responding with RenderStream layers which haven't been started
- DSOF-18981 - Fixed "object has no attribute 'previewShowAlpha'" error when opening layer editor for TransportControl layer / module
- DSOF-18971 - Fixed an issue where opening the debug menu created access violations
- DSOF-18967 - Fixed an issue where selecting edit on a layer in the stack that already has its editor open will close that editor
- DSOF-18959 - Fixed an issue where several layer stack changes could not be undone/redone
- DSOF-18957 - Fixed an issue where MR set components don't update camera proxies
- DSOF-18935 - Fixed an issue where Pickwhipping Surface Brightness to open layer did not populate parameter name
- DSOF-18934 RenderStream: Fixed an issue where stream width not divisible by 8 results in missing pixels in slices
- DSOF-18932 - Fixed an issue where renaming multiple layers does not increment properly in Layer Stacks
- DSOF-18891 - Fixed an issue where Bitmap colour palette did not change if the RGB values are manually selected
- DSOF-18889 - Fixed a segmentation fault thrown by layer tests
- DSOF-18884 - Fixed the fade layer / module being broken
- DSOF-18882 - Fixed being unable to undo pre/post input transform
- DSOF-18877 - Fixed a deadlock in RenderStream comms/logging functions
- DSOF-18819 RenderStream: Fixed an issue where workloads which choose to shut down cleanly appeared as crashed
- DSOF-18812 - Fixed an audio output buffer error on startup, stopping any audio output device from working
- DSOF-18774 - Fixed objects that aren't "on stage" taking mouse selection
- DSOF-18765 - Fixed an issue where the speed value of 1 didn't work after being set to 0 in the videotransition module
- DSOF-18762 - Fixed an issue where d3 returned "has an exposed parameter of unsupported type "float4"" after loading a notch block
- DSOF-18754 - Fixed an issue where forcing slow streams (25FPS) to run at 50FPS causes bandwidth usage to be double what is shown in the bandwidth estimate tool
- DSOF-18753 - Improved RenderStream bandwidth usage
- DSOF-18742 _ Fixed RenderStream Frame Response Error
- DSOF-18739 - RenderStream: fixed an issue where if default maps are set to ‘None’ but the scene selection is set to ‘Maps’, UE scenes will crash on startup
- DSOF-18737 - Fixed an issue where workload widget could not be opened if no machines are online in the cluster pool
- DSOF-18734 - Renderstream: Fixed Compressed RS "Packet Loss detected" and stream flashing gray
- DSOF-18733 - Fixed an issue where a RenderStream Uncompressed stream definition did not take into account layer framerate fraction.
- DSOF-18714 - Fixed an issue where the tracker delay tool rendered overlaid lines as white
- DSOF-18713 - Fixed an issue were the tracker delay calibration tool rendered wrong lines for complex mesh
- DSOF-18693 - Fixed an issue where d3 could not export a Projector Study if one already exists
- DSOF-18690 - Fixed an issue where the stage render layer didn't render to multiple viewpoints properly
- DSOF-18689 - Fixed an issue where removing list controller from MR set didn’t set target to None
- DSOF-18665 - Fixed an issue where the window size grows by number of nodes when disableUnrealConfigUpdate enabled
- DSOF-18642 - Fixed an issue where the measurement arrow was no longer being displayed
- DSOF-18637 - XR: modified behaviour of taking manual observations when Alignment Object set to "None"
- DSOF-18635 - Fixed an issue where the MultiChannelMapping editor couldn’t show all feed mappings in list
- DSOF-18629 - Fixed an issue where deleted LayerStack modules stay popped up
- DSOF-18624 - Fixed an issue where dragging on property to modify the value only worked on the label itself
- DSOF-18603 - Fixed an issue where a video layer sequenced with speed 0 followed shortly after by an increased speed will repeatedly prefetch incorrect frames
- DSOF-18600 - Fixed an issue where playing NotchLC at low speeds causes periodic spikes in CPU load
- DSOF-18579 - Fixed render nodes showing as "Idle" in d3manager when workload is running
- DSOF-18572 - Fixed an issue where d3service would crash if you have a circular shortcut in your Renderstream Projects folder
- DSOF-18559 - Fixed Batch-Process OCL Interop Locks
- DSOF-18553 - Fixed an issue where starting a stream after stopping it prompts error message
- DSOF-18548 - Fixed an issue where if the director is not subscribed to a RenderStream, active latency gets stuck at a high value
- DSOF-18527 - RenderStream: Fixed an issue where adding a machine 2+ times to a ClusterPool along with another machine results in false subnet error
- DSOF-18525 - RenderStream: Fixed an issue where 'Restart' after failover left old Notch Host instances running
- DSOF-18513 - Fixed an issue where all render nodes are shown in error when an error effects any of them
- DSOF-18496 - ACES: Fixed 'Input Transform' field appearing twice in Camera editor widget
- DSOF-18490 - Cannot start d3 when large number of machines are on the network
- DSOF-18481 RenderStream: Fixed 'workload instance mismatch' error when starting RSUC workload with 3 machines
- DSOF-18479 - Improved performance in feed view with lots of screens / projectors
- DSOF-18474 - Fixed 'TLS initialization failed' error when starting d3 or RenderStream workload
- DSOF-18464 - Network widget 'mark as failed' button is no longer greyed out
- DSOF-18452 - Fixed mobile editors that join a session reporting themselves as offline nodes until project restart.
- DSOF-18450 - Fix Module search to matches correct names
- DSOF-18445 - Fixed an issue where machine status widget goes off screen when many machine renderstream machines exist
- DSOF-18417 - RenderStream: Fixed an issue where streams could occasionally drop before recovering
- DSOF-18414 - Fixed critical graphs sometimes not updating
- DSOF-18403 - Fixed an issue where d3 dropped frames when running 12k x 2160 renderstream over 4 x4k outputs
- DSOF-18400 - Fixed RenderStream Uncompressed sending applications failing to send with cudaErrorAlreadyMapped
- DSOF-18375 - Fixed an issue where no_devices_with_ip error did not call out the fact that you cannot set 169 or 255 as the first octet.
- DSOF-18372 - Fixed an issue where starting up a director with an actor already in session will force the director to wait for 120 second timeout to launch.,
- DSOF-18369 - Fixed an issue where Content Source Machine cannot be populated immediately after populating machines into cluster pool
- DSOF-18358 - Fixed an Access Violation when setting a machine from editor -> director with enableMediaStaging option switch set
- DSOF-18345 - Fixed ValueBox expressions being incorrect for resources with sub-paths
- DSOF-18341 - Fixed serialization helpers silently failing
- DSOF-18340 - Fixed an issue where a mismatch between machine name and host name prevents RenderStream discovery
- DSOF-18329 - Fixed Timecode tags not going red when track gets duplicated
- DSOF-18268 - Fixed d3 installer overwriting custom RenderStream Projects Folder registry key
- DSOF-18240 - Fixed an issue where a hang would occur on closing d3 when ingesting bad file
- DSOF-18205 - ACES: Fixed RGB values being incorrectly converted to DMX values when mapped to DMX screens or DMX lights
- DSOF-18190 - Fixed an issue where the output feed turned red when surface is out of stage view.
- DSOF-18179 - Fixed Unpacked apx files in project resulting in an illegal attempt to create an absolute folder path
- DSOF-18149 - Fixed machine role logging not being called often, which can lead to old and incorrect information in the console
- DSOF-18129 Renderstream: Fixed CUDA error: cudaErrorMemoryAllocation - out of memory
- DSOF-18065 RenderStream: Fixed an issue where schema from machines not in the ClusterPool read
- DSOF-18032 - Fixed a typo in console_d3service.txt when indicating the adapter index
- DSOF-17948 RenderStream: Fixed Content Source Machine should reporting as out of sync if used as render node
- DSOF-17947 RenderStream: Fixed schema / JSON changes not synchronising on Sync
- DSOF-17941 Omnical: Fixed an issue where calibration reports could not be reopened once the project has been closed
- DSOF-17886 - Fixed an issue where the GUI did not update on Director when muting a layer on an Editor (while locked to Director)
- DSOF-17792 RenderStream: Fixed workload crashing when terminating d3
- DSOF-17648 - Fixed an issue where isRenameTableEnabled created "phantom" entries
- DSOF-17579 RenderStream: Fixed an issue where Bandwidth Estimate table caused Workload Instances to become misaligned
- DSOF-17534 RenderStream: Fixed an issue where Engine Health reported as "Error" when failed over
- DSOF-17514 - Fixed an issue where content rendered from tracked perspective of Camera out of sync between machines
- DSOF-17512 Fixed an issue where RenderStream layers report receiving health ‘good’ when it's not.
- DSOF-17511 RenderStream: Fixed an issue where the instance status in Cluster Workload widget was not always correct
- DSOF-17489 - Fixed an issue where Images reprojected badly on bad camera switch
- DSOF-17457 - Fixed an issue where Symbols cannot be loaded for encrypted dlls
- DSOF-17368 - Fixed an issue where you could multi-select actors in ActorStatusWidget but could not issue actions against the whole selection
- DSOF-17364 - Fixed an issue where IdentityDomain had one less resource than the resource system at first project run
- DSOF-17342 - Fixed an issue where RenderStream attempted to use unplugged adapters for ndisplay sessions
- DSOF-17284 - Fixed an issue where console files have unix line endings, causing incorrect formatting in certain applications
- DSOF-17255 - Added .rc files to d3assetlauncher, d3renderstream and d3renderstreamsend
- DSOF-17148 - Fixed an issue where after assigning a dmx table to a screen, d3 adds two empty lines in the CSV file.
- DSOF-17133 - RenderStream: Fixed a workload command failure when attempting to quit multiple Unreal streams on single machine
- DSOF-17121 - Fixed an Access Violation reinstating mr set to stage list that has had it's led screens removed
- DSOF-17052 - Fixed an issue where on AvailableStreamsChanged logged on any comms node leaving the session caused false logging and excessive spam
- DSOF-16993 - Fixed an issue where Actors that hang on launch would cause the Director to never start due to waiting for project sync behavior
- DSOF-16910 - RenderStream: Fixed an issue where the wrong log was used for multiple instances on a single render node
- DSOF-16853 - Fixed the Installer not creating start menu shortcut to d3 manager on a RX
- DSOF-16748 - Fixed an issue where turning off machines currently in the cluster workload while the Workload widget is open caused an error
- DSOF-16716 - Fixed an issue where leaving a layer name blank meant you cannot then rename it
- DSOF-16661 - RenderStream: Fixed bound-check error when sync task is removed from list and notification still open
- DSOF-16603 - RenderStream - Fixed Access Violations when starting d3 with an existing Unreal workload still running on rx's
- DSOF-16597 XR: Fixed 'no active viewports' error when MR Set has no target camera
- DSOF-16469 - Fixed an issue where a machine rejoining a session was reported as expired
- DSOF-16417 - Renderstream: Fixed editor's RenderStream layer statuses not matching servers in the session
- DSOF-16416 RenderStream: Fixed an issue where Editor machines repeatedly log 'Unable to create video capture stream' notifications while in session with a machine running uncompressed RenderStream
- DSOF-16389 - Fixed an Access Violation on attempting to start workload with no mapping assigned to a channel
- DSOF-16256 - Fixed being unable to set separate overscan components for RenderStream
- DSOF-16072 - Provided an indication that d3 is not fullscreen when it expects to be and vice-versa
- DSOF-15553 - Fixed an issue where the feed mapping editor showed white screens in a Notch. Then shows the first pixel in future use
- DSOF-15452 - Warn users when the DxTexture / VideoFile is greater than the local limitation
- DSOF-14796 - Fixed Text/Images on the Virtual Lineup Layer being at the wrong proxy level
- DSOF-14313 - Fixed Spatial maps rotating around the wrong point
- DSOF-13470 - Fixed an issue where reference points created after creating a point outside mesh will lead to RT: topological sort notifications
- DSOF-12837 - Fixed an issue where looping within a section with loop play mode occasionally played content of first frame in next section
- DSOF-12387 - Fixed an issue where tRender quality degraded over time, causes stuttering playback after a few hours
- DSOF-12246 - Fixed an issue where props in stage could not be selected/deselected via the Venue editor window.
- DSOF-10962 - Fixed an issue where generated EDIDs were not compatible with all HDMI devices, and may fail to acquire correct mode/bit depth/sampling in some situations
- DSOF-10868 - Fixed ideoClip bit depth is not being propagated from VideoFile after ingest
- DSOF-9815 - Fixed an issue where fade up/down/hold with an editor in independent mode affected the master
- DSOF-8936 - Fixed an issue where isolating a group mutes every layer on the timeline
- DSOF-8817 - Fixed an issue where hidden objects can still be interacted with
- DSOF-6599 - Notch: Fixed DfxSystem incorrectly matching different blocks on filenameAndExtension
- DSOF-4904 - Fixed an issue where the sticky pin icon could be lost when editors or cue list refreshes
- DSOF-3319 - Fixed an issue where sSetting track total length to 0, then change to non-0, might not show the newly set time
Advisories
- DSOF-18764 - Legacy Video Module doesn’t work with color shift
- Workaround: Not known
- Affects Version: r19.1.7
- Fixed in r21.0
- DSOF-20056 - Tracking Camera frustrum out of sync between Director & Actor with AxisObjectTrackingSource
- Workaround: Not Known
- Affects version: r21.0
- Fix due in r21.0.1
- DSOF-18015 - Intermittent issue - Heap Corruption causing Crash To Desktop
- Workaround: Not known
- Affects version: r19.0.1
- DSOF-17848 - With "disableDmxPacketSendWait" on, lost sACN node on network still causes the project to slow to a halt.
- Workaround: Add a static entry into the local systems ARP table.
- Open an elevated commant prompt.
- Find out MAC for IP, could use arp -a to see existing entries in local arp cache.
- Run netsh interface ipv4 show interfaces to get a list of interface names.
- Add a new entry to the ARP table netsh interface ipv4 add neighbors "<interface name>" <dest ip> <dest mac>
- E.g netsh interface ipv4 add neighbors "Wi-Fi" 10.105.1.253 01-02-03-04-05-06
- Remove entry like so; netsh interface ipv4 delete neighbors <dest ip>
- Important - Remove entries when done or re-image system!!! Otherwise network issues may occur in the future sending the manually added IP addresses.
- Affects version: r18.1.7
- Workaround: Add a static entry into the local systems ARP table.
- DSOF-17540 - Sequencing changes do not transfer to other machines in session when restoring a snapshot
- Workaround: Not known
- Affects version: r18.1.2
- DSOF-17193 - Multi User Edit in UE requires preferred sync adapter to be set to a network adapter which is available to all machines
- Workaround: Often the preferred sync adapter is set to the 25Gb network to facilitate faster sync. Unless all machines in the network have a 25Gb adapter, the preferred sync adapter must be set to another network adapter when multi user edit sessions are running in UE. The adapter can be changed back for when running sync tasks.
- Affects version: r18.0
- DSOF-17108 - Current NCAM data implementation used can exhibit unreliable packet timing
- Workaround: Not known
- Affects version: r18.0
- DSOF-16935 - d3 cannot set SDI VFCs to Quad 4K 2SI 23.98, 24, 29.97 or 30Hz
- Workaround: Not known
- Affects version: r18.0.2
- DSOF-16425 - Renderstream: When using MultiChannelMapping, only one spatial map w backplate is able to change position/rotation
- Workaround: Not known
- Affects version: r18
- DSOF-16082 - Clustered Rendering: d3service requires restart for asset discovery to work on new Unity executables
- Workaround: restart d3 service
- Affects version: r18
- DSOF-15553 - Feed mapping editor shows white screens in a notch layer on first use. In subsequent use it will then show the first pixel
- Workaround: Not known
- Affects version: r17.4.9
- DSOF-15445 - Editor machines with a user account linked to an Microsoft Account can't join d3 sessions due to permissions errors
- Workaround: Create a second local user account
- Affects version: r17.4.8
- DSOF-12837 - Looping within a section with loop play mode occasionally plays content of first frame in next section
- Workaround: Not known
- Affects version: r17.0.2
Fixes
- DSOF-19930 - Fixed an issue where a remote machine will occasionally show transport out of sync
- DSOF-19928 - Fixed an issue with capture cards video receive latency slowly drifting over time
- DSOF-19927 - Improved inconsistent Latency measurements in Video Receive Delay Calibrator tool
Advisories
- DSOF-18764 - Legacy Video Module doesn’t work with color shift
- Workaround: Not known
- Affects Version: r19.1.7
- DSOF-18015 - Intermittent issue - Heap Corruption causing Crash To Desktop
- Workaround: Not known
- Affects version: r19.0.1
- DSOF-17848 - With "disableDmxPacketSendWait" on, lost sACN node on network still causes the project to slow to a halt.
- Workaround: Add a static entry into the local systems ARP table.
Open an elevated commant prompt.
Find out MAC for IP, could use arp -a to see existing entries in local arp cache.
Run netsh interface ipv4 show interfaces to get a list of interface names.
Add a new entry to the ARP table netsh interface ipv4 add neighbors "<interface name>" <dest ip> <dest mac>
E.g netsh interface ipv4 add neighbors "Wi-Fi" 10.105.1.253 01-02-03-04-05-06
Remove entry like so; netsh interface ipv4 delete neighbors <dest ip>
Important - Remove entries when done or re-image system!!! Otherwise network issues may occur in the future sending the manually added IP addresses. - Affects version: r18.1.7
- Workaround: Add a static entry into the local systems ARP table.
- DSOF-17540 - Sequencing changes do not transfer to other machines in session when restoring a snapshot
- Workaround: Not known
- Affects version: r18.1.2
- DSOF-17193 - Multi User Edit in UE requires preferred sync adapter to be set to a network adapter which is available to all machines
- Workaround: Often the preferred sync adapter is set to the 25Gb network to facilitate faster sync. Unless all machines in the network have a 25Gb adapter, the preferred sync adapter must be set to another network adapter when multi user edit sessions are running in UE. The adapter can be changed back for when running sync tasks.
- Affects version: r18.0
- DSOF-17108 - Current NCAM data implementation used can exhibit unreliable packet timing
- Workaround: Not known
- Affects version: r18.0
- DSOF-16935 - d3 cannot set SDI VFCs to Quad 4K 2SI 23.98, 24, 29.97 or 30Hz
- Workaround: Not known
- Affects version: r18.0.2
- DSOF-16425 - Renderstream: When using MultiChannelMapping, only one spatial map w backplate is able to change position/rotation
- Workaround: Not known
- Affects version: r18
- DSOF-16082 - Clustered Rendering: d3service requires restart for asset discovery to work on new Unity executables
- Workaround: restart d3 service
- Affects version: r18
- DSOF-15553 - Feed mapping editor shows white screens in a notch layer on first use. In subsequent use it will then show the first pixel
- Workaround: Not known
- Affects version: r17.4.9
- DSOF-15445 - Editor machines with a user account linked to an Microsoft Account can't join d3 sessions due to permissions errors
- Workaround: Create a second local user account
- Affects version: r17.4.8
- DSOF-12837 - Looping within a section with loop play mode occasionally plays content of first frame in next section
- Workaround: Not known
- Affects version: r17.0.2
Fixes
- DSOF-19843 - Fixed an issue with 6G SDI video inputs are not working on vx 2 servers
- DSOF-18611 - Fixed remote machine FPS indicators not working
Advisories
- DSOF-18764 - Legacy Video Module doesn’t work with color shift
- Workaround: Not known
- Affects Version: r19.1.7
- DSOF-18015 - Intermittent issue - Heap Corruption causing Crash To Desktop
- Workaround: Not known
- Affects version: r19.0.1
- DSOF-17848 - With "disableDmxPacketSendWait" on, lost sACN node on network still causes the project to slow to a halt.
- Workaround: Add a static entry into the local systems ARP table.
Open an elevated commant prompt.
Find out MAC for IP, could use arp -a to see existing entries in local arp cache.
Run netsh interface ipv4 show interfaces to get a list of interface names.
Add a new entry to the ARP table netsh interface ipv4 add neighbors "<interface name>" <dest ip> <dest mac>
E.g netsh interface ipv4 add neighbors "Wi-Fi" 10.105.1.253 01-02-03-04-05-06
Remove entry like so; netsh interface ipv4 delete neighbors <dest ip>
Important - Remove entries when done or re-image system!!! Otherwise network issues may occur in the future sending the manually added IP addresses. - Affects version: r18.1.7
- Workaround: Add a static entry into the local systems ARP table.
- DSOF-17540 - Sequencing changes do not transfer to other machines in session when restoring a snapshot
- Workaround: Not known
- Affects version: r18.1.2
- DSOF-17193 - Multi User Edit in UE requires preferred sync adapter to be set to a network adapter which is available to all machines
- Workaround: Often the preferred sync adapter is set to the 25Gb network to facilitate faster sync. Unless all machines in the network have a 25Gb adapter, the preferred sync adapter must be set to another network adapter when multi user edit sessions are running in UE. The adapter can be changed back for when running sync tasks.
- Affects version: r18.0
- DSOF-17108 - Current NCAM data implementation used can exhibit unreliable packet timing
- Workaround: Not known
- Affects version: r18.0
- DSOF-16935 - d3 cannot set SDI VFCs to Quad 4K 2SI 23.98, 24, 29.97 or 30Hz
- Workaround: Not known
- Affects version: r18.0.2
- DSOF-16425 - Renderstream: When using MultiChannelMapping, only one spatial map w backplate is able to change position/rotation
- Workaround: Not known
- Affects version: r18
- DSOF-16082 - Clustered Rendering: d3service requires restart for asset discovery to work on new Unity executables
- Workaround: restart d3 service
- Affects version: r18
- DSOF-15553 - Feed mapping editor shows white screens in a notch layer on first use. In subsequent use it will then show the first pixel
- Workaround: Not known
- Affects version: r17.4.9
- DSOF-15445 - Editor machines with a user account linked to an Microsoft Account can't join d3 sessions due to permissions errors
- Workaround: Create a second local user account
- Affects version: r17.4.8
- DSOF-12837 - Looping within a section with loop play mode occasionally plays content of first frame in next section
- Workaround: Not known
- Affects version: r17.0.2
Fixes
- DSOF-19719 - Fixed an issue where d3 was unable to RenderStream due to a capture card error
- DSOF-18429 - Fixed an issue with the d3state logo turning red, which could cause project corruption
- DSOF-18407 - Fixed an Access Violation and stage corruption when starting project with d3Net session
- DSOF-18406 - Fixed an Access Violation when starting a project with 5+ Actors
Advisories
- DSOF-18764 - Legacy Video Module doesn’t work with color shift
- Workaround: Not known
- Affects Version: r19.1.7
- DSOF-18446 - Very large NotchLC content can cause d3 to lose access to GPU device
- Workaround: Not Known
- Affects Version: r18.1.9
- DSOF-18015 - Intermittent issue - Heap Corruption causing Crash To Desktop
- Workaround: Not known
- Affects version: r19.0.1
- DSOF-17848 - With "disableDmxPacketSendWait" on, lost sACN node on network still causes the project to slow to a halt.
- Workaround: Add a static entry into the local systems ARP table.
Open an elevated commant prompt.
Find out MAC for IP, could use arp -a to see existing entries in local arp cache.
Run netsh interface ipv4 show interfaces to get a list of interface names.
Add a new entry to the ARP table netsh interface ipv4 add neighbors "<interface name>" <dest ip> <dest mac>
E.g netsh interface ipv4 add neighbors "Wi-Fi" 10.105.1.253 01-02-03-04-05-06
Remove entry like so; netsh interface ipv4 delete neighbors <dest ip>
Important - Remove entries when done or re-image system!!! Otherwise network issues may occur in the future sending the manually added IP addresses. - Affects version: r18.1.7
- Workaround: Add a static entry into the local systems ARP table.
- DSOF-17540 - Sequencing changes do not transfer to other machines in session when restoring a snapshot
- Workaround: Not known
- Affects version: r18.1.2
- DSOF-17193 - Multi User Edit in UE requires preferred sync adapter to be set to a network adapter which is available to all machines
- Workaround: Often the preferred sync adapter is set to the 25Gb network to facilitate faster sync. Unless all machines in the network have a 25Gb adapter, the preferred sync adapter must be set to another network adapter when multi user edit sessions are running in UE. The adapter can be changed back for when running sync tasks.
- Affects version: r18.0
- DSOF-17108 - Current NCAM data implementation used can exhibit unreliable packet timing
- Workaround: Not known
- Affects version: r18.0
- DSOF-16935 - d3 cannot set SDI VFCs to Quad 4K 2SI 23.98, 24, 29.97 or 30Hz
- Workaround: Not known
- Affects version: r18.0.2
- DSOF-16425 - Renderstream: When using MultiChannelMapping, only one spatial map w backplate is able to change position/rotation
- Workaround: Not known
- Affects version: r18
- DSOF-16082 - Clustered Rendering: d3service requires restart for asset discovery to work on new Unity executables
- Workaround: restart d3 service
- Affects version: r18
- DSOF-15553 - Feed mapping editor shows white screens in a notch layer on first use. In subsequent use it will then show the first pixel
- Workaround: Not known
- Affects version: r17.4.9
- DSOF-15445 - Editor machines with a user account linked to an Microsoft Account can't join d3 sessions due to permissions errors
- Workaround: Create a second local user account
- Affects version: r17.4.8
- DSOF-12837 - Looping within a section with loop play mode occasionally plays content of first frame in next section
- Workaround: Not known
- Affects version: r17.0.2
Improvements
- DSOF-19526 - Added an option to disable remote RenderStream logging as it can saturate the network
Fixes
- DSOF-19561- Fixed an access violations and crash to desktop when RenderStream assets change on editor or director
- DSOF-19527 - Prevented RenderStream machine consoles being sent to non-controller machines on the network
Advisories
- DSOF-18764 - Legacy Video Module doesn’t work with color shift
- Workaround: Not known
- Affects Version: r19.1.7
- DSOF-18504 - Actors are regularly launching out of focus
- Workaround: Not Known
- Affects version: OS related
- DSOF-18446 - Very large NotchLC content can cause d3 to lose access to GPU device
- Workaround: Not Known
- Affects Version: r18.1.9
- DSOF-18429 - d3 logo can turn red. This indicates that the d3state has gone bad. This could potentially cause a project corruption.
- Workaround: Not known, but limited success was found by reverting to a last known good history file, attempt a re-installation of disguise software
- DSOF-18015 - Intermittent issue - Heap Corruption causing Crash To Desktop
- Workaround: Not known
- Affects version: r19.0.1
- DSOF-17848 - With "disableDmxPacketSendWait" on, lost sACN node on network still causes the project to slow to a halt.
- Workaround: Add a static entry into the local systems ARP table.
Open an elevated commant prompt.
Find out MAC for IP, could use arp -a to see existing entries in local arp cache.
Run netsh interface ipv4 show interfaces to get a list of interface names.
Add a new entry to the ARP table netsh interface ipv4 add neighbors "<interface name>" <dest ip> <dest mac>
E.g netsh interface ipv4 add neighbors "Wi-Fi" 10.105.1.253 01-02-03-04-05-06
Remove entry like so; netsh interface ipv4 delete neighbors <dest ip>
Important - Remove entries when done or re-image system!!! Otherwise network issues may occur in the future sending the manually added IP addresses. - Affects version: r18.1.7
- Workaround: Add a static entry into the local systems ARP table.
- DSOF-17540 - Sequencing changes do not transfer to other machines in session when restoring a snapshot
- Workaround: Not known
- Affects version: r18.1.2
- DSOF-17193 - Multi User Edit in UE requires preferred sync adapter to be set to a network adapter which is available to all machines
- Workaround: Often the preferred sync adapter is set to the 25Gb network to facilitate faster sync. Unless all machines in the network have a 25Gb adapter, the preferred sync adapter must be set to another network adapter when multi user edit sessions are running in UE. The adapter can be changed back for when running sync tasks.
- Affects version: r18.0
- DSOF-17108 - Current NCAM data implementation used can exhibit unreliable packet timing
- Workaround: Not known
- Affects version: r18.0
- DSOF-16935 - d3 cannot set SDI VFCs to Quad 4K 2SI 23.98, 24, 29.97 or 30Hz
- Workaround: Not known
- Affects version: r18.0.2
- DSOF-16425 - Renderstream: When using MultiChannelMapping, only one spatial map w backplate is able to change position/rotation
- Workaround: Not known
- Affects version: r18
- DSOF-16082 - Clustered Rendering: d3service requires restart for asset discovery to work on new Unity executables
- Workaround: restart d3 service
- Affects version: r18
- DSOF-15553 - Feed mapping editor shows white screens in a notch layer on first use. In subsequent use it will then show the first pixel
- Workaround: Not known
- Affects version: r17.4.9
- DSOF-15445 - Editor machines with a user account linked to an Microsoft Account can't join d3 sessions due to permissions errors
- Workaround: Create a second local user account
- Affects version: r17.4.8
- DSOF-12837 - Looping within a section with loop play mode occasionally plays content of first frame in next section
- Workaround: Not known
- Affects version: r17.0.2
Fixes
-
DSOF-19510 - Fixed an issue where FadeModule wasn’t working correctly
-
DSOF-18895 - Fixed and issue where the Parallel mapping plane in the visualiser did not render
Advisories
- DSOF-18764 - Legacy Video Module doesn’t work with color shift
- Workaround: Not known
- Affects Version: r19.1.7
- DSOF-18504 - Actors are regularly launching out of focus
- Workaround: Not Known
- Affects version: OS related
- DSOF-18446 - Very large NotchLC content can cause d3 to lose access to GPU device
- Workaround: Not Known
- Affects Version: r18.1.9
- DSOF-18429 - d3 logo can turn red. This indicates that the d3state has gone bad. This could potentially cause a project corruption.
- Workaround: Not known, but limited success was found by reverting to a last known good history file, attempt a re-installation of disguise software
- DSOF-18015 - Intermittent issue - Heap Corruption causing Crash To Desktop
- Workaround: Not known
- Affects version: r19.0.1
- DSOF-17848 - With "disableDmxPacketSendWait" on, lost sACN node on network still causes the project to slow to a halt.
- Workaround: Add a static entry into the local systems ARP table.
Open an elevated commant prompt.
Find out MAC for IP, could use arp -a to see existing entries in local arp cache.
Run netsh interface ipv4 show interfaces to get a list of interface names.
Add a new entry to the ARP table netsh interface ipv4 add neighbors "<interface name>" <dest ip> <dest mac>
E.g netsh interface ipv4 add neighbors "Wi-Fi" 10.105.1.253 01-02-03-04-05-06
Remove entry like so; netsh interface ipv4 delete neighbors <dest ip>
Important - Remove entries when done or re-image system!!! Otherwise network issues may occur in the future sending the manually added IP addresses. - Affects version: r18.1.7
- Workaround: Add a static entry into the local systems ARP table.
- DSOF-17540 - Sequencing changes do not transfer to other machines in session when restoring a snapshot
- Workaround: Not known
- Affects version: r18.1.2
- DSOF-17193 - Multi User Edit in UE requires preferred sync adapter to be set to a network adapter which is available to all machines
- Workaround: Often the preferred sync adapter is set to the 25Gb network to facilitate faster sync. Unless all machines in the network have a 25Gb adapter, the preferred sync adapter must be set to another network adapter when multi user edit sessions are running in UE. The adapter can be changed back for when running sync tasks.
- Affects version: r18.0
- DSOF-17108 - Current NCAM data implementation used can exhibit unreliable packet timing
- Workaround: Not known
- Affects version: r18.0
- DSOF-16935 - d3 cannot set SDI VFCs to Quad 4K 2SI 23.98, 24, 29.97 or 30Hz
- Workaround: Not known
- Affects version: r18.0.2
- DSOF-16425 - Renderstream: When using MultiChannelMapping, only one spatial map w backplate is able to change position/rotation
- Workaround: Not known
- Affects version: r18
- DSOF-16082 - Clustered Rendering: d3service requires restart for asset discovery to work on new Unity executables
- Workaround: restart d3 service
- Affects version: r18
- DSOF-15553 - Feed mapping editor shows white screens in a notch layer on first use. In subsequent use it will then show the first pixel
- Workaround: Not known
- Affects version: r17.4.9
- DSOF-15445 - Editor machines with a user account linked to an Microsoft Account can't join d3 sessions due to permissions errors
- Workaround: Create a second local user account
- Affects version: r17.4.8
- DSOF-12837 - Looping within a section with loop play mode occasionally plays content of first frame in next section
- Workaround: Not known
- Affects version: r17.0.2
Fixes
- DSOF-19406 - Fixed an issue where camera switching would randomly stop working
- DSOF-19396 - Fixed an issue where camera switching was incorrect for newly created Renderstream layers
- DSOF-18330 - Fixed an Access Violation when changing Editor to an Actor
Improvements
- DSOF-19400 - Installer now creates a desktop shortcut to d3 manager on a rx
Advisories
- DSOF-18764 - Legacy Video Module doesn’t work with color shift
- Workaround: Not known
- Affects Version: r19.1.7
- DSOF-18504 - Actors are regularly launching out of focus
- Workaround: Not Known
- Affects version: OS related
- DSOF-18446 - Very large NotchLC content can cause d3 to lose access to GPU device
- Workaround: Not Known
- Affects Version: r18.1.9
- DSOF-18429 - d3 logo can turn red. This indicates that the d3state has gone bad. This could potentially cause a project corruption.
- Workaround: Not known, but limited success was found by reverting to a last known good history file, attempt a re-installation of disguise software
- DSOF-18015 - Intermittent issue - Heap Corruption causing Crash To Desktop
- Workaround: Not known
- Affects version: r19.0.1
- DSOF-17848 - With "disableDmxPacketSendWait" on, lost sACN node on network still causes the project to slow to a halt.
- Workaround: Add a static entry into the local systems ARP table.
Open an elevated commant prompt.
Find out MAC for IP, could use arp -a to see existing entries in local arp cache.
Run netsh interface ipv4 show interfaces to get a list of interface names.
Add a new entry to the ARP table netsh interface ipv4 add neighbors "<interface name>" <dest ip> <dest mac>
E.g netsh interface ipv4 add neighbors "Wi-Fi" 10.105.1.253 01-02-03-04-05-06
Remove entry like so; netsh interface ipv4 delete neighbors <dest ip>
Important - Remove entries when done or re-image system!!! Otherwise network issues may occur in the future sending the manually added IP addresses. - Affects version: r18.1.7
- Workaround: Add a static entry into the local systems ARP table.
- DSOF-17540 - Sequencing changes do not transfer to other machines in session when restoring a snapshot
- Workaround: Not known
- Affects version: r18.1.2
- DSOF-17193 - Multi User Edit in UE requires preferred sync adapter to be set to a network adapter which is available to all machines
- Workaround: Often the preferred sync adapter is set to the 25Gb network to facilitate faster sync. Unless all machines in the network have a 25Gb adapter, the preferred sync adapter must be set to another network adapter when multi user edit sessions are running in UE. The adapter can be changed back for when running sync tasks.
- Affects version: r18.0
- DSOF-17108 - Current NCAM data implementation used can exhibit unreliable packet timing
- Workaround: Not known
- Affects version: r18.0
- DSOF-16935 - d3 cannot set SDI VFCs to Quad 4K 2SI 23.98, 24, 29.97 or 30Hz
- Workaround: Not known
- Affects version: r18.0.2
- DSOF-16425 - Renderstream: When using MultiChannelMapping, only one spatial map w backplate is able to change position/rotation
- Workaround: Not known
- Affects version: r18
- DSOF-16082 - Clustered Rendering: d3service requires restart for asset discovery to work on new Unity executables
- Workaround: restart d3 service
- Affects version: r18
- DSOF-15553 - Feed mapping editor shows white screens in a notch layer on first use. In subsequent use it will then show the first pixel
- Workaround: Not known
- Affects version: r17.4.9
- DSOF-15445 - Editor machines with a user account linked to an Microsoft Account can't join d3 sessions due to permissions errors
- Workaround: Create a second local user account
- Affects version: r17.4.8
- DSOF-12837 - Looping within a section with loop play mode occasionally plays content of first frame in next section
- Workaround: Not known
- Affects version: r17.0.2
Fixes
- DSOF-16853 - Fixed an issue where the Installer would not create start menu shortcut to d3 manager on a rx
Advisories
- DSOF-18764 - Legacy Video Module doesn’t work with color shift
- Workaround: Not known
- Affects Version: r19.1.7
- DSOF-18504 - Actors are regularly launching out of focus
- Workaround: Not Known
- Affects version: OS related
- DSOF-18446 - Very large NotchLC content can cause d3 to lose access to GPU device
- Workaround: Not Known
- Affects Version: r18.1.9
- DSOF-18429 - d3 logo can turn red. This indicates that the d3state has gone bad. This could potentially cause a project corruption.
- Workaround: Not known, but limited success was found by reverting to a last known good history file, attempt a re-installation of disguise software
- DSOF-18015 - Intermittent issue - Heap Corruption causing Crash To Desktop
- Workaround: Not known
- Affects version: r19.0.1
- DSOF-17848 - With "disableDmxPacketSendWait" on, lost sACN node on network still causes the project to slow to a halt.
- Workaround: Add a static entry into the local systems ARP table.
Open an elevated commant prompt.
Find out MAC for IP, could use arp -a to see existing entries in local arp cache.
Run netsh interface ipv4 show interfaces to get a list of interface names.
Add a new entry to the ARP table netsh interface ipv4 add neighbors "<interface name>" <dest ip> <dest mac>
E.g netsh interface ipv4 add neighbors "Wi-Fi" 10.105.1.253 01-02-03-04-05-06
Remove entry like so; netsh interface ipv4 delete neighbors <dest ip>
Important - Remove entries when done or re-image system!!! Otherwise network issues may occur in the future sending the manually added IP addresses. - Affects version: r18.1.7
- Workaround: Add a static entry into the local systems ARP table.
- DSOF-17540 - Sequencing changes do not transfer to other machines in session when restoring a snapshot
- Workaround: Not known
- Affects version: r18.1.2
- DSOF-17193 - Multi User Edit in UE requires preferred sync adapter to be set to a network adapter which is available to all machines
- Workaround: Often the preferred sync adapter is set to the 25Gb network to facilitate faster sync. Unless all machines in the network have a 25Gb adapter, the preferred sync adapter must be set to another network adapter when multi user edit sessions are running in UE. The adapter can be changed back for when running sync tasks.
- Affects version: r18.0
- DSOF-17108 - Current NCAM data implementation used can exhibit unreliable packet timing
- Workaround: Not known
- Affects version: r18.0
- DSOF-16935 - d3 cannot set SDI VFCs to Quad 4K 2SI 23.98, 24, 29.97 or 30Hz
- Workaround: Not known
- Affects version: r18.0.2
- DSOF-16425 - Renderstream: When using MultiChannelMapping, only one spatial map w backplate is able to change position/rotation
- Workaround: Not known
- Affects version: r18
- DSOF-16082 - Clustered Rendering: d3service requires restart for asset discovery to work on new Unity executables
- Workaround: restart d3 service
- Affects version: r18
- DSOF-15553 - Feed mapping editor shows white screens in a notch layer on first use. In subsequent use it will then show the first pixel
- Workaround: Not known
- Affects version: r17.4.9
- DSOF-15445 - Editor machines with a user account linked to an Microsoft Account can't join d3 sessions due to permissions errors
- Workaround: Create a second local user account
- Affects version: r17.4.8
- DSOF-12837 - Looping within a section with loop play mode occasionally plays content of first frame in next section
- Workaround: Not known
- Affects version: r17.0.2
Fixes
- DSOF-19258 - Fixed a crash to desktop on vx2’s that was caused by self-referential videoin
- DSOF-19252 - Fixed console spam when OBJ file contains polylines
- DSOF-19241 - Fixed an issue where it was not possible to export Omnical camera study
Advisories
- DSOF-18764 - Legacy Video Module doesn’t work with color shift
- Workaround: Not known
- Affects Version: r19.1.7
- DSOF-18504 - Actors are regularly launching out of focus
- Workaround: Not Known
- Affects version: OS related
- DSOF-18446 - Very large NotchLC content can cause d3 to lose access to GPU device
- Workaround: Not Known
- Affects Version: r18.1.9
- DSOF-18015 - Intermittent issue - Heap Corruption causing Crash To Desktop
- Workaround: Not known
- Affects version: r19.0.1
- DSOF-17848 - With "disableDmxPacketSendWait" on, lost sACN node on network still causes the project to slow to a halt.
- Workaround: Add a static entry into the local systems ARP table.
Open an elevated commant prompt.
Find out MAC for IP, could use arp -a to see existing entries in local arp cache.
Run netsh interface ipv4 show interfaces to get a list of interface names.
Add a new entry to the ARP table netsh interface ipv4 add neighbors "<interface name>" <dest ip> <dest mac>
E.g netsh interface ipv4 add neighbors "Wi-Fi" 10.105.1.253 01-02-03-04-05-06
Remove entry like so; netsh interface ipv4 delete neighbors <dest ip>
Important - Remove entries when done or re-image system!!! Otherwise network issues may occur in the future sending the manually added IP addresses. - Affects version: r18.1.7
- Workaround: Add a static entry into the local systems ARP table.
- DSOF-17540 - Sequencing changes do not transfer to other machines in session when restoring a snapshot
- Workaround: Not known
- Affects version: r18.1.2
- DSOF-17193 - Multi User Edit in UE requires preferred sync adapter to be set to a network adapter which is available to all machines
- Workaround: Often the preferred sync adapter is set to the 25Gb network to facilitate faster sync. Unless all machines in the network have a 25Gb adapter, the preferred sync adapter must be set to another network adapter when multi user edit sessions are running in UE. The adapter can be changed back for when running sync tasks.
- Affects version: r18.0
- DSOF-17108 - Current NCAM data implementation used can exhibit unreliable packet timing
- Workaround: Not known
- Affects version: r18.0
- DSOF-16935 - d3 cannot set SDI VFCs to Quad 4K 2SI 23.98, 24, 29.97 or 30Hz
- Workaround: Not known
- Affects version: r18.0.2
- DSOF-16425 - Renderstream: When using MultiChannelMapping, only one spatial map w backplate is able to change position/rotation
- Workaround: Not known
- Affects version: r18
- DSOF-16082 - Clustered Rendering: d3service requires restart for asset discovery to work on new Unity executables
- Workaround: restart d3 service
- Affects version: r18
- DSOF-15553 - Feed mapping editor shows white screens in a notch layer on first use. In subsequent use it will then show the first pixel
- Workaround: Not known
- Affects version: r17.4.9
- DSOF-15445 - Editor machines with a user account linked to an Microsoft Account can't join d3 sessions due to permissions errors
- Workaround: Create a second local user account
- Affects version: r17.4.8
- DSOF-12837 - Looping within a section with loop play mode occasionally plays content of first frame in next section
- Workaround: Not known
- Affects version: r17.0.2
Fixes
- DSOF-19185 - Fixed an issue where projects created and re-opened in r20.0.3 broke the visualiser camera
- DSOF-19177 - Fixed an issue where you cannot select resources which are added in a child of 2 or more empty folders
- DSOF-19150 - Fixed d3 spamming console on a gx2
- DSOF-19117 - Fixed Video input precomp textures, displays and mappings being visible to the user
- DSOF-18876 - Fixed an issue were in ACES mode, sRGB input transform looked very different on video input in video layer than in the video input in virtual camera
Advisories
- DSOF-18764 - Legacy Video Module doesn’t work with color shift
- Workaround: Not known
- Affects Version: r19.1.7
- DSOF-18504 - Actors are regularly launching out of focus
- Workaround: Not Known
- Affects version: OS related
- DSOF-18446 - Very large NotchLC content can cause d3 to lose access to GPU device
- Workaround: Not Known
- Affects Version: r18.1.9
- DSOF-18015 - Intermittent issue - Heap Corruption causing Crash To Desktop
- Workaround: Not known
- Affects version: r19.0.1
- DSOF-17848 - With "disableDmxPacketSendWait" on, lost sACN node on network still causes the project to slow to a halt.
- Workaround: Add a static entry into the local systems ARP table.
Open an elevated commant prompt.
Find out MAC for IP, could use arp -a to see existing entries in local arp cache.
Run netsh interface ipv4 show interfaces to get a list of interface names.
Add a new entry to the ARP table netsh interface ipv4 add neighbors "<interface name>" <dest ip> <dest mac>
E.g netsh interface ipv4 add neighbors "Wi-Fi" 10.105.1.253 01-02-03-04-05-06
Remove entry like so; netsh interface ipv4 delete neighbors <dest ip>
Important - Remove entries when done or re-image system!!! Otherwise network issues may occur in the future sending the manually added IP addresses. - Affects version: r18.1.7
- Workaround: Add a static entry into the local systems ARP table.
- DSOF-17540 - Sequencing changes do not transfer to other machines in session when restoring a snapshot
- Workaround: Not known
- Affects version: r18.1.2
- DSOF-17193 - Multi User Edit in UE requires preferred sync adapter to be set to a network adapter which is available to all machines
- Workaround: Often the preferred sync adapter is set to the 25Gb network to facilitate faster sync. Unless all machines in the network have a 25Gb adapter, the preferred sync adapter must be set to another network adapter when multi user edit sessions are running in UE. The adapter can be changed back for when running sync tasks.
- Affects version: r18.0
- DSOF-17108 - Current NCAM data implementation used can exhibit unreliable packet timing
- Workaround: Not known
- Affects version: r18.0
- DSOF-16935 - d3 cannot set SDI VFCs to Quad 4K 2SI 23.98, 24, 29.97 or 30Hz
- Workaround: Not known
- Affects version: r18.0.2
- DSOF-16425 - Renderstream: When using MultiChannelMapping, only one spatial map w backplate is able to change position/rotation
- Workaround: Not known
- Affects version: r18
- DSOF-16082 - Clustered Rendering: d3service requires restart for asset discovery to work on new Unity executables
- Workaround: restart d3 service
- Affects version: r18
- DSOF-15553 - Feed mapping editor shows white screens in a notch layer on first use. In subsequent use it will then show the first pixel
- Workaround: Not known
- Affects version: r17.4.9
- DSOF-15445 - Editor machines with a user account linked to an Microsoft Account can't join d3 sessions due to permissions errors
- Workaround: Create a second local user account
- Affects version: r17.4.8
- DSOF-12837 - Looping within a section with loop play mode occasionally plays content of first frame in next section
- Workaround: Not known
- Affects version: r17.0.2
Fixes
- DSOF-19112 - Fixed an error when hovering over points in camera observation debugger
- DSOF-19111 - Fixed Camera Calibration upgrade error when upgrading from r19.1.7 to r20.0.2
- DSOF-19067 - Fixed an issue where selecting a Chroma Source within a Luma Keyed Input without setting Luma Key Source creates a blank option
- DSOF-19064 = Fixed an issue where selecting a Chroma Source within a Luma Keyed Input results in errors
- DSOF-19043 - Fixed an error when selecting 'New Placeholder Clip' or 'New luma keyed input' as videoin input in Quick Edit
- DSOF-19028 - Fixed an issue where d3 accepted keyboard input when not in focus but mouse is over d3 and mouse is moving.
- DSOF-18437 - Fixed 'NoneType' error when setting videoin to "Unmapped" in Quick Edit view
- DSOF-18387 - Fixed an error after moving PreCompDisplay to trash or renaming it and restarting the project
Advisories
- DSOF-18764 - Legacy Video Module doesn’t work with color shift
- Workaround: Not known
- Affects Version: r19.1.7
- DSOF-18504 - Actors are regularly launching out of focus
- Workaround: Not Known
- Affects version: OS related
- DSOF-18446 - Very large NotchLC content can cause d3 to lose access to GPU device
- Workaround: Not Known
- Affects Version: r18.1.9
- DSOF-18015 - Intermittent issue - Heap Corruption causing Crash To Desktop
- Workaround: Not known
- Affects version: r19.0.1
- DSOF-17848 - With "disableDmxPacketSendWait" on, lost sACN node on network still causes the project to slow to a halt.
- Workaround: Add a static entry into the local systems ARP table.
Open an elevated commant prompt.
Find out MAC for IP, could use arp -a to see existing entries in local arp cache.
Run netsh interface ipv4 show interfaces to get a list of interface names.
Add a new entry to the ARP table netsh interface ipv4 add neighbors "<interface name>" <dest ip> <dest mac>
E.g netsh interface ipv4 add neighbors "Wi-Fi" 10.105.1.253 01-02-03-04-05-06
Remove entry like so; netsh interface ipv4 delete neighbors <dest ip>
Important - Remove entries when done or re-image system!!! Otherwise network issues may occur in the future sending the manually added IP addresses. - Affects version: r18.1.7
- Workaround: Add a static entry into the local systems ARP table.
- DSOF-17540 - Sequencing changes do not transfer to other machines in session when restoring a snapshot
- Workaround: Not known
- Affects version: r18.1.2
- DSOF-17193 - Multi User Edit in UE requires preferred sync adapter to be set to a network adapter which is available to all machines
- Workaround: Often the preferred sync adapter is set to the 25Gb network to facilitate faster sync. Unless all machines in the network have a 25Gb adapter, the preferred sync adapter must be set to another network adapter when multi user edit sessions are running in UE. The adapter can be changed back for when running sync tasks.
- Affects version: r18.0
- DSOF-17108 - Current NCAM data implementation used can exhibit unreliable packet timing
- Workaround: Not known
- Affects version: r18.0
- DSOF-16935 - d3 cannot set SDI VFCs to Quad 4K 2SI 23.98, 24, 29.97 or 30Hz
- Workaround: Not known
- Affects version: r18.0.2
- DSOF-16425 - Renderstream: When using MultiChannelMapping, only one spatial map w backplate is able to change position/rotation
- Workaround: Not known
- Affects version: r18
- DSOF-16082 - Clustered Rendering: d3service requires restart for asset discovery to work on new Unity executables
- Workaround: restart d3 service
- Affects version: r18
- DSOF-15553 - Feed mapping editor shows white screens in a notch layer on first use. In subsequent use it will then show the first pixel
- Workaround: Not known
- Affects version: r17.4.9
- DSOF-15445 - Editor machines with a user account linked to an Microsoft Account can't join d3 sessions due to permissions errors
- Workaround: Create a second local user account
- Affects version: r17.4.8
- DSOF-12837 - Looping within a section with loop play mode occasionally plays content of first frame in next section
- Workaround: Not known
- Affects version: r17.0.2
Build
Bugs
- DSOF-18709 - Feed no longer defaults to “None” in blank projects
- DSOF-18534 - Fixed projector “include/exclude” Dynamic blend option only giving the “exclude” result
- DSOF-18452 - Fixed an issue where mobile editors that joined a session would report themselves as offline nodes until project restart
Advisories
- DSOF-18446 - Actors are regularly launching out of focus
- Workaround: Not known
- Affects Version: OS related
- DSOF-18446 - Very large NotchLC content can cause d3 to lose access to GPU device
- Workaround: Not Known
- Affects Version: r18.1.9 & r19
- DSOF-18095 - RenderStream: Unable to use failover machine if an engine has crashed
- Workaround: Not Known
- Affects version: r19.0.1
- Fix due in r20.0
- DSOF-18015 - Intermittent issue - Heap Corruption causing Crash To Desktop
- Workaround: Not known
- Affects version: r19.0.1
- DSOF-17848 - With "disableDmxPacketSendWait" on, lost sACN node on network still causes the project to slow to a halt.
- Workaround: Add a static entry into the local systems ARP table.
- Open an elevated commant prompt.
- Find out MAC for IP, could use arp -a to see existing entries in local arp cache.
- Run netsh interface ipv4 show interfaces to get a list of interface names.
- Add a new entry to the ARP table netsh interface ipv4 add neighbors "<interface name>" <dest ip> <dest mac>
- E.g netsh interface ipv4 add neighbors "Wi-Fi" 10.105.1.253 01-02-03-04-05-06
- Remove entry like so; netsh interface ipv4 delete neighbors <dest ip>
- Important - Remove entries when done or re-image system!!! Otherwise network issues may occur in the future sending the manually added IP addresses.
- Affects version: r18.1.7
- Workaround: Add a static entry into the local systems ARP table.
- DSOF-17540 - Sequencing changes do not transfer to other machines in session when restoring a snapshot
- Workaround: Not know
- Affects version: r18.1.2
- DSOF-17193 - Multi User Edit in UE requires preferred sync adapter to be set to a network adapter which is available to all machines
- Workaround: Often the preferred sync adapter is set to the 25Gb network to facilitate faster sync. Unless all machines in the network have a 25Gb adapter, the preferred sync adapter must be set to another network adapter when multi user edit sessions are running in UE. The adapter can be changed back for when running sync tasks.
- Affects version: r18.0
- DSOF-17108 - Current NCAM data implementation used can exhibit unreliable packet timing
- Workaround: Not known
- Affects version: r18.0
- DSOF-16935 - d3 cannot set SDI VFCs to Quad 4K 2SI 23.98, 24, 29.97 or 30Hz
- Workaround: Not known
- Affects version: r18.0.2
- DSOF-16425 - Renderstream: When using MultiChannelMapping, only one spatial map w backplate is able to change position/rotation
- Workaround: Not known
- Affects version: r18
- DSOF-16082 - Clustered Rendering: d3service requires restart for asset discovery to work on new Unity executables
- Workaround: restart d3 service
- Affects version: r18
- DSOF-15553 - Feed mapping editor shows white screens in a notch layer on first use. In subsequent use it will then show the first pixel
- Workaround: Not known
- Affects version: r17.4.9
- DSOF-15445 - Editor machines with a user account linked to an Microsoft Account can't join d3 sessions due to permissions errors
- Workaround: Create a second local user account
- Affects version: r17.4.8
- DSOF-12837 - Looping within a section with loop play mode occasionally plays content of first frame in next section
- Workaround: Not known
- Affects version: r17.0.2
Bugs
- DSOF-17876 - Fixed an issue where the Installer would fail because visual studio 2019 runtime is not installed
Advisories
- DSOF-18095 - RenderStream: Unable to use failover machine if an engine has crashed
- Workaround: Not Known
- Affects version: r19.0.1
- Fix due in r20.0
- DSOF-18015 - Intermittent issue - Heap Corruption causing Crash To Desktop
- Workaround: Not known
- Affects version: r19.0.1
- DSOF-17848 - With "disableDmxPacketSendWait" on, lost sACN node on network still causes the project to slow to a halt.
- Workaround: Add a static entry into the local systems ARP table.
1. Open an elevated commant prompt.
2. Find out MAC for IP, could use arp -a to see existing entries in local arp cache.
3. Run netsh interface ipv4 show interfaces to get a list of interface names.
4. Add a new entry to the ARP table netsh interface ipv4 add neighbors "<interface name>" <dest ip> <dest mac>
5. E.g netsh interface ipv4 add neighbors "Wi-Fi" 10.105.1.253 01-02-03-04-05-06
6. Remove entry like so; netsh interface ipv4 delete neighbors <dest ip>
Important - Remove entries when done or re-image system!!! Otherwise network issues may occur in the future sending the manually added IP addresses. - Affects version: r18.1.7
- Workaround: Add a static entry into the local systems ARP table.
- DSOF-17540 - Sequencing changes do not transfer to other machines in session when restoring a snapshot
- Workaround: Not known
- Affects version: r18.1.2
- DSOF-17193 - Multi User Edit in UE requires preferred sync adapter to be set to a network adapter which is available to all machines
- Workaround: Often the preferred sync adapter is set to the 25Gb network to facilitate faster sync. Unless all machines in the network have a 25Gb adapter, the preferred sync adapter must be set to another network adapter when multi user edit sessions are running in UE. The adapter can be changed back for when running sync tasks.
- Affects version: r18.0
- DSOF-17108 - Current NCAM data implementation used can exhibit unreliable packet timing
- Workaround: Not known
- Affects version: r18.0
- DSOF-16935 - d3 cannot set SDI VFCs to Quad 4K 2SI 23.98, 24, 29.97 or 30Hz
- Workaround: Not known
- Affects version: r18.0.2
- DSOF-16425 - Renderstream: When using MultiChannelMapping, only one spatial map w backplate is able to change position/rotation
- Workaround: Not known
- Affects version: r18
- DSOF-16082 - Clustered Rendering: d3service requires restart for asset discovery to work on new Unity executables
- Workaround: restart d3 service
- Affects version: r18
- DSOF-15553 - Feed mapping editor shows white screens in a notch layer on first use. In subsequent use it will then show the first pixel
- Workaround: Not known
- Affects version: r17.4.9
- DSOF-15445 - Editor machines with a user account linked to an Microsoft Account can't join d3 sessions due to permissions errors
- Workaround: Create a second local user account
- Affects version: r17.4.8
- DSOF-12837 - Looping within a section with loop play mode occasionally plays content of first frame in next section
- Workaround: Not known
- Affects version: r17.0.2
Bugs
- DSOF-18473 - Fixed an issue where crossfading between sections within a normal mode video is not seamless
- DSOF-18470 - Fixed an issue where DMX monitors would not output full white
- DSOF-18381 - Improved stability of RenderStream failover
- DSOF-18366 - Preferred sync adapter will no longer reset to ‘any’ when d3service is restarted on an rx
Advisories
- DSOF-18015 - Intermittent issue - Heap Corruption causing Crash To Desktop
- Workaround: Not known
- Affects version: r19.0.1
- DSOF-17848 - With "disableDmxPacketSendWait" on, lost sACN node on network still causes the project to slow to a halt.
- Workaround: Add a static eentry into the local systems ARP table.
1. Open an elevated commant prompt.
2. Find out MAC for IP, could use arp -a to see existing entries in local arp cache.
3. Run netsh interface ipv4 show interfaces to get a list of interface names.
4. Add a new entry to the ARP table netsh interface ipv4 add neighbors "<interface name>" <dest ip> <dest mac>
5. E.g netsh interface ipv4 add neighbors "Wi-Fi" 10.105.1.253 01-02-03-04-05-06
6. Remove entry like so; netsh interface ipv4 delete neighbors <dest ip>
7. Important - Remove entries when done or re-image system!!! Otherwise network issues may occur in the future sending the manually added IP addresses. - Affects version: r18.1.7
- Workaround: Add a static eentry into the local systems ARP table.
- DSOF-17540 - Sequencing changes do not transfer to other machines in session when restoring a snapshot
- Workaround: Not known
- Affects version: r18.1.2
- DSOF-17193 - Multi User Edit in UE requires preferred sync adapter to be set to a network adapter which is available to all machines
- Workaround: Often the preferred sync adapter is set to the 25Gb network to facilitate faster sync. Unless all machines in the network have a 25Gb adapter, the preferred sync adapter must be set to another network adapter when multi user edit sessions are running in UE. The adapter can be changed back for when running sync tasks.
- Affects version: r18.0
- DSOF-17108 - Current NCAM data implementation used can exhibit unreliable packet timing
- Workaround: Not known
- Affects version: r18.0
- DSOF-16935 - d3 cannot set SDI VFCs to Quad 4K 2SI 23.98, 24, 29.97 or 30Hz
- Workaround: Not known
- Affects version: r18.0.2
- DSOF-16425 - Renderstream: When using MultiChannelMapping, only one spatial map w backplate is able to change position/rotation
- Workaround: Not known
- Affects version: r18
- DSOF-16082 - Clustered Rendering: d3service requires restart for asset discovery to work on new Unity executables
- Workaround: restart d3 service
- Affects version: r18
- DSOF-15553 - Feed mapping editor shows white screens in a notch layer on first use. In subsequent use it will then show the first pixel
- Workaround: Not known
- Affects version: r17.4.9
- DSOF-15445 - Editor machines with a user account linked to an Microsoft Account can't join d3 sessions due to permissions errors
- Workaround: Create a second local user account
- Affects version: r17.4.8
- DSOF-12837 - Looping within a section with loop play mode occasionally plays content of first frame in next section
- Workaround: Not known
- Affects version: r17.0.2
Bugs
- DSOF-18284 - Fixed an issue where add blend mode results would be presented incorrectly when not using ACES mode
Advisories
- DSOF-18015 - Intermittent issue - Heap Corruption causing Crash To Desktop
- Workaround: Not known
- Affects version: r19.0.1
- DSOF-17848 - With "disableDmxPacketSendWait" on, lost sACN node on network still causes the project to slow to a halt.
- Workaround: Add a static eentry into the local systems ARP table.
- Open an elevated commant prompt.
- Find out MAC for IP, could use arp -a to see existing entries in local arp cache.
- Run netsh interface ipv4 show interfaces to get a list of interface names.
- Add a new entry to the ARP table netsh interface ipv4 add neighbors "<interface name>" <dest ip> <dest mac>
- E.g netsh interface ipv4 add neighbors "Wi-Fi" 10.105.1.253 01-02-03-04-05-06
- Remove entry like so; netsh interface ipv4 delete neighbors <dest ip>
- Important - Remove entries when done or re-image system! Otherwise network issues may occur in the future sending the manually added IP addresses.
- Affects version: r18.1.7
- DSOF-17540 - Sequencing changes do not transfer to other machines in session when restoring a snapshot
- Workaround: Not know
- Affects version: r18.1.2
- DSOF-17193 - Multi User Edit in UE requires preferred sync adapter to be set to a network adapter which is available to all machines
- Workaround: Often the preferred sync adapter is set to the 25Gb network to facilitate faster sync. Unless all machines in the network have a 25Gb adapter, the preferred sync adapter must be set to another network adapter when multi user edit sessions are running in UE. The adapter can be changed back for when running sync tasks.
- Affects version: r18.0
- DSOF-17108 - Current NCAM data implementation used can exhibit unreliable packet timing
- Workaround: Not known
- Affects version: r18.0
- DSOF-16935 - d3 cannot set SDI VFCs to Quad 4K 2SI 23.98, 24, 29.97 or 30Hz
- Workaround: Not known
- Affects version: r18.0.2
- DSOF-16425 - Renderstream: When using MultiChannelMapping, only one spatial map w backplate is able to change position/rotation
- Workaround: Not known
- Affects version: r18
- DSOF-16084 - When arrowing Renderstream into blur layer when spatial mapped stops Renderstream updating in spatial map
- Workaround: No workaround as 3d viewport data does not persist over arrows or pre-comps
- Affects version: r18
- DSOF-16082 - Clustered Rendering: d3service requires restart for asset discovery to work on new Unity executables
- Workaround: restart d3 service
- Affects version: r18
- DSOF-15553 - Feed mapping editor shows white screens in a notch layer on first use. In subsequent use it will then show the first pixel
- Workaround: Not known
- Affects version: r17.4.9
- DSOF-15445 - Editor machines with a user account linked to an Microsoft Account can't join d3 sessions due to permissions errors
- Workaround: Create a second local user account
- Affects version: r17.4.8
- DSOF-12837 - Looping within a section with loop play mode occasionally plays content of first frame in next section
- Workaround: Not known
- Affects version: r17.0.2
Bugs
- DSOF-18238 - Fixed an issue where set extensions did not take into account population masks of screen objects on stage layer or set extension addition layer
Advisories
- DSOF-18015 - Intermittent issue - Heap Corruption causing Crash To Desktop
- Workaround: Not known
- Affects version: r19.0.1
- DSOF-17848 - With "disableDmxPacketSendWait" on, lost sACN node on network still causes the project to slow to a halt.
- Workaround: Add a static entry into the local systems ARP table.
- Open an elevated commant prompt.
- Find out MAC for IP, could use arp -a to see existing entries in local arp cache.
- Run netsh interface ipv4 show interfaces to get a list of interface names.
- Add a new entry to the ARP table netsh interface ipv4 add neighbors "<interface name>" <dest ip> <dest mac>
- E.g netsh interface ipv4 add neighbors "Wi-Fi" 10.105.1.253 01-02-03-04-05-06
- Remove entry like so; netsh interface ipv4 delete neighbors <dest ip>
- Important - Remove entries when done or re-image system!!! Otherwise network issues may occur in the future sending the manually added IP addresses.
- Affects version: r18.1.7
- DSOF-17540 - Sequencing changes do not transfer to other machines in session when restoring a snapshot
- Workaround: Not known
- Affects version: r18.1.2
- DSOF-17193 - Multi User Edit in UE requires preferred sync adapter to be set to a network adapter which is available to all machines
- Workaround: Often the preferred sync adapter is set to the 25Gb network to facilitate faster sync. Unless all machines in the network have a 25Gb adapter, the preferred sync adapter must be set to another network adapter when multi user edit sessions are running in UE. The adapter can be changed back for when running sync tasks.
- Affects version: r18.0
- DSOF-17108 - Current NCAM data implementation used can exhibit unreliable packet timing
- Workaround: Not known
- Affects version: r18.0
- DSOF-16425 - Renderstream: When using MultiChannelMapping, only one spatial map w backplate is able to change position/rotation
- Workaround: Not known
- Affects version: r18
- DSOF-16084 - When arrowing Renderstream into blur layer when spatial mapped stops Renderstream updating in spatial map
- Workaround: No workaround as 3d viewport data does not persist over arrows or pre-comps
- Affects version: r18
- DSOF-16082 - Clustered Rendering: d3service requires restart for asset discovery to work on new Unity executables
- Workaround: restart d3 service
- Affects version: r18
- DSOF-15553 - Feed mapping editor shows white screens in a notch layer on first use. In subsequent use it will then show the first pixel
- Workaround: Not known
- Affects version: r17.4.9
- DSOF-15445 - Editor machines with a user account linked to an Microsoft Account can't join d3 sessions due to permissions errors
- Workaround: Create a second local user account
- Affects version: r17.4.8
- DSOF-12837 - Looping within a section with loop play mode occasionally plays content of first frame in next section
- Workaround: Not known
- Affects version: r17.0.2
Bugs
- DSOF-18098 - Modifying colour shift parameters will now work as expected
Advisories
- DSOF-18015 - Intermittent issue - Heap Corruption causing Crash To Desktop
- Workaround: Not known
- Affects version: r19.0.1
- DSOF-17848 - With "disableDmxPacketSendWait" on, lost sACN node on network still causes the project to slow to a halt.
- Workaround: Add a static eentry into the local systems ARP table.
- Open an elevated commant prompt.
- Find out MAC for IP, could use arp -a to see existing entries in local arp cache.
- Run netsh interface ipv4 show interfaces to get a list of interface names.
- Add a new entry to the ARP table netsh interface ipv4 add neighbors "<interface name>" <dest ip> <dest mac>
- E.g netsh interface ipv4 add neighbors "Wi-Fi" 10.105.1.253 01-02-03-04-05-06
- Remove entry like so; netsh interface ipv4 delete neighbors <dest ip>
- Important - Remove entries when done or re-image system!!! Otherwise network issues may occur in the future sending the manually added IP addresses.
- Affects version: r18.1.7
- Workaround: Add a static eentry into the local systems ARP table.
- DSOF-17540 - Sequencing changes do not transfer to other machines in session when restoring a snapshot
- Workaround: Not know
- Affects version: r18.1.2
- DSOF-17193 - Multi User Edit in UE requires preferred sync adapter to be set to a network adapter which is available to all machines
- Workaround: Often the preferred sync adapter is set to the 25Gb network to facilitate faster sync. Unless all machines in the network have a 25Gb adapter, the preferred sync adapter must be set to another network adapter when multi user edit sessions are running in UE. The adapter can be changed back for when running sync tasks.
- Affects version: r18.0
- DSOF-17108 - Current NCAM data implementation used can exhibit unreliable packet timing
- Workaround: Not known
- Affects version: r18.0
- DSOF-16425 - Renderstream: When using MultiChannelMapping, only one spatial map w backplate is able to change position/rotation
- Workaround: Not known
- Affects version: r18
- DSOF-16084 - When arrowing Renderstream into blur layer when spatial mapped stops Renderstream updating in spatial map
- Workaround: No workaround as 3d viewport data does not persist over arrows or pre-comps
- Affects version: r18
- DSOF-16082 - Clustered Rendering: d3service requires restart for asset discovery to work on new Unity executables
- Workaround: restart d3 service
- Affects version: r18
- DSOF-15553 - Feed mapping editor shows white screens in a notch layer on first use. In subsequent use it will then show the first pixel
- Workaround: Not known
- Affects version: r17.4.9
- DSOF-15445 - Editor machines with a user account linked to an Microsoft Account can't join d3 sessions due to permissions errors
- Workaround: Create a second local user account
- Affects version: r17.4.8
- DSOF-12837 - Looping within a section with loop play mode occasionally plays content of first frame in next section
- Workaround: Not known
- Affects version: r17.0.2
Bugs
- DSOF-18137 - Adding crossfade to a video on the track will no longer cause an Access Violation
- DSOF-17991 - Fixed an issue where a RenderStream layer is still active after the stream is stopped, causing errors upon receiving new Image Parameters which have an incompatible resolution
- DSOF-17826 - Fixed an issue where "Manage RenderStream Workloads" was not launching all nodes in a cluster
Advisories
- DSOF-18015 - Intermittent issue - Heap Corruption causing Crash To Desktop
- Workaround: Not known
- Affects version: r19.0.1
- DSOF-17848 - With "disableDmxPacketSendWait" on, lost sACN node on network still causes the project to slow to a halt.
- Workaround: Add a static eentry into the local systems ARP table.
- Open an elevated commant prompt.
- Find out MAC for IP, could use arp -a to see existing entries in local arp cache.
- Run netsh interface ipv4 show interfaces to get a list of interface names.
- Add a new entry to the ARP table netsh interface ipv4 add neighbors "<interface name>" <dest ip> <dest mac>
- E.g netsh interface ipv4 add neighbors "Wi-Fi" 10.105.1.253 01-02-03-04-05-06
- Remove entry like so; netsh interface ipv4 delete neighbors <dest ip>
- Important - Remove entries when done or re-image system!!! Otherwise network issues may occur in the future sending the manually added IP addresses.
- Affects version: r18.1.7
- Workaround: Add a static eentry into the local systems ARP table.
- DSOF-17540 - Sequencing changes do not transfer to other machines in session when restoring a snapshot
- Workaround: Not know
- Affects version: r18.1.2
- DSOF-17193 - Multi User Edit in UE requires preferred sync adapter to be set to a network adapter which is available to all machines
- Workaround: Often the preferred sync adapter is set to the 25Gb network to facilitate faster sync. Unless all machines in the network have a 25Gb adapter, the preferred sync adapter must be set to another network adapter when multi user edit sessions are running in UE. The adapter can be changed back for when running sync tasks.
- Affects version: r18.0
- DSOF-17108 - Current NCAM data implementation used can exhibit unreliable packet timing
- Workaround: Not known
- Affects version: r18.0
- DSOF-16425 - Renderstream: When using MultiChannelMapping, only one spatial map w backplate is able to change position/rotation
- Workaround: Not known
- Affects version: r18
- DSOF-16084 - When arrowing Renderstream into blur layer when spatial mapped stops Renderstream updating in spatial map
- Workaround: No workaround as 3d viewport data does not persist over arrows or pre-comps
- Affects version: r18
- DSOF-16082 - Clustered Rendering: d3service requires restart for asset discovery to work on new Unity executables
- Workaround: restart d3 service
- Affects version: r18
- DSOF-15553 - Feed mapping editor shows white screens in a notch layer on first use. In subsequent use it will then show the first pixel
- Workaround: Not known
- Affects version: r17.4.9
- DSOF-15445 - Editor machines with a user account linked to an Microsoft Account can't join d3 sessions due to permissions errors
- Workaround: Create a second local user account
- Affects version: r17.4.8
- DSOF-12837 - Looping within a section with loop play mode occasionally plays content of first frame in next section
- Workaround: Not known
- Affects version: r17.0.2
Bugs
- DSOF-18014 - Indirections assigned to bank slots are now recallable from sockpuppet
- DSOF-17945 - Indirections assigned to bank slots now persist after project restart
Advisories
- DSOF-18015 - Intermittent issue - Heap Corruption causing Crash To Desktop
- Workaround: Not known
- Affects version: r19.0.1
- DSOF-17540 - Sequencing changes do not transfer to other machines in session when restoring a snapshoT
- Workaround: Not known
- Affects version: r18.1.2
- DSOF-17193 - Multi User Edit in UE requires preferred sync adapter to be set to a network adapter which is available to all machines
- Workaround: Often the preferred sync adapter is set to the 25Gb network to facilitate faster sync. Unless all machines in the network have a 25Gb adapter, the preferred sync adapter must be set to another network adapter when multi user edit sessions are running in UE. The adapter can be changed back for when running sync tasks.
- Affects version: r18.0
- DSOF-17108 - Current NCAM data implementation used can exhibit unreliable packet timing
- Workaround: Not known
- Affects version: r18.0
- DSOF-16425 - Renderstream: When using MultiChannelMapping, only one spatial map w backplate is able to change position/rotation
- Workaround: Not known
- Affects version: r18
- DSOF-16084 - When arrowing Renderstream into blur layer when spatial mapped stops Renderstream updating in spatial map
- Workaround: No workaround as 3d viewport data does not persist over arrows or pre-comps
- Affects version: r18
- DSOF-16082 - Clustered Rendering: d3service requires restart for asset discovery to work on new Unity executables
- Workaround: restart d3 service
- Affects version: r18
- DSOF-15553 - Feed mapping editor shows white screens in a notch layer on first use. In subsequent use it will then show the first pixel.
- Workaround: Not known
- Affects version: r17.4.9
- DSOF-15445 - Editor machines with a user account linked to an Microsoft Account can't join d3 sessions due to permissions errors
- Workaround: Create a second local user account
- Affects version: r17.4.8
- DSOF-12837 - Looping within a section with loop play mode occasionally plays content of first frame in next section
- Workaround: Not known
- Affects version: r17.0.2
Improvements
- Various overall performance improvements for OmniCal, RenderStream, Networking, and general stability
- DSOF-16807 - Locked zoom and focus encoder values are now user definable
- DSOF-12933 -xR: Added de-interlacing methods to VideoIn sources
- DSOF-17805 - GUI now remembers the size of a pinned MR set editor
- DSOF-17781 - Track scrolling now shows more of what's ahead
- DSOF-17707 - Integration of AMD super resolution (FSR)
- DSOF-17597 - Added the option to 'remove missing assets' for RenderStream assets
- DSOF-17592 - Auto generate and populate bins/boxes in the RenderStream asset based on the asset type
- DSOF-17455 - Cluster Pool tooltip 'asset missing' now specifies on which render the asset is missing
- DSOF-17406 - Added count of items to ArrayBox name
- DSOF-16197 - Allow for conditional operators in expressions
- DSOF-14846 - ColourBox: better transparency indicator
- DSOF-10860 - OmniCal: Reorganise Camera Plan Editor to make important fields easier to find
- DSOF-10760 - OmniCal: show detected Blob statistics in CaptureSetup and ViewCapture
- DSOF-9042 - OmniCal: Reduce information or provide simplified view in OptiCal report to focus on success / failure metrics.
Bugs
- DSOF-17974/17963 - Fixed a crash to desktop when using RenderStream Uncompressed with vX1 and vX2s
- DSOF-17944 - Set extension can be properly masked out
- DSOF-17943 - Screens with render layer ‘set extension mask’ is now properly affected by camera lens distortion
- DSOF-17940 - Fixed an issue where users would get prompted to download the latest version of d3, even if they were already using it
- DSOF-17939 - Fixed an error when lux visualizer cam is not looking at DMX screen
- DSOF-17923 - Fixed a performance issue that could prevent the GUI from loading
- DSOF-17920 - Fixed a purecall crash on exit for d3 servers
- DSOF-17867 - Fixed an issue where RenderStream would attempt to use unplugged adaptors for streaming
- DSOF-17860 - Content on DMX screens will now render properly on virtual cameras
- DSOF-17846 - Performance improvements for RenderStream Uncompressed
- DSOF-17835 - Fixed an issue where the wrong package would be chosen in Import Selection
- DSOF-17830 - OmniCal: fixed an issue where screen selection on the stage sometimes doesn't work when a deformed mesh is assigned
- DSOF-17804 - MultiChannel mappings now work in feed mapping editor
- DSOF-17799 - Users can now select any adapter other than the 25gb broadcast address and preferred network
- DSOF-17795 - Fixed an issue where the MR set editor preview initially appears at half size
- DSOF-17793 - Fixed an access violation when LED screen in MR set is changed to projection
- DSOF-17718 - Prop visibility will now properly change when a render layer is switched
- DSOF-17678 - Project Snapshots now included in a project diagnostic
- DSOF-17662 - RenderStream Asset now shows correct Color Profile options when a d3 project is in Gamma space
- DSOF-17630 - OmniCal: fixed an issue where projector colour was indexed incorrectly when running Blob Detection
- DSOF-17587 - Starting a workload for the first time with multiple render nodes will no longer see some nodes crash while others are compiling
- DSOF-17584 - OmniCal: Meshes are now properly sent to actors after Deform is applied
- DSOF-17485 - Fixed an issue where the default size of the camera preview is smaller than usual
- DSOF-17371 - Fixed an issue where the VideoFile editor could not be opened
- DSOF-17360 - Fixed an issue where the MR set editor preview was not visible until the widget size was changed
- DSOF-17353 - Omnical Reports no longer show overexposed or black images
- DSOF-17308 - Fixed an issue where Application mode used the wrong monitor's DPI
- DSOF-17306 - RenderStream workloads now have comms channels on the same session as the project that started the workload
- DSOF-17291 - ACES transforms now appear correctly in precomp editors
- DSOF-17272 - Fixed an issue where DMX lights and DMX screen always showed ACES options
- DSOF-17267 - RenderStream: Stop button is now be greyed out prior to first workload start
- DSOF-13822 - OmniCal camera studies performance improvements
- DSOF-11801 - Improved edge case where some VFCs detected as higher than 4 slot number
Advisories
- DSOF-18015 - Intermittent crash to desktop, currently under investigation
- DSOF-17193 - Multi User Edit in UE requires preferred sync adapter to be set to a network adapter which is available to all machines
- Workaround: Often the preferred sync adapter is set to the 25Gb network to facilitate faster sync. Unless all machines in the network have a 25Gb adapter, the preferred sync adapter must be set to another network adapter when multi user edit sessions are running in UE. The adapter can be changed back for when running sync tasks.
- Affects version: r18.0
- DSOF-17108 - Current NCAM data implementation used can exhibit unreliable packet timing
- Workaround: Not known
- Affects version: r18.0
- DSOF-16462 - Default ACES configuration: GUI defaults to sRGB, OUTPUT will maintain ACES transformation
- Workaround: Not known
- Affects version: r18
- DSOF-16425 - Renderstream: When using MultiChannelMapping, only one spatial map w backplate is able to change position/rotation
- Workaround: Not known
- Affects version: r18
- DSOF-16082 - Clustered Rendering: d3service requires restart for asset discovery to work on new Unity executables
- Workaround: restart d3 service
- Affects version: r18
- DSOF-15553 - Feed mapping editor shows white screens in a notch layer on first use. In subsequent use it will then show the first pixel.
- Workaround: Not known
- Affects version: r17.4.9
- DSOF-15445 - Editor machines with a user account linked to an Microsoft Account can't join d3 sessions due to permissions errors
- Workaround: Create a second local user account
- Affects version: r17.4.8
- DSOF-12837 - Looping within a section with loop play mode occasionally plays content of first frame in next section
- Workaround: Not known
- Affects version: r17.0.2
Bugs
- DSOF-17843 - User can now upgrade to r19.0 without seeing an installer error
- DSOF-17767 - Camera editor preview will no longer flicker in a virtual camera or MR set when overscan is set to 1,1.
- DSOF-17703 - Fixed an issue where project sync to Actor machines with large amounts of content would cause project corruption, resulting in a crash to desktop
- DSOF-17516 XR: - An Access Violation will no longer occur when attempting to open Check Coordinate System widget before any observations are taken
- DSOF-16601 - Exporting current frame of an MR set in the feed view will no longer generate a blank PNG file
New Features
- DSOF-15137 New Feature: RenderStream - Send textures to remote engines
- DSOF-14924 New Feature: RenderStream Compressed now uses H265 based transport
- DSOF-15161 New Feature: RenderStream Text parameters now supported
- DSOF-15156 New Feature: RenderStream 3D Object Transform parameters now supported
- DSOF-15204 New Feature: rx Understudy Capability for Unreal
Improvements
- DSOF-17638 OmniCal: don't use stacked projectors point clouds for mesh deform
- DSOF-17542 OmniCal should use Loopback adapter as default
- DSOF-17432 Use LZMA compression for diagnostic archives for better compression
- DSOF-17431 Increase number of crash dumps stored
- DSOF-17426 Add debug option to enable smooth video input to video layers, like XR camera video input.
- DSOF-17390 Default/Multichannel mapping option should be auto expanded when creating a new RS layer
- DSOF-17365 Optimize opening of object view
- DSOF-17338 Add slice index to Renderstream failover event in UE
- DSOF-17307 Remember size of pinned camera editor
- DSOF-17232 Report status of image parameter streams
- DSOF-17198 RenderStream: Unity now provides unique names for exposed parameters
- DSOF-17156 Hold last frame of old stream until understudy takes over
- DSOF-17155 Prioritise project sync based on machine's network receive speed
- DSOF-17134 Add System Time to TimecodeReadoutModule, (renamed to ReadoutModule)
- DSOF-16975 Change the default 'insert time' to timeline to 15 or 30s
- DSOF-16969 Coordinate system check button in spatial calibration debugging
- DSOF-16965 Consolidate colour cal software paths into one
- DSOF-16785 Unity: disable cameras that have been cloned
- DSOF-16783 NotchHost: set loading state on workload when loading block
- DSOF-16133 Add support for alpha to RS compressed transport streams.
- DSOF-16122 Add Bandwidth indications to RenderStream module
- DSOF-16108 Unity: implement ability to group exposed parameters through the GUI
- DSOF-15983 Add ability to change composite order of RenderStream channels
- DSOF-15943 Work out how to manage which machines in a d3 session output which d3 RenderStream outputs (load balancing & failover)
- DSOF-15660 Image Parameters for Notch
- DSOF-15309 Offer an option to phase startup of actors on d3net
- DSOF-15167 Backplate render layer objects must be able to be placed in the composite stack
- DSOF-8983 Ability to export/import section breaks using cue table
- DSOF-17599 OmniCal: remove redundant outlier filtering in projector bundle adjustment
- DSOF-17510 OmniCal: optimise Mesh deform performance
- DSOF-16979 OmniCal: improve camera graph construction
- DSOF-16892 Convert ProjectFileView into a Domain
Version Updates & Compatibility Changes
- DSOF-17107 Update to NCAM SDK 2.6.31
- DSOF-17620 4x2pro no longer supported in r19.0
- DSOF-17480 4x4pro no longer supported in r19.0
- DSOF-17645 2x2plus no longer supported in r19.0
Bug Fixes
- DSOF-17762 Omnical: Bundle Adjust could cause unexpected errors
- DSOF-17712 RenderStream: localhost no longer supported as a preferred transport network
- DSOF-17710 RenderStream: receive health is wrong for multiple workloads on the same render nodes
- DSOF-17703 Project corruption on Actor machines, causing CTD on startup
- DSOF-17701 RenderStream: render node crashes when quickly changing image parameter keyframes
- DSOF-17700 NotchHost: status is Ready while loading block
- DSOF-17696 RenderStream: splits are not pixel-perfect
- DSOF-17670 RenderStream: rounding errors cause sliced render nodes to crash/break
- DSOF-17623 OmniCal: don't allow pinning of Plan widget
- DSOF-17581 OmniCal: exception when setting point cloud visualization to LineUp mode
- DSOF-17573 OmniCal: plans are reloaded if OmniCal window is closed and re-opened
- DSOF-17563 RenderStream: fix multicast address allocation for image parameters
- DSOF-17562 RenderStream: per-machine multicast pools
- DSOF-17551 ColumnListView doesn't shrink to contents
- DSOF-17541 Playback stutters when chasing LTC timecode
- DSOF-17530 OmniCal: disable "Select All / None" buttons in View Capture, when not supported
- DSOF-17519 OmniCal: mesh deform gets into infinite loop when points land on triangle edge
- DSOF-17517 OmniCal: modifying capture properties of main Active Projector does not update Stacked Projector/s
- DSOF-17493 OmniCal: pointcloud not visible after calibrating a new plan
- DSOF-17492 OmniCal: minor bugs in delayed loading of plans
- DSOF-17491 Access violation at renderOutput when LED screens are in the Stage
- DSOF-17488 Exception on project close while Compressed Renderstream is running.
- DSOF-17483 Having an active (unmuted) & not launched renderstream layer causes low performance
- DSOF-17479 Renderstream displays old frames when re-launching workload
- DSOF-17478 RenderStream: string index out of range error when starting new workload with Show Log open
- DSOF-17477 When right click in parallel mapping, director would show preview of stream even though director has exclude mapping set to receive no stream
- DSOF-17476 GPU Time in MachineMonitor is always 0
- DSOF-17466 RenderStream: Only errors are logged in Unity and NotchHost
- DSOF-17463 Error when setting the RenderStream projects folder on installation
- DSOF-17460 Unity: HDRP executables do not receive remote textures
- DSOF-17456 Stream widget should open with preview expanded and scaled correctly
- DSOF-17453 Unity: RenderStream Uncompressed Unity HDRP built asset fails to send stream
- DSOF-17448 OmniCal: delayed loading of plans can lead to issues if Plan is used before data is loaded
- DSOF-17412 dynamic blend with projectors not rendered by actor does not always work
- DSOF-17386 Population masks used by mask objects ignore alpha
- DSOF-17359 Wobbling camera image for still virtual XR setup
- DSOF-17352 Unity: 'Transform' and 'Main texture' fields written to JSON regardless of exposed value
- DSOF-17351 Renderstream streams picking every available rx
- DSOF-17345 Repeated feedrect errors spamming console when using OmniCal
- DSOF-17335 RenderStream: If a stream crashes, sometimes 'stop' is greyed out in the workload widget, but 'stop' works from the network widget
- DSOF-17290 OmniCal: cameras not rendered on stage when restarting d3 with Calibration widget pinned (leads to errors)
- DSOF-17279 When using default assigner as the assigner of other channels, the instance is partially shared
- DSOF-17269 Unity: HDRP built Assets failing to send streams
- DSOF-17261 Genlock: standardise the names of "Apply Genlock" tabs
- DSOF-17247 Dynamic blend zones gamma incorrect when in ACES colour space
- DSOF-17244 ACES cause performance drop on vx4
- DSOF-17238 OmniCal: View Capture shows incorrect images and blob detection results
- DSOF-17236 d3 hangs when ingesting video sequence content
- DSOF-17217 machine specific: deleting old rslogs console folder during startup causes crash
- DSOF-17184 Backplate/Frontplate space layer objects don't account for virtual camera moves
- DSOF-17160 Shutter delay in ProjectorDevice is not persisted
- DSOF-17147 Frame skipped when Mode keyframe changed Locked to Normal
- DSOF-17142 Workload status is 'Error' when failed over but covered by an Understudy
- DSOF-17141 Can't click 'stop' on workload when one instance is not running
- DSOF-17140 Network widget doesn't refresh when machines failed
- DSOF-17098 3D perspective map overscan stretches Renderstream content
- DSOF-17096 Typo in "duplicate hostname" log notification
- DSOF-17024 OmniCal: don't spawn multiple threads for loading pointcloud data on startup
- DSOF-16928 RenderStream Active Latency causes bad camera switch when not set to to amultiple of the sessions' frame time (1/framerate)
- DSOF-16924 Importing projectors CSV gives wrong position and rotation values to the imported projectors
- DSOF-16833 MR set opens with blank spacewidget at normal size
- DSOF-16828 AssetLauncher: Unreal does not enumerate Windows-specific installations in registry
- DSOF-16723 Remote install to multiple machines sometimes fail to re-install after un-install at the remote machine
- DSOF-16345 .json is not always updated when changes are made, compiled and saved in UE
- DSOF-16016 AssetLauncher: ensure firewall doesn't block third party engines
- DSOF-15540 Stacking warp size column isn't visible by default in projector list editor
- DSOF-14865 Actors/Understudies running a d3 project will cause Directors to never start d3 due to waiting for project sync behavior
- DSOF-13796 Delete keyframes before/after only works after drawing a selection area on a keywidget
- DSOF-9617 Having a trailing space in the name of a Capture Plan causes notifications and failure to capture
- DSOF-9113 OmniCal: Tries to load zip files as if they were Plan directories
Advisories for Previous Releases
For more information on any of the following please contact support quoting the DSOF number of the issue.
If you encounter any additional bugs or issues please let us know through the community platform.
disguise hardware:
Issue: Renderstream and the Colour Calibration in the xR workflows does not work on gx1, gx2, or 2x4 hardware
Workaround (if known): New Operating System will be released in Q2 2021. OR enable project setting disableColourCalAcceleration to fall back on software only calibration
Affects version: r18
Issue: DSOF-16732 - GPU throttling on RTX range can cause frame drops in scenes with low GPU load
Workaround (if known): Change power management mode (manage 3d settings) in NVIDIA Control Panel to "Prefer Maximum Performance"
Affects version: r18.0
disguise software:
Issue: DSOF-17629 Actor feeds do not refresh once host name is assigned
Workaround (if known): Not known
Affects version: r 18.1.5
Issue: DSOF-17541 Playback stutters when chasing LTC timecode
Workaround (if known): Use MTC timecode where possible
Affects version: r 18.0.6
Issue: DSOF-17280 - If colour management is set to ACES, crossfade transitions has a strange brightness and pops
Workaround (if known): Not known
Affects version: r18.0
Issue: DSOF-17193 - Multi User Edit in UE requires preferred sync adapter to be set to a network adapter which is available to all machines
Workaround (if known): Often the preferred sync adapter is set to the 25Gb network to facilitate faster sync. Unless all machines in the network have a 25Gb adapter, the preferred sync adapter must be set to another network adapter when multi user edit sessions are running in UE. The adapter can be changed back for when running sync tasks.
Affects version: r18.0
Issue: DSOF-17108 - Current NCAM data implementation used can exhibit unreliable packet timing
Workaround (if known): Not known
Affects version: r18.0
Issue: DSOF-16928 - RenderStream Active Latency causes bad camera switch when not set to a multiple of the sessions frame time (1/framerate)
Workaround (if known): Set Active Latency to a multiple of the sessions frame time (1/framerate)
Affects version: r18.0.1
Issue: DSOF-16723 - Remote install to multiple machines sometimes fail to re-install after un-install at the remote machine
Workaround (if known): Install Locally
Affects version: r18
Issue: DSOF-16462-- Default ACES configuration: GUI defaults to sRGB, OUTPUT will maintain ACES transformation
Workaround (if known):
Affects version: r18
Issue: DSOF-16425-- Renderstream: When using MultiChannelMapping, only one spatial map w backplate is able to change position/rotation
Workaround (if known):
Affects version: r18
Issue: DSOF-16084-- When arrowing Renderstream into blur layer when spatial mapped stops Renderstream updating in spatial map
Workaround (if known): No workaround as 3d viewport data does not persist over arrows or pre-comps
Affects version: r18
Issue: DSOF-16082-- Clustered Rendering: d3service requires restart for asset discovery to work on new Unity executables
Workaround (if known): restart d3 service
Affects version: r18
Issue: DSOF-15553 - Feed mapping editor shows white screens in a notch layer on first use. In subsequent use it will then show the first pixel.
Workaround (if known):
Affects version: r17.4.9
Issue: DSOF-15445 - Editor machines with a user account linked to an Microsoft Account can't join d3 sessions due to permissions errors
Workaround (if known): Create a second local user account
Affects version: r17.4.8
Issue: DSOF-15167 - Backplate screens are not affected by layer compositing order
Workaround (if known): Instead of compositing a screen set to backplate render over the top of the MR Set backplate in d3, composite the additional backplate screen content in the render engine.
Affects version: r18.0
Issue: DSOF-12837 - Looping within a section with loop play mode occasionally plays content of first frame in next section
Workaround (if known):
Affects version: r17.0.2
Issue: DSOF-12753 - Keyframing web-module text properties overtypes previous keyframe
Workaround (if known):
Affects version: r17.0 onwards
Build
Bugs
- DSOF-17856 - LTC playback improvements for Windows 8
- DSOF-17841 - Fixed an issue where some video inputs in a Notch layer were not selectable
- DSOF-17309 - Support for Bluefish driver 6.4.1.7
- DSOF-12753 - User will no longer see errors when keyframing text properties
Bugs
- DSOF-17852 - Playback will no longer stutter when chasing LTC timecode, and audio inputs are no longer unavailable
- DSOF-17834/16998 - Section breaks on 29.97 and 59.94 projects now have parity
- DSOF-17806 - Fixed an issue where LTC was unusable on multiple transports
- DSOF-17508 - Fixed an error when the visualiser cam is not looking at DMX lights
Bugs
- DSOF-17607/17481 - Users are no longer hindered from selecting a device in the MTC module
- DSOF-17370/17292 - Expressions which read into sub-objects of layers will no longer fail to parse
- DSOF-17158 - Expressions will no longer cause an error when pulling a vertex position from a mesh
- DSOF-17629 - Setting hostname will no longer cause actor feeds to stop updating
Bugs
- DSOF-16729 - Unreal will now launch with the flag RenderOffScreen to force the stream to run in background. This saves performance and stops it running minimised. If needed, Advanced Project setting forceUnrealRenderStreamWindow will reverse behaviour
Bugs
- DSOF-17399 Tracker Delay field not updating captured images in delay calibration widget
- DSOF-17273 Installer fail “Error opening file for writing: python.exe” after creating system diagnostic
Bugs
- DSOF-17287 - Cameras will no longer switch out of sync when renderstream layers exist on an inactive track
- DSOF-17256 - Improved performance of XR with 4K camera outputs
- DSOF-17139 - Improved stability of machine sync and startup in large sessions
Fixes
- DSOF-24426 - Fixed an indefinite hang that could occur when mapping a Bluefish input to video input
- DSOF-26874 - Fixed an issue where a projector mask surface with population mask in Alpha blend mode rendered incorrectly in Feed output
- DSOF-26943 - Fixed an issue where blend implementation for Projector Alpha Mask was incorrect
Fixes
- DSOF-26283 - Fixed an issue where the Understudy Timeline was 15 seconds ahead on failover
Fixes
- DSOF-19018 - Fixed an issue were Projector View Blending + Alpha broke the functionality of mask objects
Fixes
- DSOF-20855 - Fixed an issue where the Video Trigger Layer could not arrow into Notch Block
- DSOF-23016 - Reduced CPU usage when using multiple indirections
Fixes
- DSOF-20650 Upgrading show file results in Exceptions and failure to Load
- DSOF-20583 - Fixed an issue where loop play mode occasionally plays content of first frame in next section
- DSOF-20207- Fixed an issue where with Dynamic Blending flashing on automation data update
- DSOF-19641 - Fixed an issue where the Actor is 2 frames delayed when Director jumps on the timeline
- DSOF-19138 - Fixed stuttering and infhz reported when running a radar layer
- DSOF-18906 - Fixed an issue where an unexpected VFC backplane is detected in a 4x2
Fixes
- DSOF-18905 - Bluefish SDK on 4x4 and 4x2 is lower than driver version.
- DSOF-18904 - Fixed an issue where Barco Omnical Stacking workflow doesn't call on Shutter position
- DSOF-17920 - Fixed a purecall crash on exit for d3 servers
- DSOF-17876 - Fixed an issue where the installer fails because visual studio 2019 runtime is not installed
Bugs
- DSOF-16522 - Fixed the r18 build leaving an unusable shortcut on Windows Desktop for RenderStream
Improvements
- DSOF-16710 - Ability to render undistorted front plate content
- DSOF-16685 - Include track timecode in FBX export
- DSOF-17198 - Unity: provide unique names for exposed parameters
- DSOF-17123 - Remove swapStypeFovZoom option switch
- DSOF-17084 - replace Backplane detection in Authorisation with info from d3service
- DSOF-17069 - OmniCal: save simulated camera plan poses to JSON, to help plan import on different d3 projects
- DSOF-17033 - 3D Parallel Maps
- DSOF-17013 - Make the histogram class support negative values and statistics
- DSOF-16981 - Remove 000 coordinates from solved secondary observations
- DSOF-16971 - OmniCal: Investigate slow load time when opening view calibration
- DSOF-16963 - Update to ADL 15.0
- DSOF-16950 - RenderStream: Method of batch editing the settings of a RenderStream component across multiple actors
- DSOF-16947 - Add a separate delay for lens data vs spatial data
- DSOF-16916 - Add DxFont method to render multiple text labels to improve performance
- DSOF-16906 - ProjectorListEditor should allow editing z-Clipping settings
- DSOF-16886 - Make recorder monitor widget resizable
- DSOF-16883 - Improved “Sync” placement
- DSOF-16855 - Remove 'distort output' option from lens in camera
- DSOF-16838 - Add enum to formatted string helpers
- DSOF-16461 - Speed up LUT inversion by multithreading
- DSOF-16459 - Add percentage to colour calibration progress report
- DSOF-16456 - Unity: Add support for 2D content mapping slices
- DSOF-16434 - Minimise d3manager when d3 launches
- DSOF-16401 - Ensure MetricMonitor::addSample calls are using double and not losing precision unnecessarily
- DSOF-16192 - Add whether director is dedicated or non-dedicated to console
- DSOF-16187 - Implement support for 3x3 matrix transforms for color correction
- DSOF-16180 - Split the Yaml manifest definition
- DSOF-16056 - Add button to record remote profiler stacks from d3manager network tab
- DSOF-15874 - Remora API modifications
- DSOF-15842 - Set sensor width in UI
- DSOF-7343 - Change labelling of Video Clip loop In/Out properties to clarify their function
- DSOF-17154 - OmniCal: user option to draw point labels in point cloud visualisation
- DSOF-17087 - ListResources HTTP Api should handle querying by type and name
- DSOF-16966 - Fix the long compilation time of expressioninterpretter.cpp
- DSOF-16894 - Expand unit tests to cover IDTs
- DSOF-16854 - Remove unused 'aspectRatio' property from lens shader
- DSOF-16846 - build: move static_assert for non-template types from headers to .cpp files
- DSOF-16835 - build: split up RMAXd3.h header, to reduce dependencies on d3manager and DLLs
- DSOF-16798 - Enable onDirtyResource detection without requiring ResourceTransport to be active
- DSOF-16580 - build: ndirelay should not need to link against blip.dll
- DSOF-16272 - Write virtual zoom documentation
- DSOF-16171 - Investigate why onLoadResource and onAddResource are called per frame
- DSOF-16075 - Add UE profiling hooks
- DSOF-14616 - Fix cases where newResourceAction is called for UID = 0 Resources
Bugs
- DSOF-17260 - Fix for RenderStream streams which are disabled via excluded mappings are still subscribed to, wasting bandwidth
- DSOF-17256 - Fix for set extension feather performance being very poor.
- DSOF-17211 - Fix for cameras in exported FBX have scale of 0 in Cinema4D
- DSOF-17194 - Fix for when multiple cameras are selected, the fbx export only contains keyframes for one in Cinema4D
- DSOF-17179 - Fix for exported cameras in FBX do not have FOV keyframes
- DSOF-17164 - ACES: Fix for 'Use matrix' checkbox option does not disable matrix for most stage objects
- DSOF-17163 - ACES: Fix for final matrix is available in all Colour management options for most stage objects
- DSOF-17157 - Fix for Comms asserts making debugging impossible on the office network
- DSOF-17144 - Fix for being unable to access screenpositionaxis via expression
- DSOF-17122 - Fix for there being an access violation when running in actor mode with no director
- DSOF-17080 - Fix for LED Screens throwing NameError
- DSOF-17021 - Fix for 'NoneType' error when right-clicking an empty Cluster Pool
- DSOF-17016 - Regression Fix - Multiple cameras in a spatial map render the top cam in the list to all other cam's view
- DSOF-17015 - OmniCal: Fix for lower error reporting to 1 message for every 1 second per camera
- DSOF-16988 - OmniCal: Fix for VimbaCamServer has incorrect logic for checking valid frames
- DSOF-16987 - Fix for Backplane inquiry/detection happening too many times
- DSOF-16986 - Fix for ACES Output Transform field on projectors do not import/export to CSV correctly
- DSOF-16984 - Fix for ACES transforming for camera LUT
- DSOF-16980 - Fix for lock in Option Widget not retaining upon restart project
- DSOF-16978 - Fix for VideoIn monitor: accuracy degrades over a number of days
- DSOF-16977 - AutoFilter monitor: Fix for accuracy degrading over a number of days
- DSOF-16956 - Check box options now recognised when being exported to CSV
- DSOF-16948 - Fix for Synchonised Render Time jumps around a lot due to the noisiness of tracking data.
- DSOF-16926 - OmniCal: Implemented a fix for Point Cloud updating once when changing deform settings
- DSOF-16887 - Fix for OSC string expression only being accessed with array syntax at index [0]
- DSOF-16884 - Fix for string expression causes !!!!! string too long error notification
- DSOF-16880 - Fix for mappings not being categorised correctly
- DSOF-16875 - Fix for right-clicking an object on the far edges of the visualiser will show the properties of the visualiser camera instead
- DSOF-16825 - Fix for left-clicking and dragging on the outer left or right edges of the GUI makes the visualiser camera swivel
- DSOF-16820 - Fix d3manager reporting x3 25g ports
- DSOF-16788 - Fix for applying ACES IDT on camera objects
- DSOF-16729 - Fix for Unreal instances sometimes starting minimised
- DSOF-16728 - Fix for when Source Machine in RenderStream is set to Any the asset will sync from any machine on the network with that asset, not just those in the current pool.
- DSOF-16701 - ACES: Fix for d3 test pattern looks different in ACES sRGB vs Gamma space sRGB
- DSOF-16689 - XR: Fixed for Colour Calibration creating inverted luts if camera capture phase is out of sync. Setting Num Frames Per Test should help but doesn’t
- DSOF-16623 - Fix for Camera plate & spatial mappings not following overscanned camera resolution when it changes by default
- DSOF-16552 - Fix for Projector Study Resolution error when exporting
- DSOF-16494 - XR: Fix for Filmic grain effect mapped to backplate causes content mapped to MR set screens to misalign
- DSOF-16476 - Unreal: Fix for 'Scene Selector' rough edges and inconsistencies
- DSOF-16408 - Fixed d3manager asking for a restart, when killing and restarting d3 service is all that's needed
- DSOF-16346 - RenderStream: Fix for Scene selector retaining stale data
- DSOF-16315 - OmniCal: Fix for an access violation when deforming a mesh while deform visualisation is active
- DSOF-16190 - Fix for Notch blocks containing layers with a , don't create a stream in notch_host
- DSOF-15568 - OmniCal: Fix for UI drawing "Resume Capture" button underneath the "Calibration" CollapsibleWidget
- DSOF-14988 - Fix for Dmx Lights still download GPU texture even when machine is not outputting
- DSOF-14386 - Fixed group apply feed settings button in the feed scene editor not working
- DSOF-13331 - Fix for updated obj file, wireframe and shadow not getting updated until close and relaunch project
Bugs
- DSOF-17088 - Fix for applying feed settings while alt-tabbing results in an out of memory
- DSOF-17016 - Fixed an issue with multiple cameras in a spatial map render the top cam in the list to all other cam's view
Bugs
- DSOF-17126 - OmniCal: fix for calibration error in results is 0 if projector failed (should be -1)
- DSOF-17110 - OmniCal: fix for potential access violation on shutdown prevents saving Alignment data
- DSOF-17056 - Add stack trace to texture allocation errors
- DSOF-17046 - Unbounded memory growth in actor monitoring manager
- DSOF-16626 - Plugins cannot save schema without a license
Improvements
- DSOF-17116 - OmniCal: report now prints total sum and average of al camera / projector errors
- DSOF-17095 - OmniCal: report now immediately log to console, not just at end
- DSOF-17089 - update FakeIt to latest version 2.0.8+
- DSOF-17066 - OmniCal: save Report as txt file, in addition to JSON, to help with analysis
Bugs
- DSOF-17032 - Unreal 10-bit backbuffer has insufficient alpha depth
- DSOF-17027 - RenderStream Sync erroneously excludes unreal project Saved/Config directory
- DSOF-16940 - Lut files sometimes don't apply after calibration and need to be reselected
- DSOF-16720 - Serialized module versions are not being serialized causing module upgrade every startup and RT storm
Bugs
- DSOF-16945 - Users BI opt out checkbox will now properly be set to your selected preference on remote install
- DSOF-16941 - colour calibration LUTs will now always get get re-enabled after running a Pre-calibration capture
- DSOF-16937 - Update rivermax .lic files in new installers to be up-to-date and fixed an issue where the update button for rivermax licenses would download the wrong file.
- DSOF-16930 - Fix for "None type” notification when in a session and 1 machine doesn't have a valid feed scene
- DSOF-16923 - removing tracking source and re-running spatial calibration will no longer give bad results
- DSOF-16921 - Fixes to improve our handling of errors thrown by the GPU.
- DSOF-16897 - Observation debugger lines will no longer all go to middle of screen when restarting after unticking observations
- DSOF-16876 - Fixed an error where the preview wouldn’t appear after opening texture properties while ACES is active
- DSOF-16574 - XR calibration processes will no longer appear in the stage visualizer for independent editors.
RenderStream Plugin Fixes
Unreal Plugin 844
- DSOF-16670 CameraActors which are children do not respect hierarchy when used with 2D mappings
- DSOF-16649 RenderStream channels set up as children of an EmptyActor in UE do not respect the actors location
Bugs
- DSOF-16946 - Unreal will no longer crash when no default map is set.
- DSOF-16891 - Aspect ratio in openCV for camera calibration is now used correctly instead of inferred from other data.
- DSOF-16881 - Properties of an audio clip are now viewable without a gui error.
- DSOF-16858 - Renderstream playback will no longer stall intermittently on non-controller machines in some cases.
- DSOF-16845 - Performance will no longer degrade when viewing the workload instance tooltip
- DSOF-16817 - Dmx Lights will now output correctly even when not starting at universe 1 or the dmx device does not cover universe 1
- DSOF-16717 - Alpha and additive blend modes will now blend alpha correctly in the compositor stack and precomps.
- DSOF-16797 - Alt + E to stop fast colour cal no longer causes d3 to hang indefinitely
- DSOF-16786 - RGB EXRs are no longer clamped between 0 and 1
- DSOF-16755 - FBX animation movie is no longer exported with incorrect FPS in file
- DSOF-16753 - Dmx lights are now correctly disabled by the proxy system when not outputting from local machine
- DSOF-16750 - Spatial calibration “Matrix’ mode no longer gives broken results in some cases
- DSOF-16388 - Spatial calibration no longer looks bad with two observations
- DSOF-16178 - Asset discovery no longer detects unreal executable binaries as separate assets
- DSOF-16024 - Unreal camera actor is now accessible in blueprints normally while doing renderstream.
Bugs
● DSOF-16856 - Sony IDTs no longer appear wrong
● DSOF-16841 - All LED Screens now have a hierarchy dropdown again
● DSOF-16834 - d3 trial build now starts properly
● DSOF-16811 - set extension and led LED walls no longer fall out of sync when AR fade is set to 0
● DSOF-16787 - d3service will no longer crash if empty/corrupted file ending in ".uproject" found in Renderstream Projects folder
● DSOF-16765 - Camera switching is no longer broken when frontplate is in minimal latency mode
● DSOF-16744 - rslogs folder is now correctly included in diagnostics
● DSOF-16734 - RenderStream Active Latency no longer causes excessive stuttering when not set to a multiple of the refresh rate
● DSOF-16703 - Mapping Quick Select slots no longer allow for non MultiChannel mappings to be applied on RenderStream layers
Improvements
● DSOF-16674 - Renderstream workload actions (Start, Stop Sync) will now be greyed out when the corresponding operation is in progress.
○ The Sync button will grey out while there are running sync operations, on completion of all operations (success or failure) the button will no longer be greyed out
○ The Stop button will be greyed out when the workload is not running
○ The Start and Sync buttons will be greyed out when the workload is running
○ The Start button will be greyed out while there are running sync operations
Build
Bug
- [DSOF-10160] - Fix for NDI video input flashing green when first mapped
- [DSOF-16193] - Fix for Multi transport control list with lots of transports causing buttons to appear over bar widget for last transport and mouse mis-alignment
- [DSOF-16329] - Fix for Expressions between video layers breaking with a period in certain places
Bug
- [DSOF-16230] - The user can again add new 'Exclude Mappings' when the option switch "enableActiveRegions" is enabled
Bug
● [DSOF-13114] - Fixed an issue where Input/Output DMX Axis data were mismatching
● [DSOF-14469] - Fixed an issue where Open layer expressions could break
● [DSOF-15249] - Fixed an issue where assigning a TestPattern layer to a Palette would blank out Default parameters when GUI transparency is disabled
● [DSOF-15567] - Fixed an issue in OmniCal that caused a hang when alignment point is added
● [DSOF-15647] - Fixed an issue that prevented Snapshots from being recalled after a resource has been renamed.
● [DSOF-15692] - Fixed an issue where gx machines would report invalid RenderStream
licensing
● [DSOF-15731] - Fixed an issue where a hang on close could occur when an NDI stream
assigned to videoin and embedded NDI Notch block present
● [DSOF-15746] - Fixed an issue where outputs were indexed incorrectly on Rackmount licenses
● [DSOF-15761] - Fixed an issue where a notification with too many details could cause d3 to freeze
● [DSOF-15847] - Fixed an issue where renaming a VideoIn twice cause a critical error
● [DSOF-15848] - Fixed an issue where Notch blocks could cause a critical error if the Exposable Camera parameter is open while being played
● [DSOF-15877] - Fixed an issue where Notch live reloading didnt work on win 8.1 machines
● [DSOF-15902] - Fixed an issue that caused a bounds-check error when DMXScreenPositionDriver is present
● [DSOF-15954] - Fixed an issue where d3 hangs when loading in a Notch block that contains exposed string parameters.
● [DSOF-15960] - Fixed an issue where sending an OSC command linked to an OSC Expression causes d3 to hang
● [DSOF-15972] - Fixed an issue when loading Notch blocks which are accessed via a windows shortcut, the block fails to load
● [DSOF-16030] - Fixed an issue where a vx2 running renderstream could not receive renderstream at the correct frame rate when running at full latency mode.
● [DSOF-16044] - Fixed an issue where selecting or creating a new layer collapses all previously opened key widgets
● [DSOF-16054] - Fixed an issue where a critical error could be thrown when creating MIDI
device
● [DSOF-16111] - Fixed an issue where RenderStream: Uncompressed RGB 4:4:4 Non-alpha transport configurations could produce blank stream
Improvements
● [DSOF-15592] - Disable vsync when writing movies to allow it to run faster than monitor refresh rate.
● [DSOF-15623] - New Feature: Ability to export sequenced animation to a 3d animation file
● [DSOF-15626] - New Feature: Show "Expiration" for renderstream send license in d3 manager
● [DSOF-15742] - New Feature: sockpuppet style readout on video layer and clip for current
playing frame number / time in min:sec
Bug
- [DSOF-15729] - Christie GS API message parser now correctly splits messages by delimiters
- [DSOF-15909] - ZMQ assertion should no longer cause occasional crashes in d3service
- [DSOF-15931] - d3 net has been made more robust by allowing resends for missed requests
- [DSOF-15932] - d3 should no longer have network problems operating in a network with other devices using the same network protocol
- [DSOF-16006] - On vx2 machines the Feed view "Refresh All" button now works and the, "Refresh" button now appears and works.
Improvements
- [DSOF-16042] - Improve logging when RSUC fails to create a stream with an error code.
Bug
- [DSOF-15856] - Notch layers will no longer render a single frame with their default parameters sometimes when being switched to and running at non-full frame-fractions.
- [DSOF-15891] - Console statements that should have stack traces will now all properly have them again.
Bug
- [DSOF-15709] - OmniCal: Now shows specific error message in UI when a projector device is offline [DSOF-15730] - OmniCal: calibration settings are no longer only saved when calibration has completed successfully
- [DSOF-15832] - 3+ Machines in session will no longer flicker between "Blocked" and "Connected" in the network manager
- [DSOF-15847] - Renaming a VideoIn twice no longer causes a crash
- [DSOF-15853] - Access violation no longer occurs when opening a keywidget for a field that shares a name with an exposed parameter in notch module
- [DSOF-15865] - OmniCal: bundle adjustment and reconstruction no longer use incorrect Projector blob coordinate
- [DSOF-15869] - Multiple cameras in a spatial will are no longer render all the camera views on top of one another
- [DSOF-15897] - Machines with disconnected outputs will no longer incorrectly show genlock as unavailable
Improvements
- [DSOF-15571] - OmniCal: reduce capture times when using stacked projectors
- [DSOF-15701] - OmniCal: add mode to build projector capture groups from dse excludes
- [DSOF-15710] - OmniCal: add warning about projector device issues at start of capture
- [DSOF-15873] - OmniCal: reduce logging of CamParams when receiving image data
- [DSOF-15850] - OmniCal: add tests for structured light helpers
Bugs
- [DSOF-15298] - 2D Local Notch content now works like normal 2D content with spatial mappings
- [DSOF-15299] - Notch_Host now respects camera clipping distance
- [DSOF-15515] - TIFF sequence playback performance is normal again.
- [DSOF-15658] - Snapshots: restoring feed changes no longer triggers access violations
- [DSOF-15676] - Access Violation no longer visible when linking a field to an Open layer that previously had Keyframe Editor present
- [DSOF-15690] - Christie API no longer treats FYI responses as error
- [DSOF-15738] - OmniCal: pointcloud rendering is no longer very slow when using many projectors; and lines can no longer occlude points
- [DSOF-15755] - OmniCal: incorrect point cloud is no longer passed into single projector bundle adjustment
- [DSOF-15756] - OmniCal: incorrect point cloud is no longer rendered when selecting an individual projector in the visualiser
- [DSOF-15762] - OmniCal: plan capture validation will no longer create a notification with too many details causing d3 to freeze
- [DSOF-15763] - OmniCal: performance improvements when viewing a large calibration report
- [DSOF-15766] - OmniCal: BundleAdjustment now logs errNorm for last iteration
- [DSOF-15789] - Creating an OmniCal plan no longer displays a notification "object has no attribute" which leads to an Access Violation.
- [DSOF-15802] - OmniCal: project with OmniCal plans but no plan data no longer breaks UI
- [DSOF-15827] - Vertical spacing between machines is now correct with > 2 machines in feed view
- [DSOF-15831] - Machines with disconnected outputs will no longer incorrectly show genlock as unavailable
Improvements
- [DSOF-15696] - OmniCal: "different capture settings" error now highlights which settings are different
- [DSOF-15697] - OmniCal: "Missing Stacked Projector" notification now mentions which projector is missing
- [DSOF-15698] - OmniCal: now logs capture phase details in Start/Resume Capture
- [DSOF-15699] - OmniCal: now logs whether we Start or Resume capture
- [DSOF-15702] - OmniCal: now logs start/finish of capture sub-tasks (validate, buildCaptureGroups*, detectBlobs, filterBlobCodes)
- [DSOF-15765] - OmniCal: added separate setting for projector only bundle adjustment iterations
Bugs
- [DSOF-5396] - Sharing: d3 Projects folder not getting all sharing permissions set
- [DSOF-11202] - OmniCal: ZIP archive of captured data is limited to 2GByte file size
- [DSOF-11347] - Installer shows error that CPU does not meet minimum requirements when it fails to execute the instructioncheck process
- [DSOF-11589] - VR: User height value gives incorrect position
- [DSOF-12806] - VR home position causes controller navigation to teleport in the wrong direction
- [DSOF-13869] - OmniCal remembers the DPI scaling of the machine the study was created on
- [DSOF-13894] - VIVE Rotational parameters in frame of reference not working correctly
- [DSOF-14620] - Snapshots: too many £ signs cause Snapshot to fail
- [DSOF-14621] - Snapshots: When creating a snapshot name with £ sign this won't translate with a £ sign in the snapshots list/manager
- [DSOF-14623] - Project Snapshots: Rolling back to Snapshot with £ name triggers "does not exist" notification
- [DSOF-14772] - Improve GPU profiling code
- [DSOF-14783] - 2 Clusters with the same asset should be able to request independently from different streams
- [DSOF-14815] - build should ensure that the correct compiler version is used across all CI and dev machines
- [DSOF-14991] - Failing DmxPersonalityRegistry::getPersonality() tests
- [DSOF-14992] - NDI: UYVY shows a green edge and is the wrong resolution (for some resolutions)
- [DSOF-15092] - Omnical gui does not display default projector global settings unless advanced option is toggled
- [DSOF-15112] - List editor with a high number of projectors needs to refresh after edits are made
- [DSOF-15241] - Director doesn't accept editor's cameras and can't create its own once an editor has joined.
- [DSOF-15242] - Editor can't Change Type
- [DSOF-15246] - Notch NDI Input Indexing Is Incorrect
- [DSOF-15258] - Access Violation when creating a new feed rect after deleting the first rect but not the widget
- [DSOF-15263] - MR set needs to be mapped to active feed for renderstream module to render content on dedicated director
- [DSOF-15313] - Fit to contents fills entire track length when speed is 0 or below
- [DSOF-15378] - RenderStream: streams are not being generated automatically
- [DSOF-15381] - Deferred Jump arrow key behavior at section breaks is incorrect
- [DSOF-15416] - RenderStream: scenes from levels does not work
- [DSOF-15429] - SDI VFC not outputting for 1080i 59.94
- [DSOF-15430] - New Resources in ResourceTransport are never cleared
- [DSOF-15436] - No progress information when creating diagnostic zips
- [DSOF-15438] - In a multi transport setup, crossfading to a section with a mixing blend mode (difference, hard light etc) causes the first few frames of content not mapped to all surfaces to show across all surfaces where the lower layer is mapped
- [DSOF-15444] - Imported Group Layer on editor does not have extents transferred to director properly.
- [DSOF-15455] - OmniCal: Python exception when first assigning a MobileCamera to a Camera Plan
- [DSOF-15487] - OmniCal: VimbaCamServer process sometimes gets started twice
- [DSOF-15541] - Notch layer and Notch_host both crash when loading in a specific block
- [DSOF-15546] - Prevent Windows/Nvidia/AMD from recalling previous display configurations
- [DSOF-15547] - Throttle FFS (CTRL+ALT+SHIFT+F12)
- [DSOF-15556] - OmniCal: OSC code does not check if socket failed to be created
- [DSOF-15590] - RenderStream: watermark is not present when performing Clustered Rendering
- [DSOF-15603] - VR indicates a notification when the Stage widget is open
- [DSOF-15607] - Private state is shared over RT every frame
- [DSOF-15622] - Web layer causes d3 to crash
- [DSOF-15636] - invalid map<k, t="">key error when Indirection Controller created on Editor
- [DSOF-15641] - Snapshots can't be renamed or archived
- [DSOF-15643] - Grouping layers on an editor causes unexpected behaviour of grouped layers on director [DSOF-15659] - Unable to select multiple reference points from the reference points manager
- [DSOF-15663] - d3net manager expands past the edge of the screen.
- [DSOF-15664] - New console logic can cause consoles used without contexts to crash d3 to desktop
- [DSOF-15692] - GX Machines reporting valid RS Send License when it doesn't have one
- [DSOF-15712] - RenderStream: !targets.empty() error when d3 is restarted when using camera based mappings
- [DSOF-15713] - RenderStream: Access Violation when d3 is restarted after active stream using sublevels is closed</k,>
Improvements
- [DSOF-13213] - Add support for Trackmen protocol for camera tracking
- [DSOF-14784] - HDR processing of Unreal RenderStream content
- [DSOF-15594] - Rework console to allow different endpoints
- [DSOF-15595] - Ensure RenderStream 1.8 plugins are available for 17.5 release
- [DSOF-3552] - Provide measured refresh rate of outputs in output debug menu under frame stats
- [DSOF-11948] - Add per machine rollover highlighting to the DirectorStatusWidget
- [DSOF-12378] - Add debug information dumps for display devices to system diagnostic
- [DSOF-13396] - RenderStream: Configure, start, pause or stop instances
- [DSOF-14063] - Indirections - make changes persistent through restarts
- [DSOF-14099] - Improve frame of reference
- [DSOF-14254] - Add parameter arrays to etw logging events
- [DSOF-14636] - NotchHost: uncompressed RenderStream support
- [DSOF-14639] - Add Foot Lamberts option to Projector Studies
- [DSOF-14717] - Rename ScreenPositionReceiver
- [DSOF-15019] - Move machine serial number from help -> License to help -> about d3manager in d3Manager.
- [DSOF-15183] - Prevent d3 from losing focus / fullscreen when a remote diag is created
- [DSOF-15229] - Provide a warning when output resolutions are different
- [DSOF-15542] - OmniCal: adjust nConcurrency() usage for specific sub tasks, to optimise CPU/mem usage [DSOF-15545] - OmniCal: default lens in VimbaCamServer process should match the default in CameraPlan [DSOF-15548] - Report progress of FFS (CTRL+ALT+SHIFT+F12) in console and on front panel
- [DSOF-15593] - SystemDiagnostics: Should include VimbaCPP.log from user's TEMP folder, if it exists [DSOF-15651] - Camera editor is too unwieldy - introduce separator hierarchy
Bugs
- [DSOF-15363] - Actors no longer fail to join sessions if an editor change is in-flight while they are syncing from the director.
- [DSOF-15437] - d3 Installer no longer sets rivermax license environment variable to look at the wrong location.
- [DSOF-15453] - Projects corrupted by r17.4.7 are now cleansed automatically on launch.
- [DSOF-15440] - OmniCal: Frame time stamp is no longer incorrectly assumed to be at the start of the exposure for Disguise G-507 cameras
- [DSOF-15443] - OmniCal: capture system will no longer attempt to shutter projectors when stacking feature is disabled
- [DSOF-15454] - OmniCal: MV Camera Stats no longer spams console during capture
- [DSOF-15489] - OmniCal: d3 now correctly terminates "external" VimbaCamServer processes.
Bug
- [DSOF-15262] - Rmax licence will no longer fail to install if folder does not exist
- [DSOF-15308] - Editor’s will no longer request RenderStream fram from Render Nodes if the cluster has “Director” set as the Controller
- [DSOF-15376] - Multi mapping no longer renders incorrectly or not at all with perspective maps when using a notch layer
- [DSOF-15385] - d3 Labs: Exclude Mappings' in Active Regions does not function now functions as expected
- [DSOF-15421] - d3 Labs: 'Exclude Mappings' does not close Notch instance when in Multi Map
Bug
- [DSOF-15052] - Transferring content to an actor will no longer occasionally fail with an m_file-> codec error
- [DSOF-15261] - d3 no longer reports "Uncompressed Renderstream license: unknown" when license is valid, in the right place and RSUC is working
Bugs
- [DSOF-15113] - MultiList selection does not appear in the list
- [DSOF-15174] - LED Screen - Hide Output Transform parameter until it becomes gold
- [DSOF-15211] - Trial fails to load
- [DSOF-15226] - Opened editors play shrinking animation when none of its collapsible tabs are open. Regression of DSOF-14090 caused by fix of DSOF-15107
- [DSOF-15238] - Text is rendered before the dropdown has opened
- [DSOF-15247] - When changing type occasionally you get a notification on actors and object
- state is not updated
- [DSOF-15271] - d3 reports Failed to sync project files from director even after success if any 1 IP fails
Story
- [DSOF-14160] - Add Mellanox RiverMax license support to d3
Bug
- RenderStream UC doesn't work if sender is started before d3
- When editing multiple layers of different lengths together they will all suddenly jump to the same length as one of the layers
- Need to run ndinstall after changing the rivermax license file
- All widget sections open expanded on launch
- NDI relay app takes high CPU and causes performance issues when NDI stream is not active
- Zombie NDI processes are left when renderstream node is removed
- notch host does not send correct alpha
- RSUC videoins need to be mapped to make RSUC work
- Open layer does not propagate changes properly over RT when created while in session
- Open layer occasionally causes access violation
- “RenderStream Uncompressed licensed: Yes” imply the server has valid and correct license when it is not true
- Change Type is not propagated to actors
- Renames are not propagated across RT
- Cannot drag input window of a feed map using mouse or arrow keys
Story
- add updated .lic files to installer on installer creation from aws
- Renderstream default blend mode should be premult-alpha
- Set all machines to look to C:/Program Files/Mellanox/Rivermax/lib/rivermax.lic
Bug
- When deleting video input d3 crashes
- Unreal plugin switches levels to invisible
- Fix Projector Grouping corpus tests
- Not able to Duplicate a feed rectangle in a Feed Map and Use on a Second Surface
Story
- Update rivermax.lic bundled with installer to latest
- Renderstream failure messages "no frame" and "no source" are ambiguous
Bug
- Arrow deletion doesn't get propagated over RT
- BI uploaded logs are uploaded too often and have wrong date stamp
- BI uploaded logs are missing manifest file
- Sometimes rebuilding does not trigger repack_blank execution
Task
- OmniCal: store test data in version control
Story
- Move Blob Detector Corpus testdata to version control repo
- Build agents need to support SSH cloning from commandline or change corpus sync to use different methods
Bug
- Snapshots: extended ASCII codes in snapshot names are unsupported
- Cannot open sequencing for openmodule
- Update project from r16.1.2 to r17.4, changing audio output patch creates ACCESS VIOLATION
- HTC Vive causes Access Violation and GUI issues
- Keyframe editor does not show on the layer type 'open'
- Notch layer exposed parameters do not have keywidgets, cannot be changed
Story
- Log RMAX last error when methods fail
Bug
- [DSOF-15267] - Bulk adding Projector Devices no longer causes d3 to completely stall
- [DSOF-15470] - OmniCal: high memory usage in VimbaCamServer no longer occurs during large captures
- [DSOF-15534] - OmniCal: projector calibration outliers are now filtered before CamerasThenEachProjector bundle adjustment mode
- [DSOF-15565] - OmniCal: images are no longer sent back to d3 after a capture has been stopped
Bug
- [DSOF-15261] - d3 no longer reports "Uncompressed Renderstream license: unknown" when license is valid, in the right place and RSUC is working
- [DSOF-15578] - OmniCal: BundleAdjustment no longer uses more CPU threads than gx range has
- [DSOF-15591] - OmniCal: manual z-clipping is now applied correctly after alignment
- [DSOF-15597] - OmniCal: VimbaCamServer logging is now regularly flushed, stopping missing/incomplete messages in log file
- [DSOF-15605] - OmniCal: logging now includes stacktrace when rethrowing exceptions silently, so we can diagnose problems more easily.
Bug
- [DSOF-15458] - Fix for a crash desktop when DMX lights re-added to stage
- [DSOF-15469] - Omnical: Camera stats window will no longer start MV cameras that are not in the plan
- [DSOF-15488] - OmniCal: Fix for access violation on shutdown when trying to stop VimbaCamServer process
- [DSOF-15497] - DxTexture: No longer saves external image files that are loaded in OmniCal UI
- [DSOF-15524] - OmniCal: M anual z-clipping value is now applied immediately instead of after toggling the config
- [DSOF-15531] - OmniCal: VimbaCamServer now use a fixed number of threads for png saving
- [DSOF-15532] - OmniCal: Added a debug option switch to reduce max blob detection
- concurrency
- [DSOF-15486] - OmniCal: Add a debug option switch to control number of PNG threads in
- VimbaCamServer
Bugs
- Editing resolution of rotated feed rectangles resets rotation
- Toggling lock on rotated Feed Rectangle in Feed Mapping flips respected resolution values
- flaky auth / network tests related to CI network environment
- OmniCal: projector stacking warps left disabled after capture
- Perspective Mappings do not show eyepoint/wireframe
New Features
- [DSOF-556] - New feature: User-defined default values for OSC/DMX expression
- [DSOF-825] - New feature: Individual screens and projectors can now have their output frozen (hold)
- [DSOF-1488] - New feature: Multi-channel audio from video files
- [DSOF-4880] - New feature: "OR" can now be used in expressions
- [DSOF-6386] - New feature: Widgets are now stickied on a per machine basis
- [DSOF-10825] - New feature: Tracking - Motive / NatNet support
- [DSOF-12485] - New feature: Project Snapshots
- [DSOF-13250] - New feature: Support for expressions for string type fields
- [DSOF-13298] - New feature: Camera front plate now shown in VR
- [DSOF-14077] - New feature: d3manager can now remote edit Advanced machine settings
- [DSOF-14104] - New feature: d3manager can now remote quit/restart/shutdown of machines
- [DSOF-14127] - New feature: Expressions now support 24bit DMX
- [DSOF-14151] - New feature: DmxScreen now supports a true 16-bit RrGgBb fixture type
- [DSOF-14226] - New feature: Import a fixture group via .xml file
- [DSOF-14694] - New feature: Fade in/out time for media indirections now supported
- [DSOF-14146] - New feature: Widgets can now be moved by dragging & middle mouse button
Improvements
- [DSOF-4886] - Tracking: Merge BlackTrax workflow into ScreenPositionReceiver [DSOF-4723] - Confirmation overlay for explicit save (alt-w)
- [DSOF-4838] - DMX driver now supports CMY mode
- [DSOF-7694] - Ability to set sACN priority
- [DSOF-9190] - Ability to render Lux without Footprints
- [DSOF-9966] - Add 16bit DMX color option to DmxLights
- [DSOF-10428] - RBG DMX Screen & Lights
- [DSOF-10473] - OmniCal: Indicate projector colour alongside name in Capture Setup UI
- [DSOF-11092] - OmniCal: Make camera focal length setting an option list rather than a numeric field
- [DSOF-11519] - Colour Profiles and LUTs are now available on Projectors
- [DSOF-11689] - DMX control layer now supports 16 bit values
- [DSOF-12341] - Bank Editor: When selecting a mapping bank from DMX Sockpuppet it is possible to put in a bank number into the MA that doesn't exist in d3, and still be able to select slots within Bank 0.
- [DSOF-12416] - Added vx 1 and vx 2 hardware support
- [DSOF-12952] - More information added to the d3net tab in manager
- [DSOF-13808] - sACN rev 2016 Universe Synchronisation implementation
- [DSOF-14033] - Notch: add support for exposeable arrays
- [DSOF-14066] - Improved VR tracking
- [DSOF-14087] - Add support for XYZ colour space
- [DSOF-14147] - Prevent editors from minimizing until the mouse cursor leaves the widgets bounds
- [DSOF-14178] - Include UV from 'd3 Meshes' (Rectangle/Curve etc etc) when exporting Stage as FBX
- [DSOF-14203] - Sockpuppet: auto populate error message to include bank&slot for easy navigation
- [DSOF-14210] - "About d3Manager" now shows server Serial Number.
- [DSOF-14681] - Add option to allow the user to choose TTL for multicast sACN packets
- [DSOF-14698] - $ syntax removed from OSC indirection controllers.
Bugs
- [DSOF-1144] - Fixed an issue where a specific obj locks the software using DmxScreens
- [DSOF-3104] - Fixed an issue where OSC expressions didn’t support '-' in the name
- [DSOF-3105] - Fixed an issue that made OSC expressions case sensitive
- [DSOF-4730] - Fixed an issue where a patched Notch layer did not refresh fields until made active (non-zero brightness)
- [DSOF-4930] - Fixed an issue where HAP formatted stage and feed renders cannot be opened in non-d3 applications
- [DSOF-5156] - Fixed an issue where DMX Recorders table would always truncate IP address
- [DSOF-6389] - Fixed an issue where DmxLight fixture driver info is only created when a DMXstring is created
- [DSOF-10256] - Fixed an issue where stage movies produced distorted audio if rendered at FPSs that are not 30
- [DSOF-10596] - Fixed an issue where sometimes it was not possible to start Actors after missing project notification
- [DSOF-10808] - Fixed an issue where that caused d3 to display an incorrect value when OSC Integer Argument value is below 0
- [DSOF-11589] - Fixed an issue where user height value would give incorrect position for VR
- [DSOF-11623] - Fixed an issue where the wrong refresh rate showed in head feed settings.
- [DSOF-11682] - Fixed an issue where the input field for exporting stage or feed movie does not display correct track name
- [DSOF-11918] - Fixed an issue where having the playhead at beginning of new section shows last frame of previous section for imported layers in 29.97/59.94
- [DSOF-12339] - Fixed an issue where the layer editor preview disappears when the mapping is set to none, and does not reappear when a mapping is reassigned until the layer editor has been closed and re-opened.
- [DSOF-12604] - Fixed an issue where a fatal error could occur on startup on systems with bluefish capture cards and 1080p 48FPS SDI input
- [DSOF-12685] - Fixed an issue with DMX Lights: when using fixture driver type 'fixture driver', doesn't initially output DMX unless create a second fixture to apply it to.
- [DSOF-12806] - Fixed an issue where VR home position would cause controller navigation to teleport in the wrong direction
- [DSOF-12974] - Fixed an issue where Adding Devices to Device Manager with Undo could cause a fatal error
- [DSOF-13786] - Fixed an issue where Designer did not use primary head for GUI when using rackmount GPU
- [DSOF-13809] - Fixed an issue that made it very hard to click on the visualiser camera button in certain situations
- [DSOF-13892] - Fixed an issue where embedded audio volume would instantaneously jump while crossfading if volume at a value <1.0
- [DSOF-14010] - Fixed an issue where a hang could occur on startup when upgrading from r17.1 to r17.4
- [DSOF-14037] - Fixed an issue where transition time stops working in Slideshows when you click scrub in and out of the layer.
- [DSOF-14057] - Fixed an issue which created a fatal error if you attempted unlock then refresh a slideshow.
- [DSOF-14058] - Fixed an issue where the gamma curve for Rec.709 wasn't sRGB
- [DSOF-14062] - Fixed an issue where edits in the DMX personality window does not get saved if directly exported to XML
- [DSOF-14080] - Fixed an issue where undoing a keyframe placement on Keywidget, removes latest but also creates another
- [DSOF-14090] - Fixed an issue where editors open expanded and then shrink to minimum required size
- [DSOF-14112] - Fixed an issue where the software sometimes couldnt start with multiple monitors connected
- [DSOF-14134] - Fixed an issue where having non image file extension in a .seq folder makes image sequence unusable inside the software
- [DSOF-14177] - Fixed an issue where Unpack .d3 file 'unpack file failed' when there was a notch block in the track
- [DSOF-14181] - Fixed an issue where exporting the stage throws an error
- [DSOF-14182] - Fixed an issue where system diagnostics could sometimes hang on creation
- [DSOF-14185] - Fixed an issue where Non-GUI monitors were not available in feed view
- [DSOF-14191] - Fixed an issue where bake field option closes already opened keyframe editor, makes baking opened field counter-intuitive
- [DSOF-14197] - Fixed an issue where Actor status widget doesn't appear when assigning machine as Director
- [DSOF-14217] - Fixed an issue where GenericLampDriver output mode did nothing
- [DSOF-14218] - Fixed an issue where removing a camera that is used in a notch layer spatial map causes errors only after restart
- [DSOF-14228] - Fixed an issue where an error was thrown when launching d3 and opening Indirection Controllers list with empty ListIndirectionController
- [DSOF-14241] - Fixed an issue where duplicating the mapping when a Child of Projector incorrectly links mapping and displays PerpectiveProjectionObject rather than the Mapping name
- [DSOF-14251] - Fixed an issue where keyboard shortcuts don't work unless mouse has been used at least once
- [DSOF-14270] - Fixed an issue where MultiEdit column resizing did not work
- [DSOF-14279] - Fixed an issue where patching a grouped layer with multi-edit keyframes open causes an error
- [DSOF-14291] - Fixed an issue where the cursor behaved incorrectly when attempting to add preset to projectorpreset of Projector Control layer
- [DSOF-14300] - Fixed an issue where that caused a thumbnail resolution error when adding a camera to Capture Plan
- [DSOF-14308] - Fixed an issue where the Indirections API - DxTexture resource lookup returns no resources
- [DSOF-14309] - Fixed an issue where the InDirections API should be able to set ManulaIndirection to None
- [DSOF-14310] - Fixed an issue where attempting to expand any parameter in multi layer editor causes an error
- [DSOF-14311] - Fixed an issue where keywidgets remain open when switching to a new editor, even if field in new editor is hidden
- [DSOF-14312] - Fixed an issue where an error was thrown when deleting multiple layers
- [DSOF-14352] - Fixed an issue where an error was thrown when undoing patch assignment with MultiLayerEditor open
- [DSOF-14353] - Fixed an issue where a mobile editor's sticky state will revert if not auto-saved
- [DSOF-14363] - Fixed an issue which caused constant widget resizing when moving intensity keyframes in multilayer editor
- [DSOF-14371] - Fixed an issue where a brightness of 0 when the playhead reaches a section break causes brightness to be expressed as 2.86084
- [DSOF-14404] - Fixed an issue where an error was thrown when setting OptiCalCamera Lens to 'None'
- [DSOF-14405] - Fixed an issue where an error was thrown when attempting to Calibrate Capture Plan
- [DSOF-14414] - Fixed an issue where keywidgets could remain open when a field is hidden
- [DSOF-14450] - Fixed an issue where the software could not be opened on AMD machines when accessed via Windows Remote Desktop
- [DSOF-14464] - Fixed an issue where the Web Layer did not not play video that is designed to autoplay upon landing on that web page
- [DSOF-14468] - Fixed an issue where Colourshift on a remote asset did not work
- [DSOF-14470] - Fixed an issue where Incorrect expressions could be generated from alt-drag when using the Web layer
- [DSOF-14471] - Fixed an issue where Precomps would not prefetch
- [DSOF-14474] - Fixed an issue where 16-bit amber/white compensation is incorrect on DmxLights & screens
- [DSOF-14475] - Fixed an issue where content in the layer preview is incorrectly converted from XYZ colour space while Colour Management is set to Gamma Space
- [DSOF-14496] - Fixed an issue where OscIndirectionController won't find camera if only the camera path is specified
- [DSOF-14516] - Fixed an issue where frames are occasionally duplicated and dropped on some types of video input
- [DSOF-14545] - Fixed an issue which could cause a crash when using certain Notch blocks
- [DSOF-14564] - Fixed an issue where procedurally generated meshes did not have thumbnails
- [DSOF-14584] - Fixed an issue where renamed devices do not release recorders
- [DSOF-14708] - Fixed an issue that caused NDI streams which are not live to take up too many resources
- [DSOF-14729] - Fixed an issue where About manager did not respect its contents size
- [DSOF-14742] - Fixed an issue where the Actor was unable to start due to audio error on start
- [DSOF-14860] - Fixed an issue where Notch parameters with "/" in the key/id, could not be used
- [DSOF-14864] - Fixed an issue where an error could cause a long shutdown of the software
Bugs
- Media occasionally isn't ingested after scan
- Notch: can't change Effect after active Effect goes missing/bad
Bugs
- Web Module does not play video that is designed to autoplay upon landing on that web page
- Omnical: Access Violation on creating Alignment Points
- SpaceWidget: postRender clipping causes incorrect rendering for other widgets
- LiveUpdate: broken for DxTexture/Mesh/Notch (canLiveUpdate=false) resources added while in session
Bugs
- m_file->codec() error on actor while transferring content
- Catch v1 tests sometimes contain mal-formed XML "</>"
- Access Violation upon launching a show that contains a specific piece of media
- CTD in test "auth dynamic license allocation" due to empty vector access
- [auth] tests sometimes fail due to external circumstances
- Wrong output may be identified as GUI when holding feed outputs
- Fix BlobDetector corpus data sync if TEMP folder contains whitespace
Story
- Improve slow [auth] [benchmark] tests, so they don't take so much time on CI agents
Bugs
- Access Violation in Multi Layer Editor during transitions
- Fix duplicate Catch test name in test_recorder.cpp
Story
- Rewrite undistortion tests, so they don't cause CI agent hangs
Improvements
● [ DSOF-14287 ] - Improve tracing of unit tests for CI agent troubleshooting
● [ DSOF-14304 ] - Make Catch-based tests more reliable
Bugs
- [ DSOF-14243 ] - Crossfade does not get applied to arrowed modules
Bugs
- [DSOF-14183] - Access violation on loading d3 if a list indirection controller index field is controlled via an osc expression.
- [DSOF-14201] - Notch content source arrow keyframes interpolate instead of select.
Bugs
- Sockpuppet: Notch exposed property's min max value is not carried through in DMX personality
- Stage: export stage throws an access violation
- Creating blank project in r17.3.1 blocking audio somehow
Bugs
- Alt Arrow Expressions drop .axis in BTX
- No response sent for http requests with connection: closed set in header
- prevent [Track] tests which require AudioSystem from failing due to ubsystem
issues - Object Assignment: Selecting a quick select slot with "None" assigned causes Access Violation
- Resources API returns all private resource types (fields, metadata, etc)
- Unable to create a device recording
- Can't drag option / resource keyframes
Improvements
- Investigate node-red swagger plugin errors which occur when using our specs
Technical Advisories
Notch
- Extremely demanding Notch blocks can cause an oversubscription of available memory resources - click here for full advisory.
New Features
- Designer now allows physical video inputs to be assigned to all 4 slots
- Indirections
- Layer Multi Edit
- The user can now specify a lower frame rate fraction for the GUI
- Solver smoothing factor setting in the rigid body editor
- Users can now assign key framable objects to hotkeys to allow for faster keyframing
- Banks are now available for OSC Sockpuppet
- Reference point list
- Stage export now supports additional formats
Improvements
- Networked machines now have new role names - Director & Actor
- Track crossfade setting now allows for expanded Universal Crossfade functionality
- Feed maps can now be imported & exported via the table functionality
- Operations on multiple feed rectangles now have more discoverable UI
- NDI SDK updated to version 4.5
- Exposure & gain controls now available in the OmniCal camera check UI
- Camera exposure can now be adjusted in the setup capture UI
- The Notch layer now defaults to pre-multiplied alpha blend mode
- Notch logging is now enabled by default
- useRequiredVFCResolution setting is now visible in the Advanced Project Settings
- The filmic grain layer can now act as an effect layer
- The colour adjust layer can now act as an effect layer
- When starting a network session, the project file is loaded and all machines started before loading a notch block
- Universal crossfade now has a loop mode
- Alt drag can now be used in the feed mapping editor
- A template project can now be set in Manager
- Clicking a tag now jumps you to the frame where the tag is located
- Clicking a note now jumps you to the frame where the note is located
- The gradient texture tool now has a dither parameter to help reduce banding
- The GUI now uses a faster method to blur, giving a minor performance increase
- Notch layers now have access to the "pause" playmode
Bugs
- Fixed an issue where sometimes objects could not be removed from the trash
- Fixed an issue that occasionally caused media ingestion errors on project launch
- Fixed an issue where PSN data could sometimes cause a critical error
- Fixed an issue where sometimes parameter metadata could not be accessed by the user
- Fixed an issue that caused arrows not to work for compositing certain layers
- Fixed an issue where setting the TimecodeReadout size to a high value could cause a crash
- Fixed an issue that sometimes caused issues when moving a project between gx2 and gx2c
- Fixed an issue that sometimes caused a hang while receiving automation data
- Fixed an issue where Notch blocks were sometimes marked as missing after a live reload
- Fixed an issue that caused a "bad files" error when emptying the trash
- Fixed an issue where nCam field of view was incorrect in some circumstances
- Fixed an issue where stage export as FBX would export in the wrong scale
- Fixed an issue where stage export as FBX would invert screen meshes
- Fixed an issue where the stYpe axis ordering was incorrect in the driver
- Fixed an issue where playback would stutter on a gx2c when using keyframed Notch text
- Fixed an issue that caused the minimise track arrow to become missing
- Fixed an issue that caused a critical rendering error when DMXLights were in the stage
- Fixed an issue where network adapters that contain "MGMT" did not appear in the list in Manager
- Fixed an issue where sometimes project diagnostics could not be made in certain builds of r17.2
- Fixed an issue where the test pattern layer did not render correctly when zoomed out
- Fixed an issue that caused an error when attempting to copy a key widget with no keyframes
- Fixed an issue when opening a key widget with an object view the cursor is immediately captured by the search field of that view
- Fixed an issue with live video capture via an AJA Kona 5
- Fixed an issue when overwriting existing camera study PDF files could sometimes cause a hang
- Fixed an issue that caused Advanced Project Settings to not wrap in the menu
- Fixed an issue where removing a time period from the start of the track could cause an error when performing certain functions
- Fixed an issue that sometimes allowed layers to be edited even while locked
- Fixed an issue that caused an error when merging sections on the timeline
- Fixed an issue that sometimes caused point clouds not to display when using OmniCal
- Fixed an issue where lens distortion information for Mo-Sys is was incorrectly applied
- Fixed an issue where auto z clipping values could be lost when a restart occurs
- Fixed an issue where the virtual reality editor could sometimes throw errors
- Fixed an issue where front plate could sometimes not be shown in the camera preview
- Fixed an issue where the layer editor did not always remember its last known position
- Fixed an issue in the transport control layer when using a DPI level of 100
- Fixed an issue that caused issues stickying items after using sticky with the DMX device list
- Fixed an issue that caused feed rectangles to render incorrectly after being flipped
- Fixed an issue that caused lookat distance to no longer move the projector
- Fixed an issue that caused the wrong expression to be created when linked two parameters together in an open layer
- Fixed an issue where the fade layer didn't always render to all displays
- Fixed an issue that sometimes caused the GUI to be updated on actors even when disabled
- Fixed an issue that sometimes caused a crash when exporting the stage as FBX
- Fixed an issue that meant there was no way to hide VR headsets or controllers
- Fixed an issue with the DMX sockpuppet video trigger layer that sometimes caused a warning error
- Fixed an issue where users were not warned when displays are running at different actual resolutions
- Fixed an issue that caused a rendering error when the visualiser camera was set to 1280x720
- Fixed an issue where users were not notified that comments or revision are to be changed after every export of a projector study
- Fixed an issue where Ctrl + z deleted a tag/note after moving using alt+drag instead of reverting back to previous position on timeline
- Fixed an issue where splitting a feed rectangle after rotating cause distortion
- Fixed an issue that allowed any type of characters to be used in the Insert Time field
- Fixed an issue where inverting Soft Edge Texture points produces white where black should be
- Fixed an issue that presented an error when exporting screen frame while the screen is inactive
- Fixed an issue where an error could be thrown when a Notch block had exposable arrays
- Fixed an issue where 3D manipulators could not be enabled without a restart
- Fixed an issue that cause a UI error when undoing the creation of a feed rectangle
- Fixed an issue where sometimes the ball would go through the bat when using the Tennis layer
- Fixed an issue where Transport selection was red when default is selected in the TransportControl layer
- Fixed an issue with the camera visualiser view scale
- Fixed an issue where the feed map editor could sometimes go blank after an und action
- Fixed an issue where a file list was left at the project root after creating a diagnostic
- Fixed an issue where audio was disabled in the Tennis layer
- Fixed an issue where bat speed variable was broken in the Tennis layer
Technical Advisories
Notch
- Extremely demanding Notch blocks can cause an oversubscription of available memory resources - click here for full advisory.
Bugs
- Meshes are no longer loaded in parallel on background threads.
- Creating reshape mesh with OmniCal creates perpetual hang on project launch.
Technical Advisories
Notch
- Extremely demanding Notch blocks can cause an oversubscription of available memory resources - click here for full advisory.
Bugs
-
Fixed Quad coupling 4 SDI signals for 4k capture on Deltacast cards
Technical Advisories
Notch
- Extremely demanding Notch blocks can cause an oversubscription of available memory resources - click here for full advisory.
New features
- disguise software can now run in 'Application Mode'
- Objects in the stage now have a ‘layer’ parameter to control where they render
- VIVE Tracker support implemented
- Spherical Camera implemented
Improvements
- Allow fading 'video input' when no video input is selected
- RrGgBbWw pixel type support for DmxScreen
- MIDI note event transport now has access to Play and Play &
- Loop section modes
- Global brightness is now greyed out when multi-transport is in use
- The filelist.txt now includes empty directories
Technical Advisories
Notch
- Extremely demanding Notch blocks can cause an oversubscription of available memory resources - click here for full advisory.
Bugs
r17.1.3
- MultiEventTransportRemote - requesting player list results in an exception
r17.1.2
- New installs of 17.1 on systems running i7 processor give CPU error
- Changing the roll angle in a projector results in wrong Y offset movement
r17.1.1
- License activation may fail on some machines
- d3.exe no longer marked as DPI aware in r17.1, causing DPI scaling issues on some displays
Technical Advisories
Notch
- Extremely demanding Notch blocks can cause an oversubscription of available memory resources - click here for full advisory.
Bugs
- [DSOF-13264] - License activation may fail on some machines
- [DSOF-13303] - d3.exe no longer marked as DPI aware in r17.1, causing DPI scaling issues on some displays
New Features
- DSOF-12898 - New Feature: DMX Screen type - GBR
- DSOF-12301 - New Feature: DMX Screen type - BRG
- DSOF-3599 - New Feature: Export list views to CSV files.
- DSOF-11096 - New Feature: OmniCal: Improvements to network performance in busy network environments.
- DSOF-11650 - New Feature: OmniCal: Significant performance improvements to capture & bundle adjustments on large quantities of projectors.
- DSOF-12102 - New Feature: Import projectors from CSV files
- DSOF-12702 - New Feature: TelnetMatrix devices can now have header and footer messages appended to the routing commands. This is to allow batch scripting of large quantities of matrix routes from a single device.
- DSOF-7796 - New Feature: Ability to send custom UDP/TCP strings when failover occurs.
- DSOF-13064 - New Feature: Improvements to the OmniCal Camera Stats user interface.
- DSOF-12693 - New Feature: Proof Of Play - enabled via an Advanced Project Option, this will write a text log file for every clip played.
- DSOF-12674 - New Feature: Added support for FreeD protocol and BlackTrax Helios system as camera tracking sources
- DSOF-12433 - New Feature: Machine Status is now available via Telnet Json commands using JsonMachineControl device.
- DSOF-12580 - New feature: Tracks now display timecode format in their header
- DSOF-12651 - New Feature: TelnetMatrix devices now automatically zero-pad variables when the variable is preceded with a number of 0s.
- DSOF-12747 - New Feature: d3 now prompts when your licence is nearing expiry
- DSOF-12878 - New feature: Sequenced Transitions
- DSOF-6419 - New Feature: Video Clip editor now shows the total length in H:M:S:F format as well as frames.
- DSOF-8088 - New Feature: Ability to define the OSC heartbeat rate
- DSOF-8624 - New Feature: VR now allows you to stand on venue mesh objects
- DSOF-11259 - New Feature: User selectable value ranges for brightness, volume and colour properties. These are selectable from Project Settings.
- DSOF-11979 - New Feature: DMX Universe 1 now outputs without watermark on Designer licences - to enable EVO capabilities.
- DSOF-9694 - New Feature: Props now have an option to select if they cast a shadow, and the scale factor of that shadow.
- DSOF-12633 - New Feature: Tab/Shift+Tab now work in Object views to select objects from the keyboard.
- DSOF-12759 New Feature: Projector Masks now simulate in the stage simulator as well as affecting outputs.
- DSOF-8088 - New Feature: Ability to define the OSC heartbeat rate
- DSOF-8624 - New Feature: VR now allows you to stand on venue mesh objects
- DSOF-12052 - New Feature: Support for 48fps CEA timing modes
- DSOF-13095 - New Feature: GUI now supports ultra wide monitors.
- DSOF-10497 - New Feature: Play Status as an OSC stream.
Improvements
- DSOF-8852 - Notch: Performance improvements due to memory allocation changes.
- DSOF-12377 - Improved tools for debugging issues with display devices.
- DSOF-12432 - System Diagnostics now contain advanced windows network configuration to aid in support.
- DSOF-12517 - Manipulators now remember their status when you restart d3
- DSOF-12671 - Multi-editor now shows a splash screen when certain objects have been exported to a CSV
- DSOF-7353 - Added support for Unicode keyboard character input directly into d3.
- DSOF-9646 - Notch: Added Render Interval settings to enable Notch blocks to be run at 1/2 or 1/3 of machine frame rate.
- DSOF-9765 - Camera Wireframes can now be hidden from stage visualisers.
- DSOF-10569 - OmniCal: Performance improvement with bundle adjustments.
- DSOF-11223 - Notch: Support for Unicode characters in text parameters.
- DSOF-11225 - Notch: Exposed parameters are now refreshed when remotely live-edited in Notch Builder.
- DSOF-11651 - OmniCal: Speed improvement of capture due to white level masks being used to take projector images in parallel.
- DSOF-11702 - Alt Dragging selected ranges now allows bulk addition of objects to a list (for example, adding multiple screens to a mapping)
- DSOF-11794 - OmniCal: Added ability to resume captures after timeout errors.
- DSOF-12045 - Emulated EDIDs now use the disguise VID
- DSOF-12288 - Resolved an issue where exported layers which were locked at the time of export would be imported to the same time in the new track.
- DSOF-12592 - Improved the handling of sort ordering when opening certain array boxes
- DSOF-12941 - Added new buttons to ProjectorDevice editor
- DSOF-12942 - Improved shutter response times when using ProjectorDevice
- DSOF-12442 - List arrow sources in layer DMX Personalities
- DSOF-12928 - The firmware version field will no longer be shown for VFC cards which do not have firmware (HDMI and DP VFCs)
- DSOF-4015 - CITP: Added a "None" option when selecting a DMX Device
- DSOF-12241 - Improved the UI of the multi-edit editor
Bugs
- DSOF-10411 - Fading Down could sometimes cause warped feeds to lose their warping.
- DSOF-11622 - Improvements to 10-bit behaviour on AMD based servers.
- DSOF-12704 - When failing over from DMX trigger, the playhead of the understudy could sometimes jump backwards in time.
- DSOF-12940 - When starting up d3 with an MST monitor connected, the GUI output would move to a VFC head on AMD based systems. This has now been resolved. Note that d3 does not support MST for outputs.
- DSOF-12947 - Resolved an access violation when Notch blocks were deleted.
- DSOF-2543 - Resolved an issue with video layers not outputting the correct frame when clip and output fps were adjusted
- DSOF-10091 - Multi-editor renaming a device didn't take effect until enter was pressed, but was immediately reflected in the UI. This has now been made consistent.
- DSOF-11687 - Notch: "Error caught in block..." errors could sometimes occur when clicking on Notch blocks.
- DSOF-11737 - SockPuppet: Resolved access violation when deleting a SockPuppet patch
- DSOF-11917 - Audio: Improved accuracy of seeking in VBR audio files (MP3/MOD/S3M/XM/IT)
- DSOF-12041 - VFC: Configuring VFC cards could sometimes lead to an "Index outside bounds" error when setting Quad 4K mode.
- DSOF-12063 - DMX: When deleting DMX patches, the DMX Patch Settings window would stay open. It now closes automatically.
- DSOF-12095 - Notch: When opening a block from an editor, it would sometimes get reset.
- DSOF-12122 - SockPuppet: UI for setting bank allocations wouldn't allow for mappings to be mapped to slots.
- DSOF-12513 - Manipulators now syncronise their status between different widgets
- DSOF-12542 - Resolved an issue where locked layers would incorrectly split when timelines were split.
- DSOF-12565 - Text fields now filter disallowed characters when pasting content from 3rd party applications.
- DSOF-12586 - Multi-editor: fixed an issue where copied rows were not saved properly
- DSOF-12588 - Fixed an issue where toggling locked to master caused the 3D manipulator controls to appear on the editor
- DSOF-12622 - Fixed an issue where Notch layers did not upgrade properly from specific projects
- DSOF-12650 - Added support for coupled capture inputs 2x as well as 4x on gx 2c.
- DSOF-12661 - Fixed an issue where control devices which had been removed from the device manager could still send commands
- DSOF-12665 - Fixed an issue that presented grey artifacts around pixel & population masks that had Alpha
- DSOF-12666 - Resolved an issue with DSE and soft shadows which didn't blend correctly.
- DSOF-12673 - Multi-editor sometimes does not export if the file extension gets deleted
- DSOF-12696 - Fixed an issue that caused the GUI to be rendered in place of a missing diffuse map
- DSOF-12738 - Fixed an issue where understudy failover commands could be sent before matrix routing commands were sent, resulting in mis-timed failovers.
- DSOF-12810 - Fixed a rare issue that caused an error when using the F1 help widget
- DSOF-12812 - Fixed an issue that caused an error when copying multiple keyframes into multiple keyframe editors
- DSOF-12822 - Resolved an issue where masking objects on projectors disabled DSE on blends between active regions
- DSOF-12844 - Resolved an issue with repatching Notch layers which would result in them losing all their properties.
- DSOF-12847 - Agile Camera device now has Invert Pan and Invert Tilt functionality
- DSOF-12872 - Resolved an issue where certain Windows permissions could cause d3.exe to fail to launch.
- DSOF-12882 - Fixed an issue that caused a hang when moving a large amount of layers
- DSOF-12888 - Resolved an issue where DSE caused there to be an outline around mask objects.
- DSOF-12911 - Fixed an issue that caused field duplication when importing projectors
- DSOF-12948 - Fixed an issue where an error was thrown if a notch layer was deleted before the playhead
- DSOF-12959 - Fixed an issue where some DPI settings could cause errors on startup
- DSOF-12972 - Fixed an issue where loading a Notch block without a notch license would cause a layer to become corrupt
- DSOF-13097 - Fixed an issue that altered the default mouse wheel steps for editing keyframable parameters
- DSOF-7048 - Fixed an issue that caused exposed parameters to re-appear after an undo action
- DSOF-8094 - Resolved an issue where SockPuppet Video layers with Speed toggled off would not play video.
- DSOF-10442 - Screenshots on a Solo now correctly screenshot the GUI head.
- DSOF-10508 - Typing in the search bar in CueSetList no longer resizes the Notes column.
- DSOF-11242 - Fixed an issue where excessive copying and pasting a notch block could sometimes cause a crash
- DSOF-11695 - Resolved an issue where it was possible to Bake/Clear fields on a locked layer.
- DSOF-12103 - Half Speed Low Latency mode now has improved latency behaviour.
- DSOF-12243 - Disabling and re-enabling manipulators would always reset the mode to Transform, now they will remember their mode.
- DSOF-12264 - Resolved an issue where deleting an EventTransportDMX patch from the DMX Patch window would have no effect.
- DSOF-12431 - Fixed text overlapping issue in the ProxyMaker
- DSOF-12583 - Multi-editor: rows outside of the scroll view were incorrectly ignored for actions
- DSOF-12584 - Multi-editor: fixed an issue where pasted values could show disallowed characters
- DSOF-12619 - Improvements to the Auto Z clipping algorithm
- DSOF-12631 - Right clicking on Blend modes no longer shows an expression field, since expressions can't be applied to Blend modes.
- DSOF-12743 - Resolved an issue with EventTransportDMX where Brightness would be set if any DMX on the same universe was received.
- DSOF-12818 - Improved support for Swedish keyboard character usage
- DSOF-12843 - Resolved a bug related to the UV maps of alembic files as projection surfaces.
- DSOF-12935 - Fixed an issue that sometimes occurs when deleting a group of layers
- DSOF-12937 - Improved tooltips to reflect new 10-bit based values
- DSOF-12976 - Fixed an issue where the multi-edit dialogue would not open for feed rectangles
- DSOF-12977 - Fixed an issue where changing device manager could sometimes create a stall
- DSOF-13052 - Fixed an issue that sometimes hung the main thread when moving a camera in the stage
- DSOF-12610 - Added support for longer projector names in Identify test pattern mode.
- DSOF-12742 - Failover Test field in EventTransportDMX does not pulse blue when the value changes
- DSOF-12758 - Trial no longer shows 'VR Navigator' menu, since VR is not supported in Trial.
- DSOF-12839 - Fixed an issue in the video layer that sometimes occurs when baking keyframes
- DSOF-12880 - Fixed an issue in the UI rendering of projector mask preview
- DSOF-12919 - Resolved some memory leaks related to manipulators.
- DSOF-12921 - Fixed an issue where the quantiser volume was not shown as a slider
- DSOF-10871 - Fixed an error when attempting to use a notch layer with no name
- DSOF-11246 - OmniCal: Mesh deform improvements on points seen by two cameras.
- DSOF-11638 - 8 bit display modes were sometimes displayed in the VFC configuration properties despite the output being connected to a 10-bit monitor
- DSOF-12370 - Quantiser metronome now supports 0-1 values rather than 0-255
- DSOF-12701 - Fixed an issue where notes could sometimes span two lines
Bugs
- [DSOF-12975] - Access violations on editor when undoing deletion of a group created by master
Bugs
- [DSOF-12803] - Education licence only works if it's the only license on the network.
Bugs
- [DSOF-12932] - Fixed error when un-grouping layers in a multi-machine session.
Bugs
- [DSOF-10298] - Warning logged every frame in console when capture group used with bluefish cards
- [DSOF-12594] - Sockpuppet: Continuous 'outFrame out of bounds' notification after selecting a video clip from the video slot using MA
- [DSOF-12654] - Sockpuppet: Loop outframe parameter default value is 48
- [DSOF-12700] - VR anti-alias setting does not work for Schematic camera
- [DSOF-12727] - Warp bias has no effect on 4-point warping
- [DSOF-12756] - Layer Editor: holding shift to mouse wheel scroll the next keyframe incorrectly uses large increments
- [DSOF-12814] - HSV Palette turn into 'Bad Texture' on load of d3
- [DSOF-12835] - VR: Unable to get FOV for index 0
- [DSOF-12836] - VR: Attempting to pan the VR camera preview results in an error
- [DSOF-12845] - Purelink matrix will only send last route
- [DSOF-12924] - OSC sending is rate limited to one message every 5ms
Bugs
- [DSOF-12697] - Provide diagnostics for rare problems encountered during sequencing
- [DSOF-12663] - Fix issue where d3manager won’t run on some systems due to error with libeay32.dll
- [DSOF-11491] - VR: Prevent DMX Light beams from following headset movement
Bugs
- [DSOF-12647] - Device list showed devices still under development
Bugs
- [DSOF-12368] - When using a Notch block, and applying a warp to a mapping it may create flashes around the outside of the mapping boundary
- [DSOF-12566] - Changes in patch assignment editor may not always be saved on exit
- [DSOF-12623] - Zoom to object (F) should work when 3D manipulators are disabled
Workflow changes
r17 includes a number of significant changes to workflows, and it is advised that you read through these release notes carefully before upgrading existing projects to ensure there is time to validate the project before roll up is completed.
10-bit textures
- HDR images (EXR) are no longer tone mapped (Adaptive logarithmic mapping (F. Drago, 2003)) to 8-bit on load
- Tone mapping must be done in the Colour Profile on the Video Clip or Display to keep same behaviour
10-bit control
- Brightness, volume and colour values have been remapped from 0 - 255 to 0.0 - 1.0
- UI will now show decimal values instead of integer values
- Expressions on these properties that don’t use the “scale::” prefix may stop working (e.g. custom expression for DMX control of layer brightness)
- Open layers connected to these properties may need to be rebuilt (e.g. prop alpha)
- ScreenPositionAxes and ScreenPositionExpressions connected to these properties may need to be rebuilt (e.g. fade display alpha using automation)
- DMX personalities are 8-bit by default but some properties can be changed to 16-bit by editing the DMX personality in the Patch Assignments
- OSC sockpuppet will no longer accept values in the old 8-bit ranges for these properties
DMX personalities
- Now versioned by d3 version (r17.0) instead of internal version (e.g. v10)
- Prefixed by disguise instead of d3
- Various flaws and duplicated fields cleaned up
New Features
- [DSOF-7051] - Precomp workflow
- [DSOF-9061] - Support for Newtek NDI protocol as video input source
- [DSOF-10942] - 10-bit texture support
- [DSOF-11162] - 10-bit improvements to data handling
- [DSOF-6192] - 3D Manipulators for stage objects
- [DSOF-7803] - SockPuppet: 'layer source' for effect modules which receive arrow sources
- [DSOF-8752] - 3D Masking and feathering
- [DSOF-10482] - Export current frame of live video input
- [DSOF-10706] - Ability to internally lock all output heads
- [DSOF-10823] - Booleans options appear as tick boxes in the UI
- [DSOF-11103] - Version Number is now displayed when keyframing in Video Layer
- [DSOF-11131] - Add projector visibility property to the Projector List
- [DSOF-11153] - 10-bit stage/feed movies
- [DSOF-11761] - Add support for animated Alembic files
- [DSOF-11930] - List view for media assets
- [DSOF-11134] - DMXMachineControl device
- [DSOF-11140] - MDC layer
- [DSOF-11141] - OSCMachineControl device
- [DSOF-11142] - OSCTester
- [DSOF-11143] - Tennis layer
- [DSOF-11144] - PureLinkMatrix layer
- [DSOF-11146] - TransportControl layer
- [DSOF-11147] - VideoTrigger layer
Improvements
- [DSOF-1866] - Added ability to Lock layers
- [DSOF-3533] - SockPuppet personality versions now follow d3 software version numbers
- [DSOF-6411] - Added ability to export internal textures.
- [DSOF-7873] - Added 'mouseOrbitInvertY'option switch for inverting Y mouse movement when orbiting.
- [DSOF-10341] - Move Advanced Machine Settings to Settings menu
- [DSOF-10867] - Added 'disableUITransparency' option switch to disable blurred background of widgets for performance improvement
- [DSOF-10919] - 10-bit camera export
- [DSOF-10968] - Improved performance when adjusting mappings by caching compiled shaders
- [DSOF-11014] - Improved feedback when resources are unable to be deleted from trash
- [DSOF-11104] - Improved feedback when there is an invalid format for a DMXTableScreen Table
- [DSOF-11105] - Notification added when a Table resizes to 0kb
- [DSOF-11129] - Added ability to select a source texture on effect-style layers (previously arrows were assumed)
- [DSOF-11182] - Added an alert about potentially breaking changes when rolling up from older versions
- [DSOF-11186] - Add the ability for integer fields to be draggable sliders in the UI
- [DSOF-11191] - GUI: Added [Inactive] to previews in layer editor when a layer is not active
- [DSOF-11438] - Added VFC firmware version in the UI
- [DSOF-11447] - d3machine_test should print 'usage' text when running with unknown command
- [DSOF-11633] - Query min and max warp grid size from projectors
- [DSOF-11646] - Added OSC play mode strings as the Output Messages
- [DSOF-11678] - OmniCal: AlignmentPoints now have default labels
- [DSOF-11736] - Import Projector: Support new MappingMatter CSV headers
- [DSOF-11776] - VideoClips can now be edited in a list view
- [DSOF-11837] - Increased the default HSV palette image size to 1024x1024
- [DSOF-11924] - OmniCalprojector list is now vertical and scrollable
- [DSOF-12026] - Reduced VRAM usage of blurred widgets
- [DSOF-12027] - Reduced VRAM usage of thumbnails/previews
- [DSOF-12034] - Videos in the missing box are now selectable in other boxes.
- [DSOF-12035] - Resources now have automatically-defined boxes for different resource types.
- [DSOF-12036] - Performance improvements with high quantities of projectors/cameras in stage
- [DSOF-12219] - SockPuppet control for Notch texture inputs
- [DSOF-12358] - Improved Notch module control from DMX SockPuppet
- [DSOF-12571] - Retire Lena
- [DSOF-12585] - Disable NDI in Notch blocks, since NDI is now supported natively in d3
Bugs
- [DSOF-591] - Arrows overlapped making it unclear where the origin is
- [DSOF-9871] - Track Jump module set to Stop mode could cause unpredictable behaviour
- [DSOF-9999] - Setting timecode readout size to greater than 200 caused an error
- [DSOF-10065] - Interlaced sync would fail because frame errors were detected
- [DSOF-10089] - List Editor sometimes displayed the wrong title in the header
- [DSOF-10108] - Interlaced sync would fail on slave machines when d3service failed to enter fullscreen mode
- [DSOF-10180] - Pasting modules near the end of the track caused the module to past the end of the track
- [DSOF-10227] - Audio modules could lose sync if playback commenced (or resumed) partway through an audio track
- [DSOF-10323] - Video in 5 to 16 would get lost forever after sending them to the trash until project restart
- [DSOF-10329] - DMX Output/Input monitor displayed a "collapsible" icon for no reason
- [DSOF-10406] - Applying feed settings to another machine remotely via the feed view caused the local machine to briefly lose fullscreen
- [DSOF-10450] - Output set as timing server with timing source set to internal had a grey genlock indicator in feed view on AMD systems
- [DSOF-10486] - 'Input Size' renders only one pixel of textures:
- [DSOF-10499] - Large audio files could cause the audio layer to hang
- [DSOF-10500] - Various audio Layers playing back at the same time will go out of sync
- [DSOF-10501] - FPS dropped when using DMX screen with 10 bit enabled on Windows 10 machine
- [DSOF-10678] - 'blob_storage' folder appeared erroneously in d3 Projects folder
- [DSOF-10820] - LUT files did not reload when replaced while d3 was running
- [DSOF-10920] - Bitmap/DxTexture: all images in objects/DxTexture were 8-bit only
- [DSOF-10953] - Duplicating open layer when linked to Mesh of surface would stop rendering the keyframe timeline
- [DSOF-10981] - Audio would not start again when encountering new keyframe of the same audio track
- [DSOF-10991] - 10-bit content could cause an error while creating thumbnails
- [DSOF-11012] - Notch: Occasional 'negative time' message when playing into a layer
- [DSOF-11056] - Performance issue when using automation to move screens in feed view
- [DSOF-11074] - Audio Module in Normal mode with Paused at Endpoint after endpoint is reached would restart if playhead jumped back in the track.
- [DSOF-11154] - Undo (CTRL + Z) multiple time could result in an access violation
- [DSOF-11156] - DMX screens/lights could output invalid values
- [DSOF-11205] - OSC: fix broken subscribe usage
- [DSOF-11213] - d3 fails to load large audio file
- [DSOF-11214] - Stall when jumping out of audio layers causing them to become inactive
- [DSOF-11226] - Problems sending MIDI note of value 0
- [DSOF-11237] - Small fix for Teal coloured LEDs on DP VFC cards
- [DSOF-11255] - Quantiser: volume field is no longer a slider
- [DSOF-11258] - Missing Media list is not updated after deleting the layer which references it.
- [DSOF-11269] - CITP: Choosing PNG thumbnails created JPEG thumbnails
- [DSOF-11272] - Regression: Setting speed to 0 on video layer did not freeze live video inputs
- [DSOF-11279] - SockPuppet: type object 'SockPuppetVideoModule' had no attribute 'tint'
- [DSOF-11287] - MatrixControlModule: DMX personality improvements
- [DSOF-11289] - DmxPersonalityMap: ignoring palette/xCol/yCol does not prevent creation of tint/colour property
- [DSOF-11309] - Layer: displayed module type is the raw type, not the display type
- [DSOF-11313] - Error when scrubbing in audio layer while playing and in locked mode
- [DSOF-11314] - Sync card error status could prevent d3 from starting
- [DSOF-11319] - SockPuppet: cannot view/select personality versions of renamed modules (eg. LegacyVideo)
- [DSOF-11325] - Duplicate clips in the same video layer will not restart
- [DSOF-11361] - StatisticMetrics: inconsistencies in handling values and mask data structures
- [DSOF-11396] - Performance regression generating mipmapped masks
- [DSOF-11397] - In Normal Mode + Pause, the audio will stop playing if we click along the timeline.
- [DSOF-11405] - Hold at End of Section would stop playback of certain nodes in in SockpuppetNotchModule
- [DSOF-11415] - Performance improvement with multi-transport and large quantities of layers.
- [DSOF-11427] - Video layer and audio layer volume is not in 0 - 1 range
- [DSOF-11494] - Notch layer image source confusion after removing source arrow
- [DSOF-11495] - Notch layer image source crashed layer if using procedural textures
- [DSOF-11510] - Attempting to activate adapters will attempt to activate non-AMD adapters due to incorrect vendor ID.
- [DSOF-11553] - Remote Machine Monitoring had no colour
- [DSOF-11558] - Prefetcher report had incorrect value
- [DSOF-11561] - Audio shorter than quantised track produces errors/stops track audio playback. Brown bar and broken waveform at loop
- [DSOF-11593] - Camera fades to black when ux-fading from location with no layers
- [DSOF-11594] - Modifying the resolution of a feed head did not render the correct resolution feed movie
- [DSOF-11606] - Indirection keyframes were sometimes erased as "corrupt" on startup
- [DSOF-11607] - Texture thumbnails had regressed
- [DSOF-11608] - ModuleVersionUpgradeMap broke layers using Indirections
- [DSOF-11609] - Projector Preset editor is truncated when it contains no projectors
- [DSOF-11611] - Video layer didn’t refresh after being OSC patched
- [DSOF-11614] - List editor GUI doesn't update when a parameter is moved to trash
- [DSOF-11639] - Access violations were shown when changing module from SockPuppetVideoModule to VariableVideoModule
- [DSOF-11641] - OmniCal: Mesh Deform doesn't always get sent to other machines
- [DSOF-11645] - OSC Sockpuppet is 16bit unsigned integer
- [DSOF-11652] - Frame stats incorrectly showed queued time as after the present time
- [DSOF-11661] - Highlighting multiple rows in a list editor and adjusting a value, creates offset in selected value box to others
- [DSOF-11704] - Replace clip with video in using shortcut ctrl + 1234 work only on Master
- [DSOF-11712] - Access violation when trying to change resolution of media via the video layer
- [DSOF-11714] - Projector assignment stretches UV's beyond boundaries of surface while direct-mapped
- [DSOF-11718] - Rename DMXcontrol layer to DMXLightsControl
- [DSOF-11744] - Performance drop comparing perspective mapped vs spatial mapped content
- [DSOF-11765] - Endless invalid DMXProperty type notification when attempting to repatch all patches in personality versions...
- [DSOF-11778] - Access violation when trying to undo (Ctrl+Z) a deleted layer
- [DSOF-11841] - Gradients generated by gradient module were always 8-bit
- [DSOF-11850] - Layers with arrows could occasionally flash previous content on first frame
- [DSOF-11855] - File handles can leak from a texture when an exception is thrown
- [DSOF-11861] - Using generated texture as pixel mask in 10-bit mode causes GUI to strobe
- [DSOF-11876] - OmniCal: access violation loading images in View Calibration and alignment UI
- [DSOF-11881] - Attempting to modify DMX Personality of DMX transport patch via Patch Assignments resulted in an error
- [DSOF-11932] - d3service failed to start if running headless on gx2c
- [DSOF-11939] - Access violation when setting a precomp as a pixel mask
- [DSOF-11941] - UXFading to/from a section of the timeline containing a blur layer causes the GUI to flash black for 1 or 2 frames
- [DSOF-11955] - Regression: Access violation when opening and closing the properties of a video layer
- [DSOF-11978] - compose: cannot receive precomps as sources
- [DSOF-12006] - Impossible to close layer creation list with esc key
- [DSOF-12009] - Continuous Access violation after deleting a video layer with a missing media
- [DSOF-12049] - Shortening layers could cause on-screen menus to display wrongly
- [DSOF-12051] - OmniCal: Out of memory errors during simulated captures with a large number of cameras and projectors
- [DSOF-12065] - Snapping behavior when rotating projectors
- [DSOF-12089] - MOV format: parsing header writes outside of struct's member variable sizes
- [DSOF-12099] - QuickCal: LineUp button never flashed, even if LineUp mode selected
- [DSOF-12105] - Fall back to 8-bit EDID emulation if 10-bit is not supported by the machine type
- [DSOF-12106] - Added a check if VFC backplane is present on vx 4
- [DSOF-12119] - ObjectView: empty type boxes appear when resource is filtered out
- [DSOF-12120] - ObjectView: new objects can be created that bypass type filter
- [DSOF-12121] - Notch: Video clip parameters weren’t shown in editor when patched to SockPuppet
- [DSOF-12123] - Notch: Licence popup was unreadable at certain font sizes
- [DSOF-12125] - Ungrouped layers did not update the track when edited through the layerView.
- [DSOF-12138] - Invalid data was sometimes written to OLED on 4x4, 2x4, gx2c, gx2
- [DSOF-12150] - ObjectView: empty directory boxes appear when resource is filtered out
- [DSOF-12153] - Assigning sub-folders into bank editor caused problems
- [DSOF-12156] - MatrixRoutingModule: routes were not resent when re-entering layer
- [DSOF-12161] - DmxMachineControl Restart and Shutdown range has an overlap
- [DSOF-12162] - DmxMachineControl shuts down project but not machine when shutdown command is enabled
- [DSOF-12163] - Out of range error on MediaManager Start
- [DSOF-12164] - Access violation when deleting a layer with missing media while missing media list is open
- [DSOF-12167] - ProjectorConfig: incorrect vmap load causes r17 project corruption
- [DSOF-12168] - Deleting first brightness keyframe of a layer caused the GUI to render incorrectly
- [DSOF-12169] - Changing blend mode of LUT layer to MASK caused an Access Violation
- [DSOF-12201] - Projectors could be added as projector mask objects
- [DSOF-12203] - Population masks used by mask objects were ignored
- [DSOF-12204] - Long lists of properties in personality editor cause window to become too large, cause selection offsets
- [DSOF-12206] - When an object is removed from the stage it should be removed from the selection list. This does not happen after you switch stages.
- [DSOF-12222] - Access violation on startup/bad file for projectors in hierarchies
- [DSOF-12223] - ObjectView: center aligned thumbnails are no longer center aligned
- [DSOF-12229] - d3 state bar wrapped if any name is long
- [DSOF-12230] - Keyboard and mouse bindings for camera navigation are global
- [DSOF-12231] - Clicking on 'New (x):' text in object view didn’t transfer focus to input text box
- [DSOF-12233] - Video layer - On video layer keyframe show the version which is enabled by the user
- [DSOF-12237] - Camera Look-At Position was rendered in world space instead of in parent space.
- [DSOF-12238] - Wireframe for geometric mappings is not visible while editing mapping
- [DSOF-12242] - LZW TIFF image sequences were not handled properly
- [DSOF-12244] - Camera view could take overVisualiser camera controls
- [DSOF-12245] - Performance reduction while resizing modules
- [DSOF-12250] - Upgrading a project could cause Brightness and Colour Shift to upgrade incorrectly
- [DSOF-12251] - List view was not resizeable
- [DSOF-12256] - [Project Specific] legacy video module: [colour x,y, brightness, audio volume, output, keying] values can no longer be sequenced after upgrading project
- [DSOF-12257] - Notch layers (with specific textures assigned/traits) cause exit to stall for a minute
- [DSOF-12259] - Camera location bindings are no longer global
- [DSOF-12260] - ObjectView: widget is the wrong size on first start
- [DSOF-12261] - Default projection surface had an alpha value of 0.39215
- [DSOF-12265] - Error when clicking Personality Versions for Dmx Patch created by EventTransportDmx
- [DSOF-12266] - DmxPersonality list editor does not update when underlying personality changes
- [DSOF-12269] - d3labs: Access violation when changing type of screen
- [DSOF-12277] - Texture editors showed unnecessary fields
- [DSOF-12278] - When in composite texture, if you select a custom texture you cannot change to a different type of texture
- [DSOF-12284] - Remora/OLED - "UNK" shown on OLED when VFC slots are empty
- [DSOF-12290] - Cuelist failed test: Press UP or DOWN while holding SHIFT or CTRL
- [DSOF-12293] - SockPuppet. Audio layer DMX personality was missing parameters
- [DSOF-12294] - Blur module mapped white to output on creation
- [DSOF-12295] - SockPuppet. r16 and r17 dmx personalities are not compatible
- [DSOF-12297] - Access violation when closing the parameters of a module
- [DSOF-12299] - When piping multiple layers together. If the top layer is not as long as the ones below the arrow connects to thin air
- [DSOF-12302] - Notifications thrown on patching Notch layer on OSC: "(5) Index out of bounds 0/0" and "(2) 'NoneType' object has no attribute 'fieldSequenceEditors'"
- [DSOF-12303] - Multiple ACCESS_VIOLATION: using web layer and Xfade
- [DSOF-12306] - Projectors - "Access Violation" shown when creating a new projector with the same name as an existing projector
- [DSOF-12308] - Video layer blending within precomp looks different on different machines
- [DSOF-12311] - Device recording could cause d3 to halt
- [DSOF-12314] - Video: When you move the layer over the play head the frame does not update
- [DSOF-12315] - Feed mapping editor cannot be zoomed out with right-click + drag
- [DSOF-12317] - Brightness slider will stretch out of the boundaries if the value is higher than 1
- [DSOF-12323] - Resolution representation of the feed is not updated, just after zoom in & out
- [DSOF-12325] - LEDScreen: If the resolution is higher than 8192 X or Y the image was not rendered on feed preview.
- [DSOF-12326] - Exporting notch layer personality sometimes failed
- [DSOF-12353] - Access violation caused by changing Surface 1 type to LedScreen
- [DSOF-12359] - FeedWarpEditor: keyboard shortcuts are broken
- [DSOF-12366] - Prefetcher did not prefetch next keyframe while on a 'None' keyframe
- [DSOF-12372] - No output on slave until layer is moved when using precomps in a d3Net session
- [DSOF-12379] - F11 Camera Bookmark shortcuts for Goto [F11] and Store [Alt+F11] is unresponsive
- [DSOF-12384] - Translate manipulator icon scales incorrectly on high-DPI screens
- [DSOF-12385] - Unable to unlock camera bookmark
- [DSOF-12398] - Patch assignments always showed data for Universe 1
- [DSOF-12423] - When the projector and its "look at" object is multi selected with Translate manipulator, the "look at" object does not move with the projector
- [DSOF-12479] - DMX SockPuppet Notch: Mode parameter did not appear in the personality
- [DSOF-12547] - Projector feather expanded all black elements of projector view (including content)
- [DSOF-12548] - Detailed exception information was not logged when an error occurred in AudioFilePlayerThread
- [DSOF-12559] - Export d3 generated textures to /output/ instead of /outputs/
- [DSOF-12561] - Cue list - "list index out of range" notification shown when resizing cue list widget vertically (bottom to top)
- [DSOF-12562] - DSE does not backfill shadows cast by other projectors
- [DSOF-12563] - Cue list - "need more than 1 value to unpack" notification was shown when searching cue list
- [DSOF-12564] - LUT module: did not prefetch
- [DSOF-12567] - Notch: List of layer sources did not update until layer editor was reopened
- [DSOF-12572] - d3service reported wrong VFC DP slot numbers in some cases
- [DSOF-12578] - Projector MSAA could project white onto mask objects
- [DSOF-12579] - Changing projector mask resolution significantly changed mask visually
- [DSOF-12597] - Removing puck from session while another machine has selected him causes out of range error - breaking the UI
Bugs
- ScreenPositionExpression may cause clipping of objects on outputs
- Fix case where interlaced fields may be out of order on Deltacast capture cards
Bugs
- [DSOF-12128] - Regression in 3G SDI capture quality for delta cast cards
- [DSOF-12097] - Media content is reported "missing" after being copied to multiple machines in a session
- [DSOF-12086] - Movement threshold does not function with Prediction enabled.
Bugs
- [DSOF-1122] - Quantiser alignment incorrect until zoom/reopen
- [DSOF-7077] - Changing of BPM given ACCESS_VIOLATION notification
- [DSOF-8249] - Output border stays green after changing SDI Quad 4k split mode
- [DSOF-10288] - Audio transitions occur when manually jumping along the track - In Normal Mode Only
- [DSOF-10349] - Sock puppet. Audio is not played after timecode lost even if it is set to 'play'
- [DSOF-10377] - Regression - Master layer value is applied after the playhead has past the layer
- [DSOF-10885] - Moving Note/Tag after resizing timeline give Invalid t: < 0
- [DSOF-11230] - 4096x2160 10 bit capture fails
- [DSOF-11612] - 2x2 does not allow 4k GUI output via DP
- [DSOF-11619] - Quantiser "out of range" color indicator is broken.
- [DSOF-11672] - Exception in cuelist when switching between setlists
- [DSOF-11719] - VR - teleporting appears to elevate the camera
- [DSOF-11723] - d3 can't set the GUI output correctly when a RTX6000 is used as a designer and not rackmount
- [DSOF-11731] - Custom test macros evaluate expression twice instead of once, causing side effects
- [DSOF-11732] - Remove Position, Rotation and Scale from Projector List Editors
- [DSOF-11758] - Error opening cue setlist when there is "empty tag field"
- [DSOF-11764] - Using Shift drag on the timeline causes " Invalid t: > track length" and "Invalid t: < 0" notifications
- [DSOF-11783] - Moving Note/Tag after resizing timeline give Invalid t: < track length
- [DSOF-11802] - Patching a Gradient layer gives 'NoneType' object has no attribute 'childOfType'
- [DSOF-11805] - Access violation after moving a noise arrowed layer above compose layer
- [DSOF-11845] - Audio Error in getDSPClock when scrubbing in audio layer while playing and in locked mode
- [DSOF-11852] - Audio Error in getFrequency when scrubbing in audio layer while in locked mode
- [DSOF-11853] - Access violation when replacing audio files in Quantiser
- [DSOF-11857] - Omnical camera label doesn't show up from r16 onwards.
- [DSOF-11872] - Audio is heard while scrubbing timeline with audio track even when stopped.
- [DSOF-11874] - Deltacast 1080p30 3GA input results in capture thread continuously restarting
- [DSOF-11875] - Audio Layer - Play Channels = Booth - does not mirror if the asset is MONO.
- [DSOF-11878] - Audio: Distortion when changing the play mode form Normal to Locked.
- [DSOF-11882] - Syncmanager will hang indefinitely when an exception is thrown
- [DSOF-11884] - Info field of Audio Track editor is always empty
- [DSOF-11889] - AudioFile editor is empty
- [DSOF-11891] - Audio: Universal crossfade within one audio clip in normal mode will cause the clip to fade out
- [DSOF-11893] - Audio: Playback never resumes if jumping into a section that sets mode to normal
- [DSOF-11894] - Transitioning between two(2) audio clips in an audio module with a non-zero transition time produces a high-volume blip after the transition completes
- [DSOF-11896] - Audio: Advancing from a section break in locked mode causes embedded audio to stutter
- [DSOF-11897] - Audio: Changing channels in Audio Output Patch causes patched audio to restart
- [DSOF-11903] - Audio: Pausing and resuming normal mode audio playback while in loop mode mutes the audio layer until it is reactivated
- [DSOF-11904] - Audio channel selection is affected by transition time
- [DSOF-11905] - Audio restarts when jumping across timeline
- [DSOF-11922] - Sockpuppet: Embedded Audio sample is repeated if module is set to stop on clock lost
- [DSOF-11923] - Sockpuppet: Embedded Audio pops on start if playback triggered by timecode
- [DSOF-11953] - Audio: AudioModule does not correctly find and use prefetched audiofileplayer
- [DSOF-11963] - 2SI mode caused VFC border to turn red
- [DSOF-11964] - 2SI mode does not persist through restarts of d3
- [DSOF-11974] - Sockpuppet/Audio: "Access violation" shown when changing track slot on MA
- [DSOF-12013] - Exception when modifying the resolution of a GradientTexture
- [DSOF-12014] - Failed test: Change the reflectivity value of surface 1 - Changing value does nothing
- [DSOF-12016] - Horizontally resizing Cue List can make window not respond to mouse input
- [DSOF-12017] - Failed test: Select a row, then resize so that the row would be clipped
- [DSOF-12042] - Cannot create trial installer for r16.1
- [DSOF-12056] - "global name '_activeRowIndex' is not defined" error when opening Cue list
- [DSOF-12068] - Cue set list: Attempting to resize produces error
- [DSOF-12069] - Cue list will sometimes select "Track" instead of what is typed into search bar
Improvements
- [DSOF-4799] - Ctrl + Shift and drag to edit previous and next keyframe simultaneously
- [DSOF-11532] - Include rotational parameters in frame of reference
- [DSOF-11742] - Detect SDI VFC input colour depth
- [DSOF-11743] - Add 'disableInputInCameraEditor' option to remove mouse and other navigation shortcuts
- [DSOF-11747] - Redirect d3 manager to look at the marketing downloads site
- [DSOF-11813] - d3manager: append license number to download request
- [DSOF-11844] - Add 2SI mode for QSDI VFCs
- [DSOF-11886] - Create "Remove Ingestion History" button in d3manager.
- [DSOF-11895] - Audio: Commencing playback of embedded audio in a video module with transition time at a non-zero value causes the audio to fade up
- [DSOF-11913] - Display sample rate in AudioTrack editor in kHz for consistency
- [DSOF-11928] - Add AMD log with EDID and link training info to diag
- [DSOF-12003] - Update FMOD from 1.10.12 to latest 2.00.05
Bugs
- [DSOF-11967] - Allow project view mesh culling for performance improvement on projects with large numbers of vertices.
Improvements
- [DSOF-11912] - Set StutterMode key on vx4 for stability improvement.
Bugs
- [DSOF-11839] - Playhead continues past section break when in Loop Section play mode set by PlayMode layer
- [DSOF-11869] - When playing to end of section, timecode cursor on track and keyframe editor will show an incorrect value
- [DSOF-11921] - Creating a ScreenPositionExpression when an unnamed ScreenPositionAxis exists will cause d3 to hang indefinitely
- [DSOF-11925] - EventTransportOSC: commands executed after device has been removed and reassigned
Bugs
- [DSOF-11818] - Cursor is seen on 'GUI' output of 4x2 as a Slave
Bugs
- [DSOF-11758] - Error opening cue setlist when there is "empty tag field"
- [DSOF-11733] - Depth buffer artefacts may be visible in unexpected places
- [DSOF-10811] - Timeline time loses TC adjustments changes when playing to end of section
Bugs
-
[DSOF-10995] - Display re-ordering may be incorrect on vx 4
-
[DSOF-11667] - Regression: d3 slow to load with long image sequences
-
[DSOF-11713] - Green Artifacts in the video capture when notch block is used
-
[DSOF-11728] - Default test patterns have regressed
Bugs
- [DSOF-10084] - Importing layers places keyframes in wrong position on 29.97 timecode timeline
- [DSOF-11673] - Display Manager Subsystem crash on startup (IDXGIOutput::GetDisplayModeList failed to get modes)
- [DSOF-11706] - UID assignment collision when proxies generated by d3 exist
Bugs
- [DSOF-11675] - VideoTransition layer broken in r16.0
- [DSOF-11680] - ADL fails to enumerate GPU connector when an invalid display is present
- [DSOF-11683] - Cannot set non-integer framerates in VideoClips
Improvements
Bugs
- [DSOF-7942] - Remove missing resources will not remove any unless all missing resources in tab are unused
- [DSOF-11564] - DMX screens should not render on slaves that aren't outputting DMX
- [DSOF-11574] - Cue List: Invalid string notification and broken UI when creating CUE tag and note
- [DSOF-11576] - Cue List: Float division by Zero notification and broken UI when creating CUE tag
- [DSOF-11583] - Unable to import feed rectangle tables from other projects
- [DSOF-11586] - Access Violation when loading a LUT file assigned to a screen but not present in folder
- [DSOF-11595] - Cue list: Moving horizontal scroll bar clears cue list
- [DSOF-11598] - Stability of DPX sequence playback is reduced by larger amount of layers when overall pixel count is kept the same
- [DSOF-11630] - DMX SPR driver updates regardless of change in input, thereby causing large position jitter.
- [DSOF-11643] - Incorrect expiration warning for Notch license
- [DSOF-11668] - HAP files give errors or don't appear in r16
New features
- [DSOF-6288] - Image sequences become a Gold feature
- [DSOF-8092] - Sockpuppet over OSC
- [DSOF-8373] - OmniCal Multipose QuickAlign
- [DSOF-9353] - OmniCal Rig Check improvements
- [DSOF-10237] - Cue List - Redesign
- [DSOF-10609] - vx 4 playback performance
- [DSOF-10623] - Projector Yoke Control
- [DSOF-10650] - NotchLC support
- [DSOF-10679] - ObjectTrackingSource for controlling object positions
- [DSOF-10757] - Cue Set List Beta Process
- [DSOF-10897] - Full 10-bit pipeline introduction support
- [DSOF-6289] - Indirection support for DMX Banks
- [DSOF-6543] - External way to create projector information and import (via CSV/Table)
- [DSOF-8426] - OptiCal: BlobDetection UI that shows effect of settings, masks etc
- [DSOF-8469] - Update ScreenPositionModule Configurations from referenced Screen's position
- [DSOF-9575] - OmniCal: Add multi-pose to Quick Align
- [DSOF-9576] - OmniCal: Automatically disengage SPR device when alignment is in progress and add switch for disabling Screen Position Module interference with SPR device.
- [DSOF-9577] - OmniCal: UI in QuickAlign window to copy position to min/max values in screen position axis
- [DSOF-10152] - Add ncam support to ScreenPositionReceiver
- [DSOF-10307] - Add ability to export (parts of) the current Stage as a 3D file format
- [DSOF-10311] - Omnical: Load blob detection masks from file
- [DSOF-10471] - ProjectorControl: a layer that moves physical projectors and changes their configurations
- [DSOF-10491] - Canon CLog2, CLog3 Log video, Canon Cinema Gamut support
- [DSOF-10524] - Auto Scroll option within Cue Set List
- [DSOF-10683] - Define and test ImageSequenceFormat::extractFrameNumber
- [DSOF-10736] - Image Sequences: Add gold support for .dpx files
- [DSOF-11099] - Notify user on use of the same 'Tag' number
- [DSOF-11273] - Add Camera Tracking drivers (stype & mo-sys) which affect Camera lens
- [DSOF-11453] - Expanded support for further versions of SDI firmware.
Improvements
- [DSOF-753] - Some form of communication to inform when checkpointing
- [DSOF-883] - Zoom to object
- [DSOF-971] - "Force quit all" should give a pop-up notification or warning.
- [DSOF-1397] - OSC event transport: osc expression for "hold"
- [DSOF-2630] - User experience: Enable the preferred tag to persist after project restart
- [DSOF-2745] - Keyboard shortcut for splitting layers
- [DSOF-2987] - OmniCal: use faster and more flexible iOS logging framework
- [DSOF-4387] - Shortcut to minimise track
- [DSOF-5009] - Other method to bring up Cue Set List
- [DSOF-5393] - Cue list per Track
- [DSOF-6844] - OmniCal: button to rotate input camera images in CaptureSetup
- [DSOF-6940] - Add Weston 3-field deinterlace method
- [DSOF-7920] - Optical: Single Click an Alignment point to confirm placement
- [DSOF-7926] - Optical: Ability to Hold an alignment point and use scroll wheel at the same time
- [DSOF-8777] - Allow selection of reduced blanking level when generating EDID
- [DSOF-8892] - OptiCal: Update displayed blobs in capture setup when changing blob filter settings
- [DSOF-9037] - OptiCal: Alignment doesn't work when resolutions of cameras are different
- [DSOF-9041] - OptiCal: Rig check should not be dependent on an alignment first
- [DSOF-9081] - OptiCal: View capture blobs always outputs every projector
- [DSOF-9090] - Identify Notch license expiry date via d3manager (including networked machines)
- [DSOF-9178] - OptiCal: Rig check should support mesh deform as part of the workflow
- [DSOF-9179] - OptiCal: Rig check doesn't utilise screen space well with 10+ cameras
- [DSOF-9338] - Camera labels should have their own visibility option.
- [DSOF-9402] - ScreenPosition: Rename to ObjectPosition
- [DSOF-9491] - OmniCal: Show un-cropped camera view in iOS camera app
- [DSOF-9529] - Active projector list needs a vertical scroller in capture setup window
- [DSOF-9623] - OmniCal: iOS app should display Auto/Locked state for Exp/WB/Focus
- [DSOF-9642] - OmniCal: Allow naming and duplication of alignment poses
- [DSOF-9706] - OmniCal: Allow Rig Check of cameras with different names
- [DSOF-9758] - Remember State for SPR Device's Engaged Status When Using QuickAlign
- [DSOF-9764] - OmniCal: iOS app UI updates very slowly for changes in focus, ISO etc
- [DSOF-9780] - OmniCal: Automatically override SP Module when alignment is in progress and vice versa, remembering original state.
- [DSOF-9781] - OmniCal: Add ability to select SPR device in Quick Align's Automation Section.
- [DSOF-9819] - OmniCal: Selecting or changing automation device should automatically disengage and remember state
- [DSOF-9866] - OmniCal: Persist Quick Align Settings
- [DSOF-9868] - OmniCal: All screens in pose which have automation axes assigned should participate in set max/ min workflow.
- [DSOF-9869] - OmniCal: Programmatically call Align to Alignment Points when setting max/ min.
- [DSOF-9880] - OmniCal: When duplicating a plan also copy its capture and results
- [DSOF-9896] - Ability to set Min and Max for all Screens in the Current Pose
- [DSOF-9901] - OmniCal: Ability to use props (or any Objects) as alignment surfaces in quick align.
- [DSOF-9903] - OmniCal Rig Check Aligner: Display the current screen being Rig Checked for Alignment
- [DSOF-9909] - OmniCal: Improve disabling of screen position modules when quick align is open.
- [DSOF-9914] - OmniCal: Allow user to adjust opacity of alignment points.
- [DSOF-9915] - OmniCal: Respect locked flag in OmniCal Stage Plan editor.
- [DSOF-9955] - OmniCal: warn before changing the master screen
- [DSOF-9962] - OmniCal: AlignmentPoints should have default names (labels)
- [DSOF-9968] - Bring back the zoom in the timeline without pressing alt (option switch)
- [DSOF-9988] - Tooltip for TC adjust
- [DSOF-9992] - OmniCal: Remember the discovery adapter.
- [DSOF-10050] - OmniCal QuickAlign: import reference points does not import all points
- [DSOF-10057] - OmniCal: Rename "camera #" in QuickAlign to "view #" to avoid confusion with actual cameras
- [DSOF-10058] - OmniCal: make MobileCam UI read-only, so that changes always go through Plan workflow
- [DSOF-10067] - OmniCal: warn about dubious aspect ratio calculation for projectors
- [DSOF-10104] - OmniCal: make CaptureSetup options widget scrollable
- [DSOF-10129] - Integrate the options switch omniCalRenderFrameDelay into omniCal UI
- [DSOF-10151] - OmniCal: Allow opening Capture Setup even with no cameras or projectors
- [DSOF-10309] - Add support for 25mm Lens Intrinsics for MV Cameras (for future implementation).
- [DSOF-10360] - Upload 24-bit RGB as packed textures and decode on the GPU
- [DSOF-10375] - LivePP is not using a parameter for conan path, instead it is hardcoded
- [DSOF-10410] - 10-bit support on the gx 2c
- [DSOF-10451] - Tooltips for everything in clip properties
- [DSOF-10465] - Add the ability to query the list of active transports from multi-transport event transport
- [DSOF-10467] - OmniCal: Allow mix of iPods and machine vision cameras in same plan
- [DSOF-10469] - ListEditor: copy-paste rows
- [DSOF-10494] - HDR: d3 isn't handling scene linear values well (sRGB looks incorrect)
- [DSOF-10510] - Strategically add margin to cue set list to improve clarity
- [DSOF-10517] - OmniCal: Don't request images from mobile cameras which are not in a plan
- [DSOF-10536] - OmniCal: Persist camera image orientation
- [DSOF-10541] - OmniCal: Make View Capture only show blobs from selected projectors
- [DSOF-10543] - OmniCal: Add confirmation dialog before executing plan
- [DSOF-10547] - GVG Matrix should notify when errors are returned by the device
- [DSOF-10549] - OmniCal: Add plan name to camera study report
- [DSOF-10574] - OmniCal: Don't crop images in UI when they are un-distorted
- [DSOF-10579] - OmniCal: Limit camera gain settings in UI
- [DSOF-10580] - Give specific error when selected network adaptor is unavailable on d3 start
- [DSOF-10583] - Ability to Add Reference points on LED surfaces
- [DSOF-10585] - Simulate pitch/tilt/zoom projector control in visualiser
- [DSOF-10592] - Standardize camera omnical white balance gain values to be in dB
- [DSOF-10593] - OmniCal: handle user abort appropriately, don't treat as error
- [DSOF-10625] - OmniCal: make aspect ratio calculation from DLT even clearer in Report
- [DSOF-10634] - OmniCal: Rig Check Aligner UI should be consistent with Quick Align
- [DSOF-10642] - Change Default Brightness of LED
- [DSOF-10653] - Import Projector: support new MappingMatter CSV that contains UUIDs
- [DSOF-10707] - OmniCal: Remove reference to ScreenPositionAxis in alignment poses
- [DSOF-10719] - Automation: Add support for latest simotion driver
- [DSOF-10728] - Notify user when projection surface has more than 12 (Dynamic soft edge limit) projectors assigned
- [DSOF-10734] - Add re-image logs to system diag
- [DSOF-10738] - Ignore Timecode Module still shows 'Chasing Timecode' in transport widget
- [DSOF-10745] - Change word Clear for Colour in Head Configuration widget.
- [DSOF-10752] - The name IgnoreTimecode is misleading for the layer's actual function
- [DSOF-10761] - Warn user when an image sequence has gaps
- [DSOF-10832] - Update Movecat protocol to version 3.
- [DSOF-10842] - Projector Control: Allow user to show/ hide columns
- [DSOF-10843] - Projector Control: Allow user to display multiple projector control editors which can be configured differently.
- [DSOF-10848] - List Editor: show/hide columns
- [DSOF-10851] - OmniCal: Add option to keep showing content on displays which are not part of a capture
- [DSOF-10905] - Optimise CONTEXTN usage in Widget update/render functions
- [DSOF-10913] - GradientTexture: generate gradient in 10-bit if in 10-bit mode
- [DSOF-10914] - SoftEdgeTexture: generate gradient in 10-bit if in 10-bit mode
- [DSOF-10922] - DSE: generate a 10-bit gradient in 10-bit mode
- [DSOF-10954] - OmniCal: camera bandwidth limit should ignore non-MV cameras (e.g. iPods)
- [DSOF-10965] - List Editor: Review short-term changes made to some list editor in r15.2
- [DSOF-10975] - OmniCal: Add ability to apply plan and result alignments from open module
- [DSOF-10994] - Change behaviour of Cue Set List "Go" button from double click to one click
- [DSOF-11017] - Rename CueSetList
- [DSOF-11039] - OmniCal: Improve UI for pose editor.
- [DSOF-11042] - OmniCal: Allow correction of focal lengths without having to redo capture
- [DSOF-11049] - Fix build dependency for auto-generated RC files
- [DSOF-11051] - Trial license Product Code should be set automatically
- [DSOF-11077] - minor Build System improvements around inconsistencies and dependencies
- [DSOF-11079] - Explicitly mark tests that involve throwing (expected) exceptions with a Catch tag
- [DSOF-11081] - OSC sockpuppet Address and strings Export and visualize.
- [DSOF-11098] - d3_test: load test DLLs via explicit names, rather than wildcard *_test.dll to avoid branch conflicts
- [DSOF-11116] - build: reduce unused 3rd party dependencies in conanfile
- [DSOF-11126] - OmniCal: add advanced option for Auto/Manual bandwidth management to vmap
- [DSOF-11184] - build: "install" project does not re-run, even if output folder is deleted
- [DSOF-11326] - Log file and line number when exceptions are thrown by NVAPI and ADL
- [DSOF-11459] - OmniCal: "Check Cameras" window opens far top left of the screen
- [DSOF-11483] - ListEditor: use Resource description for popup menu title
- [DSOF-11488] - OmniCal: "Execute plan" throws "master screen not set" error if QuickAlign was never done
- [DSOF-11575] - Expose m_updateNumber to python - allowing for easier programmatic detection of when machines have finished applying feed settings
Bugs
- [DSOF-1475] - Per projector output mode GUI problem
- [DSOF-1579] - BMP, TIFF screenshot formats don't work
- [DSOF-5932] - Cue Set List show wrong information for TC Tags
- [DSOF-9082] - Introducing earlier frames to an already ingested image sequence can cause access violations
- [DSOF-9442] - OmniCal: Uncaught exception when exiting d3 whilst blob is been detected
- [DSOF-9505] - OmniCal: Remove legacy code in editor_aligner.py
- [DSOF-9582] - Can not delete capture plans
- [DSOF-9770] - OmniCal: multi-pose automation only works when input values are in metres
- [DSOF-9775] - OmniCal: screen positions set by automation are inconsistent with alignment poses
- [DSOF-9870] - OmniCal: Master Screen is still selected as the current screen when creating poses
- [DSOF-9879] - OmniCal: Don’t show notification when creating poses without automation device selected.
- [DSOF-9906] - QuickAlign: changing camera removes pose-specific label
- [DSOF-9965] - OmniCal: Setting Min and Max Output using MultiPose can cause unexpected rotation.
- [DSOF-10011] - d3 start is delayed if image sequences are present in videoFile folder
- [DSOF-10039] - OmniCal QuickAlign: disallow reshape tools when not in base pose
- [DSOF-10106] - Widget inconsistencies with maxSize and pos
- [DSOF-10122] - Removing camera from OmniCal list requires a restart to take effect
- [DSOF-10162] - d3module.dll not running
- [DSOF-10206] - Changing between different Drivers will make all ASIO outputs go "Unknown"
- [DSOF-10243] - QuickCal correspondence point rendering doesn't work with feed-proxied Projectors
- [DSOF-10269] - List Editor: Fix scrolling
- [DSOF-10295] - Changing bit depth via NvAPI fails occasionally depending on current display mode
- [DSOF-10323] - Video in 5 to 16 get lost forever after send them to the trash until project restart
- [DSOF-10332] - ObjectView items remain at previous size after deleting long text
- [DSOF-10339] - OmniCal: VimabCamServer writes temp files to project directory
- [DSOF-10365] - Root cause vx 4 stall on quit
- [DSOF-10371] - Omnical. Enable discovering mobile cameras stops working after changing several times from yes to no
- [DSOF-10386] - 'Audio Error in createSound' notification when audio file is missing on slave
- [DSOF-10405] - Excessive console spam, input does not display when coupled input signal is lost/stopped
- [DSOF-10423] - OmniCal: Reshape Scaling and Screen Scaling options in QuickAlign not saved as json
- [DSOF-10436] - When a video layer's speed is linked with an expression to another video layer's speed, the speed of the controlled video layer is doubles when it hits an intersection.
- [DSOF-10437] - Screen Position Receiver. DMX channels of axis created with a DMX screen position receiver driver overlaps
- [DSOF-10446] - Audio will stop and Video skips frames if the mode is changed from timecode to normal via sockpuppet.
- [DSOF-10454] - Asio Driver will not live update.
- [DSOF-10456] - Blend Gamma and Sharpness doesn’t grey out when opening Omnical
- [DSOF-10462] - VR Camera rotation incorrect
- [DSOF-10484] - ListEditor: cannot undo an edit of multiple rows
- [DSOF-10488] - Notch License Distributor is not responding to requests sent via d3manager
- [DSOF-10498] - Projector names don't get updated in OmniCal studies after renaming in the stage
- [DSOF-10504] - Video: Changing 'at the end point' from Ping-Pong to Loop doesn't work
- [DSOF-10509] - Adding or deleting long strings of text in Notes column breaks rendering of CueSetList editor
- [DSOF-10512] - Investigate why Cue Set List editor's performance is low
- [DSOF-10516] - Selecting a row in a ListEditor then pressing up or down raises an exception
- [DSOF-10519] - Cue Set List cannot be locked open
- [DSOF-10525] - Horizontal Scroll Bar Appears in Cue Set List
- [DSOF-10535] - List Editor in Feed cannot properly toggle test pattern
- [DSOF-10546] - Regression - Unable to Multiselect then duplicate feed rectangles
- [DSOF-10554] - strobe: Doesn't work as an arrow source into other layer types
- [DSOF-10564] - ListEditor: use field name instead of display name when looking up columns
- [DSOF-10568] - log useful error when d3 crashes; due to free disk space alert
- [DSOF-10573] - Error trying to use Realtek ASIO device due to incorrect buffer size
- [DSOF-10582] - d3 fails to start on designer machine when opening some projects
- [DSOF-10587] - List Editor: Unable to duplicate multiple feed rectangle via list editor
- [DSOF-10591] - Ndi birddog is causing d3/NDI applications to crash
- [DSOF-10594] - OmniCal: silently ignoring potential errors during Capture (e.g. file handling)
- [DSOF-10595] - OmniCal - When OmniCal not setup, 'NoneType' notification when user clicks "Resets plan projectors"
- [DSOF-10599] - EDID emulation control on GUI and non-VFC heads is error prone and difficult to find
- [DSOF-10601] - Multi Transport Track selection doesn't work in 15.2
- [DSOF-10603] - Broken UI for "Export Current Camera View"
- [DSOF-10626] - Changing tracks via track bin causes GUI errors when pinned
- [DSOF-10682] - Projectors controlled by a projector device controller sometimes do not send DMX commands on input.
- [DSOF-10686] - When a layer crashes, we have to restart d3 to retry running the layer
- [DSOF-10696] - OmniCal: Mesh deform changes surface to use subdivided mesh even if no deform is performed
- [DSOF-10726] - MultiTransport: 'NoneType' object has no attribute 'findWidgetByName'
- [DSOF-10732] - Project upgrade from r15.x to r15.4 causes corruption
- [DSOF-10737] - Audio Lock mode doesn't behave as expected when using 'loop section' play mode
- [DSOF-10746] - Upgrade of Buckingham palace project fails
- [DSOF-10750] - Bounds check notifications after upgrading EdSheeran_MultiplyWorldTour2014 project
- [DSOF-10774] - 10-bit DPX screenshot generated from d3 cannot be loaded in d3
- [DSOF-10797] - Errors while playing back an image sequence while its gaining extra frames
- [DSOF-10799] - List Editor: Display on Feed rectangle is editable
- [DSOF-10800] - Unable to open DMX Patch Editor
- [DSOF-10804] - DxShaderHeaderCompiler: cannot parse cs_5_0 shaders
- [DSOF-10805] - OmniCal: Visualise Calibration draws points in red most of the time, even for good calibrations
- [DSOF-10813] - moveColumn failed. No column exists for "Name" error for Projector multi-selection
- [DSOF-10839] - ListEditor: primary selection row does not support multi-row actions when selected using keyboard
- [DSOF-10856] - Audio crackles and pops with multiple multichannel files and audio layer
- [DSOF-10857] - OmniCal: View capture can only show white level and grid images of first projector in list
- [DSOF-10862] - Access violation when updating projector control device when using simulation config
- [DSOF-10864] - List Editor: Unable to lock multiple camera bookmark by clicking the first selected camera bookmark
- [DSOF-10865] - List Editor: Multi-select and multi-edit does not work with MultiTransport Manager
- [DSOF-10870] - Cue set list: Long Cue set list severely degrades frame rate
- [DSOF-10872] - OmniCal: RigCheck fails to open if original plan data is not available
- [DSOF-10873] - installer: include VimbaCamServer.exe in 'minimal' installer
- [DSOF-10880] - video in Inputs are auto assigned in swapped order
- [DSOF-10881] - gx 2c can only use 5 video inputs at a time
- [DSOF-10886] - Cue Set List: Adding a track to a new setlist gives ACCESS VIOLATION
- [DSOF-10889] - Weston 3-field deinterlacing method produces bobbing
- [DSOF-10890] - Cue Set List: Adding a track to a new setlist gives Pure Function call
- [DSOF-10901] - Weave deinterlace method causes bobbing
- [DSOF-10906] - OmniCal: camera thumbnails show question mark after a capture
- [DSOF-10909] - List Editor: Double-clicking Projector under Display in Feed rectangle List Editor gives 'NoneType' notification
- [DSOF-10910] - Projector FXAA downgrades output to 8-bit
- [DSOF-10911] - Blur and MotionBlur layers downgrade content to 8-bit
- [DSOF-10912] - Notch: Using Input processing size or notchRenderInterval downgrades image to 8-bit
- [DSOF-10916] - Adding latency to a feed head downgrades output to 8-bit
- [DSOF-10917] - Hold downgrades output to 8-bit
- [DSOF-10921] - ImageSequences: 16-bit TIFFs cause access violations
- [DSOF-10926] - Regression: Starting project with all video inputs connected and assigned causes OS-level hang
- [DSOF-10934] - DeviceRecording: Using restricted filename characters in section notes breaks recording.
- [DSOF-10936] - OmniCal: OpticalCalibrator::activate fails due to SlaveManSystem not being initialised
- [DSOF-10938] - List Editor: d3 freezes when trying to hide the last visible column
- [DSOF-10944] - OmniCal: QuickAlign shows old base pose alignment images after doing a new full capture
- [DSOF-10946] - OmniCal: unsupported camera commands crash iPods
- [DSOF-10948] - OmniCal: Access violation when attempting to open module the currently selected plan.
- [DSOF-10949] - Error message on OSC sockpuppet (Type mismatch - can't assign from 'Resource::RP' to 'VideoClip::RP')
- [DSOF-10959] - OmniCal: bring back vmap changes after machinevision_fixes merge (in r15.4)
- [DSOF-10995] - Display re-ordering may be incorrect on vx 4
- [DSOF-10998] - Embedded audio can pop when jumping to a new location in the same clip in locked mode, or changing clip
- [DSOF-11027] - OmniCal: Projector lens distortion lookup calculation stalls main thread
- [DSOF-11029] - List Editor: d3 freezes when sorting on certain columns in list editor
- [DSOF-11033] - Cannot export DPX screenshot while in 8-bit mode
- [DSOF-11040] - OmniCal: Focal lengths not set correctly in a plan when creating it from a folder
- [DSOF-11059] - BlueFish: capture group downgrades 10-bit capture to 8-bit
- [DSOF-11063] - Content from previous section is visible for first frame of new section
- [DSOF-11076] - Error when selecting a mapping through sockpuppet osc
- [DSOF-11078] - various unit/integration test fixes and improvements for r15.4
- [DSOF-11080] - Image constructor overwrites adjacent memory
- [DSOF-11082] - OmniCal: Error finding camera plan during simulated calibration when no mobile device is set
- [DSOF-11109] - ListEditor: Incorrect number of arguments to call when sorting
- [DSOF-11112] - OmniCal: Auto reset of screen meshes when opening Quick Align UI should revert to reshaped meshes if they exist
- [DSOF-11121] - ACCESS_VIOLATION using OSC
- [DSOF-11122] - ACCESS_VIOLATION: user-mode DEP violation
- [DSOF-11155] - Undoing a full drag instead of individual moves
- [DSOF-11158] - Timeline widget sizing breaks when expanding groups of layers, when it's height reaches the top of the bounds of screen
- [DSOF-11174] - Broken layer overlap and contains logic
- [DSOF-11183] - OmniCal: Renaming a pose makes it disappear from list of poses in QuickAlign
- [DSOF-11194] - build: PCH compilation wrongly use blip_base precompiled header in several projects
- [DSOF-11211] - OmniCal: duplicate camera plan names are allowed
- [DSOF-11212] - clicking 'quit all' causes notification, machines do not quit all.
- [DSOF-11222] - Exclude vx 4 MGMT network interface from being used by session.
- [DSOF-11232] - OmniCal - Cannot perform capture due to file "being used by another process"
- [DSOF-11238] - GUI never appears on d3 start
- [DSOF-11250] - OmniCal: Cannot toggle guidelines in Rig Check Alignment UI due to python error
- [DSOF-11251] - OmniCal: Arrow key controls don't work for moving points in Rig Check UI
- [DSOF-11261] - Undo can drop frame rate significantly
- [DSOF-11270] - ObjectView doesn't work in List Editor
- [DSOF-11274] - Multitransport bounds check
- [DSOF-11280] - Multitransport bounds check
- [DSOF-11311] - Sockpuppet: OSC-controlled layers don't go dormant
- [DSOF-11322] - Sockpuppet: OSC input isn't restricted by limits or number of options
- [DSOF-11330] - Cue List re-sizes itself larger after pinning and project restart
- [DSOF-11346] - OmniCal: Calibrator does not send BW setting to cameras when changing BW value
- [DSOF-11348] - OmniCal: Stage Plan should use cameras in the current plan in order to determine nAliveMVCameras.
- [DSOF-11351] - GPU memory occupied by NotchLC videos is never released
- [DSOF-11357] - Large surge in GPU memory usage if system starts regularly dropping frames on GPU while playing NotchLC videos
- [DSOF-11358] - Unable to open 'Check Camera...' in the attached project
- [DSOF-11363] - Error in zip_d3_project_for_debug.py
- [DSOF-11385] - Tracking: MoSysF4 driver displays name twice in data monitor.
- [DSOF-11386] - Tracking: MoSysF4 driver only updates tracking sources for camera 0
- [DSOF-11420] - Changing screen type while in the feed view produces an error
- [DSOF-11421] - Fullscreen switching causes genlock to be dropped on vx4
- [DSOF-11425] - Trial version installer fails due to missing license file
- [DSOF-11430] - Cue list: Remaining timestamps get compressed if cue list is not it its widest
- [DSOF-11433] - Slowly horizontally decreasing the window size of a ResizableWidget causes the window contents to shudder
- [DSOF-11434] - OSC sockpuppet: editing patch multiple times causes UI glitch
- [DSOF-11441] - OmniCal: Multi-Pose rotations are not normalised automatically
- [DSOF-11442] - AR camera drivers with no lens file loaded set camera FOV to 0
- [DSOF-11445] - Cue list: Double colon after a search tag returns no results
- [DSOF-11451] - Cue list: Tag column gets shortened when resizing cue list
- [DSOF-11458] - OmniCal: Cameras and pose names do not get updated on the QuickAlign window when creating a new pose
- [DSOF-11468] - Unable to set 10-bit mode on gx 2c with d3 EDIDs
- [DSOF-11469] - OmniCal: Validation messages need to be swapped when clicking the "Check Cameras" button for simulated and live cameras capture plan
- [DSOF-11475] - Audio does not playback in the audio layer using sockpuppet OSC
- [DSOF-11482] - OmniCal: Camera settings not applied to cameras when opening the Rig Check / Camera Check window
- [DSOF-11485] - Omnical: blob detection masks lock up capture when images mismatch in resolution to the camera
- [DSOF-11489] - Stringify EEPROM data when logging it to console
- [DSOF-11490] - d3service does not correctly handle HDMI cards with invalid EEPROM data or data that can't be read
- [DSOF-11498] - OmniCal: Renaming a pose does not update camera image text in QuickAlign
- [DSOF-11499] - OmniCal: Device name mismatch error when opening Check Cameras UI
- [DSOF-11500] - Tag type changes to Midi when changing the tag entry in Cue List
- [DSOF-11518] - OSC Patch editor fields does not have user friendly display name or tooltips
- [DSOF-11521] - ListEditor - removing all columns and then re-adding them breaks the window
- [DSOF-11530] - Error when Test route button is pressed and test input or test output field is empty
- [DSOF-11534] - Access violation on shutdown when closing all widgets / GuiSystem
- [DSOF-11548] - TelnetConsole: Some commands are not properly propagated through resource Transport
- [DSOF-11549] - PQ colour space outputs incorrectly low values
- [DSOF-11550] - Mosys lens data reports incorrect PA width
- [DSOF-11565] - Venue contains Tracking Source field
- [DSOF-11572] - Setting a 10-bit EDID for SDI VFC on a vx4 crashes d3service
- [DSOF-11578] - vx4: d3service and d3buddy intermittent crash due to remora HTTP post error
- [DSOF-11613] - Unable to set 10-bit mode on gx 2c with d3 EDIDs
Other
- [DSOF-11195] - Revised T&Cs for Trial only
- [DSOF-11507] - Update default test pattern images
Fixes
Content Mapping
- Content mapped directly to projector incorrectly used both dynamic blend & feather masks
Video Output
- Extremely rare condition when querying display modes causes potential failure on startup
Current known issues
Audio
- Large audio files may cause the audio layer to stutter as it processes the files. Workarounds:
- use video files with embedded audio
- employ smaller, compressed audio files types such as MP3
- or try staggering multiple audio files on the timeline to save overdue, instant demand by multiple files
- Potential audio crackles with multiple, multichannel files
- Embedded audio in video goes out of sync when video is played in ping-pong mode
- Playing to Loop section in Locked mode when section has been resized ignores the section break
These four have potential fixes identified, but need to go through the process of code review and verification
- Audio layer may go out of sync from the playhead over a long period of time
- note: this has been observed only intermittently and is of the order of 15 frames over a 12 hour period
- Audio does not start again when encountering a new keyframe of the same audio track
- when the same audio track is sequenced multiple times in the audio layer, it does not start again on the new keyframe as the video layer does
These two are still under investigation
Fixes
Keyframe
Keyframes are not tracking between section breaks when in ‘Normal’ mode rather than ‘Locked’
Hardware integration
Ensure fan settings persists after a reboot
Networking
Failure to start the project if a vx 4 is a Slave to a gx or pro range Master
VFC
More robust handling of HDMI cards to ensure they get recognised at startup
Video Output
Intermittent failure to start caused by HDMI VFC cards clashing with nvidia enumeration (evident particularly on gx 2s)
Current known issues
Legacy known issues from r15.1 and earlier
LUT
[High-resolution LUT files] All sample LUT files included in r15.1 have a grid point count of 32. Although the layer supports higher numbers of grid points, this comes with the consequence of taking longer to load on project start (but will not delay the project itself). It is recommended not to exceed 64 grid points
OmniCal
Doing a rig check from simulated plan to actual cameras for the first time can result in the physical cameras being not found. Workaround: run the rig check with simulated cameras
VR
- VR entails on additional render overhead
- This may result in a poor performance
Upgrading 32-bit to 64-bit Sockpuppet shows
- There may be issues upgrading Sockpuppet projects from 32-bit to 64-bit in 14.4.x builds. If your project falls into this category, please contact support@disguise.one who can arrange a project upgrade for you
Permissions error after installing
- On a small number of machines, a python-based permissions error will prevent software from starting.
- This issue can be solved by restarting Windows
Potential UI performance regression with long and busy timelines
- With either long or busy timelines containing e.g. a plethora of notes/cues, the UI may suffer a degradation in performance
- Minimising the timeline negates this
Slideshows transition time
- The transition time between slides in slideshows is currently broken
- The fix for this makes fundamental changes to timeline operations, so will take a while to work its way into future releases
Fixes
Display Management -
- Improve reliability of genlock on gx 1
Display Management -
- Address gx and plus range failure to start in headless mode
Current known issues
Audio
We have reports of users experiencing audio clicking or popping. Release 15.1.4 has some fixes to address this and reduce the chances of this occurring. However, we recognise that this has not been completely cleared up. Audio clicking may still be prevalent on higher frequency sounds. If you experience this try the following workarounds:
- Reduce the volume of the audio. We are noticing that our interaction with drivers adds volume which can result in clicking
- Use WASAPI instead of ASIO. The prevalence of clicking is more pronounced on ASIO
- Edit the Hammerfall settings to reduce the Output Level (see screengrab below)

Audio clicking during high performance
Additionally, under heavy load, if a project starts to drop frames this may have a knock-on effect on the audio, especially if embedded into a video file
Downgrade your 15.1.x project to 15.0.7
If you have already sequenced your project in 15.1.x and want to downgrade the project to an earlier release prior to the audio issues, there is a special version of 15.0.7 to accommodate this. Notes:
- Only downgrades from releases r15.1.0-r15.1.9 to r15.0.7
- Audio mappings will need to be repatched
- Upgrade back to r15.1 should be possible, but not to another r15.0 release
Version 15.0.7 can be downloaded from here
LUT
[High-resolution LUT files] All sample LUT files included in r15.1 have a grid point count of 32. Although the layer supports higher numbers of grid points, this comes with the consequence of taking longer to load on project start (but will not delay the project itself). It is recommended not to exceed 64 grid points
OmniCal
Doing a rig check from simulated plan to actual cameras for the first time can result in the physical cameras being not found. Workaround: run the rig check with simulated cameras
Legacy known issues
VR
- VR entails on additional render overhead
- This may result in a poor performance
Upgrading 32-bit to 64-bit Sockpuppet shows
- There may be issues upgrading Sockpuppet projects from 32-bit to 64-bit in 14.4.x builds. If your project falls into this category, please contact support@disguise.one who can arrange a project upgrade for you
Permissions error after installing
- On a small number of machines, a python-based permissions error will prevent software from starting.
- This issue can be solved by restarting Windows
Potential UI performance regression with long and busy timelines
- With either long or busy timelines containing e.g. a plethora of notes/cues, the UI may suffer a degradation in performance
- Minimising the timeline negates this
Slideshows transition time
- The transition time between slides in slideshows is currently broken
- The fix for this makes fundamental changes to timeline operations, so will take a while to work its way into future releases
Technical Advisories
Notch
- Extremely demanding Notch blocks can cause an oversubscription of available memory resources - click here for full advisory.
Audio
- Audio clicking or popping and audio drifting out of sync with video under heavy load - click here for full advisory.
OmniCal
- Potential signal drop from wireless OmniCal kits - click here for full advisory.
Fixes
Major Fixes
- Camera - MSAA defaulting to on impacts performance, default should be set to off
- Licensing -Ensure license checks cater for disguise OmniCal cameras
Other fixes
[GUI] Upgrade LegacyVideo Layers unnecessarily requires a GroupLayer to be expanded in order to upgrade
[Layers] A multi-selection of Legacy Video layers from within a group will fail to upgrade to Video layer
Improvements
Major improvements:
- d3Manager - Warn users if there is an incompatibility between a later software version and earlier OS versions of the pro range
Other improvements:
- [VFC] Notify user when HDMI VFC cards are used in an OS that does not support them
Current known issues
VR
- VR entails on additional render overhead
- This may result in a poor performance
Upgrading 32-bit to 64-bit Sockpuppet shows
- There may be issues upgrading Sockpuppet projects from 32-bit to 64-bit in 14.4.x builds. If your project falls into this category, please contact support@disguise.one who can arrange a project upgrade for you
Permissions error after installing
- On a small number of machines, a python-based permissions error will prevent software from starting.
- This issue can be solved by restarting Windows
Potential UI performance regression with long and busy timelines
- With either long or busy timelines containing e.g. a plethora of notes/cues, the UI may suffer a degradation in performance
- Minimising the timeline negates this
Slideshows transition time
- The transition time between slides in slideshows is currently broken
- The fix for this makes fundamental changes to timeline operations, so will take a while to work its way into future releases
Build
New Features
- [d3Manager] New mechanism for processing Options.ini and Machine.ini files
- [Device Control] Support for matrix switching using GVG protocol
- [Device Control] Support for AJA KUMO Matrix
- [Feed Outputs] Ability to apply alpha gradients in softedge textures
- [Layers] Promotion of previously under the hood layer DmxTableScreen to core product status
- [OSC] Support for multiXY OSC (trackpad) strings for use in layers
- [Projector Calibration] Greater control of the Wireframe Mesh cleanup angle (previously fixed at 5 degrees between edges) for Projector Config / QuickCal
- [Video Output] Add mechanisms for improving the usability and safety of Apply Feed Settings
- [Video Output] Add ability to independently manage GUI EDID emulation in the feed view on pro range machines on dedicated GUI heads
- [Visualiser] Add diffuse map to screens
Improvements
- [Audio] Audio pan now an option ('Balance') in the Audio layer
- [Automation / Encoders] Compensate for Visual Act driver scaling in mm
- [Automation / Encoders] Improve the best guess solver for Rigid Body with just one or two points
- [Automation / Encoders] Ignore duplicate data from STSDriver
- [Blank Project] Auto is now the default method for Quick-Cal, replacing Zhang
- [d3manager] Provide prompt for users if older firmware or OS image are detected via d3manager
- [DMX / Artnet] Rename DMX Device's 'Speed' parameter to 'Rate' and provide explanatory tooltip
- [DMX / Artnet] New monitor in Patch Assignments widget that combines the DMX monitor values with the Patch Assignments
- [DMX / Artnet] Fade Up should be "00..10" rather than "10...20"
- [DMX / Artnet] Employ consistent Transport State Ranger for Play and Fade Down. Now starts from 11 not 10 as previously
- [Expressions] New 'Track Time' variable available for us in expressions
- [Expressions] Support for integer arguments for OSC expressions
- [Feed Visualiser] Project refresh rate settings added to Feed view.
- [Feed Visualiser] Permit screenshots of the visualiser or individual cameras without showing the accompanying d3 GUI
- [Feed Visualiser] Throw up an alert instead of notification when a screenshot is exported from the feed view
- [GUI] Ability to display lens focal length millimetres
- [GUI] Modify the AnimateCamera default text to 'Local visualiser instead of 'None'' to avoid confusion
- [GUI] Employ a thumbnail of placeholder image for logical video in when selecting the video in clip
- [GUI] Add an indicator that a layer field is keyframed or externally controlled by e.g. Sockpuppet or an expression
- [GUI] Ability to cycle between the main/root windows in the GUI using CTRL-TAB (forward) and CTRL-SHIFT-TAB (backwards)
- [GUI] Move MatrixControl layer from Misc to Control section of the layers list
- [GUI] Provide notification explaining the failure to open Editors while playing a mixed Master
- [GUI] Machines' matrix inputs now in an editable list, similar to matrix outputs for each feed
- [GUI] Mark as read' and 'Mark all as read' options to clear notifications
- [GUI] Ability to select set list from Active Set List field in d3state tracks list
- [GUI] Ability to name Camera export screenshots
- [Keyframe editor] Provide a better indication of the drop location for keyframes editing
- [Layers] Changes to LegacyVideo layer speed keyframing will incorrectly change to Cubic/Linear to Select when upgrading
- [Layers] Rename Video layer to LegacyVideo and move to Legacy section; also rename VariableVideo layer to just Video
- [Layers] Rename layers to better capture their characteristics:
- - AnimateCamera -> AnimateCameraControl
- - AnimateCamera2-> AnimateCameraPreset
- - TargetModule -> TargetControl
- - Target2Module -> TargetPreset
- [Layers] Web layer custom parameters increased
- [Layers] Addition of Scale X and Y to Bitmap layer to ease application of gradients
- [Layers] Include -1 in the Video default range to make it easier to mirror-flip content
- [Licensing & Security] Update Codemeter dialogs with disguise branding
- [Movie Writer] Make the Open layer enabled by default when in Hold mode
- [Notch] Accept DMX channel hinting for sockpuppet
- [Sockpuppet] dmx universe occupancy masked off for transport control to avoid the potential for an overlap in patching
- [Sockpuppet] Ability to add dummy or placeholder patches into Patch Assignments
- [Sockpuppet] Ability to Alt drag individual media content to Bank Editor
- [Stage] Camera bookmarks now include the local visualiser's orthographic or perspective state
- [Stage] Allow the user to omit the .obj extension from the filename when performing an obj export
- [Stage] Notify users when meshes are exported (new export location projectfolder/output/mesh instead of projectfolder/)
- [Timeline] Play mode not correctly accounted for when playing forward, leading to potential for the next section start to be the previous or current one
- [Timeline] Rename DVI Matrix Control Layer to MatrixControl to indicate wider matrix control usage
- [VFC] Emulated EDID labelling to make it easier to identify to the GUI or passthrough outputs
- [Video Capture] Multiview video input now available as an additional option for capture input
- [Video Capture] Potential for "Unable to create video capture stream" notification at startup due to incorrect NDI startup sequence
- [Video Capture] Ability to sequence capture placeholder video clips in event of signal loss
Fixes
- [Audio] Potential playback failure if jumping out and back into a Sockpuppet video layer after removing Audio LineOut
- [Audio] Edge case of Audio sample rate conversion exception when Slaves and Understudies render frames with the same time
- [Audio] Mono MP3 files incorrectly play at double speed
- [Audio] Prevent WASAPI initialisation error on RDP connection
- [Automation / Encoders] Axis smoothing does not work with wrapped automation axes e.g. turntables
- [Automation / Encoders] ScreenPositionAxis/Expression incorrectly allow property references to types that are convertible to float, but directly casts to float
- [Automation / Encoders] Provide 'None' as an object in Automation Axis and ScreenPositionExpression for better editing in case of error
- [Automation / Encoders] When tracked points disappear from stage and reappear, they animate into view
- [Automation / Encoders] Movement threshold does not work unless prediction is turned on
- [Automation / Encoders] Duplicate PSN frames are not dropped, but processed
- [Automation / Encoders] Fixes for automation filtering and interpolation
- [Blank Project] Exception when deleting processes from the list in Monitor Manager
- [Camera] DMX lights cones incorrectly displayed when output is at 0
- [Content Mapping] Unexpected feed maps positioning after project specific manipulation
- [Content Mapping] Duplicating a feed map incorrectly positions the newly opened editor on top of the track widget
- [d3manager] Alternate d3manager project library path on a Slave not properly processed until project start
- [d3manager] Retain highlight on last selected project upon restarting d3manager
- [d3manager] Remove unnecessary license expiration text from the Trial version of d3manager
- [Device Control] LightwareMatrix commands may time out due to inefficient queuing
- [Device Control] Ctrl + z to undo after creating a device causes a 'recvFrom returned error'
- [Device Recording] Unable to open media - still copying?' appears when trying to immediately play back a freshly created device recording
- [Device Recording] Performance hit with Device Recording across multiple section breaks and beyond those section boundaries
- [DMX / Artnet] dmx screen RGB -> RGBW colour conversion incorrect
- [DMX Lights] DmxTableScreen unable to output if it uses more universes than available devices
- [DMX Lights] DmxTableScreen does not resample the table when reselected
- [DMX Lights] Lights are rendered black only in Hap exported stage movies, losing their original colouring
- [DMX Lights] Employing a population mask hides DMX pixel addresses when restarting the project
- [Expressions] Alt + dragging the horizontal FOV of the visualiser camera to a layer parameter produces a notification while the equivalent typed expression works
- [Feed Outputs] Feed warps assigned to differing projectors that reference the other may cause black output
- [Feed Outputs] Hold, Fade Up & Fade Down commands do not pass over on Editors when going between 'Independent' and 'Lock to Master'
- [Feed Visualiser] The solo's GUI head is incorrectly placed at the right-most head in its feedscene out of the three
- [Feed Visualiser] Alt-F for 1:! preview output feeds in feed view not operative
- [File Management] d3 creates unnecessary empty duplicate folders within the objects directory
- [GUI] Misreporting of Notch video parameters in some blocks
- [GUI] Keyframe being affected by ctrl+scroll is not properly telegraphed
- [GUI] TC tags edited from the set list only get saved when hitting Enter
- [GUI] Restore mesh export command to the mesh editor widget
- [GUI] Ensure correct right-click behaviour when selecting a Sockpuppet video clip, both assigned and unassigned
- [GUI] Anomalous icon on top left corner next to d3State menu when VariableVideo layer editor is open
- [GUI] Master output brightness and master output volume have both lost their tooltips
- [GUI] UI dirt visible in some pre r15 video Layers
- [GUI] Mouse location can lose its bearings when using a secondary display of differing resolution to show the stage view
- [GUI] Labels' darkened background is white and obscures the actual label text when over a white colour
- [GUI] Add a tooltip in the d3Net menu to better explain Master type
- [GUI] Reported fps is rounded to the nearest 5, producing misleading feedback on 24/48 fps systems
- [GUI] Changing an Understudy to an Editor by removing it from Master does not update the now Editor's track UI correctly
- [GUI] Cue set list does not adapt itself to cater for lengthy notes while editing
- [GUI] Duplicating a renamed Master Brightness/Volume results in a notification on project restart
- [GUI] Cleaned up minor visual glitch above the d3State button
- [Installer] Installer now correctly logs the precise installed version e.g. 15.x.y
- [Keyframe editor] Upgrading video to variable video incorrectly causes the speed keyframe to be locked in 'Select' mode
- [Keyframe editor] Dragging a new keyframe over another placed at the start of a layer causes the original to be dragged beyond the start
- [Live Update] An Editor joining a Master in Hold mode, will incorrectly force the Master into Fade up
- [Machine Roles] Editors can become Masters and lock to themselves after unnecessary hacking of hostnames
- [Machine Roles] Master is still available as an option to be setup as an understudy or a slave
- [MIDI] Edge case of an infinite loop in MTC layer after first missed send window
- [MIDI] Improved the consistency of MidiNote output
- [Layers] Improved handling of Web layer for smoother animations
- [Layers] Blend Mode applied via an open layer would scroll through the different blend modes when trying to keyframe it
- [Layers] Exception in TimecodeReadout layer if more than one video layer is present
- [Layers] Bounds check error when deleting keyframes relating to exposed text strings
- [Layers] None' as Video or VariableVideo input to blur layer incorrectly blurs the previous frame rather than black zero alpha frame
- [Layers] TrackJump is ignored when in Hold Output Mode
- [Layers] Access Violation encountered in min/max Brightness widget after editing other objects
- [Movie Writer] When Recording a Stage Movie whilst in Feed View, d3 incorrectly records a feed movie of the GUI head
- [Networking] Network lag can prevent Editors from joining a session without a failed to sync warning being issued
- [Networking] Ensure that the machine's IP address is taken from host name resolution instead of Zyre
- [Notch] Patched Notch layers now have a Timecode section enabling locking to timecode as videos
- [Package] Files stored in internals/objects that do not have extensions inadvertently get deleted on startup
- [Package] An exported group loses its arrow assignments on import.
- [Project Upgrade] Project specific upgrade problem from pre r12 to r15
- [Projector Calibration] Wireframe view incorrectly ignores z-values so renders parts of a model that should not be seen
- [Projector Calibration] DSE include/exclude list is not updated to match the type between corresponding projectors
- [Sockpuppet] Returning to a timecode chasing state from a LoopInframe state will incorrectly offset timecode chase
- [Sockpuppet] Editing ranges on fields in Sockpuppet does not update the range in the DMX personality
- [Sockpuppet] A playback delay in Sockpuppet can make Master & Slave drift out of sync
- [Sockpuppet] No right-click option to open a video clip in Sockpuppet grid and half-size grid
- [Sockpuppet] Changing camera Inputs using Sockpuppet causes 'BlueFishThread 1X capture dropped field(s)' notification
- [Sockpuppet] Alt-arrow dragging a folder to a slot in Bank Editor places the media in a differing order from that shown in resources
- [Sockpuppet] Changing play mode from Timecode to Pause causes an incorrect jump to the wrong frame
- [Sockpuppet] Failure to refresh Bank Editor when modified by an Editor
- [Sockpuppet] Video information overlay does not appear on Sockpuppeted Video layers
- [Stage] AnimateCamera does not work during Hold mode
- [Stage] Unable to draw Projector measurements to vertices on a Projector's box
- [Stage] Camera bookmarks do not recall a saved FOV, incorrectly recalling the FOV set in the stage properties menu
- [Startup] Improve time to quit a project
- [Timeline] Alt-tab from or to d3 while playing forward causes playhead to incorrectly jump to the end of a track or to last section
- [Transport Controls] A TC tag at track start followed by a Cue tag one frame causes timecode to stop chasing and ignore timecode
- [VFC] Notification when changing VFC split mode from Mirror to Quad or Quad 4K
- [VFC] Black output from legacy Video layer in free-run on project load when content placed at track beginning
- [VFC] Remove unnecessary delays when failover is triggered
- [Video Capture] Exception when repeatedly capturing and changing signal resolution
- [Video Capture] Spurious notification when jumping out and back into a video layer with video input
- [Video Capture] Corrupted output following particular set of steps in assigning 4k video in, replacing mapping with grouping and replacing signal in to capture group
- [Video Output] Specifying a bad clip rectangle may cause a DirectX exception
- [Video Output] Notify the user on the detection of passive DP dongles
- [Video Output] Projector less than 1m away from an object incorrectly render black in the feeds
Known issues
VR
- VR entails on additional render overhead
- This may result in a poor performance
Upgrading 32-bit to 64-bit Sockpuppet shows
- There may be issues upgrading Sockpuppet projects from 32-bit to 64-bit in 14.4.x builds. If your project falls into this category, please contact support@disguise.one who can arrange a project upgrade for you
Permissions error after installing
- On a small number of machines, a python-based permissions error will prevent software from starting.
- This issue can be solved by restarting Windows
Potential UI performance regression with long and busy timelines
- With either long or busy timelines containing e.g. a plethora of notes/cues, the UI may suffer a degradation in performance
- Minimising the timeline negates this
Slideshows transition time
- The transition time between slides in slideshows is currently broken
- The fix for this makes fundamental changes to timeline operations, so will take a while to work its way into future releases
r15 Launch Changelog
*IMPORTANT*
This is the last 32-bit version of the software.
The r14.5 build is a general release for all 32-bit users and should not be confused with earlier custom builds.
Fixes
- [Automation / Encoders] Restore behaviour of PSN frames sent across multiple frames
- [Automation / Encoders] Movement threshold does not work unless prediction is on
- [Automation / Encoders] Tracked points disappearing from view reappear by animating into view
- [Device Control] Large amount of GVG route switching causes issues with AJA switchers
- [Device Recording] Scrubbing device recording not functioning correctly
- [Device Recording] Reduced performance encountered at the end of a device recording
- [Infrastructure] Project specific upgrade from r11 to r14.x.x relating to disk monitor
- [Projector Calibration] Reference point placement not always correct if the cursor is slightly off the mesh being calibrated to
- [Projector Calibration] Manage Reference points at surface extremes in particular models not handled well
- [Sockpuppet] Unexpected jumps while looping video via Sockpuppet
Known issues
Upgrading 32-bit to 64-bit Sockpuppet shows
- There may be issues upgrading Sockpuppet projects from 32-bit to 64-bit in 14.x builds. If your project falls into this category, please contact support@disguise.one who can arrange a project upgrade for you
Permissions error after installing
- On a small number of machines, a python-based permissions error will prevent software from starting.
- This issue can be solved by restarting Windows
Potential UI performance regression with long and busy timelines
- With either long or busy timelines containing e.g. a plethora of notes/cues, the UI may suffer a degradation in performance
- Minimising the timeline negates this
Slideshows transition time
- The transition time between slides in slideshows is currently broken
- The fix for this makes fundamental changes to timeline operations, so will take a while to work its way into future releases
New features
HDMI-VFC
- Support for new HDMI-VFC cards
- N.B. this requires OS 4.2 on 4x4pro. OS 4.2 is scheduled to be released in conjunction with r15)
solo server
- New license type to support solo server
Improvements
Video Output
- Better EDID management to cope with updated AMD driver (this driver is to be released in the OS image 4.2 for the 4x4pro update which is scheduled to coincide with the release of r15)
Fixes
Audio
- Intermittent crackling when playing back audio files
Known issues
Upgrading 32-bit to 64-bit Sockpuppet shows
- There may be issues upgrading Sockpuppet projects from 32-bit to 64-bit in 14.4.x builds. If your project falls into this category, please contact support@disguise.one who can arrange a project upgrade for you
Permissions error after installing
- On a small number of machines, a python-based permissions error will prevent the software from starting.
- This issue can be solved by restarting Windows.
Potential UI performance regression with long and busy timelines
- With either long or busy timelines containing e.g. a plethora of notes/cues, the UI may suffer a degradation in performance
- Minimising the timeline negates this
Slideshows transition time
- The transition time between slides in slideshows is currently broken
- The fix for this makes fundamental changes to timeline operations, so will take a while to work its way into future releases
Hardware
Server Model
Version History
Current OS
11 October 2023
Version: rx_23Q3
Release notes:
- NVIDIA - upgraded driver to v536.25
- Windows - upgraded to Windows 10 version 22H2
Key Driver Versions:
- NVIDIA - 536.25
- Intel Chipset Driver - 10.1.8.5
- Intel Network - 26.8
- Mellanox Network Driver - 2.90.50010 (Driver: 2.90.25506)
- Mellanox MFT - 4.20.0.34
- Rivermax - 1.1.22655
Download the RX OS image by using the links below:
Previous OS
04 July 2022
Version: 198.945
Release notes:
Disguise OS Image Version 198.945 is specific to the RX media servers and is a major system update that we recommend to anyone requiring Nanite support on UE5. The OS update rolls up windows to version 21H2 bringing with it significant changes to the Windows operating system. DirectX 12 now features as an aspect of the operating system whilst the Nvidia control panel comes embedded with Windows apps as part of NVIDIA’s DCH branch. It is an update that allows us to provide improved Nanite support in Unreal Engine 5.0 through driver integration. Windows 21H2 is the precursor to Windows 11; packed with features and all the latest security updates to mid April 2022. Welcome RX, to the next generation of Disguise OS.
- Windows 10 updates to 21h2, this includes the latest security updates up to mid April 2022. It includes a UAC bug fix to allow Designer to remote install.
- NVIDIA driver 511.79 provides driver updates up to March 2022 and moves our NVIDIA drivers over to the DCH branch for faster release intervals.
- Direct X 12 is now the main graphics engine in the version of windows and provides significant performance improvements.
- The latest Designer will be installed on new servers, and upgrading a media server will preserve the existing version of Designer installed. Disguise recommends upgrading to Designer r21, to work in local languages and find solutions for the most complex projects with peers around the world. Take advantage of improved workflows and integrations with most of the leading technology.
- Intel Network Proset 26.8 is included and comes with a new advanced teaming utility for teaming compatible intel adapters. Please note: that teaming may not be possible with vLANs and the Mellanox adapters.
- Mellanox driver has been reverted to 2.940.22655.23 for Rivermax integration with RenderStream and Designer
Firmware & Drivers:
- Intel Chipset - 10.1.9.2
- Intel_network - 26.8
- NVIDIA Production Driver - 511.79
- Mellanox OF2 - 2.940.22655.23
- Mellanox MFT - 4.18.0
- Designer r21 if new, else your existing Designer will persist.
Download the RX OS image by using the links below:
Launch OS
04 July 2022
Version: 171.796
Release notes:
Disguise OS image version 171.796 is specific to the RX media servers and is a product OS launched with the RX. Please note this OS does not support Nanite and may have some bugs with Mellanox connectivity.
- Fix issue where some systems with newer than 16.29.2002 NIC firmware would get stuck at 95% during reimaging.
- Fix versioning number issues by promoting to OS 171
- Supports RX and RX II
Firmware & Drivers:
n/a
Disguise does not currently support downgrading OS due to the potential effect of firmware regression on capture cards which can cause the card to stop working as expected. If you have found an issue with the current OS please report this to Disguise support as we may be able to provide bug fixed updates to OS’s more rapidly if logged through our support team.
Launch OS are provided as the lowest OS version number available but known to be stable and fairly downgrade safe and therefore this section might be blank. If you’d like to recover the OS to the version currently on the media server follow these steps.
- Hold down shift when selecting restart from windows
- Select the option “use another operating system”
- Then select “ResetOS”
This will recover your OS to your current version using the recovery partition.
Download the RX OS 171 image by using the links below:
Please follow this link for a step-by-step guide to updating your OS.
Please note: any users that are working with Rufus v4.2 will experience a warning that outlines that the ISO contains a UEFI bootloader that has been revoked and will produce a Windows Recovery Screen (BSOD). This warning does not apply to Disguise media servers, and the ISO will not produce a BSOD. Please continue through the process of creating a bootable USB device. This issue is not seen on earlier versions of Rufus.
Current OS
11 October 2023
Version: rx_23Q3
Release notes:
- NVIDIA - upgraded driver to v536.25
- Windows - upgraded to Windows 10 version 22H2
Key Driver Versions:
- NVIDIA - 536.25
- Intel Chipset Driver - 10.1.8.5
- Intel Network - 26.8
- Mellanox Network Driver - 2.90.50010 (Driver: 2.90.25506)
- Mellanox MFT - 4.20.0.34
- Rivermax - 1.1.22655
Download the RX II OS image by using the links below:
Previous OS
04 July 2022
Version: 198.945
Release notes:
Disguise OS Image Version 198.945 is specific to the RX media servers and is a major system update that we recommend to anyone requiring Nanite support on UE5. The OS update rolls up windows to version 21H2 bringing with it significant changes to the Windows operating system. DirectX 12 now features as an aspect of the operating system whilst the Nvidia control panel comes embedded with Windows apps as part of NVIDIA’s DCH branch. It is an update that allows us to provide improved Nanite support in Unreal Engine 5.0 through driver integration. Windows 21H2 is the precursor to Windows 11; packed with features and all the latest security updates to mid April 2022. Welcome RX to the next generation of Disguise OS.
- Windows 10 updates to 21h2, this includes the latest security updates up to mid April 2022. It includes a UAC bug fix to allow Designer to remote install.
- NVIDIA driver 511.79 provides driver updates up to March 2022 and moves our NVIDIA drivers over to the DCH branch for faster release intervals.
- Direct X 12 is now the main graphics engine in the version of windows and provides significant performance improvements.
- The latest Designer will be installed on new servers, and upgrading a media server will preserve the existing version of Designer installed. Disguise recommends upgrading to Designer r21, to work in local languages and find solutions for the most complex projects with peers around the world. Take advantage of improved workflows and integrations with most of the leading technology.
- Intel Network Proset 26.8 is included and comes with a new advanced teaming utility for teaming compatible intel adapters. Please note: that teaming may not be possible with vLANs and the Mellanox adapters.
- Mellanox driver has been reverted to 2.940.22655.23 for rivermax integration with RenderStream and Designer.
Firmware & Drivers:
- Intel Chipset - 10.1.9.2
- Intel_network - 26.8
- NVIDIA Production Driver - 511.79
- Mellanox OF2 - 2.940.22655.23
- Mellanox MFT - 4.18.0
- Designer r21 if new, else your existing Designer will persist.
Download the RX II OS image by using the links below:
Launch OS
04 July 2022
Version: 171.796
Release notes:
Disguise OS Image Version 171.796 is specific to the RX media servers and is a product OS launched with the RX. Please note this OS does not support Nanite and may have some bugs with Mellanox connectivity.
- Fix issue where some systems with newer than 16.29.2002 NIC firmware would get stuck at 95% during reimaging.
- Fix versioning number issues by promoting to OS 171
- Supports RX and RX II
Firmware & Drivers:
Not available
Disguise does not currently support downgrading OS’s due to the potential effect of firmware regression on capture cards which can cause the card to stop working as expected. If you have found an issue with the current OS please report this to Disguise support as we may be able to provide bug fixed updates to OS’s more rapidly if logged through our support team.
Launch OS’s are provided as the lowest OS version number available but known to be stable and fairly downgrade safe and therefore this section might be blank. If you’d like to recover the OS to the version currently on the media server follow these steps.
- Hold down shift when selecting restart from windows
- Select the option “use another operating system”
- Then select “ResetOS”
This will recover your OS to your current version using the recovery partition.
Download the RX OS 171 image by using the links below:
Please follow this link for a step-by-step guide to updating your OS.
Please note: any users that are working with Rufus v4.2 will experience a warning that outlines that the ISO contains a UEFI bootloader that has been revoked and will produce a Windows Recovery Screen (BSOD). This warning does not apply to disguise media servers, and the ISO will not produce a BSOD. Please continue through the process of creating a bootable USB device. This issue is not seen on earlier versions of Rufus.
Current OS - r27.2+
23 April 2024
Version: 24Q2
Release notes:
Disguise OS image version vx1_vx2_24Q2 is the current OS and specific to the VX 1 and VX 2 media servers. This OS includes an update to the Deltacast SDK (6.22.01) to enable support for the Disguise VX 3 media server, which makes use of a new capture card variant.
In order to make use of this new Deltacast SDK, please note that users will need to run this OS with Designer software version r27.2 and above.
The previous OS will work with Designer software versions r27.0 to r27.1.3.
We have removed 24Q1_1 from the website as it contained an incorrect driver version. We have resolved this by updating the Current OS to 24Q2 which can be downloaded below.
Firmware & Drivers:
- Nvidia - 472.98
- Nvidia AR SDK (Turing) - 0.6.5
- Nvidia Video Effects SDK (Turing) - 0.7.6
- Deltacast - 6.22.01
- Deltacast Videomaster Library - 6.15.5
- Mellanox MFT - 4.20.0.34
- Mellanox Network - 2.90.500.10
- Windows - Windows 10 1809
Download the VX 1 OS image by using the link below:
Previous OS - r27.0 to r27.1.3
31 January 2024
Version: 24Q1
Release notes:
Disguise OS image version vx1_vx2_24Q1 is the current OS and is specific to both the VX 1 and VX 2 media servers. This OS includes an update to the Matrox SDK (10.4.101) and provides the following improvements to Disguise media servers with a Matrox SDI capture card installed:
- Mixed frame rate support - users can now work with any combination of video resolution formats and refresh rates across each video input
- Ultra-low latency mode - we have reduced the video latency when running in ultra-low-latency mode from 4 frames per second to 3 frames per second at 30Hz, 50Hz and 60Hz
- General performance improvements
To benefit from these improvements, please note that users will need to run this OS version with Designer software version r27 and above.
Firmware & Key Driver Versions:
- Nvidia driver: 472.98
- Matrox Driver - 10.4.101.1269
- Mellanox Network Driver - 2.90.50010 (Driver:2.90.25506)
- Mellanox MFT - 4.20.0.34
Download the VX 1 OS image by using the links below:
Previous OS - r22.0 to r26.5.2
14 March 2024
Version: 203C.1048
Download the VX 1 OS image by using the links below:
Please follow this link for a step-by-step guide to updating your OS.
Please note: any users that are working with Rufus v4.2 will experience a warning that outlines that the ISO contains a UEFI bootloader that has been revoked and will produce a Windows Recovery Screen (BSOD). This warning does not apply to Disguise media servers, and the ISO will not produce a BSOD. Please continue through the process of creating a bootable USB device. This issue is not seen on earlier versions of Rufus.
Current OS - r27.2+
23 April 2024
Version: 24Q2
Release notes:
Disguise OS image version vx1_vx2_24Q2 is the current OS and specific to the VX 1 and VX 2 media servers. This OS includes an update to the Deltacast SDK (6.22.01) to enable support for the Disguise VX 3 media server, which makes use of a new capture card variant.
In order to make use of this new Deltacast SDK, please note that users will need to run this OS with Designer software version r27.2 and above.
The previous OS will work with Designer software versions r27.0 to r27.1.3.
We have removed 24Q1_1 from the website as it contained an incorrect driver version. We have resolved this by updating the Current OS to 24Q2 which can be downloaded below.
Firmware & Drivers:
- Nvidia - 472.98
- Nvidia AR SDK (Turing) - 0.6.5
- Nvidia Video Effects SDK (Turing) - 0.7.6
- Deltacast - 6.22.01
- Deltacast Videomaster Library - 6.15.5
- Mellanox MFT - 4.20.0.34
- Mellanox Network - 2.90.500.10
- Windows - Windows 10 1809
Download the VX 2 OS image by using the link below:
Previous OS - r27.0 to r27.1.3
31 January 2024
Version: 24Q1
Release notes
Disguise OS image version vx1_vx2_24Q1 is the current OS and is specific to both the VX 1 and VX 2 media servers. This OS includes an update to the Matrox SDK (10.4.101) and provides the following improvements to Disguise media servers with a Matrox SDI capture card installed:
- Mixed frame rate support - users can now work with any combination of video resolution formats and refresh rates across each video input
- Ultra-low latency mode - we have reduced the video latency when running in ultra-low-latency mode from 4 frames per second to 3 frames per second at 30Hz, 50Hz and 60Hz
- General performance improvements
To benefit from these improvements, please note that users will need to run this OS version with Designer software version r27 and above.
Key Drivers:
- Nvidia driver: 472.98
- Matrox Driver - 10.4.101.1269
- Mellanox Network Driver - 2.90.50010 (Driver:2.90.25506)
- Mellanox MFT - 4.20.0.34
Download the VX 2 OS image by using the links below:
Previous OS - r22.0 to r26.5.2
14 March 2024
Version: 203C.1048
Download the VX 2 OS image by using the links below:
Please follow this link for a step-by-step guide to updating your OS.
Please note: any users that are working with Rufus v4.2 will experience a warning that outlines that the ISO contains a UEFI bootloader that has been revoked and will produce a Windows Recovery Screen (BSOD). This warning does not apply to Disguise media servers, and the ISO will not produce a BSOD. Please continue through the process of creating a bootable USB device. This issue is not seen on earlier versions of Rufus.
Current OS - r27.2+
13 March 2024
Version: 24Q1_1
Release notes:
Disguise OS image version vx4_24Q1_1 is the current OS and specific to the VX 4 media server. This OS includes an update to the Deltacast SDK (6.22.01) to enable support for the Disguise VX 3 media server, which makes use of a new capture card variant.
In order to make use of this new Deltacast SDK, please note that users will need to run this OS with Designer software version r27.2 and above.
The previous OS will work with Designer software versions r27.0 to r27.1.3.
Firmware & Drivers:
- AMD - 19Q3
- Deltacast - 6.22.01
- Deltacast Videomaster Library - 6.15.5
- Matrox - 10.4.101
- Mellanox MFT - 4.20.0.34
- Mellanox Network - 2.90.500.10
- Windows - Windows 10 1809
Download the VX 4 OS image by using the link below:
Previous OS - r27.0 to r27.1.3
31 January 2024
Version: 24Q1
Release notes:
Disguise OS image version vx4_24Q1 is the current OS and is specific to the VX 4 media server. This OS includes an update to the Matrox SDK (10.4.101) and provides the following improvements to Disguise media servers with a Matrox SDI capture card installed:
- Mixed frame rate support - users can now work with any combination of video resolution formats and refresh rates across each video input
- Ultra-low latency mode - we have reduced the video latency when running in ultra-low-latency mode from 4 frames per second to 3 frames per second at 30Hz, 50Hz and 60Hz
- General performance improvements
To benefit from these improvements, please keep in mind that users will need to run this OS version with Designer software version r27 and above.
Key Drivers:
- AMD: 19Q3
- Matrox Driver - 10.4.101.1269
- Mellanox Network Driver - 2.90.50010 (Driver:2.90.25506)
- Mellanox MFT - 4.20.0.34
We have created a combined ISO to support several VX 4 users with 100Gb NIC upgrades that require an alternative AMD driver. The ISO is built so that only the users that require the alternative AMD driver will receive the modified image.
Download the VX 4 image by using the links below:
Previous OS - r22.0 to r26.5.2
17 April 2023
Version: 23Q2 (215.1147)
RELEASE NOTES:
disguise OS Image Version vx4_23Q2 is the current OS and specific to the vx 4 media server.
We have updated our naming convention for Disguise OS' and we will be phasing this in with updates to the Current OS range. It will be based off the year and quarter in which it was introduced.
We have created a combined ISO to support a number of vx 4 users with 100Gb NIC upgrades that require an alternative AMD driver. The ISO is built so that only the users that require the alternative AMD driver will receive the modified image.
Please note that in d3manager the image version will be shown as 215.1147. We will update this to show the new naming convention in future OS updates.
Firmware & Key Driver Versions:
- AMD - 19.Q3
- Deltacast - 6.15.10
- Deltacast Videomaster Library - 6.15.5
- Matrox - 10.3.10.673
- Mellanox MFT - 4.20.0.34
- Mellanox Network - 2.90.500.10
Part 1 – 4 GB
Part 2 – 4 GB
Part 3 – 694 MB
Advisory – 17 KB
Please follow this link for a step-by-step guide to updating your OS.
Please note: any users that are working with Rufus v4.2 will experience a warning that outlines that the ISO contains a UEFI bootloader that has been revoked and will produce a Windows Recovery Screen (BSOD). This warning does not apply to Disguise media servers, and the ISO will not produce a BSOD. Please continue through the process of creating a bootable USB device. This issue is not seen on earlier versions of Rufus.
Current OS - r27.2+
23 April 2024
Version: 24Q2_1
Release notes
Disguise OS image version vx4p_24Q2_1 is the current OS and specific to the VX 4+ media server. This OS includes an update to the Deltacast SDK (6.22.01) to enable support for the Disguise VX 3 media server, which makes use of a new capture card variant.
In order to make use of this new Deltacast SDK, please note that users will need to run this OS with Designer software version r27.2 and above.
The previous OS will work with Designer software versions r27.0 to r27.1.3.
We have removed 24Q1_1 from the website as it contained an incorrect driver version. We have resolved this by updating the Current OS to 24Q2_1 which can be downloaded below.
Firmware & Drivers:
- AMD - 22Q2
- Deltacast - 6.22.01
- Deltacast Videomaster Library - 6.15.5
- Matrox - 10.4.101
- Mellanox MFT - 4.20.0.34
- Mellanox Network - 2.90.500.10
- Windows - Windows 10 1809
Download the VX 4+ OS image by using the link below:
Previous OS - r27.0 to r27.1.3
23 April 2024
Version: 24Q2
Release notes
Disguise OS image version vx4+_24Q2 is the current OS and is specific to the VX 4+ media server. This OS includes an update to the Matrox SDK (10.4.101) and provides the following improvements to Disguise media servers with a Matrox SDI capture card installed:
- Mixed frame rate support - users can now work with any combination of video resolution formats and refresh rates across each video input
- Ultra-low latency mode - we have reduced the video latency when running in ultra-low-latency mode from 4 frames per second to 3 frames per second at 30Hz, 50Hz and 60Hz
- General performance improvements
To benefit from these improvements, please keep in mind that users will need to run this OS version with Designer software version r27 and above.
We have removed 24Q1 from the website as it contained an incorrect driver version. We have resolved this by updating the Current OS to 24Q2 which can be downloaded below.
Key Drivers:
- AMD: 22Q1
- Matrox Driver - 10.4.101.1269
- Mellanox Network Driver - 2.90.50010 (Driver:2.90.25506)
- Mellanox MFT - 4.20.0.34
Download the VX 4+ OS image by using the links below:
Previous OS - r22.0 to r26.5.2
14 March 2024
Version: 204A.1048
Download the VX 4+ OS image by using the links below:
Please follow this link for a step-by-step guide to updating your OS.
Please note: any users that are working with Rufus v4.2 will experience a warning that outlines that the ISO contains a UEFI bootloader that has been revoked and will produce a Windows Recovery Screen (BSOD). This warning does not apply to Disguise media servers, and the ISO will not produce a BSOD. Please continue through the process of creating a bootable USB device. This issue is not seen on earlier versions of Rufus.
Current OS
01 October 2021
Version: 180.841
Release notes:
Disguise OS Image Version 180.841 is specific to the 2x4pro, GX 1 and GX 2. This image includes no driver change, however it patches a critical bug released in 175.819; as such, we recommend any users currently on version 175 or older to update with priority.
- essential to security and overall system stability. A fix to the windows product id process on deployment prevents windows from failing to activate post deployment, as in previous versions of the OS image.
- Nvidia driver updated to 461.92; fixing the issue where UCRS is blocked by no OpenCL support in driver. Lower versions of the Nvidia driver also showed instability in Genlock. This version has been rigorously tested by the Disguise team.
- Bluefish drivers remain 5.11.0.47
Firmware & Drivers:
- Nvidia to 461.92 the latest stable build for this platform
- Intel Network to 25.2 → 6.5.0.48 oncard
- Intel Chipset to 10.11.2.84
- Intel NVMe to 4.3.0.1006
- FTDI to 2.12.28
- RME Audio to 4.2.9
- Bluefish Tools to 5.11.0.0
- Vimba to 2.1
- GX 1, GX 2 Bios (Not always applicable)
- Bluefish OEM to 5.11.0.47
Download the GX 1 image by using the links below:
Previous OS
04 July 2022
Version: 166.804
Release notes:
Disguise OS 166.804 is an original 2x4pro, GX 1 and GX 2 media server product release OS. This OS has no previously recorded release notes. Please use at your own risk.
Firmware & Drivers:
N/A
Disguise does not currently support downgrading OS due to the potential effect of firmware regression on capture cards which can cause the card to stop working as expected. If you have found an issue with the current OS please report this to Disguise support as we may be able to provide bug fixed updates to OS more rapidly if logged through our support team.
Previous OS are provided for media servers already running that version of the OS. If you’d like to recover the OS to the version currently on the media server follow these steps.
- Hold down shift when selecting restart from windows
- Select the option “use another operating system”
- Then select “ResetOS”.
This will recover your OS to your current version using the recovery partition.
Download the GX 1 OS 166 image by using the links below:
Launch OS
04 July 2022
Version: 3
Release notes:
Disguise OS 3 is an original 2x4pro, GX 1 and GX 2 media server product release OS. This OS has no previously recorded release notes. Please use at your own risk.
Firmware & Drivers:
N/A
Disguise does not currently support downgrading OS’s due to the potential effect of firmware regression on capture cards which can cause the card to stop working as expected. If you have found an issue with the current OS please report this to Disguise support as we may be able to provide bug fixed updates to OS more rapidly if logged through our support team.
Launch OS are provided as the lowest OS version number available but known to be stable and fairly downgrade safe and therefore this section might be blank. If you’d like to recover the OS to the version currently on the media server follow these steps.
- Hold down shift when selecting restart from windows
- Select the option “use another operating system”
- Then select “ResetOS”.
This will recover your OS to your current version using the recovery partition.
Download the GX 1 OS 3 image by using the links below:
Please follow this link for a step-by-step guide to updating your OS.
Please note: any users that are working with Rufus v4.2 will experience a warning that outlines that the ISO contains a UEFI bootloader that has been revoked and will produce a Windows Recovery Screen (BSOD). This warning does not apply to Disguise media servers, and the ISO will not produce a BSOD. Please continue through the process of creating a bootable USB device. This issue is not seen on earlier versions of Rufus.
Current OS
01 October 2021
Version: 180.841
Release notes:
Disguise OS Image Version 180.841 is specific to the 2x4pro, GX 1 and GX 2. This image includes no driver change, however it patches a critical bug released in 175.819; as such, we recommend any users currently on version 175 or older to update with priority.
- essential to security and overall system stability. A fix to the windows product id process on deployment prevents windows from failing to activate post deployment, as in previous versions of the OS image.
- Nvidia driver updated to 461.92; fixing the issue where UCRS is blocked by no OpenCL support in driver. Lower versions of the Nvidia driver also showed instability in Genlock. This version has been rigorously tested by the Disguise team.
- Bluefish drivers remain 5.11.0.47
Firmware & Drivers:
- Nvidia to 461.92 the latest stable build for this platform
- Intel Network to 25.2 → 6.5.0.48 oncard
- Intel Chipset to 10.11.2.84
- Intel NVMe to 4.3.0.1006
- FTDI to 2.12.28
- RME Audio to 4.2.9
- Bluefish Tools to 5.11.0.0
- Vimba to 2.1
- GX 1, GX 2 Bios (Not always applicable)
- Bluefish OEM to 5.11.0.47
Download the GX 2 image by using the links below:
Previous OS
04 July 2022
Version: 166.804
Release notes:
Disguise OS 166.804 is an original 2x4 Pro, GX 1 and GX 2 media server product release OS. This OS has no previously recorded release notes. Please use at your own risk.
Firmware & Drivers:
N/A
Disguise does not currently support downgrading OS due to the potential effect of firmware regression on capture cards which can cause the card to stop working as expected. If you have found an issue with the current OS please report this to Disguise support as we may be able to provide bug fixed updates to OS more rapidly if logged through our support team.
Previous OS are provided for media servers already running that version of the OS. If you’d like to recover the OS to the version currently on the media server follow these steps.
- Hold down shift when selecting restart from windows
- Select the option “use another operating system”
- Then select “ResetOS”.
This will recover your OS to your current version using the recovery partition.
Download the GX 2 OS 166 image by using the links below:
Launch OS
04 July 2022
Version: 3
Release notes:
Disguise OS 3 is an original 2x4pro, GX 1 and GX 2 media server product release OS. This OS has no previously recorded release notes. Please use at your own risk.
Firmware & Drivers:
N/A
Disguise does not currently support downgrading OS’s due to the potential effect of firmware regression on capture cards which can cause the card to stop working as expected. If you have found an issue with the current OS please report this to Disguise support as we may be able to provide bug fixed updates to OS’s more rapidly if logged through our support team.
Launch OS’s are provided as the lowest OS version number available but known to be stable and fairly downgrade safe and therefore this section might be blank. If you’d like to recover the OS to the version currently on the media server follow these steps.
- Hold down shift when selecting restart from windows
- Select the option “use another operating system”
- Then select “ResetOS”.
This will recover your OS to your current version using the recovery partition.
Download the GX 2 OS 3 image by using the links below:
Please follow this link for a step-by-step guide to updating your OS.
Please note: any users that are working with Rufus v4.2 will experience a warning that outlines that the ISO contains a UEFI bootloader that has been revoked and will produce a Windows Recovery Screen (BSOD). This warning does not apply to Disguise media servers, and the ISO will not produce a BSOD. Please continue through the process of creating a bootable USB device. This issue is not seen on earlier versions of Rufus.
Current OS - r27.2+
13 March 2024
Version: 24Q1
Release notes:
Disguise OS image version gx2c_24Q1 is the current OS and specific to the gx 2c media server. This OS includes an update to the Deltacast SDK (6.22.01) to enable support for the Disguise VX 3 media server, which makes use of a new capture card variant.
In order to make use of this new Deltacast SDK, please note that users will need to run this OS with Designer software version r27.2 and above.
The previous OS will work with Designer software versions up to r27.1.3.
Firmware & Key Driver Versions:
- Nvidia - 472.98
- Nvidia AR SDK (Turing) - 0.7.6
- Nvidia Video Effects SDK (Turing) - 0.6.5
- Deltacast - 6.22.01
- Deltacast Videomaster Library - 6.15.5
- Mellanox MFT - 4.20.0.34
- Mellanox Network - 2.90.500.10
- Windows - Windows 10 1809
Please contact support@disguise.one for feedback and issues
Download the GX 2C OS image by using the links below:
Previous OS - up to r27.1.3
11 July 2022
Version: 199B.947
Release notes:
Disguise OS Image Version 199B.947 is specific to the GX 2C media server and is a cumulative system update. This cumulative OS update includes the latest system drivers recommended and tested by the Disguise team built with the latest windows security updates.
- Windows 10 remains at 1809 but Microsoft's cumulative and security updates have been included up to April 2022.
- NVIDIA driver updated to 472.98 to improve performance with notch blocks. Full details of the driver can be found in the release notes here.
- dotNet has been updated to 4.8+.
- Designer r21.0.2 will be installed at the factory or your existing version of Designer will be reinstalled on postboot.
- Deltacast 6.15.10 is the driver we recommend at this time, and we’re currently working with Deltacast towards updating the driver in the next base version release.
- RME Audio Driver has been updated to 4.3.8 and tested to ensure audio performs as expected from previous versions of the driver.
Firmware & Drivers:
- Intel Chipset - 10.1.2.84
- Intel network - 26.8 ≡ 4.1.239.0 (X550-T2) & 12.18.12.1 (I210)
- Intel NVMe - 5.3.0.1005
- Nvidia Driver - 472.98 ≡ 30.0.14.7298
- RME Audio Driver 4.3.8
- FTDI - 2.12.36
- Deltacast Driver - 6.15.10
- Deltacast VideoMaster - 6.15.5
- Matrox - 10.2.101.26081
- Vimba - 2.1
- Designer - r21.0.2 - 88695
- dCare - 1.9.0
- dScope - 1.12
Please contact support@disguise.one for feedback and issues
Download the GX 2C OS image by using the links below:
Please follow this link for a step-by-step guide to updating your OS.
Please note: any users that are working with Rufus v4.2 will experience a warning that outlines that the ISO contains a UEFI bootloader that has been revoked and will produce a Windows Recovery Screen (BSOD). This warning does not apply to Disguise media servers, and the ISO will not produce a BSOD. Please continue through the process of creating a bootable USB device. This issue is not seen on earlier versions of Rufus.
Current OS
01 October 2021
Version: 180.841
Release notes:
disguise OS Image Version 180.841 is specific to the 2x4pro, gx 1 and gx 2. This image includes no driver change, however it patches a critical bug released in 175.819; as such, we recommend any users currently on version 175 or older to update with priority. A new gx OS is scheduled for Q3 of 2022.
- essential to security and overall system stability. A fix to the windows product id process on deployment prevents windows from failing to activate post deployment, as in previous versions of the OS image.
- Nvidia driver updated to 461.92; fixing the issue where UCRS is blocked by no OpenCL support in driver. Lower versions of the Nvidia driver also showed instability in Genlock. This version has been rigorously tested by the disguise team.
- Bluefish drivers remain 5.11.0.47
Firmware & Drivers:
- Nvidia to 461.92 the latest stable build for this platform
- Intel Network to 25.2 → 6.5.0.48 oncard
- Intel Chipset to 10.11.2.84
- Intel NVMe to 4.3.0.1006
- FTDI to 2.12.28
- RME Audio to 4.2.9
- Bluefish Tools to 5.11.0.0
- Vimba to 2.1
- GX1, GX2 Bios (Not always applicable)
- Bluefish OEM to 5.11.0.47
Download the 2x4 pro image by using the links below:
Previous OS
04 July 2022
Version: 166.804
Release notes:
disguise OS 166.804 is an original 2x4 Pro, gx 1 and gx 2 media server product release OS. This OS has no previously recorded release notes. Please use at your own risk.
Firmware & Drivers:
Unknown
disguise does not currently support downgrading OS’s due to the potential effect of firmware regression on capture cards which can cause the card to stop working as expected. If you have found an issue with the current OS please report this to disguise support as we may be able to provide bug fixed updates to OS’s more rapidly if logged through our support team.
Previous OS’s are provided for media servers already running that version of the OS. If you’d like to recover the OS to the version currently on the media server follow these steps.
- Hold down shift when selecting restart from windows
- Select the option “use another operating system”
- Then select “ResetOS”.
This will recover your OS to your current version using the recovery partition.
Download the 2x4pro OS 166 image by using the links below:
Launch OS
04 July 2022
Version: 3
Release notes:
disguise OS 3 is an original 2x4 Pro, gx 1 and gx 2 media server product release OS. This OS has no previously recorded release notes. Please use at your own risk.
Firmware & Drivers:
Unknown
disguise does not currently support downgrading OS’s due to the potential effect of firmware regression on capture cards which can cause the card to stop working as expected. If you have found an issue with the current OS please report this to disguise support as we may be able to provide bug fixed updates to OS’s more rapidly if logged through our support team.
Launch OS’s are provided as the lowest OS version number available but known to be stable and fairly downgrade safe and therefore this section might be blank. If you’d like to recover the OS to the version currently on the media server follow these steps.
- Hold down shift when selecting restart from windows
- Select the option “use another operating system”
- Then select “ResetOS”.
This will recover your OS to your current version using the recovery partition.
Download the 2x4pro OS 3 image by using the links below:
Please follow this link for a step-by-step guide to updating your OS.
Please note: any users that are working with Rufus v4.2 will experience a warning that outlines that the ISO contains a UEFI bootloader that has been revoked and will produce a Windows Recovery Screen (BSOD). This warning does not apply to disguise media servers, and the ISO will not produce a BSOD. Please continue through the process of creating a bootable USB device. This issue is not seen on earlier versions of Rufus.
4x4pro OS Image
08 April 2022
Version: 193.934
Release notes:
disguise OS Image Version 193.934 is specific to the 4x4pro and 4x2pro. This is a cumulative OS update fixing key deployment bugs in OS 181 and providing cumulative security updates to Windows 8.1 Embedded installed up to 16/02/2022. A bug fix included in 193.934 fixes a known bug seen with versioning when utilising a redisguise. It also includes a missing USB 3.0 driver found in later variants of the pro range.
- KB890830 has been excluded from update cycle
- Intel Network Proset 26.8 has been included to provide access to Intel ANS features via the command or adapter properties.
- **AMD FirePro w9100 driver has not been updated.
In addition to the above cumulative updates the following Windows and Deployment bugs are directly patched by OS 193:
- The NIC adapters were incorrectly named and provisioned.
- The USB adapters would not function as expected.
- Non hardware specific devices present in configuration.
d3 will maintain the previous version on your media server. Please note the latest d3 for the 4x pro range is r18.1.10 revision 84524 which can be accessed from the previous versions section of the website here.The fixes as detailed below resolve bugs found within the OS 181 and d3 r18.1.9 and below.
- d3 was reporting on the 4x2 media server that there was no VFC backplane.
- d3 was reporting on all media servers that there was a Bluefish driver versus sdk mismatch.
- If you have either of these errors in 193 please update to the above mentioned newer version of d3 before contacting support.
When upgrading from an OS Version lower than 181 please note the following key changes to the OS apply in addition to the above:
- Command prompt has been removed from the Win X menu and is replaced by PowerShell version 5.1 framework to aid disguise remote support teams in troubleshooting complex issues both onsite and remotely.
- New Bluefish drivers and firmware are included in this build to resolve issues related to the failure of the Bluefish cards in d3. This OS Image automatically updates the bluefish firmware and will require the user to manually turn on the device after the first boot cycle. The new drivers & firmware together solve the known failure of the bluefish card in d3. d3 r18.1.9 revision - 81046.
- Bluefish provide BlueToolbox, a new tool combining the features of the previous tools (e.g. BlueInfo, BlueProps, DMABenchmarking, etc.) whilst adding new features like video/audio capture preview, changing default card behaviour and user card licence query, effectively replacing the blue info application previously deployed on disguise 4x4pro’s and 4x2pro’s. A new firmware updater allows the disguise re-imaging tool to update to the latest bluefish firmware upon deployment, after which the machine will shut down.
- LSA RAID Tools have been updated and will require the username to login.
- Hibernation mode has been disabled.
Firmware & Drivers:
- AMD FirePro w9100 - v17.Q3.1** ≡ 170111.310593
- Bluefish driver - v6.5.0.51
- Bluefish Epoch Supernova 4i firmware - v136
- Intel Chipset Driver C622 - v10.1.2.19
- Intel Network Driver - v26.8 ≡ 3.14.214.0
- RME Audio Driver - v4.29
- MegaRAID2 - v6.714.18.00
- Vimba - v2.1
- FTDI - v2.12.28
- Open SLP - 3.0.0
A note on versioning:
At disguise, we release OS image updates as follows: Base version number (187. etc) will always contain all the drivers as listed above. Rolling or decimal updates (.863 etc) improve the current base version number by optimising drivers and enhancing the way the OS is deployed on your media server.
Please contact support@disguise.one for feedback and issues.
Download the 4x4pro OS image by using the links below:
Please follow this link for a step-by-step guide to updating your OS.
Please note: any users that are working with Rufus v4.2 will experience a warning that outlines that the ISO contains a UEFI bootloader that has been revoked and will produce a Windows Recovery Screen (BSOD). This warning does not apply to disguise media servers, and the ISO will not produce a BSOD. Please continue through the process of creating a bootable USB device. This issue is not seen on earlier versions of Rufus.
4x2pro OS Image
08 April 2022
Version: 193.934
Release notes:
disguise OS Image Version 193.934 is specific to the 4x4pro and 4x2pro. This is a cumulative OS update fixing key deployment bugs in OS 181 and providing cumulative security updates to Windows 8.1 Embedded installed up to 16/02/2022. A bug fix included in 193.934 fixes a known bug seen with versioning when utilising a redisguise. It also includes a missing USB 3.0 driver found in later variants of the pro range.
- KB890830 has been excluded from update cycle
- Intel Network Proset 26.8 has been included to provide access to Intel ANS features via the command or adapter properties.
- **AMD FirePro w9100 driver has not been updated.
In addition to the above cumulative updates the following Windows and Deployment bugs are directly patched by OS 193:
- The NIC adapters were incorrectly named and provisioned.
- The USB adapters would not function as expected.
- Non hardware specific devices present in configuration.
d3 will maintain the previous version on your media server. Please note the latest d3 for the 4x pro range is r18.1.10 revision 84524 which can be accessed from the previous versions section of the website here.The fixes as detailed below resolve bugs found within the OS 181 and d3 r18.1.9 and below.
- d3 was reporting on the 4x2 media server that there was no VFC backplane.
- d3 was reporting on all media servers that there was a Bluefish driver versus sdk mismatch.
- If you have either of these errors in 193 please update to the above mentioned newer version of d3 before contacting support.
When upgrading from an OS Version lower than 181 please note the following key changes to the OS apply in addition to the above:
- Command prompt has been removed from the Win X menu and is replaced by PowerShell version 5.1 framework to aid disguise remote support teams in troubleshooting complex issues both onsite and remotely.
- New Bluefish drivers and firmware are included in this build to resolve issues related to the failure of the Bluefish cards in d3. This OS Image automatically updates the bluefish firmware and will require the user to manually turn on the device after the first boot cycle. The new drivers & firmware together solve the known failure of the bluefish card in d3. d3 r18.1.9 revision - 81046.
- Bluefish provide BlueToolbox, a new tool combining the features of the previous tools (e.g. BlueInfo, BlueProps, DMABenchmarking, etc.) whilst adding new features like video/audio capture preview, changing default card behaviour and user card licence query, effectively replacing the blue info application previously deployed on disguise 4x4pro’s and 4x2pro’s. A new firmware updater allows the disguise re-imaging tool to update to the latest bluefish firmware upon deployment, after which the machine will shut down.
- LSA RAID Tools have been updated and will require the username to login.
- Hibernation mode has been disabled.
Firmware & Drivers:
- AMD FirePro w9100 - v17.Q3.1** ≡ 170111.310593
- Bluefish driver - v6.5.0.51
- Bluefish Epoch Supernova 4i firmware - v136
- Intel Chipset Driver C622 - v10.1.2.19
- Intel Network Driver - v26.8 ≡ 3.14.214.0
- RME Audio Driver - v4.29
- MegaRAID2 - v6.714.18.00
- Vimba - v2.1
- FTDI - v2.12.28
- Open SLP - 3.0.0
A note on versioning:
At disguise, we release OS image updates as follows: Base version number (187. etc) will always contain all the drivers as listed above. Rolling or decimal updates (.863 etc) improve the current base version number by optimising drivers and enhancing the way the OS is deployed on your media server.
Please contact support@disguise.one for feedback and issues.
Download the 4x4pro OS image by using the links below:
Please follow this link for a step-by-step guide to updating your OS.
Please note: any users that are working with Rufus v4.2 will experience a warning that outlines that the ISO contains a UEFI bootloader that has been revoked and will produce a Windows Recovery Screen (BSOD). This warning does not apply to disguise media servers, and the ISO will not produce a BSOD. Please continue through the process of creating a bootable USB device. This issue is not seen on earlier versions of Rufus.
Current OS
06 May 2022
Version: 197.948
Release notes:
Disguise OS Image Version 197.948 is specific to the Solo media server is a cumulative update to the Windows 1607 OS. The Solo OS is built within the long term servicing channel (LTSC) of Windows 10 and runs Windows 10 2016 LTSB (1607) until 2026. It includes security and cumulative system update up to mid April 2022. Updates to the NVIDIA Graphics drivers, and .net 4.8 improved Designer performance and compatibility with the new gold version. Newer capture card drivers are included for both optional Bluefish and Vision cards.
- Windows 10 remains at 1607, with cumulative security updates up until mid April 2022.
- NVIDIA driver 472.98 released on 31st Jan 2022 is installed within this OS. It includes updates to CUDA and some improved notch block performance. Full details of the driver can be found in the release notes here.
- dotNet has been updated to 4.8+ with all the latest security updates.
- Designer r21.0.2 will be installed at the factory or your existing version of Designer will be reinstalled on postboot.
- Intel Network Proset 26.8 is included; Intel Teaming is not fully supported on the Solo under Windows 1607
- Bluefish (optional SDI card) has been updated to driver 6.5.0.51 with new firmware v32 to improve performance in Designer. The update to the firmware will cause the media server to shut down and initiate a cold boot.
- The BlueInfo tool has been replaced by BlueToolbox, a new tool combining the features of the previous tools (e.g. BlueInfo, BlueProps, DMABenchmarking, etc.) whilst adding new features like video/audio capture preview, changing default card behaviour and user card licence query. A new firmware updater allows the Disguise re-imaging tool to update to the latest bluefish firmware.
- Vision LC (optional HDMI card) has been updated to the latest version 1.2.4
- RMEAudio has been updated to version 4.39, please note you will need to set the WDM device configuration in hammerfall to enable all of the audio devices. This cannot be set in Window 1607 the way that we usually set this in our other products.
Firmware & Drivers:
- Intel Chipset - 10.1.9.2
- Intel_network - 26.8
- NVIDIA - 472.98
- VisionLC 1.2.4
- Bluefish - 6.5.0.51
- Designer r21.0.2 if new, else your existing Designer will persist.
- RME Audio - 4.39
Download the Solo OS image by using the links below:
Please follow this link for a step-by-step guide to updating your OS.
Please note: any users that are working with Rufus v4.2 will experience a warning that outlines that the ISO contains a UEFI bootloader that has been revoked and will produce a Windows Recovery Screen (BSOD). This warning does not apply to Disguise media servers, and the ISO will not produce a BSOD. Please continue through the process of creating a bootable USB device. This issue is not seen on earlier versions of Rufus.
2x2plus OS Image
02 July 2018
Release notes:
N/A
Download the 2x2plus OS image by using the links below:
Please follow this link for a step-by-step guide to updating your OS
Please note: any users that are working with Rufus v4.2 will experience a warning that outlines that the ISO contains a UEFI bootloader that has been revoked and will produce a Windows Recovery Screen (BSOD). This warning does not apply to disguise media servers, and the ISO will not produce a BSOD. Please continue through the process of creating a bootable USB device. This issue is not seen on earlier versions of Rufus.
Current OS - r27.2+
31 January 2024
Version: 24Q1
Release notes:
Disguise OS image version gx3_24Q1 is the current OS and specific to the GX 3 media server. This OS includes an update to the Matrox SDK (10.4.101) and provides the following improvements to Disguise media servers with a Matrox SDI capture card installed:
- Mixed frame rate support - users can now work with any combination of video resolution formats and refresh rates across each video input
- Ultra low latency mode - we have reduced the video latency when running in ultra low-latency mode from 4 frames per second to 3 frames per second at 30Hz, 50Hz and 60Hz
- General performance improvements
Key Drivers:
- Nvidia - 513.12
- Deltacast - 6.15.10
- Deltacast Videomaster Library - 6.15.5
- Matrox - 10.4.101
- Mellanox MFT - 4.20.0.34
- Mellanox Network - 2.90.500.10
- Nvidia AR SDK - 0.7.6
- Nvidia Video Effects SDK - 0.6.5
- Windows - Windows 10 1809
In order to benefit from these improvements, please note that users will need to run this OS version with Designer software version r27 and above.
Download the GX 3 OS image by using the links below:
Previous OS - up to r26.5.2
04 July 2023
Version: 201F.1063
Release notes:
Disguise OS Image Version 201F.1063 is specific to the GX 3 media server. This is a performance update allowing you to upgrade from the previous OS version for the VX 4 media sever.
This is the same base OS 200+ as was released previously, with the addition of rollup and rollback support. The F version of this OS provides NVIDIA AR and Video Effects SDK support on notch blocks.
Windows is at 1809 and security updates up to Q3 2022 are included. This version is lock stepped with Designer r22, and features both major improvements to Mellanox drivers and a new SDK that enables support for 3G-Level B and 48Hz SDI signals on Matrox capture cards. Rivermax 1.10.20 improves stream stability on RenderStream reducing packet and frame loss.
* Please note that users will need to run this OS version with Designer software versions r22 - r26.5.1 only. For any user wishing to use Designer software versions r27 and above with the GX 3, please run Disguise OS image version gx3_24Q1 and above.
- Windows 10 remains at 1809 but Microsoft's cumulative updates to March 2022 are included for improved security and functionality.
- NVIDIA driver updated to 513.12; is included out of box and uses the new NVIDIA DCH control panel. We understand that some users may require newer versions of the NVIDIA driver. Our drivers require extensive testing to ensure that the drivers work with the VFC backplane.
- Mellanox transitions to 2.90.50010 with Rivermax 1.10.20 support. Both the driver and RenderStream license are now fully integrated and will require no reinstallation of the driver after redisguise.
- Matrox driver and SDK 10.3.100.6 provide support for video formats in 48Hz and 3G-Level B SDI on Matrox capture cards.
- dCare and dScope have been update to the latest versions to use with the stable driver 6.15.10
- Designer should always be used with r22 and above.
Firmware & Drivers:
- Nvidia - 513.12
- Intel Chipset Driver - ASMB_815 - 10.1.9.2
- Intel Network - 26.8
- RME Audio Driver - 4.2.9
- Mellanox Network Driver - 2.90.50010
- Mellanox MFT - 4.20.0.34
- Rivermax - 1.10.20
- Matrox - 10.3.100.673
- Deltacast Driver - 6.15.10
- Deltacast Videomaster Library - 6.15.5
- Vimba - 2.1
- FTDI - 2.12.36.4
- SMC - 5.0.5
Software
Application Version
- dCare - 1.12
- dScope - 1.9.0
- NVIDIA AR SDK - 0.7.6
- NVIDIA Video Effects SDK - 0.6.5
Download the GX 3 OS image by using the links below:
Please follow this link for a step-by-step guide to updating your OS.
Please note: any users that are working with Rufus v4.2 will experience a warning that outlines that the ISO contains a UEFI bootloader that has been revoked and will produce a Windows Recovery Screen (BSOD). This warning does not apply to Disguise media servers, and the ISO will not produce a BSOD. Please continue through the process of creating a bootable USB device. This issue is not seen on earlier versions of Rufus.
Launch OS
06 April 2023
Version: 205.1104
Release notes
- NVIDIA - 516.94
- Mellanox MFT - 4.20.0.34
- Mellanox Network - 2.90.25506.0
Download the EX 3 OS image by using the links below:
Please follow this link for a step-by-step guide to updating your OS.
Please note: any users that are working with Rufus v4.2 will experience a warning that outlines that the ISO contains a UEFI bootloader that has been revoked and will produce a Windows Recovery Screen (BSOD). This warning does not apply to disguise media servers, and the ISO will not produce a BSOD. Please continue through the process of creating a bootable USB device. This issue is not seen on earlier versions of Rufus.
Current OS
19 October 2023
Version: 23Q3
Release notes
- NVIDIA - 517.40
- AMD Chipset Driver - 2.18.30.202
- Intel Network - 26.8
- AJA Corvid44 12G - 16.2.5.3
- Blackmagic Desktop Video - 12.6.0.0
Download the PX OS image by using the links below:
Current OS - r27.2+
13 March 2024
Version: 24Q1
Release notes
Disguise OS image version vx2p_24Q1 is the current OS and specific to the VX 2+ media server. This OS includes an update to the Deltacast SDK (6.22.01) to enable support for the Disguise VX 3 media server, which makes use of a new capture card variant.
In order to make use of this new Deltacast SDK, please note that users will need to run this OS with Designer software version r27.2 and above.
The previous OS will work with Designer software versions r26.4 to r27.1.3.
- Nvidia - 516.94
- Nvidia AR SDK (Ampere) - 0.6.5
- Nvidia Video Effects SDK (Ampere) - 0.7.6
- Deltacast - 6.22.01
- Deltacast Videomaster Library - 6.15.5
- Mellanox MFT - 4.20.0.34
- Mellanox Network - 2.90.500.10
- Windows - Windows 11 23H2
Please contact support@disguise.one for feedback and issues
Download the VX 2+ OS image by using the link below:
Launch OS - r26.4 to r27.1.3
15 December 2023
Version: 23Q4
Release notes
- NVIDIA - 516.94
- Deltacast - 6.15.10
- Deltacast Videomaster Library - 6.15.5
- Mellanox MFT - 4.20.0.34
- Mellanox Network - 2.90.500.10
- Windows - Windows 11 23H2
Please contact support@disguise.one for feedback and issues
Download the VX 2+ OS image by using the links below:
Please follow this link for a step-by-step guide to updating your OS.
Please note: any users that are working with Rufus v4.2 will experience a warning that outlines that the ISO contains a UEFI bootloader that has been revoked and will produce a Windows Recovery Screen (BSOD). This warning does not apply to Disguise media servers, and the ISO will not produce a BSOD. Please continue through the process of creating a bootable USB device. This issue is not seen on earlier versions of Rufus.
Launch OS - r27.2+
13 March 2024
Version: 24Q1
Release notes
Disguise OS image version vx3_24Q1 is the launch OS and specific to the VX 3 media server.
Hardware support for the VX 3 has been enabled from Designer software version r27.2 and above.
- Nvidia - 551.52
- Nvidia AR SDK (Ampere) - 0.6.5
- Nvidia Video Effects SDK (Ampere) - 0.7.6
- Deltacast - 6.22.01
- Deltacast Videomaster Library - 6.15.5
- Mellanox MFT - 4.20.0.34
- Mellanox Network - 2.90.500.10
- Windows - Windows 11 23H2
Please contact support@disguise.one for feedback and issues
Download the VX 3 OS image by using the link below:
Please follow this link for a step-by-step guide to updating your OS.
Please note: any users that are working with Rufus v4.2 will experience a warning that outlines that the ISO contains a UEFI bootloader that has been revoked and will produce a Windows Recovery Screen (BSOD). This warning does not apply to Disguise media servers, and the ISO will not produce a BSOD. Please continue through the process of creating a bootable USB device. This issue is not seen on earlier versions of Rufus.
Launch OS
10 June 2024
Version: 24Q2
Release notes
Disguise OS image version EX2C_EX2_EX3P_24Q2 is the launch OS and specific to the EX 2, EX 2C and EX 3+.
- NVIDIA - 551.52
- NVIDIA AR SDK - 0.8.2
- NVIDIA Video Effects SDK - 0.7.2
- Deltacast - 6.22.06
- Mellanox Firmware Tools - 4.20.0.34
- Mellanox Network - 2.90.25506
- Windows - Windows 11 23H2
Please contact support@disguise.one for feedback and issues
Download the OS image by using the link below:
Please follow the links below for a step-by-step guide to updating your OS on each of EX machine:
Please note: any users that are working with Rufus v4.2 will experience a warning that outlines that the ISO contains a UEFI bootloader that has been revoked and will produce a Windows Recovery Screen (BSOD). This warning does not apply to Disguise media servers, and the ISO will not produce a BSOD. Please continue through the process of creating a bootable USB device. This issue is not seen on earlier versions of Rufus.
Launch OS - r27.5.1+
10 June 2024
Version: 24Q2
Release notes
Disguise OS image version RXIII_24Q2 is the launch OS and specific to the RX III.
Hardware support for this machine has been enabled from Designer software version r27.5.1 and above.
- NVIDIA - 551.52
- NVIDIA AR SDK - 0.8.2
- NVIDIA Video Effects SDK - 0.7.2
- Mellanox Firmware Tools - 4.20.0.34
- Mellanox Network - 2.90.25506
- Windows - Windows 11 23H2
Please contact support@disguise.one for feedback and issues
Download the OS image by using the link below:
Please follow this link for a step-by-step guide to updating your OS.
Please note: any users that are working with Rufus v4.2 will experience a warning that outlines that the ISO contains a UEFI bootloader that has been revoked and will produce a Windows Recovery Screen (BSOD). This warning does not apply to Disguise media servers, and the ISO will not produce a BSOD. Please continue through the process of creating a bootable USB device. This issue is not seen on earlier versions of Rufus.